
You've got a steel beam in place, a stack of timber joists ready to run into it, and a hanger catalogue that seems to assume every supporting member is wood. The first hanger gets held against the beam. The holes don't land properly, the flange blocks access, and the fasteners either won't grip or leave the connection vulnerable to movement. That's where a straightforward framing job turns into a steel-to-wood detailing problem.
Joist hangers to steel beam connections can work well, but the right answer depends on the beam geometry, the support path, the fastener, the surrounding moisture conditions, and the loads the connection must resist. A standard wood hanger isn't automatically suitable just because it fits the joist.
Why Attaching Joist Hangers to Steel Beams Is Different
A common retrofit starts with a wood-framed floor or deck that once sat on a masonry wall. The wall is removed, a steel I-beam takes its place, and the existing joists need to connect to the beam's side. A contractor reaches for a familiar face-mount hanger, drills a few holes, and finds that the beam flange is in the way. The hanger may sit proud of the web, the fasteners may have insufficient grip, and the joist can still rotate inside the connector.
That failure usually begins with the wrong question. The question isn't just, “What hanger fits this joist?” It's, “How will the joist transfer load into this particular steel section?”

Start with the beam geometry
An I-beam gives you a web and flanges, but those parts create very different installation conditions.
- Web access: The web is the vertical plate between the flanges. It may provide a practical fastening surface, but access can be tight if the joists sit close together.
- Flange thickness: A hanger may need to clear the flange, sit on the lower flange, or attach to a wood nailer installed over the beam.
- Fastener grip: A self-tapping screw needs suitable steel thickness and enough thread engagement. A through-bolt needs access to both sides. A powder-actuated pin needs a substrate and tested connection detail that support its use.
- Rotation control: A connection that carries downward load may still allow the joist or hanger to twist. Lateral restraint and uplift can change the required connector completely.
Ontario provides a useful example of why generic wood-hanger advice falls short. The Ontario Building Code allows joists framed into the side of a steel beam to bear on the beam's bottom flange, or on 38 mm by 38 mm lumber bolted to the web with 6.3 mm bolts spaced no more than 600 mm apart. That is a support detail, not a typical wood-to-wood face-mount hanger installation. The Ontario steel-beam joist support requirements show why the beam and the code path must be identified before hardware is selected.
California takes a different route for residential deck framing. When joists are framed into the side of a beam or ledger, they must be supported by approved joist hangers. California also requires at least 1 1/2 inches of bearing on wood or metal at beam ends, and 3 inches on concrete or masonry. The California Residential Code floor provisions treat side-framed joists as a hanger-supported condition, so connector selection and bearing aren't cosmetic details.
Field rule: Identify the beam section, support face, access conditions, and governing code before you choose the hanger.
Steel projects may also require a custom-fabricated hanger rather than a catalogue wood connector. Structural steel practice commonly treats joist hangers in steel contexts as custom-fabricated components, especially where the hanger must be welded or shaped around a particular flange and web arrangement. If the connection carries substantial loads, resists uplift, or forms part of a larger engineered frame, have the connection designed rather than adapting a wood detail in the field.
Choosing the Right Hanger and Fastener for Steel
Selection becomes clearer when you separate the support method from the fastener method. A top-mount hanger, a face-mount hanger, a hanger resting on the bottom flange, and a custom steel bracket can all be valid in the right situation. None is universally correct.
| Support Method | Fastener Type | Best Use Case |
|---|---|---|
| Top-flange hanger over a wood nailer | Approved connector screws or nails | A timber nailer is securely attached to the top of the steel beam and there's top access |
| Face-mount hanger on a steel web | Self-tapping structural screws or through-bolts | The hanger can sit flat against the web and the steel thickness and access suit the fastener |
| Joist bearing on the bottom flange | No direct hanger, where permitted by the governing code | The beam flange provides a stable bearing seat and the joist is restrained against movement |
| 38 mm by 38 mm web nailer | 6.3 mm bolts, spaced as permitted | Ontario-style side support using lumber bolted to the steel web |
| Welded steel hanger | Weld designed for the connection | Custom steel fabrication, unusual geometry, heavy loads, or limited mechanical fastening access |
| Powder-actuated attachment | Tested pins and approved detail | Suitable steel substrate and a fastening system specifically rated for the application |
A top-flange hanger makes sense when a wood nailer has already been engineered and fixed to the top of the beam. It gives the installer a familiar wood bearing surface, but it can lose capacity if the specified fasteners can't be installed to their required penetration. A top-mount solution also needs top access, which may disappear after the deck or floor sheathing is installed.
A face-mount hanger works better when the joists are already laid out and the installer can reach the beam web. The hanger must sit flush, and its holes must align with a fastening schedule suitable for steel. Don't substitute ordinary wood screws. They aren't made to develop reliable thread engagement in structural steel.
A bottom-flange bearing detail can be efficient, but bearing alone doesn't necessarily prevent rotation, uplift, or lateral displacement. Confirm that the code and design allow that support path, then provide the restraint the assembly needs.
For treated lumber or damp exterior exposure, choose corrosion-resistant connector steel and compatible fasteners. California practice recognises stainless steel and protective coatings such as G90 minimum, G185, or post-fabrication hot-dipped galvanising for connector durability, as described in this California DSA connector interpretation. Ontario-facing guidance also identifies stainless steel or hot-dipped galvanised steel with at least Z550/G185 coating for treated wood exposure.
For a practical source of galvanised joist hangers, joist hanger nails, structural screws, bolts, and anchors, contractors can review Xtreme eDeals' joist hanger and screw range. Match the product finish to the fastener finish, and check the manufacturer's published installation requirements rather than mixing parts from unrelated systems.
How to Prepare and Install Joist Hangers on Steel
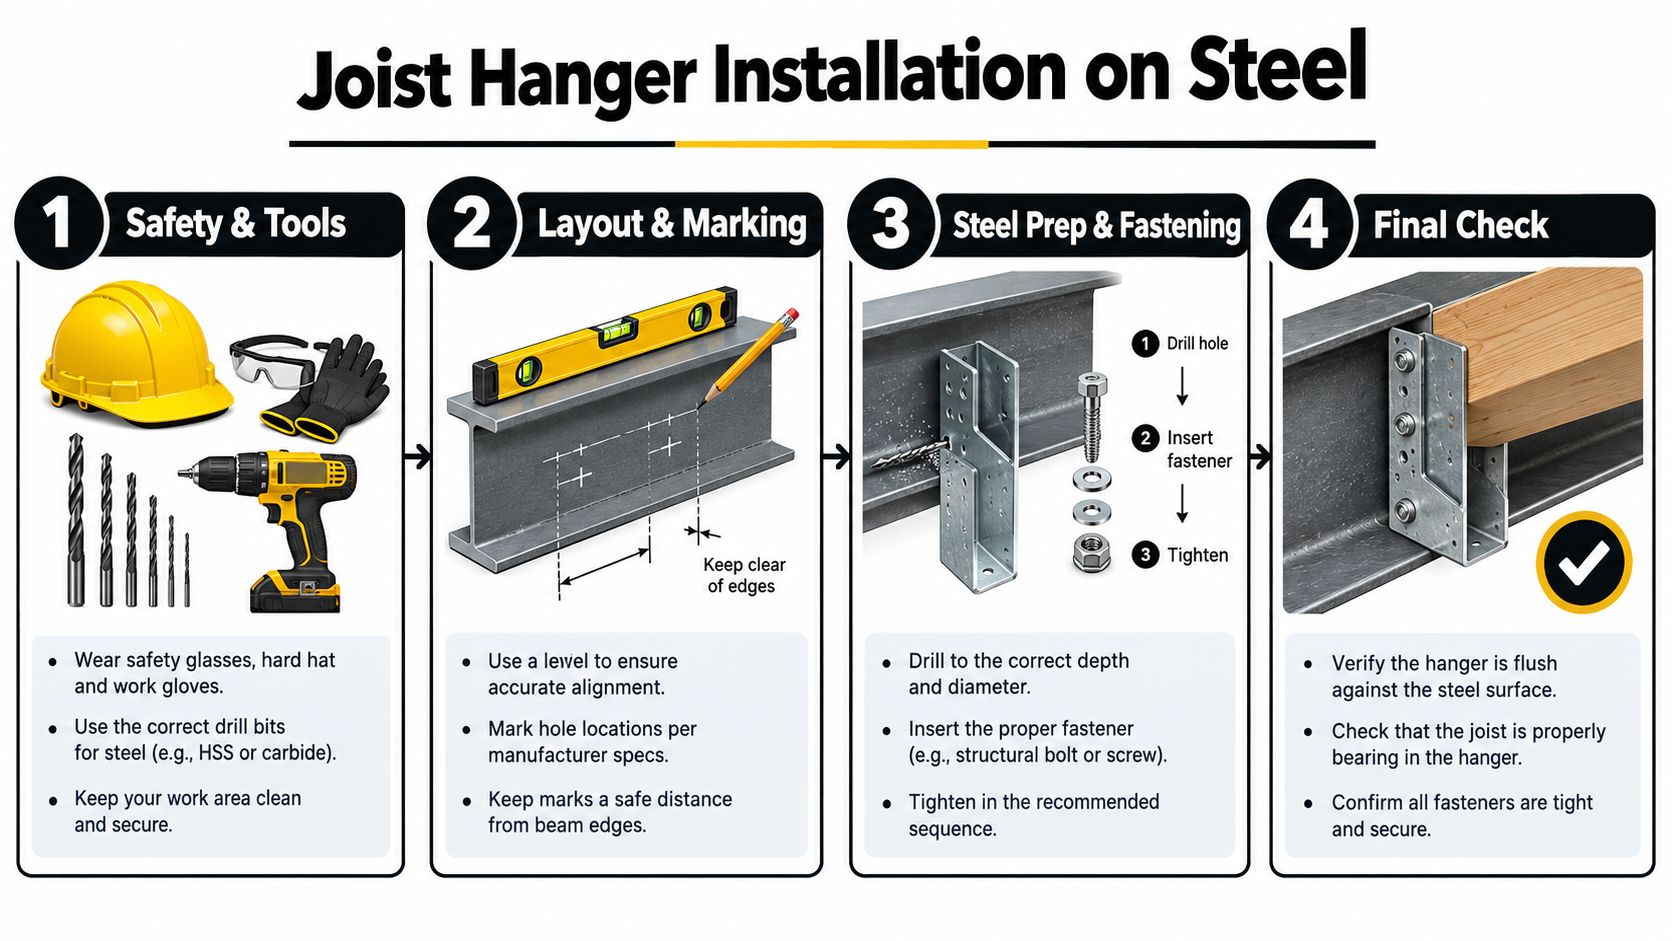
A good installation starts before the drill comes out. Steel edges are sharp, overhead work is awkward, and a misplaced hole can leave you with a hanger that won't sit flat. Protect your eyes and hands, control the work area, and support loose joists so they can't shift while you're fitting connectors.
Lay out the connection before drilling
Mark the joist centre lines on the beam and transfer the joist depth to the hanger. Check the beam for camber, welds, stiffeners, existing holes, and flange edges. A hanger that looks centred from below can be offset enough to reduce bearing or force the joist against one side.
Clamp the hanger in its intended position and use it as the drilling template. Don't drill through a hole that sits too close to a flange edge or an existing opening. If the hanger needs to move to clear an obstruction, move the layout consistently and confirm that the joist still lands at the intended elevation.
A level helps establish the top line, but the joist seat matters more than a perfect visual line across an irregular retrofit. Dry-fit several adjacent joists where access is tight. This catches interference between hanger flanges, weld beads, and the beam before every hole is repeated.
Prepare the steel and make the holes cleanly
Remove loose mill scale, dirt, oil, and surface rust from the fastening area. A clean surface helps the hanger sit flush and makes it easier to inspect the connection later. If the beam has been painted, confirm whether the coating must be removed locally for drilling, bolting, or welding, then use the specified primer or repair coating after the work.
Use a sharp bit suited to the steel thickness. Drill at a controlled speed, keep the tool square to the web, and use cutting fluid to limit heat and extend bit life. For a tapped connection, drill the correct pilot diameter for the selected thread, clear the chips, and tap without forcing the tool. A rushed hole often becomes oversized, angled, or damaged, which undermines the fastener's engagement.
In a tight joist bay, a compact right-angle drill may save access, but it won't correct poor alignment. If through-bolting, plan the opposite-side access before setting the hanger. If welding, protect surrounding wood from heat and sparks, and have the weld size, length, steel compatibility, and field procedure specified by the responsible designer.
Fasten, seat, and verify
Install the selected fasteners in the required sequence. Keep the hanger tight to the web or nailer while driving screws, and don't let a self-tapping screw spin after it has stripped the steel. Over-torquing can damage the screw or enlarge the hole. Through-bolts should draw the hanger firmly into contact without crushing the wood or distorting the connector.
Set the joist fully into the seat. The joist end must bear where the hanger design expects it to bear, with the correct depth engaged in the connector. Check that the joist is plumb, the hanger isn't twisted, and the side flanges remain in full contact with the support face.
For detailed wood-hanger handling and installation principles, use Xtreme eDeals' joist hanger installation guide, then reconcile those instructions with the steel hanger manufacturer's requirements and the project drawings.
A short visual walkthrough can help with the order of operations, especially for first-time installers. Review the demonstration below before beginning, but don't treat a generic video as a substitute for the approved connector detail.
Meeting Code and Load Requirements Without Guesswork
A connection can look solid and still fail an inspection because it lacks approved hardware, adequate bearing, lateral restraint, or a documented load path. Treat the code requirements as field checks, not paperwork to review after the timber is installed.
California's residential deck provisions distinguish top-bearing and side-framed conditions. A joist bearing on top of a single-ply beam or ledger needs a mechanical connector, while a joist framed into the side requires an approved joist hanger. The same code path sets minimum bearing of 1 1/2 inches on wood or metal and 3 inches on concrete or masonry. Those dimensions describe actual support, not the nominal depth of the hanger.
California also states that where joist hangers or blocking provide lateral restraint, their depth must be at least 60% of the joist depth. That requirement matters because a hanger isn't only carrying vertical reaction. It can also help keep the joist from rolling or rotating at the support.

Read the steel framework correctly
California's Building Code requires structural steel design, fabrication, and erection to comply with AISC 360. Open-web steel joists and joist girders follow Steel Joist Institute specifications, including SJI CJ, K, LH/DLH, and JG. The steel system itself therefore has a recognised design framework. It isn't a blank surface for improvised connector details.
The same steel provisions set L/r ≤ 300 for tension members, with stated exceptions for certain hangers and bracing, and KL/r ≤ 200 for compression members. Those limits help distinguish ordinary hanger components from engineered steel support members. A fabricated hanger that becomes part of the structural steel system needs more than a convenient shape and a few welds.
Confirm the complete load path
Check the vertical reaction at every joist, then ask what happens under uplift, lateral movement, and rotation. A screw that works for downward load may not have the same suitability for uplift. A bottom-flange seat may support gravity but need blocking, clips, or another restraint method to control lateral movement.
A commercial retrofit deserves a broader review than the hanger alone. This resource on load path analysis for commercial buildings is useful when the beam, joists, deck, walls, and foundations form one connected structural chain.
Inspection question: Can you show where the joist reaction enters the hanger, where the hanger enters the steel, and how rotation or uplift is resisted?
Record the beam size, hanger model, fastener type, coating, hole layout, and installed condition. Photograph the connection before it's concealed. If the beam has unusual geometry, the joist loads are significant, or the connection is welded or custom-fabricated, involve a structural engineer and the local building official before installation.
Protecting Against Corrosion and Inspecting the Connection
Steel connections often fail through neglect rather than dramatic overloading. Moisture enters around treated timber, drilled holes lose their protective coating, and mismatched metals accelerate corrosion at the interface. A hanger that looks acceptable on installation day can deteriorate if the finish and fastener weren't selected for the exposure.
Match the coating to the environment
For treated wood, exterior decks, wet basements, and exposed steel, use connector and fastener materials intended for corrosive conditions. Stainless steel is a direct choice where the design and budget support it. Hot-dipped galvanised products are another common route, with accepted protection levels including G90 minimum, G185, or post-fabrication hot-dipped galvanising in California connector practice. Ontario guidance identifies stainless steel and hot-dipped galvanised steel with at least Z550/G185 coating for treated-wood exposure.
The fastener finish must be compatible with the hanger finish. Don't install a heavily protected hanger with a plain fastener and assume the connection has the same durability. For stainless options, Xtreme eDeals' stainless steel fasteners provide one product category to consider alongside the hanger manufacturer's approved fastening schedule.
After drilling, remove burrs and protect exposed steel as specified. A field-applied coating may be appropriate for damaged galvanising or prepared steel, but it must be compatible with the existing coating and the project's corrosion-control requirements. Welded areas need particular attention because heat affects the surrounding protective finish.
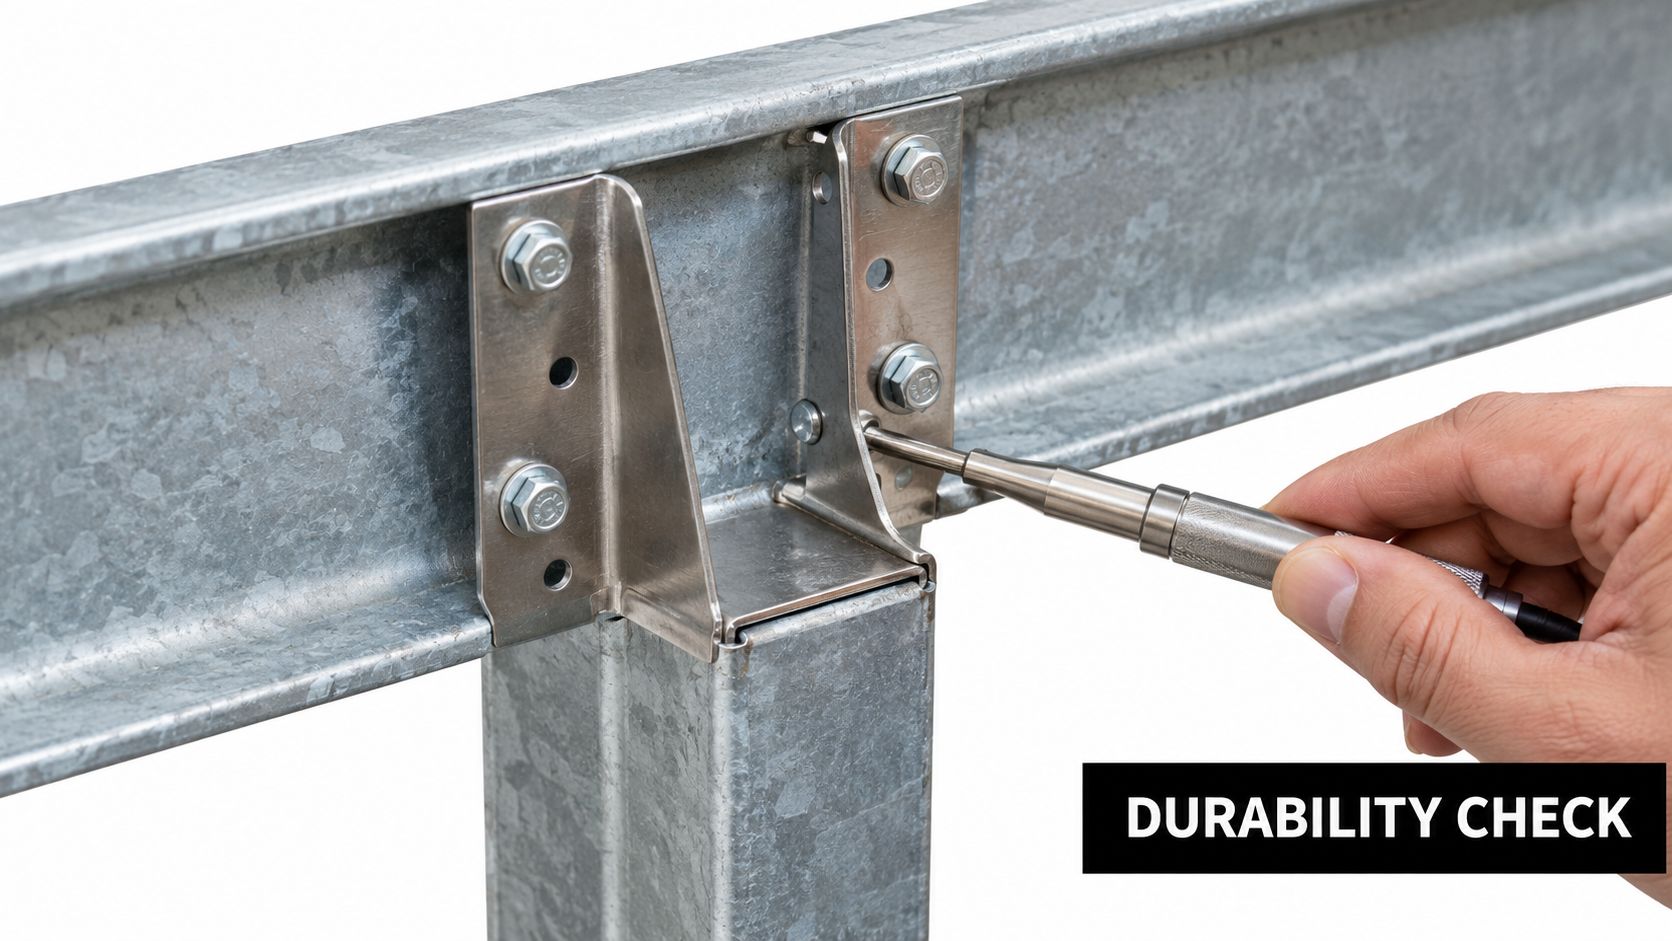
Inspect the installed hanger
Look at the connection after fastening and again after the structure has experienced weather and normal use. The inspection should be deliberate, not a quick glance from across the room.
- Hanger fit: The connector should sit tight to the steel or nailer, without a visible gap, twist, or bent flange.
- Fastener condition: Check for missing, loose, stripped, or visibly damaged fasteners. Replace a failed fastener with the specified product, not a longer wood screw.
- Joist seating: Confirm the joist remains fully seated and hasn't backed out, dropped, or shifted sideways.
- Movement signs: Look for fresh gaps, crushed wood, squeaks that began after installation, rust staining, or marks showing the hanger is rotating.
- Drainage and moisture: Keep water from collecting at the steel-to-wood interface, and correct leaks or trapped debris before corrosion advances.
A loose screw isn't always solved by tightening it. If the steel thread is stripped or the hole has enlarged, the original connection detail may no longer apply. Stop, document the condition, and obtain an approved repair rather than filling the damaged hole with a random fastener.
Final Checks and Pro Tips for a Lasting Installation
Before the framing disappears behind decking or flooring, inspect the connection as a complete assembly:
- Fit: The hanger matches the joist dimensions and sits flat against the support.
- Fastening: Every required hole pattern is filled with the approved fastener type.
- Bearing: The joist is fully seated, with the required bearing and depth engagement.
- Restraint: Blocking, hanger depth, flange bearing, or another specified detail controls rotation and lateral movement.
- Durability: The hanger, fasteners, drilled areas, and welds have suitable corrosion protection.
- Records: The product, layout, fastening method, and concealed-work photographs are documented.
On a large deck, make one accurate template and use it to mark every hanger location. Dry-fit a small group first, because a repeating error is expensive to correct after all the steel is drilled. Keep the bits sharp, use cutting fluid, and don't force a self-tapper after it has lost its bite.
Avoid the shortcuts that cause the most trouble: wood screws in steel, unapproved fastener substitutions, unsupported bottom-flange seats, and over-torqued self-tapping screws. Call a qualified contractor or structural engineer when the connection is custom-fabricated, welded, heavily loaded, exposed to severe corrosion, or difficult to verify from the drawings.
XTREME EDEALS INC. offers joist hangers, joist hanger nails, structural screws, bolts, washers, and anchors for deck and framing projects, including hardware suited to evaluating steel-to-wood connection options. Visit XTREME EDEALS INC. to compare the available products before you drill, bolt, or order a custom steel detail.