
A deck frame can look nearly complete until you reach the last joist. It meets the side of a ledger or beam, there's no support directly beneath it, and a small amount of movement can make the end feel less secure than the rest of the frame. That's where a joist hanger for an end joist needs to do more than hold the lumber in place: it has to fit the connection and form part of the load path.
For a California deck, the practical checks are measurable. Confirm the bearing condition, provide the required resistance to rotation, and install the fasteners specified for the hanger. A connector that looks close enough isn't a substitute for those checks.
Why the End Joist Hanger Runs the Load Path
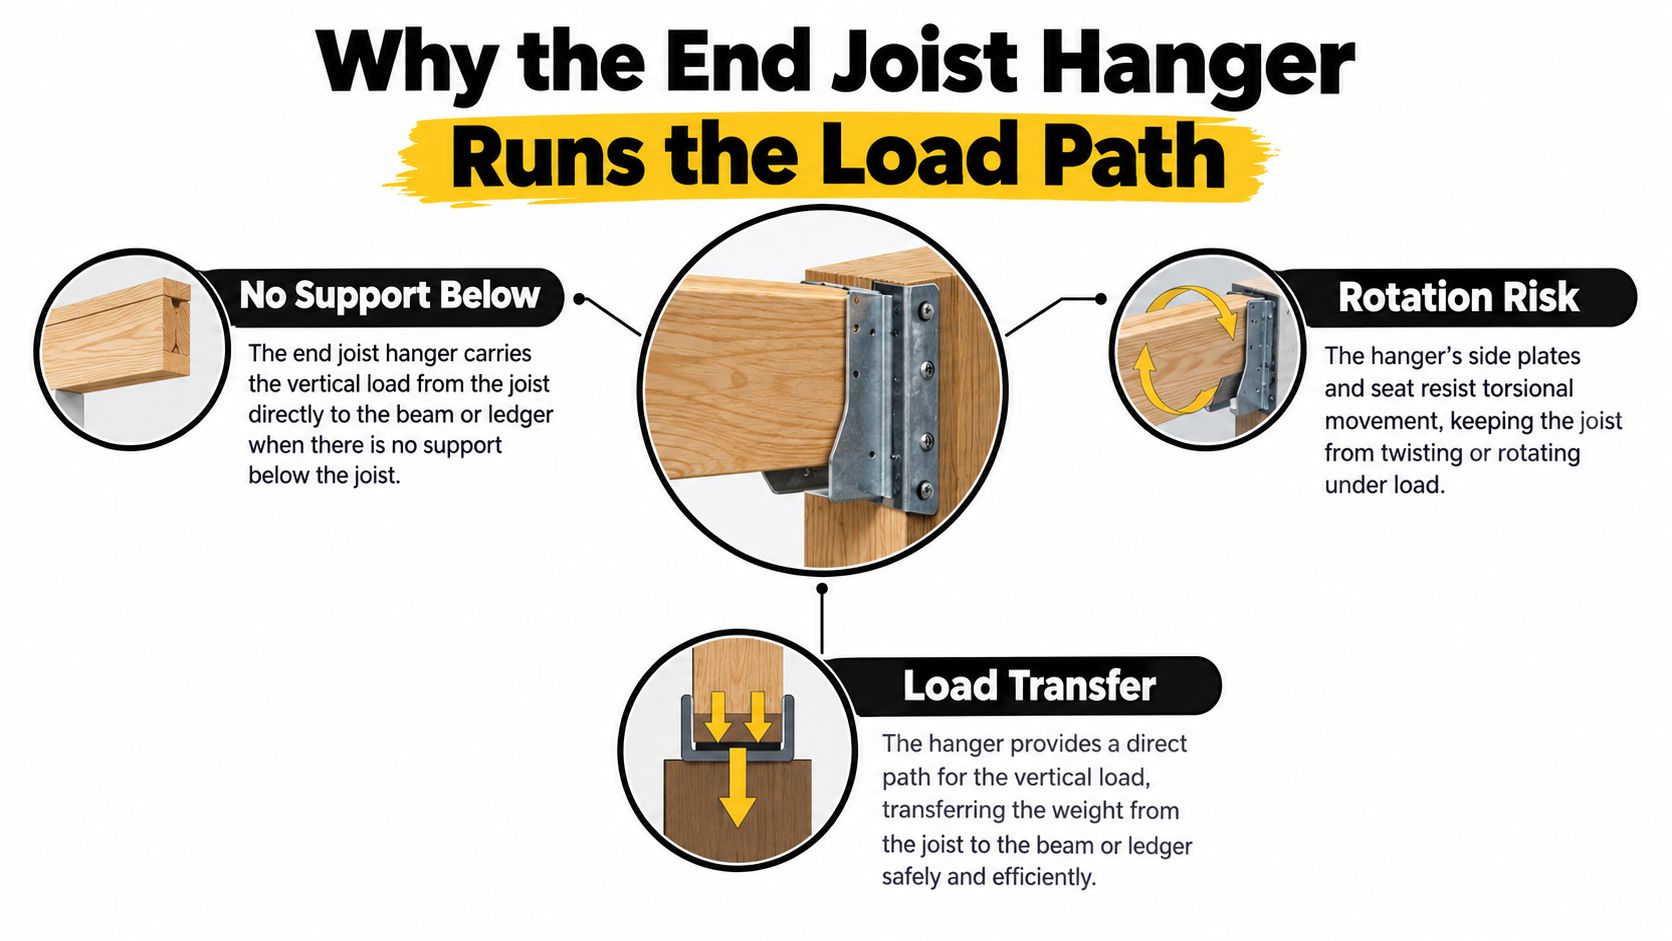
At the end of a joist run, the framing may have no bearing surface beneath the joist. If the joist is framed into the side of a beam or ledger instead of resting on top, its connection must transfer the load into that supporting member. An approved hanger provides that connection, while helping keep the joist from rotating at its supported end.
California's residential requirements give you a useful field benchmark. Joist ends must bear at least 1.5 inches on wood or metal, or 3 inches on concrete or masonry, across the full joist width. If a joist is supported from the side rather than bearing on top, an approved joist hanger is required. The code also calls for lateral resistance at joist ends and bearing points to prevent rotation. Those provisions make the end connection a structural detail, not a positioning accessory. See the California Residential Code provisions for exterior decks.
Check the connection, not just the bracket
Start by identifying how the joist is supported. If it sits on top of a beam or ledger, check the actual bearing length and the support beneath it. If it attaches to the side of that member, use an approved hanger for the joist and loading condition. Face nails or nails driven into end grain don't replace the specified hanger connection.
Next, check how the joist end is restrained against rotation. Blocking or an approved hanger-based restraint must meet the applicable depth requirement, and a rim joist must be fastened to each joist as specified. A hanger may transfer vertical load while leaving the end inadequately restrained if the rest of the detail is missing.
Field check: Before installation, identify the bearing surface, the structural member receiving the hanger, and the detail that prevents the joist from rolling.
These checks also help explain why a hanger and a joist resting on a beam aren't interchangeable details. Review the practical differences in joist hangers versus resting joists on a beam. For an end joist, the right choice depends on the actual support and the complete connection, not on which detail looks simpler from above.
Hanger Types and Engineered Alternatives Compared
The right hanger family depends first on the joist and supporting-member geometry. For common dimensional lumber, a face-mount hanger is the usual choice when a joist frames into the side of a beam or ledger. Its flanges attach to the face of the support, and its seat holds the joist end. Match the hanger to the lumber dimensions and follow its approved fastener schedule.
Where the beam or ledger edge leaves little room for a conventional flange, an inside-flange hanger may suit the detail. Check that the connector fits the actual framing layout and that its installation instructions allow the fasteners to be driven as specified. Tight clearance doesn't justify leaving out fasteners or shifting the connector away from the structural face.
| Hanger family | Typical end-joist use | Joist type | Key watch-out |
|---|---|---|---|
| Face-mount hanger | Joist framed into the face of a beam or ledger | Dimensional lumber | Match dimensions and use the specified fasteners |
| Inside-flange hanger | Limited clearance at the beam or ledger edge | Dimensional lumber | Confirm the flange and fasteners fit the framing |
| Sloped or skewed hanger | Angled connection or dropped-beam condition | Dimensional lumber, where approved | Use a model designed for the actual angle and orientation |
| Dedicated I-joist hanger | Engineered member supported at a beam or ledger | Wood I-joist | Confirm product evaluation and manufacturer requirements |
Engineered members need their own connector
A dimensional-lumber hanger isn't automatically suitable for an engineered wood I-joist. The member's geometry, flange and web construction, and the way the connection resists rotation differ from solid-sawn lumber. Use a hanger designed and evaluated for that specific member type, and follow the I-joist manufacturer's limits for fasteners and field modification.
California guidance for I-joist hangers calls for evaluation under ASTM D7147 and an applicable product evaluation addressing ICC-ES AC13. That's a selection requirement, not just paperwork. It helps distinguish a connector whose performance has been evaluated for the intended application from one that merely appears to fit. The California Division of the State Architect's hanger guidance sets out these performance considerations.
For any hanger, check both the actual joist depth and width before ordering. A connector can look close in a product photo and still be the wrong match for the member or connection. Sloped and skewed models also need to suit the framing angle, rather than relying on a standard hanger to accommodate a condition it wasn't made for.
Sizing for Load, Depth, and Rotation
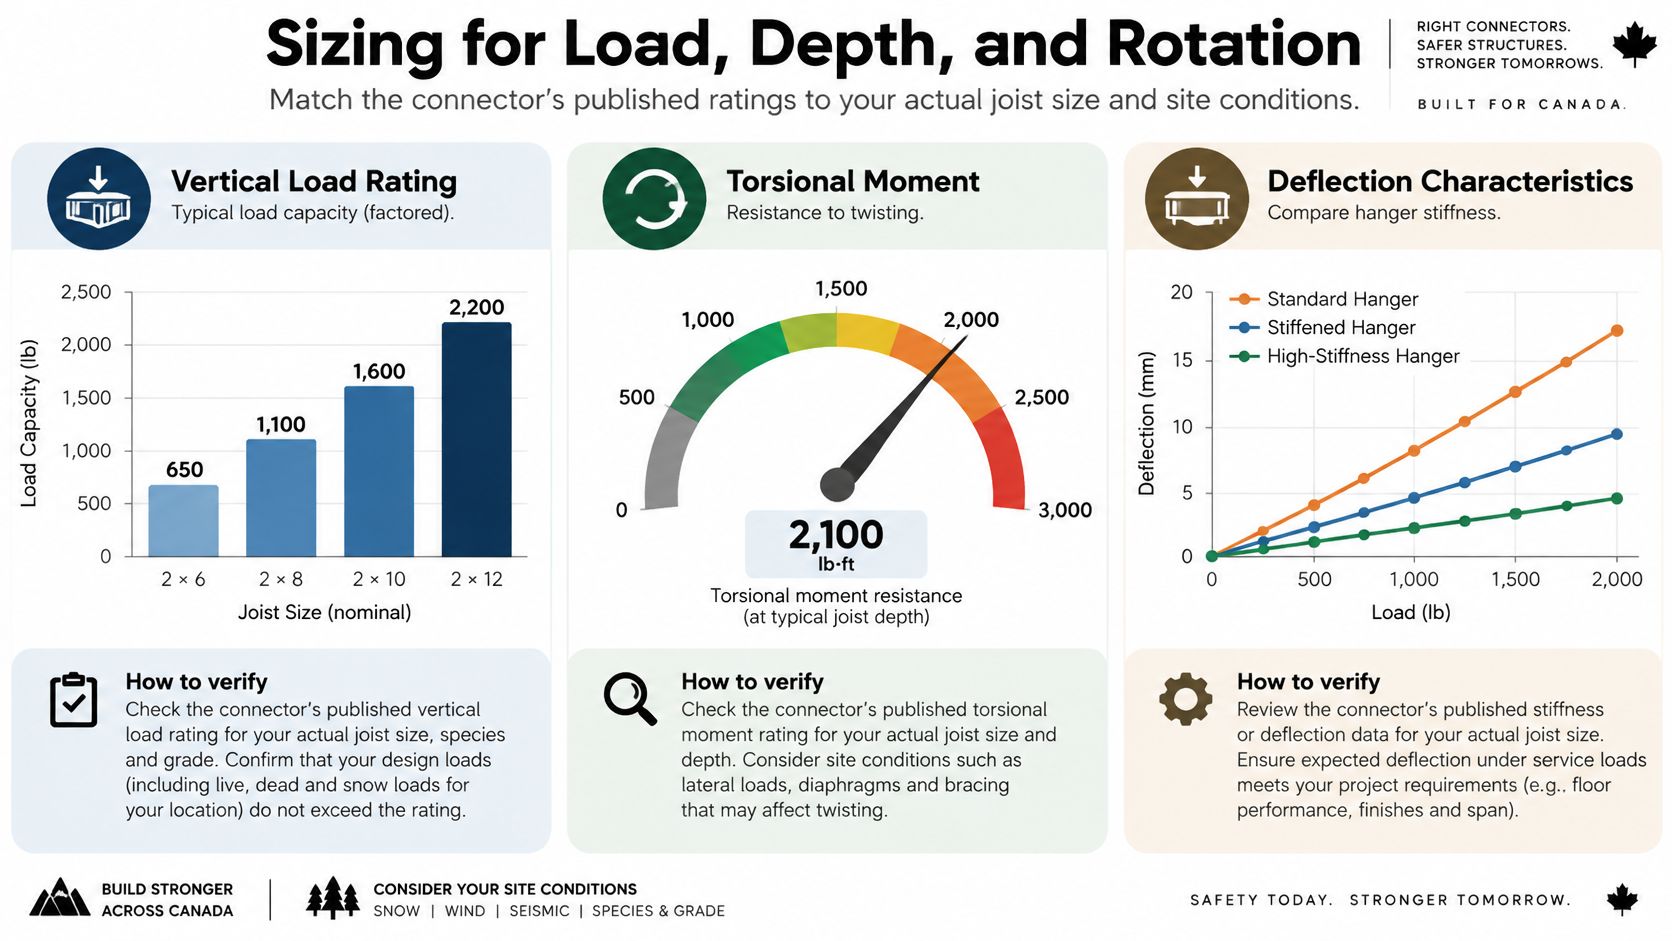
A hanger's dimensions tell you whether it may fit. They don't establish whether it's suitable for the load. Check the connector's published capacity and installation details for the joist type, span, and supporting member. California's 2025 code guidance calls for vertical load-bearing capacity, torsional moment capacity, and deflection characteristics to be determined under ASTM D7147. For an end joist, torsional capacity matters because the supported end can rotate, particularly if framing or other components apply force away from the joist's centreline.
The supporting detail matters just as much as the hanger rating. The California code's bearing benchmarks are 1.5 inches on wood or metal and 3 inches on concrete or masonry. Where the joist frames into the side of a beam or ledger and can't meet an appropriate bearing condition, use an approved hanger. A published load rating also assumes the connector is installed with its specified fasteners, not a partial set.
Make the restraint measurable
California guidance requires blocking used for lateral restraint to have a depth of at least 60% of the joist depth. For a nominal 2×8 with an actual depth of about 7.25 inches, that benchmark is approximately 4.35 inches. Check the actual joist and restraint dimensions on site rather than relying on the nominal size alone.
A rim joist can provide the restraint when it's connected to each joist with the specified fasteners. The exact requirement is detailed in the California deck requirements for residential construction. That guidance also describes deck-end hold-down arrangements, which are separate from joist hangers. The broader lesson is that the perimeter connection needs to be considered as part of the deck's load path; a hanger doesn't replace required lateral restraint.
Use the connector's published vertical and torsional information, then verify how the joist end is restrained. If the load or framing condition falls outside the manufacturer's approved details, get the connection resolved before framing proceeds.
For an additional visual reference, watch the hanger installation overview below.
To confirm the connector dimensions against the lumber, use a product reference such as this guide to joist hanger dimensions. Treat sizing as the first check, not the final approval.
Step-by-Step Installation of a Joist Hanger for End Joist
A good installation starts with the supporting member, not the connector. Confirm that the beam or ledger is structurally adequate, properly supported, and suitable to receive the hanger. The connector must attach to the structural member itself, not siding, sheathing, or decorative trim.
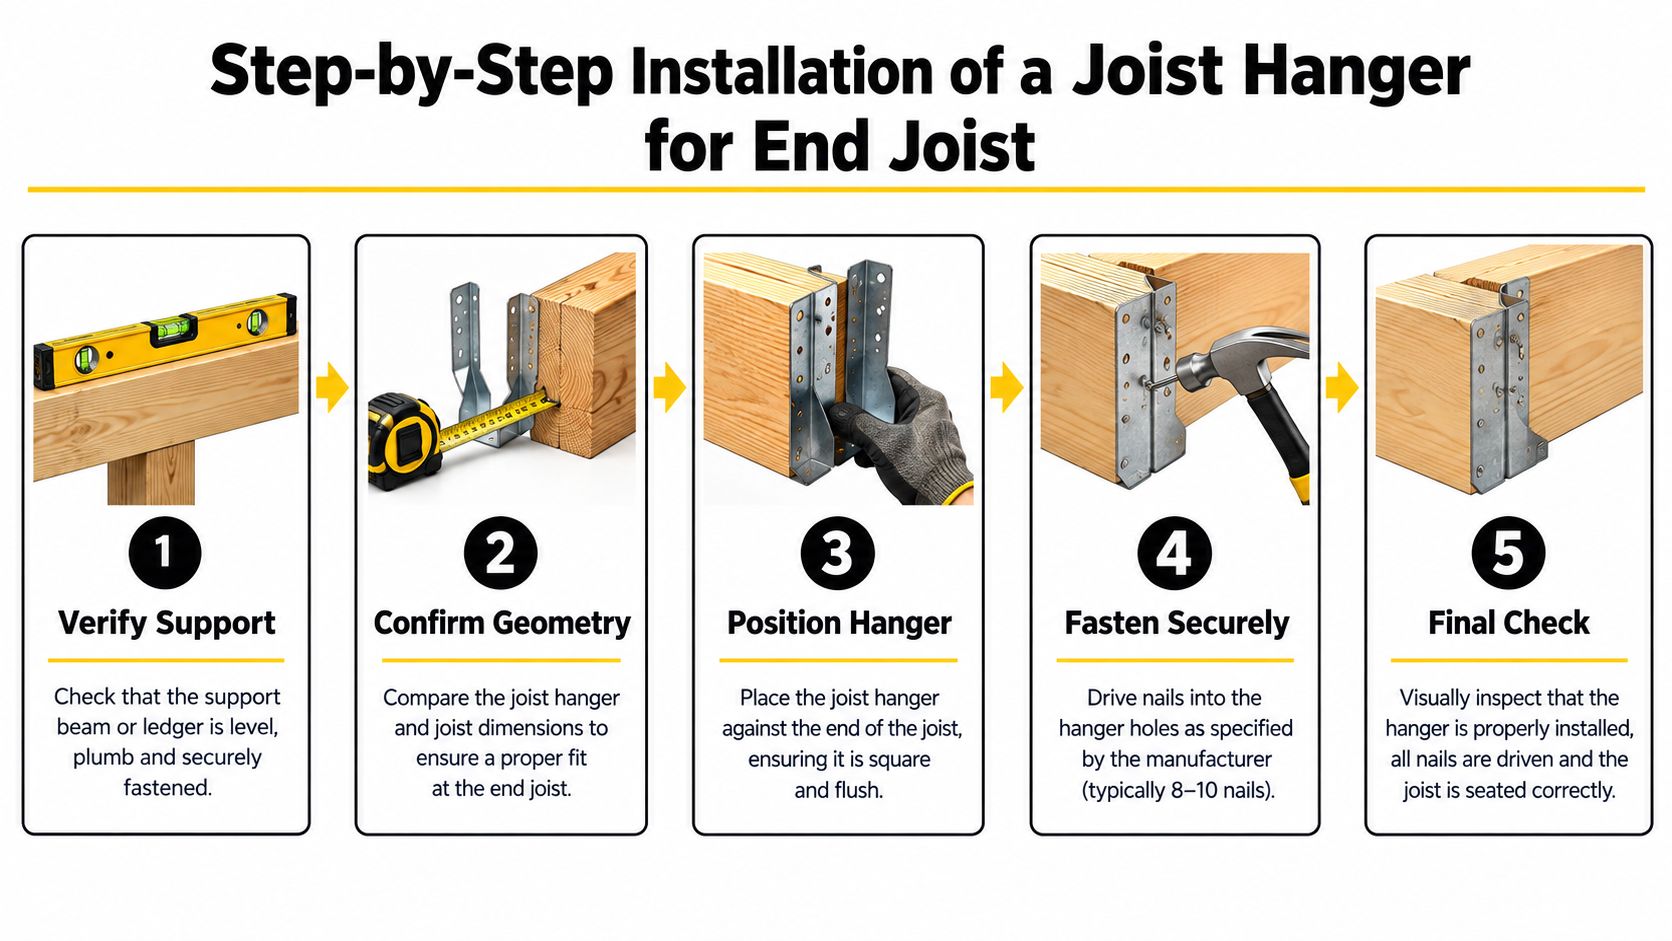
Then follow a single routine, using the hanger's evaluation report and the joist manufacturer's requirements where applicable:
- Verify the support. Check the beam or ledger for its condition and support. Confirm that it's the intended structural attachment point.
- Confirm the geometry. Compare the hanger with the actual joist depth and width. Check that the connector is approved for the joist type and framing orientation.
- Position the hanger. Set it square on the structural face and place it so the joist will seat fully. Don't use a hanger that leaves the joist hanging above its seat.
- Fasten the hanger and joist. Install every fastener required by the connector's evaluation report, using the specified type and length. Don't swap in drywall screws or generic wood screws.
- Add lateral restraint and inspect. Install the required blocking or rim-joist connection, then check seating, fasteners, and restraint before the connection is concealed.
Don't leave the restraint to assumption
Where a rim joist supplies the restraint, California guidance specifies at least three 10d nails measuring 3 inches by 0.128 inches, or three No. 10 by 3-inch wood screws, per joist. Follow that requirement where it applies, and check the local approved detail for the project. A rim board that feels firm by hand isn't proof that the required connection is installed.
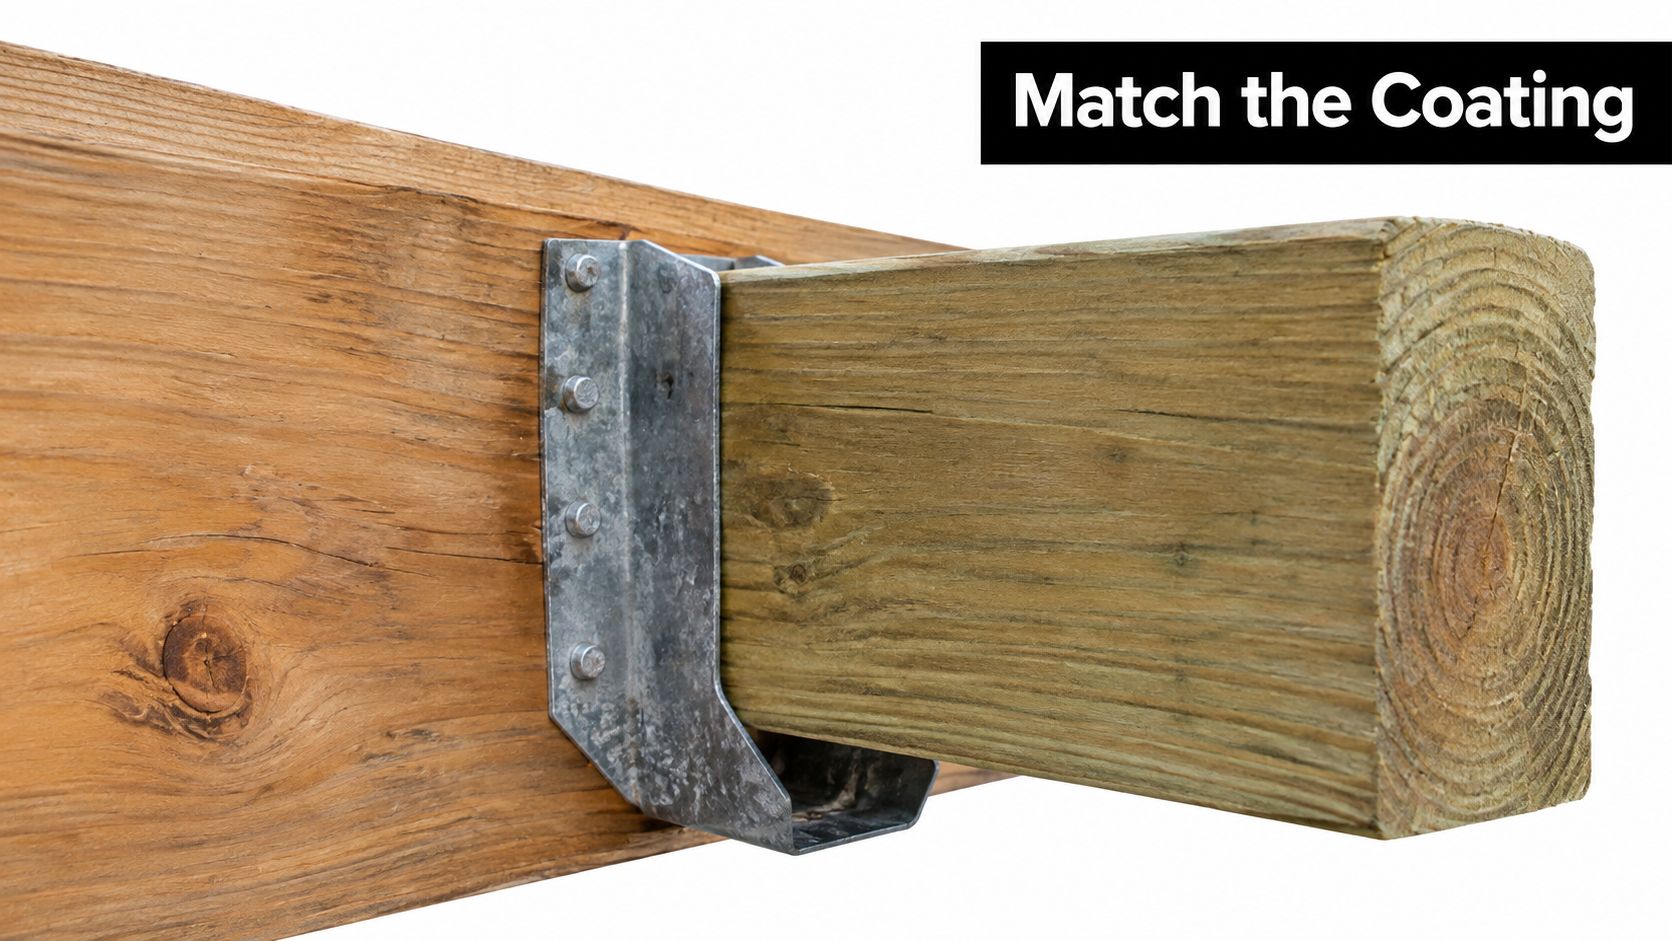
For exterior work with treated lumber, a California county deck guide specifies hot-dip galvanised or ZMAX hangers. Select the connector and its fasteners as a compatible assembly, and use the product's stated fastener type rather than substituting whatever is in the tool pouch. The Eureka deck permitting handout provides local guidance on installation and corrosion compatibility.
Matching Coating and Material to the Site
“Stainless is always better” sounds decisive, but it isn't a complete specification. The right connector depends on the treated lumber, the fasteners, the exposure, and the manufacturer's approval for that combination. A hanger and its fasteners work as one connection; choosing a corrosion-resistant connector while ignoring fastener compatibility leaves the assembly unresolved.
| Site condition | Practical specification direction | What to verify |
|---|---|---|
| Standard inland exposure | Consider hot-dip galvanised or ZMAX connectors for treated-lumber exterior work | Treatment compatibility and matching fasteners |
| Coastal exposure | Consider stainless-steel connector hardware and compatible fasteners | Manufacturer approval for the material combination |
| Wildland-Urban Interface project | Check corrosion compatibility alongside fire-related material requirements | Local requirements and the approved assembly |
Add wildfire requirements to the decision
In a Wildland-Urban Interface area, the material question can extend beyond corrosion. California provisions recognise exterior fire-retardant-treated wood and ignition-resistant deck materials as regulated construction options. That doesn't mean every hanger coating is automatically suitable for every treated product. Confirm that the treatment chemistry, connector coating, and fasteners are approved together for the project.
Local guidance may also address connector type and framing clearances. For example, Placerville's deck submittal information discusses galvanised or stainless-steel hangers and selecting a connector for the dimensions and load carried. It also identifies inside-flange hangers as a possible solution where edge clearances are limited. Use that as local guidance, not a substitute for confirming your own jurisdiction's requirements.
For a broader overview of galvanised joist hanger options, compare the coating with the site and the treatment in the lumber. Then confirm the final connector-and-fastener combination with the manufacturer and local building department.
Common Field Mistakes That Fail Inspection
The errors that undermine a hanger connection often look minor from the deck surface. A few empty holes, the wrong screws, or a joist that doesn't sit fully in its seat can change the connection from the tested installation to something else. The published capacity applies to the specified assembly, not to a connector that merely resembles it.
Check for these problems before the framing is covered:
- Missing fasteners: Fill the holes required by the hanger's approved installation. Don't assume a partly fastened connector retains its published capacity.
- Substituted screws: Drywall and generic wood screws aren't a stand-in for the specified hanger nails or approved connector screws. Use the fastener type and length the evaluation report calls for.
- A gap beneath the joist: Seat the member fully. A gap can interfere with support and may mean the joist isn't bearing as intended.
- Omitted end restraint: Install the required blocking or rim-joist connection even if the frame feels stiff by hand.
- Unapproved I-joist modification: Don't notch, drill, or alter an engineered member outside its manufacturer's limits.
For hanger-supported I-joist bearings, California public-school guidance sets a measurable placement rule: lateral and rotational support must be located no more than 12 inches from the bearing point, unless the hanger has been tested for torsional capacity. Check the applicable project requirements in the California residential code guidance for floors.
Before inspection, verify fastener spacing, edge distance, and end distance against the evaluation report and joist manufacturer's limits. Look for over-notching or other field changes that could invalidate the connection details. The practical test is straightforward: compare the installed connection with the complete approved detail, not just with the hanger's outline.
Pre-Build Checklist and Where to Source the Hardware
Before the first hanger goes on, run through the details that determine whether the connection is right:
- Bearing: Measure the actual bearing condition and identify the structural support.
- Joist type: Match dimensional lumber or an engineered joist to its approved hanger family.
- Fasteners: Confirm the required type, length, and count from the product details.
- Restraint: Identify the blocking or rim-joist detail and confirm it meets the applicable requirement.
- Coating: Match the connector and fasteners to the lumber treatment and site exposure.
For the final assembly, check with the local building department and the connector manufacturer. A hardware supplier can then help you source a hanger in the required dimensions and the specified fasteners without substituting an unapproved part. The Decorex Hardware joist-hanger range carried by XTREME EDEALS INC. includes deck-framing hardware intended for joist-to-ledger and joist-to-beam connections, including options for common dimensional-lumber sizes.
XTREME EDEALS INC. offers joist hangers, deck-framing fasteners, and related hardware for projects where the end-joist connection needs to match the lumber, load, and site conditions. Review the available options and build your hardware list at XTREME EDEALS INC..