
You close the double driveway gate, slide the latch home, and expect the two leaves to stay put. Later, the centre gap has shifted, the latch no longer lines up, and the inner edge catches the vehicle as you pull through. That recurring movement usually isn't a failed latch. It means the gate leaves need a positive anchor at the ground.
A gate drop rod gives one leaf a guided vertical pin that settles into a centre stop, receiver, or ground socket. The hardware is simple, but reliable performance depends on more than drilling a hole. Rod style, gate height, guide alignment, soil movement, receiver construction, and accessibility requirements all affect whether the repair still works months after installation.
Why Your Double Drive Gate Keeps Drifting
On a suburban driveway, the problem often appears during an ordinary Saturday morning. The homeowner backs out, notices that the left leaf has crept past the right one again, and watches the centre gap catch against the truck mirror. The latch may still be intact, but the two free-swinging leaves have no dependable support once the latch is released.
Wind pushes broad gate panels sideways. Settlement changes the relationship between the hinges and the grade. A concrete pad that isn't level can make one leaf roll or settle differently from the other. Gravity also pulls the unsupported inner edge down, especially when a heavy leaf has developed even modest hinge-side sag.
That drift is what most owners interpret as a latch problem. Replacing the latch can improve engagement for a short time, but it won't stop the leaves from wandering across the opening.
What the rod actually fixes
A drop rod anchors the active or stabilised gate leaf at its closed position. The rod passes through guides mounted to the gate frame and drops into a receiver aligned with the centre stop. That connection prevents the inner edge from walking sideways while the gate is shut.
It won't correct a badly sagging hinge assembly, and it won't compensate for a receiver installed off the gate's travel line. It also won't solve a post that is moving in the ground. The rod is a stabilising component, not a substitute for sound gate framing and properly set posts.
Practical rule: If the leaves don't meet correctly before the rod is installed, repair the alignment first. A drop rod should lock a correctly positioned gate, not force a distorted one into place.
The decisions that matter are straightforward. Choose a style that suits the leaf and frame, match the length to the gate, and install the receiver in material that can tolerate the movement already occurring in the yard. California sites deserve extra attention because settlement, irrigation-softened ground, expansive soils, and freeze-thaw conditions in inland or mountain areas can change alignment after the original installation. A rod that worked at handover can later bind because the ground moved beneath it, not because the rod was defective.
Choosing the Right Gate Drop Rod Type and Size
Start with the gate frame, not the product box. A surface-mount strap-style rod suits many wood and vinyl leaves because its guide plates sit against the frame. A U-bolt model is more natural on a tube-frame metal gate, while a pin-and-chain assembly is commonly selected for commercial chain-link work where the gate sees heavier handling.
Material choice follows exposure. Zinc-plated steel keeps a basic residential installation economical. Hot-dip galvanised hardware is a better fit for wet conditions, and stainless steel makes more sense where salt exposure is constant. The receiver deserves the same attention as the rod. A corrosion-prone stop can lose alignment even when the shaft itself remains straight.
Match length to the gate
California retail listings show a standardised category rather than a custom-fabrication market. Commonly stocked options include a 30-inch drop rod, a 36-inch standard fence gate drop rod, and a 48-inch heavy-duty drop rod, as shown in California marketplace gate-drop-rod listings. Residential double-drive kits are also sold in 36-inch and 44-inch lengths, with clamps for a 1-3/8-inch outside-diameter gate upright, as described by residential double-drive drop-rod kit specifications.
For many residential double-drive and chain-link applications, the everyday benchmark is a 1/2-inch rod diameter, with guide openings designed around 1-3/8-inch upright tubes. Relevant hardware listings also show mounting holes around 3/16 inch to 1/4 inch, depending on the bracket system, as detailed in galvanised chain-link gate drop-rod specifications.
Don't choose length by gate height alone. Measure from the intended upper guide position to the receiver location, then confirm the rod clears the ground when raised and seats securely when lowered. A longer rod isn't automatically stronger if it projects into a walkway or bottoms out before the gate reaches its proper closed position.
Consider the whole access system
A ground rod stabilises a gate, but it doesn't replace the latch, lock, intercom, or controlled-entry equipment used by the people who operate it. If the project includes powered access or remote release, review what to look for in a gate access system before fixing the hardware layout. The rod, centre stop, latch, and access controls must work together rather than compete for the same operating space.
For a simpler manual option, compare the installation and clearance requirements of a cane bolt for a gate. The right choice depends on the frame, traffic pattern, corrosion exposure, and whether the operating hardware can be placed where users can reach it safely.
Tools and Pre-Install Checks Before You Drill
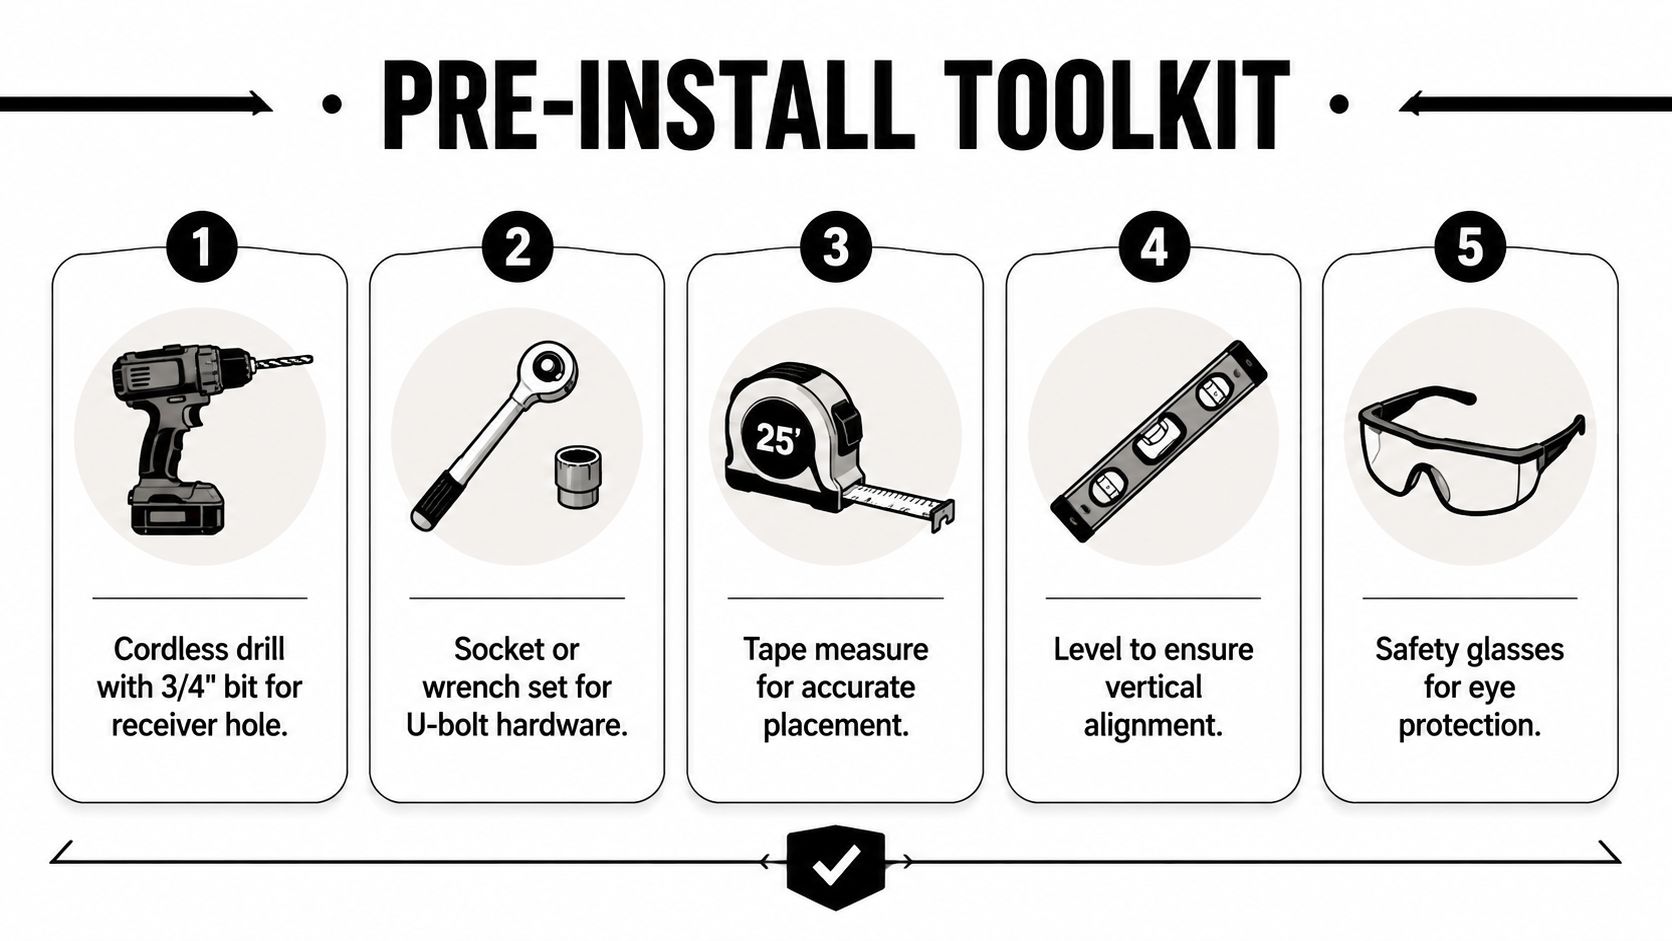
A drop rod usually fails because the receiver was marked before the gate, hinges, and ground were checked together. Set out a cordless drill, a 3/4-inch bit for the receiver hole, a socket or wrench set for U-bolt hardware, a tape measure, a 4-foot level, a pencil, safety glasses, and a socket wrench that fits the gate's existing hinge bolts.
Match the bit to the substrate. A poor choice can overheat, wander, or leave a rough receiver opening before the hole reaches its required depth. Review how to choose the right drill bit if the receiver will pass through concrete, masonry, or another hard surface.
Check the frame and swing
Measure the gate upright before selecting the strap or U-bolt. The guides need to fit closely enough that they cannot rock on the frame. Residential double-drive kits commonly clamp to a 1-3/8-inch outside-diameter upright, so confirm the tube with a tape measure instead of relying on its appearance.
Open and close the active leaf several times. Check hinge play, sag, and whether both leaves meet naturally. Measure the centre gap and the vertical distance from the bottom rail to grade. Those measurements show whether a 30-inch rod reaches the receiver with usable clearance or whether a 36-inch rod is needed.
Then identify the landing surface. The rod may finish on a driveway, in a concrete pad, or in a receiver set into dirt or gravel. Loose topsoil can shift under load and leave the gate misaligned months later. For concrete, choose the correct drilling and fastening method, including guidance on wedge anchors in concrete when the receiver or related hardware must be secured to a slab.
For a California double-drive or perimeter gate, the repeatable layout places the lower clamp about 3 inches from the bottom of the gate upright, with the raised rod about 1/2 inch above the ground. Close the gate before marking the receiver. Drill the 3/4-inch receiver hole on the rod's centreline, following the Pro-Series drop-rod instructions.
Record the alignment before drilling. A photo or pencil mark on the post gives you a reference after settlement, hinge movement, or seasonal soil change shifts the gate. It also helps separate a rod problem from a ground problem during later repairs.
Mounting the Drop Rod Step by Step
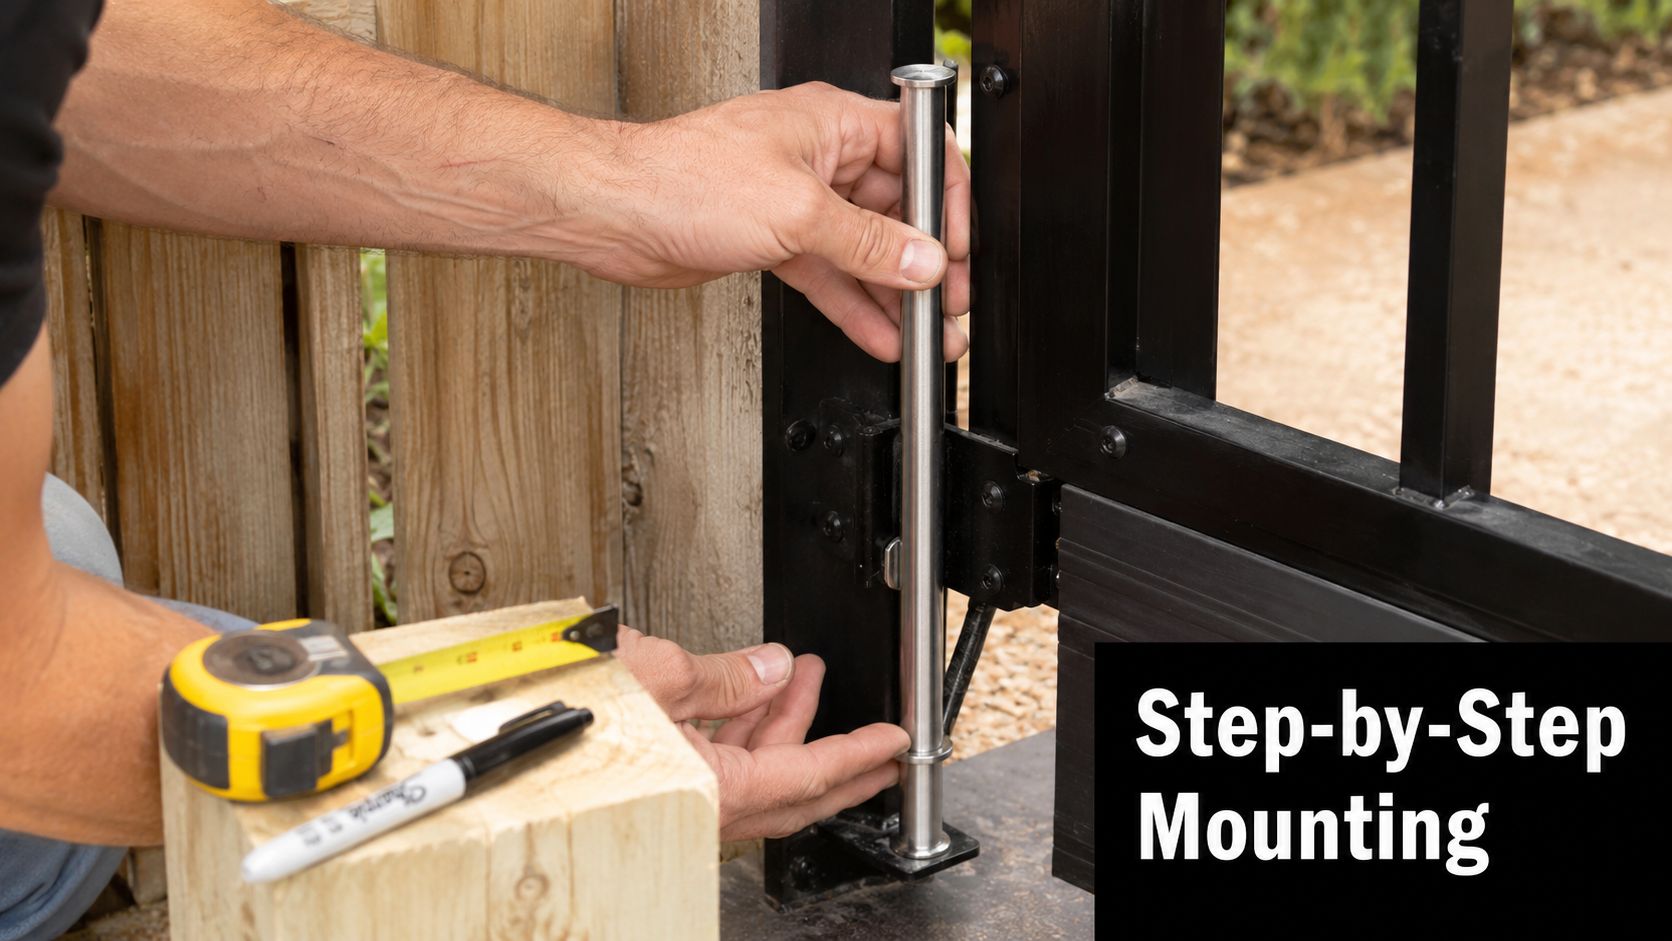
Prop the gate open on a stable block so the leaf is supported and the frame isn't hanging from the hinges while you work. The mounting workflow is easiest when the gate sits in its natural plane, with the vertical member plumb enough for the rod to travel without side pressure.
Position the drop rod against the active leaf's vertical frame member. Install the female strap hinges or guide brackets near the top brace rail and near the bottom, using the frame as the reference line. The gate bracket kit should suit the frame profile and fastener type rather than being forced onto an incompatible upright.
Mark the upper guide where the handle remains clear of the top edge and the lower guide near the bottom support. Drill pilot holes suited to the bracket's U-bolts, machine fasteners, or wood screws. Snug the hardware first, then slide the rod through both guides. It should move freely without wobbling excessively, and the guides must remain in one vertical line.
Set the receiver to the rod
Close the supported gate leaf and bring the second leaf into its normal meeting position. Lower the rod until it indicates the exact centre of the receiver. Don't mark from the latch or from the post alone. The rod's actual travel is the reference that matters.
On dirt or gravel, drive the receiver stake or sleeve until its cap sits flush with grade. On concrete, mark the centreline, pre-drill the 3/4-inch receiver hole, and clear the dust before seating the sleeve. A clean opening matters because a tight, irregular hole can make a straight rod appear bent.
The receiver should align with the rod while the gate is closed, not while the gate is being forced into position. Hold a torpedo level against the rod, adjust the lower guide if necessary, and check that the shaft drops cleanly without rubbing the bracket.
Cycle the rod through the receiver three times before final tightening. This catches a receiver that is slightly off-centre, a lower guide that is twisted, or a gate leaf that shifts as it closes. After the final bolts are snug, open and close both leaves through their complete travel and confirm that the centre stop, keeper, handle, and latch don't project into the walkway or interfere with the second leaf.
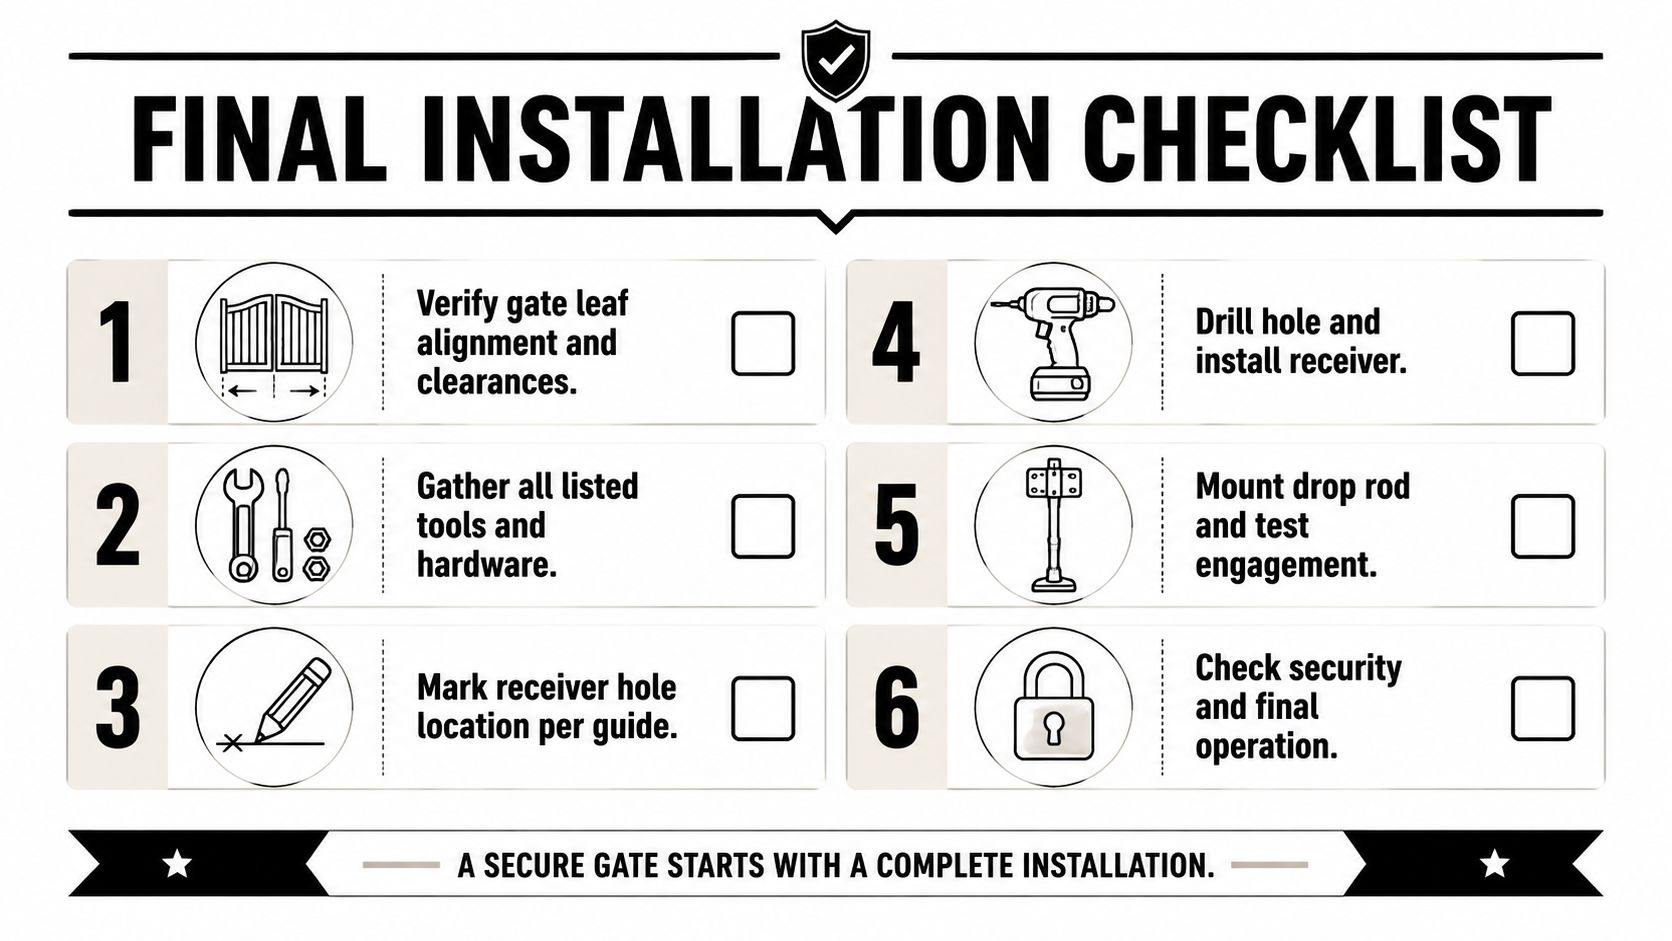
Use this sequence as the final field check:
- Support the gate and establish its natural alignment.
- Mount the upper and lower guides on the vertical frame member.
- Confirm a smooth, plumb rod movement.
- Mark the receiver from the closed gate position.
- Install the ground receiver or socket.
- Test repeated engagement before locking down all hardware.
The rod should stabilise the gate without acting as a pry bar. If you have to force the handle, stop and correct the geometry.
Common Drop Rod Problems and How to Fix Them
A drop rod that drags usually points to alignment, not a mysterious hardware defect. The gate leaf may have sagged, a post may have racked, or the receiver may have shifted as the ground settled. Start by loosening the lower bracket, bringing the rod plumb with a torpedo level, and re-anchoring the receiver only after the rod lands square.
Diagnose the symptom before changing parts
Grinding or scraping normally comes from a guide clamp tightened too far, a bent shaft, or grit packed into the receiver sleeve. Each condition increases friction and can wear through protective galvanising. Clean the receiver, inspect the rod by rolling it across a flat surface, and loosen the guide just enough to restore free travel.
A handle that binds as the gate swings often means the keeper or stop tab strikes the second leaf. Trimming the stop tab or shimming the receiver can restore clearance. Forcing the handle through the obstruction transfers the load into the bracket and can elongate the mounting holes.
A receiver that no longer lines up is often reporting movement in the gate or ground. Replacing the rod without correcting that movement usually repeats the failure.
Seasonal moisture creates another nuisance. If the rod freezes, a silicone-based lubricant on the shaft and a rubber cap over the receiver can reduce moisture entry. Persistent play at the upper guide usually traces to loose U-bolts. Re-torque them once, then inspect the holes. If the bracket has already pulled the holes out of shape, relocating it is more dependable than continuing to tighten.
This is a useful diagnostic distinction, similar to separating faulty appliance vs wiring problems. Test the component, then inspect the surrounding installation. A rod may be functioning correctly while the receiver, frame, or ground condition causes the visible symptom.
Ground movement changes the repair
When a rod stops seating as it did at installation, check for settlement, irrigation-softened soil, expansive ground, and seasonal movement before drilling a larger hole. A drilled socket, centre stop, and anchored receiver each behave differently as the surrounding material shifts. The most durable choice is the one that holds the receiver in stable material and allows future realignment without damaging the gate frame.
If the rod only seats partially, don't bury the problem under a deeper hole. Re-establish the closed-gate position, confirm the leaf hasn't sagged, and reset the receiver to the new centreline.
Maintenance Habits and Code Considerations
Treat the rod as moving hardware, not as a piece of the fence that can be ignored. Walk the installation during spring and autumn. Check that the shaft still drops cleanly, the receiver hasn't filled with grit or organic debris, and corrosion hasn't developed beneath damaged coating or plating.
A light silicone or PTFE spray on the shaft and pivot point twice a year helps prevent the grinding that accelerates wear. Brush visible rust with a wire brush and touch the affected area before corrosion spreads. Re-torque guide-clamp bolts annually because wood frames shrink and metal posts flex with temperature changes.
Code can change the hardware plan
California's accessibility rules create a practical conflict that product pages often skip. Operable gate hardware generally needs to sit 34 to 44 inches above the finish floor or ground, according to the California gate and door hardware provisions. A ground-mounted drop rod may stabilise the leaf perfectly, yet its handle can be unsuitable as the primary operable device for an accessible route.
Pool and spa access gates can involve different self-latching conditions, including latch-release hardware at up to 54 inches only in the specified circumstances described by the same California code reference. The code language focuses on operable parts and self-latching devices, so don't assume that a ground rod alone determines compliance.
Commercial work also needs a deliberate review of handle height, projection, and pedestrian circulation. On an accessible route, the operating component must not create an obstruction, and the final mounting position should be reviewed with the authority having jurisdiction before drilling.
California listings that include Proposition 65 warnings show that gate hardware can also enter a regulatory environment where chemical-exposure disclosure applies when applicable. The framework has applied to products sold in the state since 1986, so sellers and buyers should review the product information rather than treating the warning as an installation detail.
Maintenance follows the site
A coastal gate needs corrosion checks. A gate beside irrigation needs receiver cleaning and ground observation. A gate in expansive or seasonally shifting soil needs more frequent alignment checks than one installed on stable concrete. The inspection rhythm should reflect what the site does, not just what the product instructions say.
Quick Reference Checklist Before You Buy and Install
Take this list to the hardware aisle and the gate.
- Confirm the frame: Measure the gate upright and make sure the guide clamp or U-bolt matches its profile.
- Match the rod: Verify the gate height, available drop, rod length, and the typical 1/2-inch residential diameter before buying.
- Choose the receiver: Decide between a centre stop, drilled socket, stake, or anchored receiver based on the driveway and soil condition.
- Check the centreline: Close both leaves naturally and mark where the rod lands. Don't use the latch position as a substitute.
- Inspect the guides: Confirm the strap hinges or brackets can sit near the top and bottom supports while keeping the rod plumb.
- Prepare the tools: Bring the drill, 3/4-inch bit, wrench set, tape measure, level, pencil, safety glasses, and the correct hinge-bolt socket.
- Test before tightening: Cycle the rod through the receiver repeatedly, then open and close both leaves to check clearance.
- Review compliance: Check operable-part height, self-latching requirements, accessible-route clearance, and local pool-gate interpretation before final mounting.
- Plan upkeep: Inspect the receiver and guides in spring and autumn, lubricate the shaft and pivot point twice a year, and re-torque the guide hardware annually.
If your gate keeps drifting, measure the frame and centreline before ordering hardware, then choose a receiver method suited to the actual ground. XTREME EDEALS INC. offers fencing accessories, cane bolts, brackets, fasteners, and related gate hardware for DIY and professional projects. Visit XTREME EDEALS INC. to compare compatible components and organise the parts needed for a clean installation.