
If you're looking for an unbreakable grip in solid concrete, nothing beats a wedge anchor. They are the absolute go-to for heavy-duty jobs like fastening deck posts, securing railings, or locking down structural supports. They create enormous holding power through a surprisingly simple mechanical principle, which is why they’re a top pick for both seasoned contractors and serious DIYers.
What Are Wedge Anchors and How Do They Work?
Think of a rock climber jamming a cam into a crack in a cliff face. The more weight they put on it, the more the cam expands, wedging itself tighter against the rock. A wedge anchor operates on that same core idea, but for concrete.
It’s a high-strength fastener designed to forge a powerful mechanical bond inside a pre-drilled hole. It doesn't just sit in the concrete; it becomes an integral part of the structure itself. This level of reliability is why wedge anchors in concrete are often specified for any job where strength and safety are paramount.
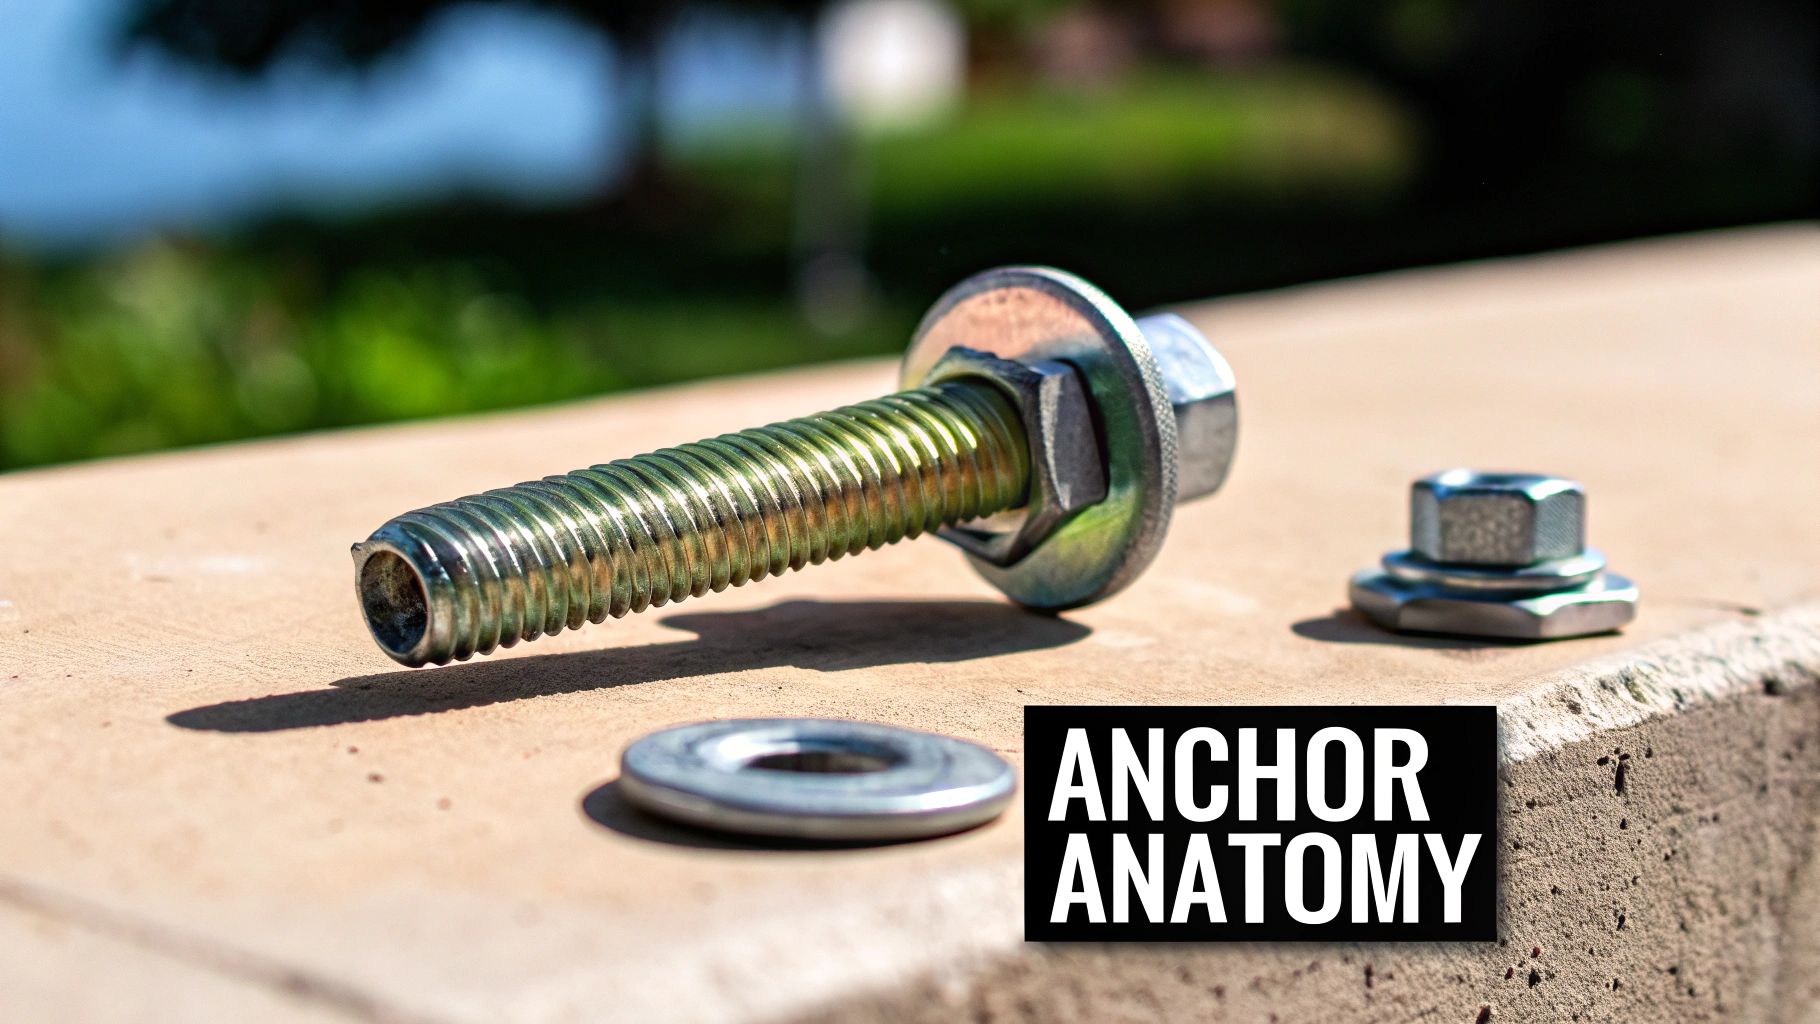
The Anatomy of a Powerful Grip
The design behind a wedge anchor is beautifully simple. It's just a few key parts working in perfect concert to generate incredible friction.
- Threaded Stud: This is the main body of the anchor, the part you see and thread the nut onto.
- Expansion Clip: A segmented sleeve or clip wrapped around the very bottom of the stud.
- Tapered Mandrel: This is the cone-shaped end of the stud that the expansion clip sits on.
- Nut and Washer: The hardware you use to tighten the anchor and secure whatever you're fastening.
When you start tightening the nut, it pulls the threaded stud upwards. This simple action forces the expansion clip to ride up the tapered, cone-shaped end. As it moves up the ramp, the clip is forced to expand outward with immense pressure. The segments on the clip bite hard into the walls of the concrete hole, creating a friction-based grip that's exceptionally strong against any pull-out forces.
The core idea is straightforward: convert the rotational force of tightening a nut (torque) into a powerful, outward-expanding force (friction). This is what gives the wedge anchor its formidable holding capacity.
Why This Mechanical Bond Matters
This mechanical expansion concept has been a cornerstone of construction for decades. Here in Canada, engineers have long relied on it. The principle was heavily validated in the United States, particularly after the California Department of Transportation (Caltrans) began extensive research back in the 1980s.
A pivotal 1989 study confirmed that the stud-wedge design was the top performer for resisting pullout. In their tests, 1/2-inch diameter anchors were sustaining loads between 5,000 to 8,000 pounds.
This is the kind of proven, real-world performance that matters. It’s why XTREME EDEALS INC. is proud to stock high-quality, code-compliant anchors from trusted brands like Power Bull and Simpson Strong-Tie, ensuring your projects are built on a foundation of absolute strength. Our Power Bull anchors, for example, offer exceptional value and performance, making them a top choice for contractors and serious DIYers alike. You can dive deeper into these early findings on concrete fastening performance if you're curious.
Choosing the Right Wedge Anchor for Your Project
Picking the right wedge anchor isn’t just some minor detail—it’s the very foundation of your project’s safety and longevity. Get it wrong, and you could be looking at premature failure, rust, or a connection that just isn't secure. The good news is, getting it right boils down to understanding four key things: the anchor's material, its protective coating, its diameter, and its length.
Think of it like choosing tires for your car. You wouldn't put summer tires on for a Canadian winter, and you definitely wouldn't use indoor-rated hardware for an outdoor deck. The exact same logic applies to wedge anchors in concrete.
Matching the Material to the Environment
The first big decision comes down to where the anchor is going to live. This one factor dictates the best material for the job, protecting your fixture from the elements and making sure it lasts.
Carbon Steel (Zinc Plated): This is your bread and butter for any dry, indoor application. The zinc plating gives it a basic shield against rust, making it perfect for things like securing shelving in a garage, installing machinery in a workshop, or anchoring fixtures in a dry basement. Our Power Bull Zinc Plated Wedge Anchors are an economical and reliable choice for these interior jobs.
304 Stainless Steel: When your project heads outside or into damp areas, you need to bring in the tougher stuff. Type 304 stainless steel is built for exterior work like securing deck posts, railings, and fence bases in most climates. It shrugs off rain and humidity without breaking a sweat.
316 Stainless Steel: For the absolute harshest conditions, this is the top dog. Type 316 has an extra ingredient—molybdenum—that gives it superior protection against chlorides. That makes it non-negotiable for projects near the coast with salt spray in the air, or in places with chemical exposure, like around a swimming pool.
To help you sort through these options at a glance, here’s a quick guide.
Wedge Anchor Material and Coating Selection Guide
| Material/Coating | Best For | Corrosion Resistance | Common Applications |
|---|---|---|---|
| Carbon Steel (Zinc Plated) | Dry, indoor environments only | Low | Securing workshop machinery, garage shelving, interior fixtures. |
| 304 Stainless Steel | Outdoor use in non-coastal areas, damp environments | High | Deck posts, exterior railings, fence bases, signposts. |
| 316 Stainless Steel | Coastal regions, salt spray, chemical exposure | Very High | Marine docks, swimming pool equipment, industrial settings. |
Choosing the right material from the start is the single best thing you can do to prevent corrosion and ensure your connections stay strong for years to come.
At XTREME EDEALS INC., we stock a full lineup of Power Bull and Simpson Strong-Tie wedge anchors in all these materials, so you can always find the perfect fit. Our Power Bull anchors are available in contractor-friendly multi-packs, giving you a range of options for tackling different jobs on the fly.
Calculating the Perfect Anchor Length
Once you've nailed down the material, the next critical step is getting the length right. An anchor that’s too short won't bite into the concrete properly, which tanks its holding power. Figuring out the right length is actually a simple formula:
Anchor Length = Fixture Thickness + Minimum Embedment Depth + Nut/Washer Height
Let's walk through a real-world example. Say you're fastening a 2-inch thick wooden post base to a concrete patio. The anchor manufacturer says you need a minimum embedment depth of 3 inches for that specific anchor diameter. You also need to leave about half an inch for the nut and washer to sit on top.
- Fixture Thickness: 2 inches
- Minimum Embedment: 3 inches
- Nut & Washer Height: 0.5 inches
- Total Required Length: 5.5 inches
In this case, you’d grab the next standard size up, which would be a 5.5-inch or possibly a 6-inch anchor. This quick calculation guarantees the anchor is buried deep enough to give you its maximum rated strength while holding your fixture down tight.
Diameter and Holding Power
The final piece of the puzzle is the anchor's diameter. The rule here is dead simple: a larger diameter means greater holding power. A 1/2-inch anchor can handle way more load—both pull-out (tension) and sideways (shear) forces—than a 3/8-inch anchor can.
Often, your project's engineering specs or local building codes will tell you exactly what diameter to use. For heavy-duty structural connections like deck ledger boards or main support posts, bigger diameters like 1/2" or 5/8" are the norm. For lighter jobs, like securing railing posts, a 3/8-inch anchor might be all you need.
If you’re in the design phase for a new deck, remember that your layout choices can also influence your hardware needs. You can find some great inspiration in our guide on deck railing ideas that will inspire you and your guests. By carefully thinking through these four elements, you can be confident that every wedge anchor you install provides the safe, secure, and lasting connection your project deserves.
Understanding What a Wedge Anchor Can Really Handle
To get a real feel for how reliable a wedge anchor is, you need to understand the forces it’s built to fight against. Every anchor has its limits on paper, but in the real world, its strength comes down to a careful mix of physics, the quality of your concrete, and most importantly, how well you install it. Nailing this balance is the difference between a rock-solid connection and a potential failure waiting to happen.
Every anchor has to deal with two main forces:
- Tension Load: This is the force trying to pull the anchor straight out. Picture the wind trying to lift a deck railing post right out of its footing—that’s tension.
- Shear Load: This is the sideways force pushing against the anchor. Imagine someone leaning hard against a fence post—that’s shear.
An anchor's ability to stand up to these forces isn't just one simple number. It's a team effort, and a few key players have a huge say in the final result.
The Factors That Make or Break an Anchor's Strength
When manufacturers list performance data, they're talking about perfect lab conditions. Your job site is anything but. The three biggest variables you need to worry about are the quality of your concrete, how deep you set the anchor, and where you put it.
Concrete Quality (PSI): We measure concrete strength in Pounds per Square Inch (PSI). Higher PSI means the concrete is denser and stronger, giving the anchor's expansion clip something solid to bite into. An anchor set in 4,000 PSI concrete is going to be worlds stronger than the same one in weaker 2,500 PSI concrete.
Embedment Depth: This one’s simple: how deep is the anchor buried? The deeper it goes, the more concrete it has to grab onto. This spreads the load over a much wider area and dramatically boosts its pull-out strength. Always stick to the manufacturer's minimum embedment depth—it's not just a suggestion.
Anchor Placement: Where you drill the hole is just as critical. Placing an anchor too close to the edge of the concrete or too near another anchor creates a weak spot. The forces can literally cause a chunk of concrete to crack and "blow out," taking your anchor with it.
Here’s the bottom line: a wedge anchor is only as strong as the concrete it’s in and how well it’s installed. The best hardware in the world can't make up for crumbly concrete or a botched installation.
Why Your Torque Wrench Is Your Best Friend
This brings us to the most critical step of the entire process: tightening the nut with the right amount of torque. Torque is the rotational force that pulls the anchor's stud upward, forcing the clip to expand and lock into the concrete. A calibrated torque wrench is the only way to know for sure that you've hit the sweet spot specified by the manufacturer.
It's a classic rookie mistake to just eyeball it or crank on a regular wrench until it feels "good and tight." That's a gamble you don't want to take.
Over-tightening: Going overboard with the torque is a recipe for disaster. You can crack the concrete around the anchor, strip the threads, or even snap the stud clean off. All you've done is create a massive stress point that's ready to fail.
Under-tightening: Being too gentle is just as bad. If you don't apply enough torque, the expansion clip never fully engages the concrete. You're left with a loose connection that has only a tiny fraction of its rated holding power.
For any serious structural work—from deck posts to garage shelving—a torque wrench isn't just a nice-to-have. It’s a non-negotiable tool for safety and peace of mind. Reputable brands like Simpson Strong-Tie and Power Bull, available through XTREME EDEALS INC., provide incredibly detailed spec sheets that tell you the exact torque setting for every single anchor size.
This precision is even more critical in places prone to earthquakes. Wedge anchors are essential for seismic safety, and torque-controlled models have been proven to stand up to earthquake forces in concrete ranging from 2,500 to 8,500 psi. Take Simpson Strong-Tie’s Wedge-All anchors, for example. They can handle an ultimate tension load of 17,000 pounds (75.6 kN) in 4,000 psi concrete, showing just how much muscle they have for securing things like post bases and heavy gate hinges. You can dive into these impressive structural performance ratings yourself to see just how much these anchors can take.
A Step-by-Step Guide to Installing Wedge Anchors
Proper installation is what transforms a simple piece of metal into an incredibly strong structural component. Think of it like a recipe for strength; skipping a step or measuring incorrectly can ruin the entire dish. The same principle applies to wedge anchors in concrete. Following a precise, methodical process is the only way to squeeze every bit of rated holding power out of your anchor.
Getting it right is surprisingly straightforward. We’ve broken down the entire process into five clear, manageable steps. Stick to this guide, and you can be confident that every anchor you set is safe, secure, and ready to do its job perfectly.
Step 1: Drill the Hole Correctly
The foundation of a solid anchor installation is a perfectly drilled hole. You're aiming for a clean, straight shaft that matches the anchor's diameter exactly.
Your standard drill isn't going to get this done. You need a hammer drill armed with an ANSI-standard carbide-tipped bit. This combo doesn't just cut; it pulverizes the concrete, creating the ideal rough surface for the anchor's clip to grab onto. Make sure your drill bit diameter is the same as the anchor's—a 1/2-inch anchor needs a 1/2-inch hole. Simple as that.
Drill to the specified depth. This should be at least the minimum embedment required by the manufacturer, plus a little extra room for any dust that settles at the bottom. Drilling too shallow is a classic mistake and a critical failure point; the anchor simply won't have enough room to set.
Step 2: Clean the Hole Thoroughly
I can't stress this enough: do not skip this step. It’s the most overlooked part of the process, and it's absolutely critical. All that concrete dust and debris left in the hole acts like a layer of tiny ball bearings, preventing the expansion clip from making solid contact with the concrete. This can gut the anchor's holding power.
To get it clean, just follow this two-part cycle:
- Brush: Grab a stiff wire brush (ideally one that matches the hole's diameter) and scrub the inside walls a few times. This loosens all the fine dust and particles clinging to the sides.
- Blow: Use compressed air—a can or a compressor—to blast all that loose debris out of the hole.
Repeat this brush-and-blow cycle at least twice. You want that hole spotless.
A clean hole is a strong hole. Taking an extra 30 seconds to clear out the dust is the single best investment you can make to guarantee a secure connection.
Step 3: Insert and Set the Anchor
With a clean hole ready, it's time to set the anchor. First, make sure the nut and washer are on the top end of the anchor body. Here's a pro tip: thread the nut on until its top is flush with the top of the anchor stud. This little trick protects the threads from getting mangled when you tap it with the hammer.
Gently insert the anchor through whatever you're mounting (like a post base or bracket) and into the hole. Now, give the top of the anchor a few taps with a hammer. Drive it in until the washer and nut are seated firmly against the surface of your fixture. The anchor should feel snug and ready for the final, most important step.
This is what a properly installed anchor is designed to resist:
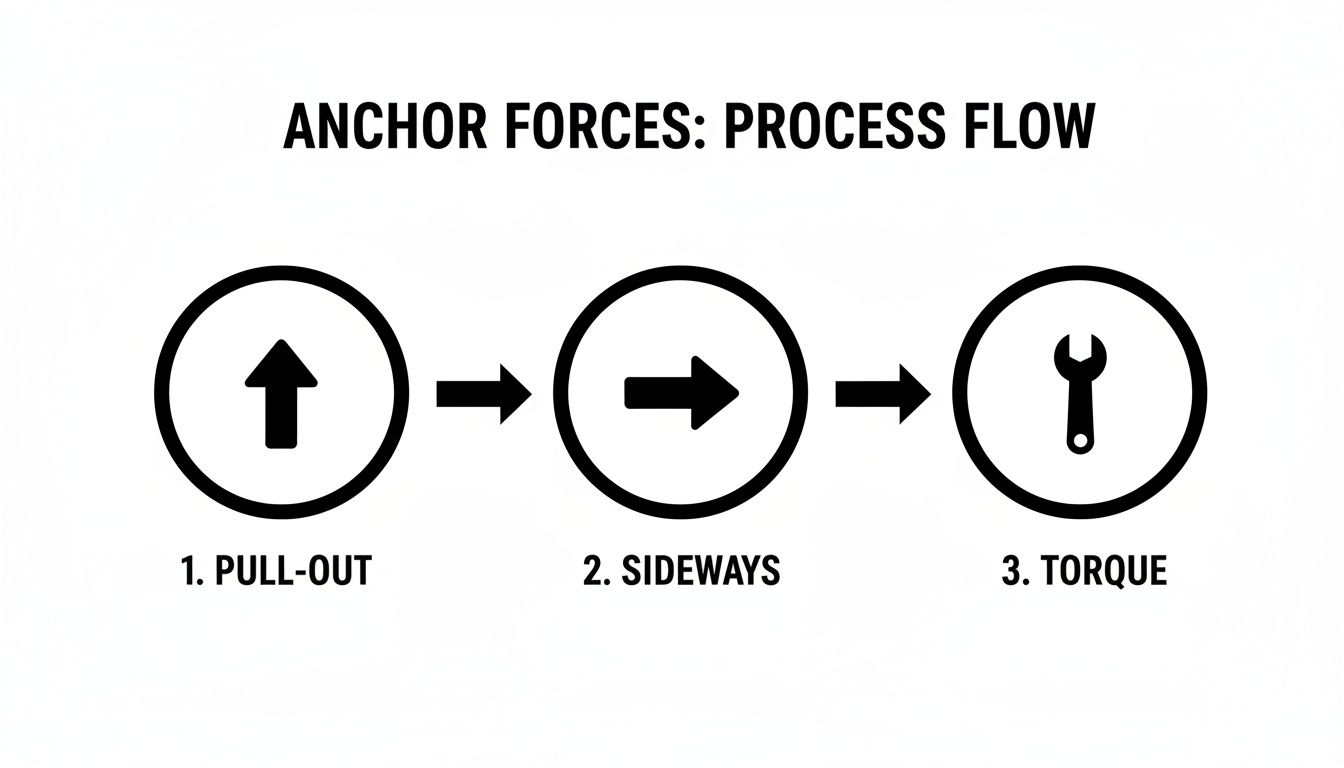
This simple visual shows the pull-out (tensile), sideways (shear), and rotational forces that a wedge anchor must withstand to keep everything locked in place.
Step 4: Tighten the Nut to the Correct Torque
This is where the magic happens. As you tighten the nut, it pulls the anchor's stud upward, forcing the expansion clip over the tapered cone at the bottom. This action wedges the clip tightly against the concrete walls, creating that rock-solid hold. To do this right, you absolutely must use a calibrated torque wrench.
Guessing the tightness with a standard wrench is just asking for trouble.
- Under-tightening means the clip never fully expands. The result? A weak, unreliable connection.
- Over-tightening is just as bad. You can actually crack the concrete or damage the anchor itself.
Look up the manufacturer's specified torque value for your anchor's diameter and the concrete's strength (PSI). Brands like Power Bull and Simpson Strong-Tie—which you can find at XTREME EDEALS INC.—always provide these specs on the box or on their website. Set your torque wrench to that exact number and tighten the nut until the wrench gives that satisfying click. For some projects, you might want to look into the specifics of wall mounting brackets and their fastening requirements.
Step 5: Final Inspection
Once the anchor is torqued down, give it a quick once-over. The washer should be flat and tight against your fixture, and there shouldn't be any hairline cracks in the concrete radiating out from the anchor. If it all looks good, the installation is complete. You now have a safe and reliable connection built to last.
Comparing Wedge Anchors to Other Concrete Fasteners
Walk into any hardware store, and the wall of fasteners can be a bit intimidating. With so many options, how do you know which one is right for your project? While wedge anchors in concrete are the undisputed champs for heavy-duty, structural jobs, they aren't the only tool in the box.
Getting a handle on the key differences between a wedge anchor and its common cousins—like sleeve, drop-in, and epoxy anchors—is the key to a safe, solid installation. The best anchor always comes down to the base material, the load it needs to carry, and the environment. A fastener that’s perfect for solid concrete might be a total failure in a hollow block wall.
This breakdown will help you see exactly where wedge anchors shine and when another option might be a smarter choice.
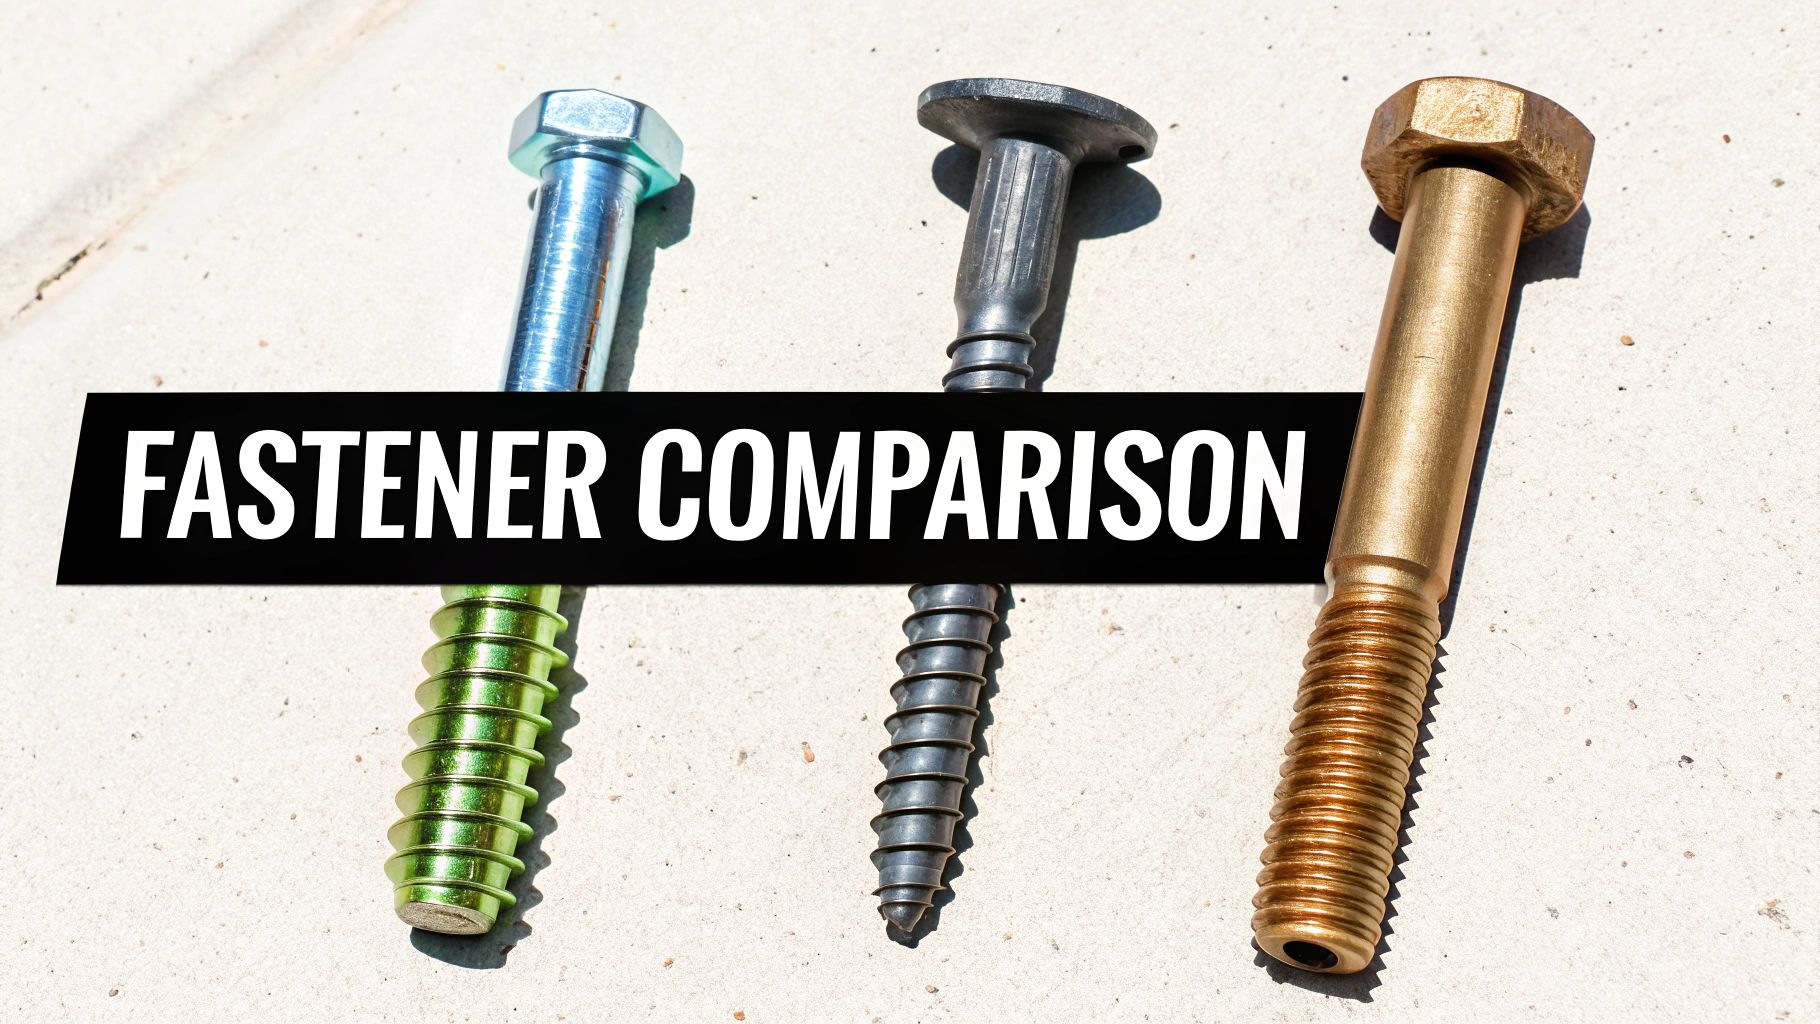
Wedge Anchors vs. Sleeve Anchors
The easiest way to think about this is that a wedge anchor is a specialist, while a sleeve anchor is more of a generalist. Wedge anchors are engineered for one thing: solid, dense concrete. That little expansion clip at the bottom creates an incredibly powerful friction hold, but it needs a solid, unyielding surface to bite into.
Sleeve anchors, on the other hand, are a bit more forgiving. Their sleeve expands along the entire length of the anchor body. This makes them a great choice for softer or more brittle materials like brick, concrete block (CMU), or even lower-strength concrete. They don't have the same brute holding power as a wedge anchor in high-psi concrete, but their gentle, distributed pressure is far less likely to crack or blow out weaker materials.
- Go for a Wedge Anchor when: You're securing structural posts, heavy machinery, or ledger boards to a solid concrete foundation.
- Grab a Sleeve Anchor for: Fastening fixtures to brick walls, hollow concrete blocks, or other porous masonry.
Wedge Anchors vs. Drop-In Anchors
A drop-in anchor is what we call a "female" anchor. It's basically a threaded insert that you set flush into the concrete. You then use a separate bolt to attach your fixture. This design is fantastic for situations where you might need to remove the fixture later on, as it leaves no stud sticking out of the concrete.
The trade-off? Their holding power is generally quite a bit lower than a wedge anchor's. Drop-ins are perfect for medium-duty jobs, like hanging pipe, conduit, or threaded rod from a concrete ceiling. But for heavy structural loads that will see vibration or shear forces, the solid stud and superior grip of a wedge anchor is the only way to go for peace of mind.
Wedge Anchors vs. Epoxy (Adhesive) Anchors
Here, we're comparing a mechanical anchor to a chemical one. A wedge anchor works instantly through physical force and friction. An epoxy anchor, as the name suggests, uses a chemical adhesive to bond a threaded rod directly to the concrete.
Epoxies offer truly incredible strength—often exceeding the strength of the concrete itself. They're also your best friend when dealing with oversized holes or when you have to anchor very close to a concrete edge without risking a blowout. The downside is the fuss and the wait time. You have to be meticulous about cleaning the hole, and then you have to wait (sometimes for hours) for the epoxy to fully cure before you can apply any load.
A wedge anchor gives you immediate, dependable strength the second you torque it down. An epoxy anchor can provide mind-boggling strength, but it demands patience and a very precise installation.
Concrete Anchor Comparison
To make it even clearer, here's a quick cheat sheet comparing these popular anchor types. This should help you pinpoint the best option for your specific job.
| Anchor Type | Holding Power | Best Use Case | Installation Ease |
|---|---|---|---|
| Wedge Anchor | Very High | Heavy-duty loads in solid concrete (posts, machinery) | Moderate |
| Sleeve Anchor | Medium-High | Medium loads in concrete, brick, or block | Easy |
| Drop-In Anchor | Medium | Suspending items from ceilings; removable fixtures | Moderate |
| Epoxy Anchor | Extremely High | Highest loads, close-to-edge applications, cracked concrete | Difficult (Requires curing) |
At the end of the day, the numbers don't lie. Data clearly shows the superior load-bearing muscle of wedge anchors in concrete for immediate mechanical fastening. For example, a standard 3/8-inch x 3-inch Simpson Strong-Tie Wedge-All anchor can hit an ultimate tension of 10,040 pounds in 4,000 psi concrete. That's a huge step up from many other mechanical anchors of a similar size, making them the go-to for critical connections like post bases or heavy gate hinges. You can dig into these impressive anchor performance metrics to see for yourself.
Here at XTREME EDEALS INC., we stock a full range of fastening solutions for any project. While wedge anchors from trusted brands like Power Bull and Simpson Strong-Tie are our top pick for structural work in solid concrete, we know every job has its own quirks. For custom projects where you might need a mix of fasteners, like a new gate, be sure to check out our guide on how to install a Nuvo Iron gate insert. Knowing the difference between these anchors is what lets you build with real confidence.
Common Questions About Wedge Anchors Answered
You can read a manual front to back, but once you're on the job site with a drill in your hand, the real questions start to pop up. Getting a quick, clear answer can be the difference between a smooth project and a day full of headaches.
Here, we'll tackle the most common questions we hear from both seasoned pros and weekend DIYers about using wedge anchors in concrete. Think of this as your go-to cheat sheet for those "what if" moments.
Can I Reuse a Wedge Anchor After Removing It?
That's a hard no. Once a wedge anchor has been set and then pulled out, it's done for good. You should never, ever try to reuse one.
The magic is in the expansion clip at the bottom. When you tighten the nut, that clip expands and bites into the concrete, creating that incredible holding power. But it's a one-time deal—the metal deforms permanently. If you try to set it again, you'll get a dangerously weak connection that's a fraction of its original strength. For everyone's safety, grab a new anchor for every single hole.
What Happens If I Drill the Hole Too Deep?
Drilling a bit too deep is actually much better than drilling too shallow. It's usually not a problem at all.
As long as the anchor can still be set to the manufacturer's specified minimum embedment depth, it will work just fine. The anchor will just sit a little lower in the hole.
The real mistake to avoid is drilling the hole too shallow. If it's not deep enough, you won't be able to drive the anchor in far enough for the clip to expand properly. This seriously compromises its load capacity and creates a major failure risk.
How Close to a Concrete Edge Can I Install an Anchor?
This is a critical safety point, so pay close attention. You always have to follow the manufacturer's specs for minimum edge and spacing distances. You'll find this info in the technical data sheet, and it's usually based on the anchor's diameter.
When you install an anchor too close to an edge or another anchor, you concentrate a massive amount of stress in a tiny area of the concrete. Under load, this can cause the concrete to crack and "blow out," leading to a complete and sudden failure. Don't eyeball it; look up the numbers.
Do I Really Need a Torque Wrench?
Yes. For any job that's structural in any way, a calibrated torque wrench isn't just a nice-to-have—it's essential.
Applying the correct torque is what properly sets the anchor. It’s not just about making it feel "tight." If you over-torque, you can actually fracture the concrete around the anchor or damage the anchor itself. If you under-torque, you're left with a loose, weak connection that won't hold the load it's rated for. Using a torque wrench is the only way to guarantee a safe, reliable, and code-compliant installation every single time.
Whether you’re putting up a small handrail or framing out an entire deck, having the right hardware is non-negotiable. At XTREME EDEALS INC., we stock a full range of high-quality wedge anchors from trusted names like Power Bull and Simpson Strong-Tie, so you know you're building with strength and reliability. Our Power Bull line offers exceptional value and performance across all common sizes and materials, including zinc-plated and stainless steel options. Explore our selection of fasteners and build with confidence. Visit us at https://www.xtremeedeals.ca.