

You've finished the fence or deck frame, the posts are standing straight, and the remaining shopping list looks simple: screws, stain, and decorative post caps 4×4. It's tempting to choose the first attractive style that appears on the screen. Then the cap arrives, the opening is too tight, the post top is uneven, or the finish doesn't suit the weather your project faces.
A 4×4 cap is a small component, but it sits where appearance, water protection, installation method, and local building requirements meet. The right choice should fit the actual post, suit the material and climate, and work with the structure already approved or built. Here's how to make that decision without getting caught by the sizing traps that send many buyers back to the store.
Why the Cap on a 4×4 Post Deserves Real Thought
The usual moment comes late on a Saturday. The fence panels are attached, the gate is hung, and you're standing in the yard with a sample cap in one hand. The post tops are exposed, the end grain is visible, and the finished fence still looks one detail short of complete.
That cap has two jobs. It gives the post a deliberate visual finish, and it helps shield the top from direct exposure to rain, dirt, and debris. A California fence specification takes the protective role seriously for steel pipe posts, requiring the top to be permanently capped to help prevent rainfall and small animals from entering the post (California fence specification).
The last item can affect the whole line
On a long fence, repeated details create rhythm. A flat cap can make a contemporary fence look quiet and orderly. A pyramid or ball profile can add a traditional note to every corner, gate, and railing post. If one cap sits crooked or leaves a visible gap, the eye catches it because the same detail appears repeatedly.
The top of a post also deserves more than a cosmetic inspection. An uneven cut can prevent a slip-fit cap from seating properly. A damp or damaged post end can leave the cap rocking, while a poorly selected fastener can introduce corrosion at the interface.
Practical rule: Choose the cap only after you've confirmed what the post actually measures and how the post is used.
The structural context matters most on decks. A decorative piece shouldn't be confused with an approved post-to-beam connector, and it shouldn't substitute for one. On a fence, the cap may be primarily protective and decorative. On a deck, the post and connection arrangement may be part of a permitted structural assembly, so the finish piece must never interfere with that assembly.
That's why the best purchase isn't just the prettiest cap. It's the one that protects the post, suits the architecture, installs cleanly, and belongs on the specific 4×4 assembly you're building.
What a 4×4 Post Cap Actually Is
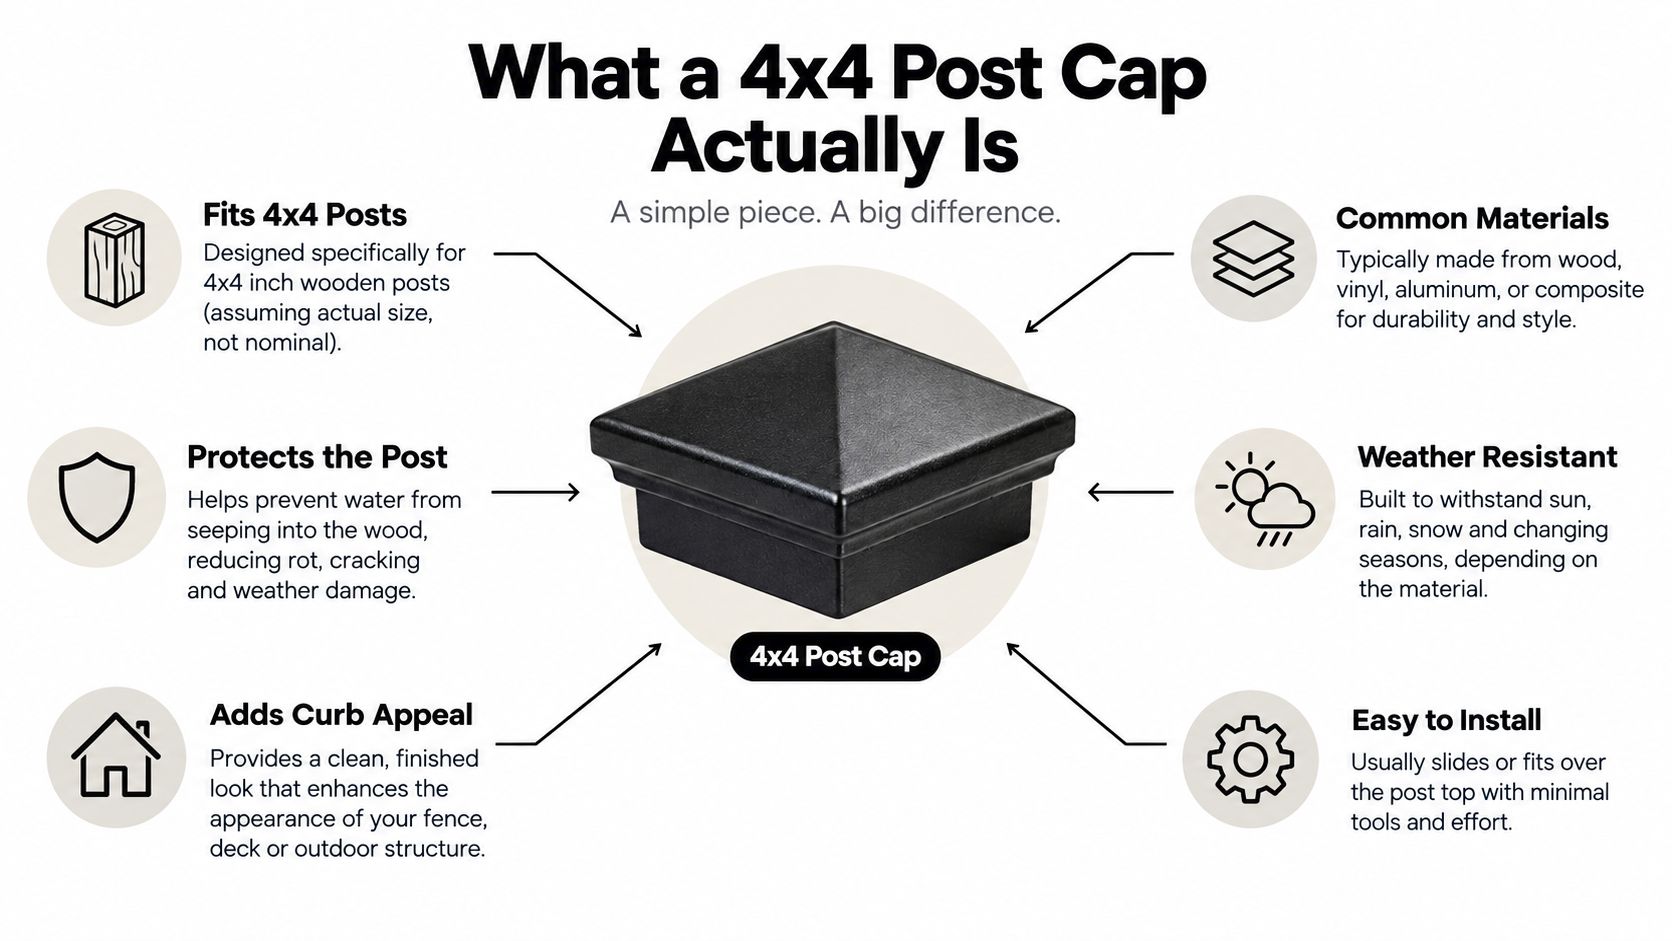
A 4×4 post cap is a cover fitted over the top of a nominal 4×4 wood, composite, or metal post. Depending on its design, it may shed water, keep debris out, cover an exposed cut, and provide a finished decorative profile.
The important word is nominal. A post sold as 4×4 usually isn't a literal four inches square after milling. Many products labelled 4×4 are made to fit an opening around 3-5/8 inches, and some product listings specifically warn that the cap isn't intended for a true 4×4 post (4×4 metal post cap sizing example).
Think of the cap like a picture frame around a window. The window may be described by a standard size, but the frame must match the actual opening and the way the window is installed. A cap's outside dimensions, inside opening, and mounting method all matter. A sleeve-style cap surrounds the post, an internal-fit model sits inside an opening, and a true-fit cap is made for a post that really measures four inches.
Measure the post, not the label
Use a reliable tape measure or calliper and check the finished post near the top. Measure both width and depth, because a post can be slightly out of square after cutting, drying, staining, or years of weather exposure. Also check whether the post has a sleeve, wrap, trim board, or metal skin that changes the surface the cap must fit.
A cap listed as 4×4 may therefore be correct for a nominal wood post but wrong for a true 4×4 metal post. The reverse can also happen. Before ordering, confirm:
- Actual opening: Compare the cap's internal dimensions with the post's measured dimensions.
- Fit type: Identify whether it's external, internal, sleeve-style, or designed for a true-size post.
- Post material: Check whether the cap is intended for wood, steel, aluminium, composite, or a wrapped post.
- Top condition: Make sure the post is square, sound, and free of raised splinters.
For a useful starting point, compare compatible products such as 4×4 post covers and read the specification details rather than relying on the product title alone. The attractive profile only works if the opening matches.
Materials and Finishes Worth Knowing
Material changes the way a cap ages, installs, and looks beside the rest of the property. The right question isn't which material is universally best. It's which material suits your post, exposure, maintenance habits, and design.

Metal for a crisp, controlled finish
Powder-coated steel caps are a practical choice for many wood fence and deck projects. They provide a clean architectural appearance, and a dark finish can tie together black hardware, railing brackets, lights, and gate hinges. On pressure-treated lumber, metal also creates a deliberate contrast between the changing character of the wood and the consistent cap finish.
Inspect the coating and fastening details. A scratch at the edge or a bare fastener can become the first visible failure point, especially where moisture remains trapped against the post. An appropriate protective coating range can help you think through compatible exterior finishes and maintenance products.
Copper when the cap should become part of the landscape
Copper is a more expressive choice. It begins bright and gradually develops a patina, so the cap changes character rather than trying to remain visually unchanged. That ageing process can work especially well on a craftsman-style home, a garden gate, or a high-visibility deck where the cap is intended to be noticed.
Copper makes less sense when you want every component to retain a uniform factory appearance. It also needs to relate to nearby hardware. A copper cap beside bright silver hinges may look accidental, while copper lighting, planters, or trim can make the choice feel intentional.
Aluminium as the lightweight middle ground
Aluminium suits projects where low weight and corrosion resistance matter. It pairs naturally with aluminium fence systems and can provide a refined metal appearance without the visual heaviness of steel. Check how the cap is retained, since a lightweight product may rely on pressure fit, tabs, adhesive, or a specific fastener arrangement.
Plastic and composite for flexibility
Plastic and composite caps are often the economical route, with many available shapes and colours. They can work well for a straightforward fence refresh, particularly when the cap needs to blend into a painted or synthetic post system.
Don't assume every plastic cap is suitable for full sun. Some product information warns that models may not be UV protected, so check the specification before using one on an exposed fence line. A cap that looks perfect in the box can fade, become brittle, or lose its fit if the material isn't intended for that exposure.
Measuring and Mounting a 4×4 Cap the Right Way
A cap can look perfect on the package and still fail at the post. Start with the finished surface, not the lumber label. Measure across the post in one direction, rotate the tape, and measure the other direction. Check near the top and slightly below it, because weathered or pressure-treated wood may vary.
Measure the surface that will touch the cap. Paint, stain, a sleeve, or trim can add enough thickness to change the fit. Inspect the cut as well. A slanted top can make a correctly sized cap sit crooked, much like a lid resting on an uneven box.
Measure twice, then compare those dimensions with the manufacturer's internal opening. The label “4×4” is only a starting point.
Mounting style affects both retention and future access. A friction-fit cap slips over the post and relies on a close match between the opening and the finished post. Some products also call for exterior silicone. This creates a neat installation and allows later removal for inspection or replacement, provided the opening is correctly sized and the post top is clean.
A screw-on cap anchors into the post. It suits an exposed deck railing or another location where firm, lasting attachment matters. Use the specified fastener. Overtightening can distort thin metal, damage a finish, or strip the wood around the screw.
Adhesive or tab-mounted caps work with metal posts, sleeves, and no-drill installations. Confirm that the adhesive is rated for exterior use, then clean and dry both mating surfaces. Dust, moisture, or an incompatible coating can leave the cap loose even when the dimensions are correct.
| Mounting Style | Best For | Key Trade-Off |
|---|---|---|
| Friction-fit | Clean, close-fitting wood post tops | Easy to install, but depends on accurate sizing |
| Screw-on | Exposed locations needing firm retention | More secure, but leaves fastener points and may be less removable |
| Adhesive or tab-mounted | Metal posts, sleeves, and no-drill applications | Clean appearance, but relies on surface preparation and product compatibility |
Deck connections require a separate check of the approved hardware and installation details. California residential deck guidance identifies requirements for manufactured post caps or post-to-beam connectors, including sizing to the post and beam dimensions and using the specified connection system (Millbrae residential deck requirements). Review the project drawings and manufacturer instructions for fastener type, placement, and any required connector approval. A decorative cap should match the post finish, while a load-bearing connector must match the engineered connection.
Weather, Corrosion, and Code Considerations
A homeowner may choose a cap for its profile, then discover that the material, fasteners, or fire rating does not suit the site. A coastal deck, a rain-exposed fence, and a sunny inland post face different demands. The right cap must fit the 4×4 post and the conditions around it.
Begin with the exposure at the post:
- Salt air: Choose a material and finish made for corrosive conditions. Check the fasteners and any cut edges, because those areas can corrode first.
- Persistent rain: Use a shape that directs water away from the post top rather than forming a recess where moisture can collect.
- Strong sun: Confirm UV suitability before selecting plastic or composite. Heat and sunlight can shorten the service life of an unsuitable product.
- Wildfire exposure: Check local requirements before choosing wood or another combustible decorative material.
A practical maintenance plan should cover the cap, post, and nearby outdoor surfaces. Guidance on weatherproofing your exterior surfaces can help you plan cleaning, surface checks, and protection for exposed materials. Regular inspection also gives you a chance to find loose fasteners, finish failure, or trapped moisture before the post top deteriorates.
The post still controls the decision
A decorative cap does not increase the structural capacity of a post. It must be selected within the limits that apply to the post, the structure, and the site.
Paradise municipal guidance permits 4×4 nominal posts up to a maximum height of 8 feet, while 6×6 nominal posts are permitted up to 14 feet. Taller structures require engineering from a California Licensed Design Professional (Paradise deck, porch, stair, and guard guidance). These limits illustrate a sizing trap: a cap sold for a nominal 4×4 may not suit a post with different actual dimensions, and a visually attractive cap does not make an oversized or modified post compliant.
For a deck, guard, tall fence, altered structural member, or project in a wildfire area, confirm local requirements before ordering. Ask whether the cap material, fasteners, clearance, and fire treatment match the approved design. The cap is the weather-facing finish, while the post and its connections remain part of the regulated assembly.
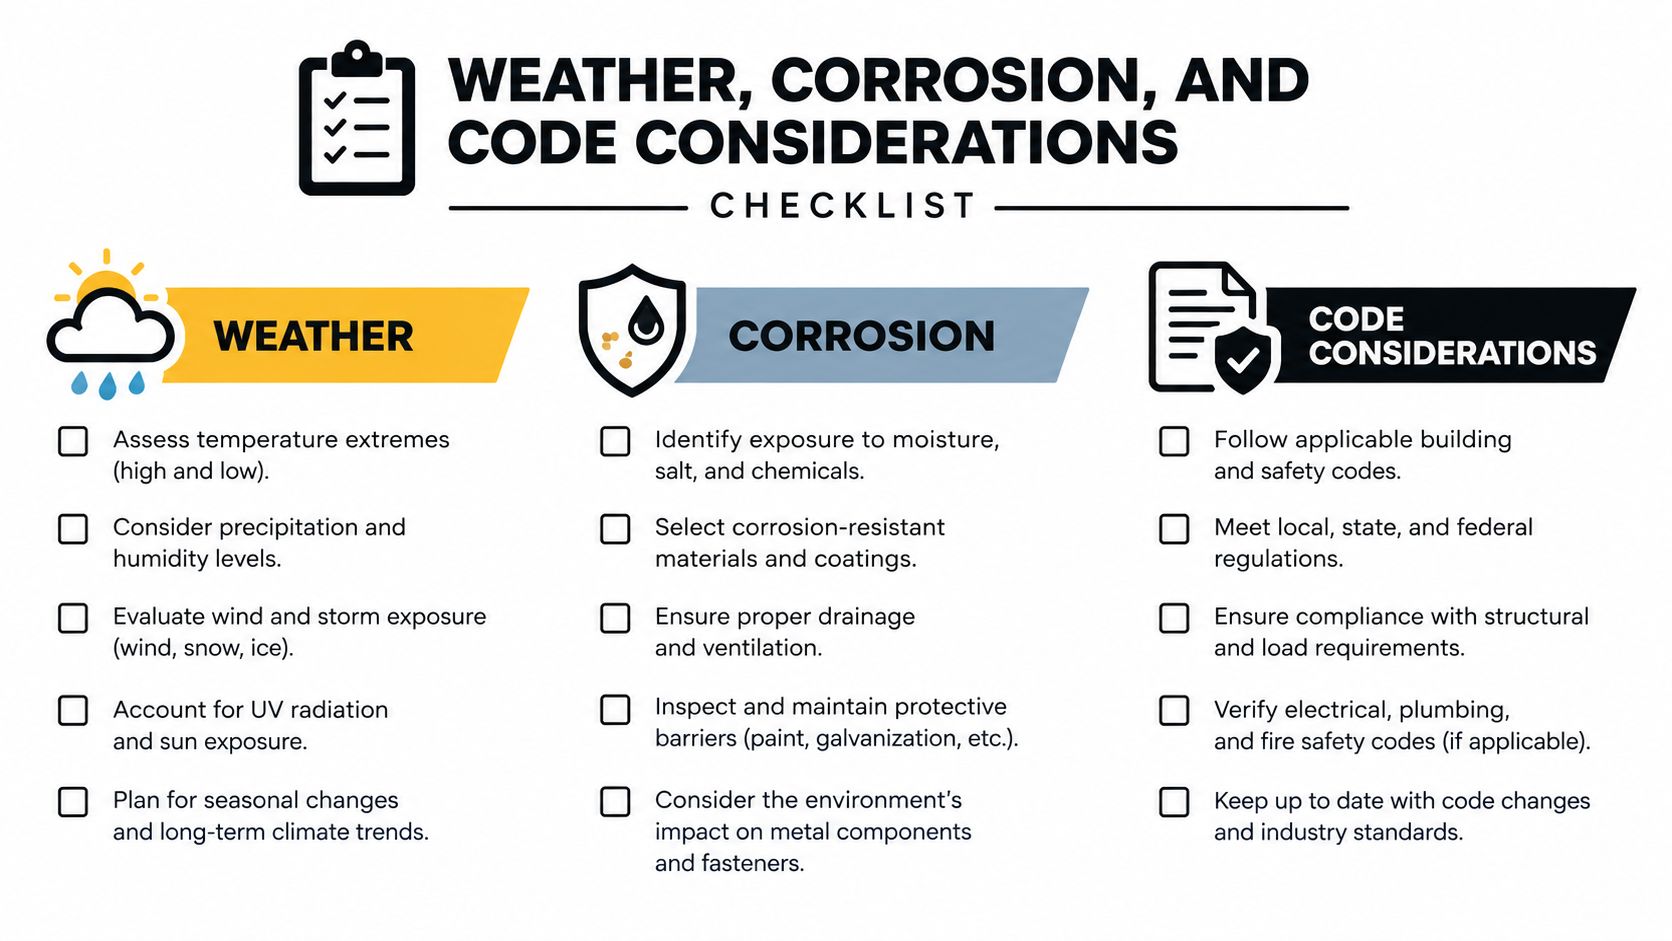
Use the checklist to compare site exposure with material, drainage, corrosion, and code requirements before placing the order.
Style and Design Choices That Actually Work
Style should follow the architecture and the post layout, not compete with them. A cap repeated across a fence line becomes part of the home's exterior language, so the profile needs to work from the street, the yard, and the side gate.
A pyramid cap gives a familiar, angled finish that suits traditional, craftsman, and many transitional homes. It catches light on each slope and helps a straight fence line feel more finished without becoming ornate. A ball cap makes a stronger statement, especially on entry gates, corner posts, and formal boundaries. It can look out of place on a very restrained modern fence if the surrounding design has no other rounded details.
Match the profile to the visual job
A flat-top cap is the quietest option. Choose it when the fence should recede behind planting, when the architecture is minimalist, or when you want the post to look neatly sealed without drawing attention. A solar-lit cap becomes both a decorative feature and a light source, making sense at gates, stair approaches, or walkway entrances where the cap has a clear visual and practical role.
Post spacing changes the effect. Closely spaced caps create a repeated pattern, while widely spaced deck posts make each cap more noticeable. A decorative profile that feels balanced on a gate may look excessive across every post on a long privacy fence.
Design rule: Spend more on a cap when it marks an entrance or a visible focal point. Use a quieter finish where repetition already creates enough detail.
Copper can justify its premium position when patina and material character are central to the design. It's less convincing when attached to a basic wood post with unrelated hardware and no other warm-metal accents. A well-finished powder-coated metal cap can hold its own visually while keeping the design organised.
If you're planning a broader exterior refresh, resources on high-impact curb appeal projects can help place a small post-cap upgrade within the larger relationship between fences, gates, landscaping, lighting, and entry details.
Browse post caps for decks when the project calls for a profile selected specifically for deck posts and railing contexts. Whatever style you choose, confirm the fit first. A beautiful cap on the wrong opening still looks unfinished.

Install, Maintenance, and Troubleshooting
Installation problems usually begin before the cap touches the post. The top needs to be square, clean, and free from loose fibres. Remove dust and debris from the opening, then test the cap without forcing it. If it rocks, binds, or stops unevenly, check the post dimensions and cut before adding adhesive or screws.
A friction-fit cap should seat evenly around the post. If the manufacturer calls for exterior silicone, apply a controlled bead where specified, rather than filling the whole cavity. Excess sealant can trap water, squeeze out around the edges, and make future removal unnecessarily difficult.
Screw-on models need a steady hand. Drive the fastener until the cap is secure, but don't crush a thin flange or strip the coating. If the cap uses pre-punched holes, use those locations. Drilling through a coated surface can expose metal, so treat the exposed area according to the product instructions.
Small checks prevent larger repairs
Look at the cap after the first substantial weather event and again during routine outdoor maintenance. You're checking for movement, pooling water, staining, and corrosion around fasteners or contact points.
- A loose cap: Remove it, inspect the post top, clean both surfaces, and reassess whether the opening is correct before reseating it.
- Rust at a fastener: Identify whether the problem is the screw, a damaged coating, or moisture held at the joint. Replace compatible hardware and repair exposed finish as appropriate.
- A shifted cap after seasonal movement: Check whether the wood changed dimension, the adhesive failed, or the cap was never a true fit.
- Debris in a recess: Clear leaves and dirt so water can drain rather than remain against the post end.
Caps also deserve the same practical attention you give to the surrounding yard. Guidance on perfection turf and landscape beds is relevant because vegetation, irrigation, and maintenance equipment can affect how much moisture and debris reach fence and deck posts.
The protective purpose is easy to verify in steel fencing. A California fence specification requires steel pipe posts to have the top permanently capped to prevent rainfall and small animals from entering the post (Marin Resource Conservation District fence specification). Decorative design is valuable, but keeping water and debris out is the reason the cap remains useful after the novelty of the upgrade wears off.
A Simple Buying Framework for Homeowners and Contractors
A reliable choice starts with the post, then moves outward to the site, attachment, code requirements, and appearance. That order prevents a decorative cap from hiding a sizing or inspection problem.
Start by measuring the finished post. Check width and depth in both directions, including any sleeve, trim, or cladding. Confirm whether it is nominal wood, true-size lumber, metal, composite, or sleeved. Compare those measurements with the cap's internal opening, not the advertised “4×4” label. That label often describes the post category rather than the space inside the cap.
Match the material to the exposure. Salt air, rainfall, strong sun, irrigation, and limited maintenance access can change the sensible choice. Metal, copper, aluminium, plastic, and composite offer different balances of appearance, corrosion resistance, upkeep, and cost. Check any local fire-rating requirements before ordering, particularly for a permitted deck, porch, or fence project.
Choose attachment for the actual location. A close friction fit may work on an accessible fence post with little contact. Screws provide a more deliberate hold where wind, pets, gates, or frequent handling could shift the cap. Adhesive or tabs may suit metal posts and sleeves only when the product instructions approve that method.
Treat the cap as part of the permitted assembly. Ask whether the cap changes post height, drainage, clearances, or access to required hardware. An inspector may accept the decorative profile while rejecting a cap that conceals an unsuitable connection or leaves the post inadequately protected. Confirm local requirements before installation.
Then select pyramid, ball, flat-top, or solar-lit profiles that suit the home, post spacing, gate, and nearby hardware.
XTREME EDEALS INC. lists these profiles for compatible wood and metal posts, plus related deck and fencing hardware. Its catalogue includes Decorex Hardware, CAD pricing, and multi-pack options for individual repairs or contractor orders.
Choose the cap that fits the post, site, attachment, and permit first. Let appearance make the final distinction.
Visit XTREME EDEALS INC. to compare CAD-priced options.