
Most advice about a 4×4 post cover starts with “find a sleeve that fits a 4×4 post.” That sounds sensible, but it's the reason many buyers end up with the wrong product. In Canada, 4×4 often describes a nominal post rather than its measured size, and a decorative sleeve can hide moisture damage without stopping it. The right choice depends on the post's actual dimensions, its exposure to water, the installation detail at the base, and whether the cover is decorative or rated for ground contact.
A good cover can improve the finished appearance, reduce direct weather exposure, and protect a sound post from some surface wear. It can't turn decayed lumber into a structural member, replace ground-contact-rated treatment, or correct a footing that holds water. The practical approach is to measure first, inspect the ground line, and match the cover to the job rather than buying by the label alone.
What a 4×4 Post Cover Actually Does
A post cover isn't automatically a rot-prevention system. Some products are above-ground decorative sleeves intended to conceal lumber and create a finished surface. Others are designed to provide more substantial protection around a post, but even those need drainage, sound lumber, and a properly detailed base to work as intended.
That distinction matters because decay commonly begins near grade, where splash-back, soil moisture, snow, and trapped water keep the wood wet. Canadian fencing guidance describes post decay as a ground-line problem, and one Canadian failure report recorded rot extending more than 2 inches above grade in about 0.1% of 96,000 repaired posts. That figure comes from Canadian fence-post repair guidance, and it illustrates why inspecting the base is more useful than judging the visible finish.
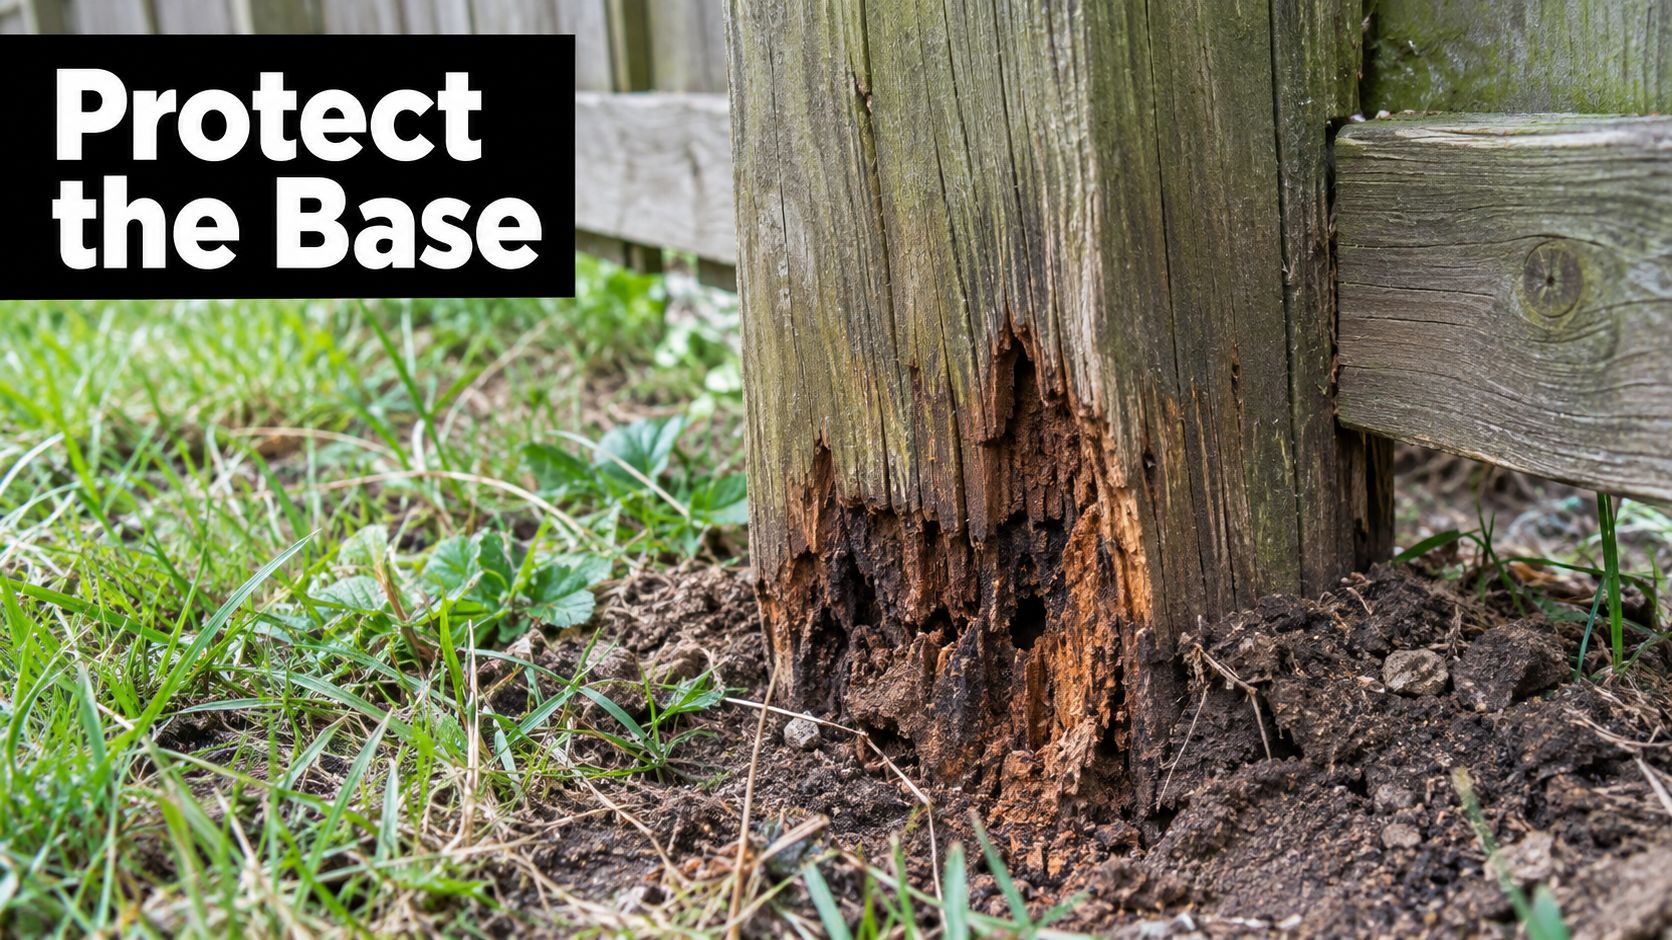
A sleeve is not a structural repair
A cover surrounds the existing post. It doesn't normally carry the deck, fence, or patio-cover load in place of the post underneath. If the timber is soft, split through the load path, visibly leaning, or decayed at the concrete line, covering it only makes inspection harder.
Before fitting a sleeve, probe questionable areas with a screwdriver or awl and check for movement at the base. A sound post can be a suitable candidate for a cover. A failing post needs repair or replacement, and the structural solution should be decided before the finish is installed.
Practical rule: A cover can supplement sound construction. It can't substitute for ground-contact-rated lumber, drainage, or a protected post base.
California municipal standards show why the 4×4 post remains such a common light-duty residential format. Laguna Hills lists 4×4 posts as a minimum in its attached patio-cover guidance, with footing sizes increasing from 12-inch square supports for 50 square feet to 24-inch square supports for 200 square feet. San Diego County similarly uses 4×4 posts for lower-height applications and moves to larger members as structures grow. This 4×4 timber post guide summarises those local examples.
Protection depends on the base detail
A sleeve may reduce direct rain and sunlight on exposed wood, but it can also create a concealed cavity if water enters at the top or cannot drain below. A cap, flashing detail, open bottom, or designed drainage path can make the difference between a dry cover and a moisture trap.
For decorative finishing pieces, XTREME EDEALS INC. offers 4×4 post caps and related post-top accessories. Treat a cap as part of the water-management detail, not as proof that the post itself is protected from ground moisture.
Understanding True Sizing and Fit Tolerances
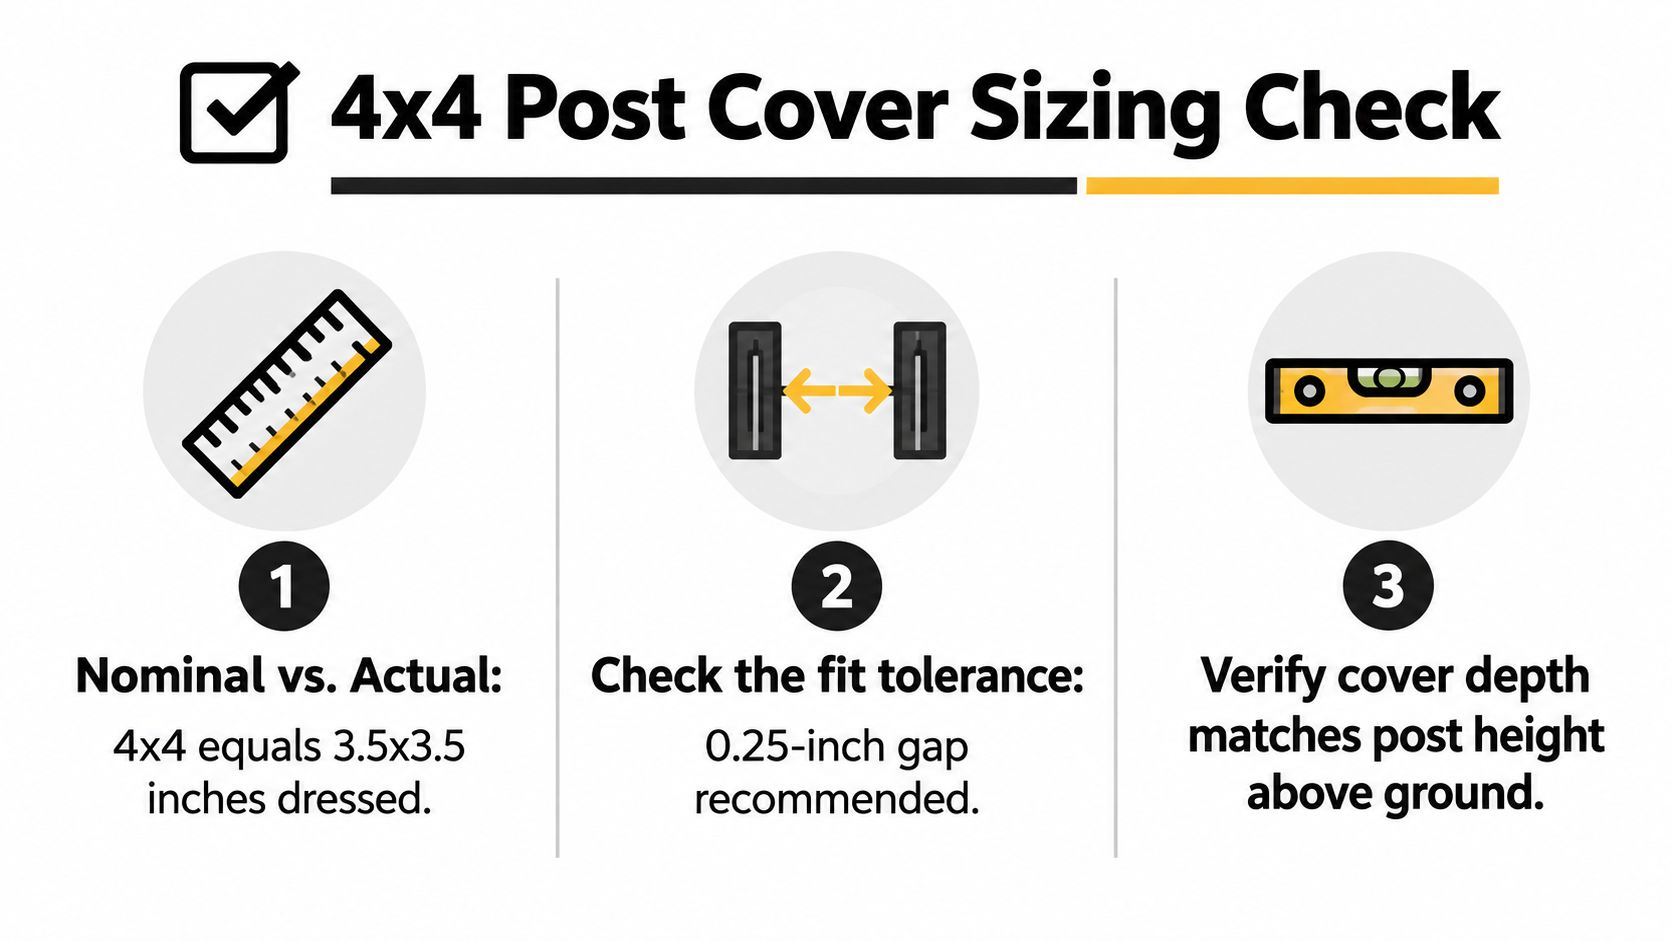
The label 4×4 tells you less than most buyers expect. A dressed nominal 4×4 post commonly measures 3.5 x 3.5 inches, while rough-sawn or specialty lumber can be closer to a true 4 x 4 inches. Pressure treatment, weather exposure, paint, wraps, and uneven milling add further variation.
Canadian bracket sizing guidance distinguishes dressed 4×4 posts at 3.5 inches actual size from 4×4 rough posts at 4 inches actual size. The Canadian Scaffold rough-post bracket listing is a useful reminder that “4×4” can describe different physical products.
Measure the post you actually have
Don't measure the packaging, an old invoice, or the nominal description. Measure the post where the cover will sit.
- Remove anything that changes the fit. Account for old trim, loose paint, adhesive residue, shims, wraps, and surface build-up. If a wrap will remain, measure over it.
- Measure both faces. Use a reliable tape measure or calliper to record the width and depth. Don't assume the post is square.
- Check several points. Measure near the top, around the middle, and close to the lower section. Weathered posts can swell, shrink, or become irregular.
- Record the largest measurement. A sleeve that fits the smallest point may bind at the largest one.
- Compare with the manufacturer's fit dimensions. Look for internal opening dimensions, not only “fits 4×4.”
- Confirm depth and height. The sleeve must cover the intended exposed post without fouling the soil, concrete, bracket, rail hardware, or deck framing.
A Canadian listing shows a sleeve marketed as 4 inches by 4 inches with actual external dimensions of 4.45 inches by 4.45 inches, or 113 mm by 113 mm. That's an external measurement, not necessarily the clear internal opening. Another listing identifies a 4×4 fit with an assembled depth of 50.38 inches for a 48-inch kit, showing how finished dimensions can differ from the nominal kit description. This Canadian post-sleeve listing demonstrates why product drawings matter.
Allow for movement without creating a loose shell
The cover shouldn't need to be hammered over the post, and it shouldn't rattle or rotate once installed. A small manufacturer-approved tolerance allows installation and material movement, but an oversized cavity can collect debris and water or make the sleeve difficult to align with rails and caps.
For a new installation, confirm the post dimensions before ordering. For a retrofit, inspect every post rather than assuming a row of old fence posts is uniform. A few minutes with a calliper can prevent a return, a cut-up sleeve, and a day of field rework.
A sleeve designed for a nominal post also may not fit a post with a metal bracket, a surface-mounted base, or a thick protective coating. The opening, length, and clearance around the hardware all need checking together. For bottom connection hardware, compare the cover with the options available through the 4×4 post anchor selection before you commit to a sleeve profile.
Comparing Materials and Finishes for Every Project
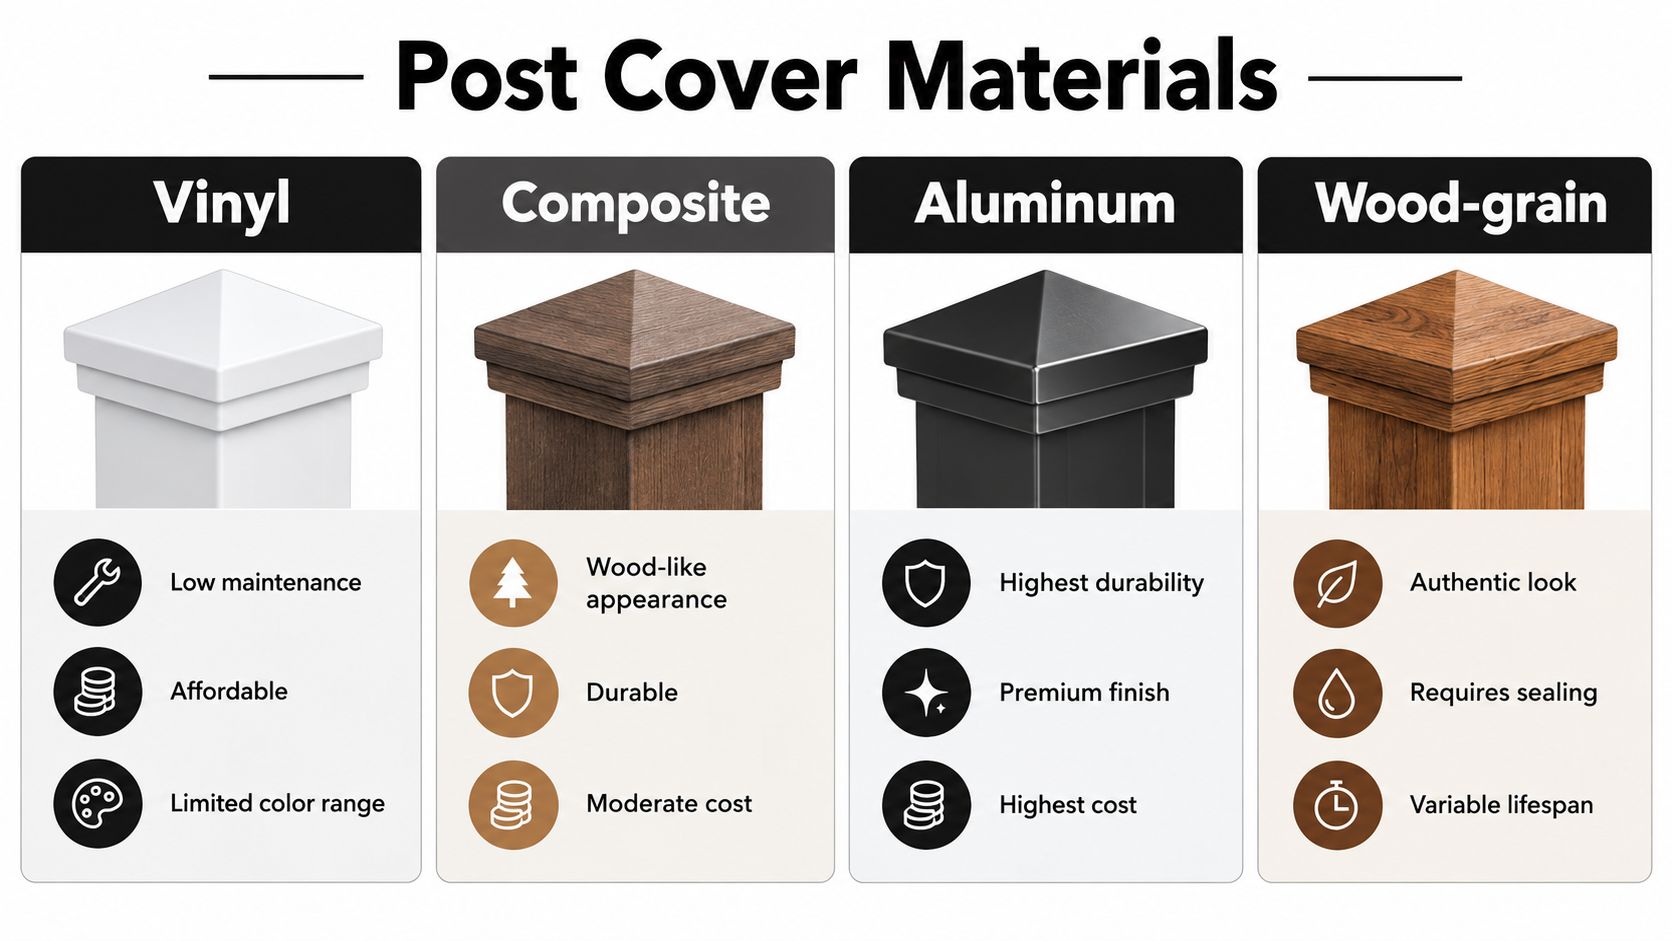
Material choice changes the maintenance routine, appearance, and tolerance for weather exposure. The common options include vinyl or PVC, composite, aluminum, and wood-grain finishes, but “wood-grain” describes a surface appearance rather than a single structural material. A textured PVC sleeve and a sealed timber wrap may look similar from a distance while behaving very differently at the base.
Vinyl and PVC
Vinyl and cellular PVC are practical for homeowners who want a clean finish with little painting or staining. They handle ordinary rain and humidity well, clean easily, and suit many fence and deck styles. Their limitations are equally practical. Colour ranges can be narrower, thin products can feel less substantial, and impact or temperature movement can affect joints if the installation is careless.
A smooth white sleeve can suit a modern fence or railing. A textured finish can soften the contrast between a manufactured cover and timber framing. In coastal areas, wash salt and grime from the surface rather than allowing residue to remain at joints and caps.
Composite
Composite sleeves provide a more timber-like appearance and usually feel more substantial than basic vinyl. They're a reasonable choice where the post is highly visible and the owner wants a richer finish without maintaining exposed wood. Match the colour and texture to the decking or railing, but don't assume a wood-like surface should be installed directly into soil.
Composite products still need a compatible base detail and room for water to escape. For broader exterior material decisions, SuperiorPRO's durable siding guide offers useful context on comparing weather resistance and maintenance rather than choosing by appearance alone.
Aluminum
Aluminum suits demanding exposures and projects where low upkeep matters more than the lowest purchase price. It works with metal-post systems and can provide a precise, architectural finish, but it needs compatible fasteners and careful attention to galvanic compatibility around other metals.
Canadian aluminum fence guidance specifies an 80 mm x 80 mm extruded aluminum post with a 2 mm wall thickness for many residential applications, and recommends a 9-foot underground post length for 4-foot, 5-foot, and 6-foot panels. Those are post-system specifications, not a universal sleeve rule, so confirm the cover and post manufacturer's details before combining products. Primealux's aluminium fence-post guidance provides that adjacent hardware context.
Wood and wood-look finishes
Real wood offers the most authentic appearance, but it requires sealing and closer inspection. A wood-grain synthetic finish reduces that maintenance burden, though its colour stability and surface durability depend on the product. In all cases, prioritise the post's water management over the imitation grain. A convincing finish won't rescue a base that stays wet.
How to Choose the Right Cover for Your Project
The right cover changes with the project. A homeowner refreshing a sound fence may prioritise appearance and simple installation. A contractor building a deck needs to coordinate the cover with structural posts, fasteners, guard details, and inspection access. A property manager replacing covers across several units needs repeatable sizing, consistent colour, and a product that can be cleaned and replaced without custom work.
A decorative pyramid, ball, or flat-top cap can complete the top of a post, but it doesn't solve a bottom connection problem. Likewise, a skirt or base cover can conceal a bracket and improve the transition at grade, but it must not block drainage or cover evidence of decay. The most useful selection process separates the visible finish from the structural and moisture-control decisions underneath.
| Project Type | Recommended Material | Style Priority | Key Consideration |
|---|---|---|---|
| DIY fence refresh | Vinyl or PVC | Match existing fence colour and trim | Measure each post and inspect the ground line before covering |
| New deck built to code | Composite, aluminum, or specified PVC system | Coordinate with railing and decking | Confirm post dimensions, fastening, uplift resistance, and standoff details |
| Multi-unit property repair | Consistent vinyl, PVC, or aluminum system | Repeatable appearance across units | Standardise measurements, replacement parts, cleaning, and access for inspection |
Budget should follow exposure
For a sheltered backyard project, a cost-effective vinyl sleeve may provide the finish you need. In heavy rain, coastal salt exposure, or areas with large temperature swings, a more durable composite or aluminum option can make sense if its joints and base detail suit the site. The expensive material isn't automatically the durable installation. A premium sleeve installed against wet soil can fail its purpose faster than a simpler sleeve installed with proper drainage.
High-wind locations deserve particular care. Ontario and Canadian deck applications require exterior posts and columns to resist uplift and lateral movement, so a cover must never interfere with the post base, connector, or inspection of the connection. The cover is a finish around the assembly, not permission to ignore the assembly.
For a contractor, document the measured post size, cover model, attachment method, and cap or skirt used. For a homeowner, keep the product drawing with your project records. Those details make future repairs easier, especially when a replacement cover uses a different interpretation of “4×4.”
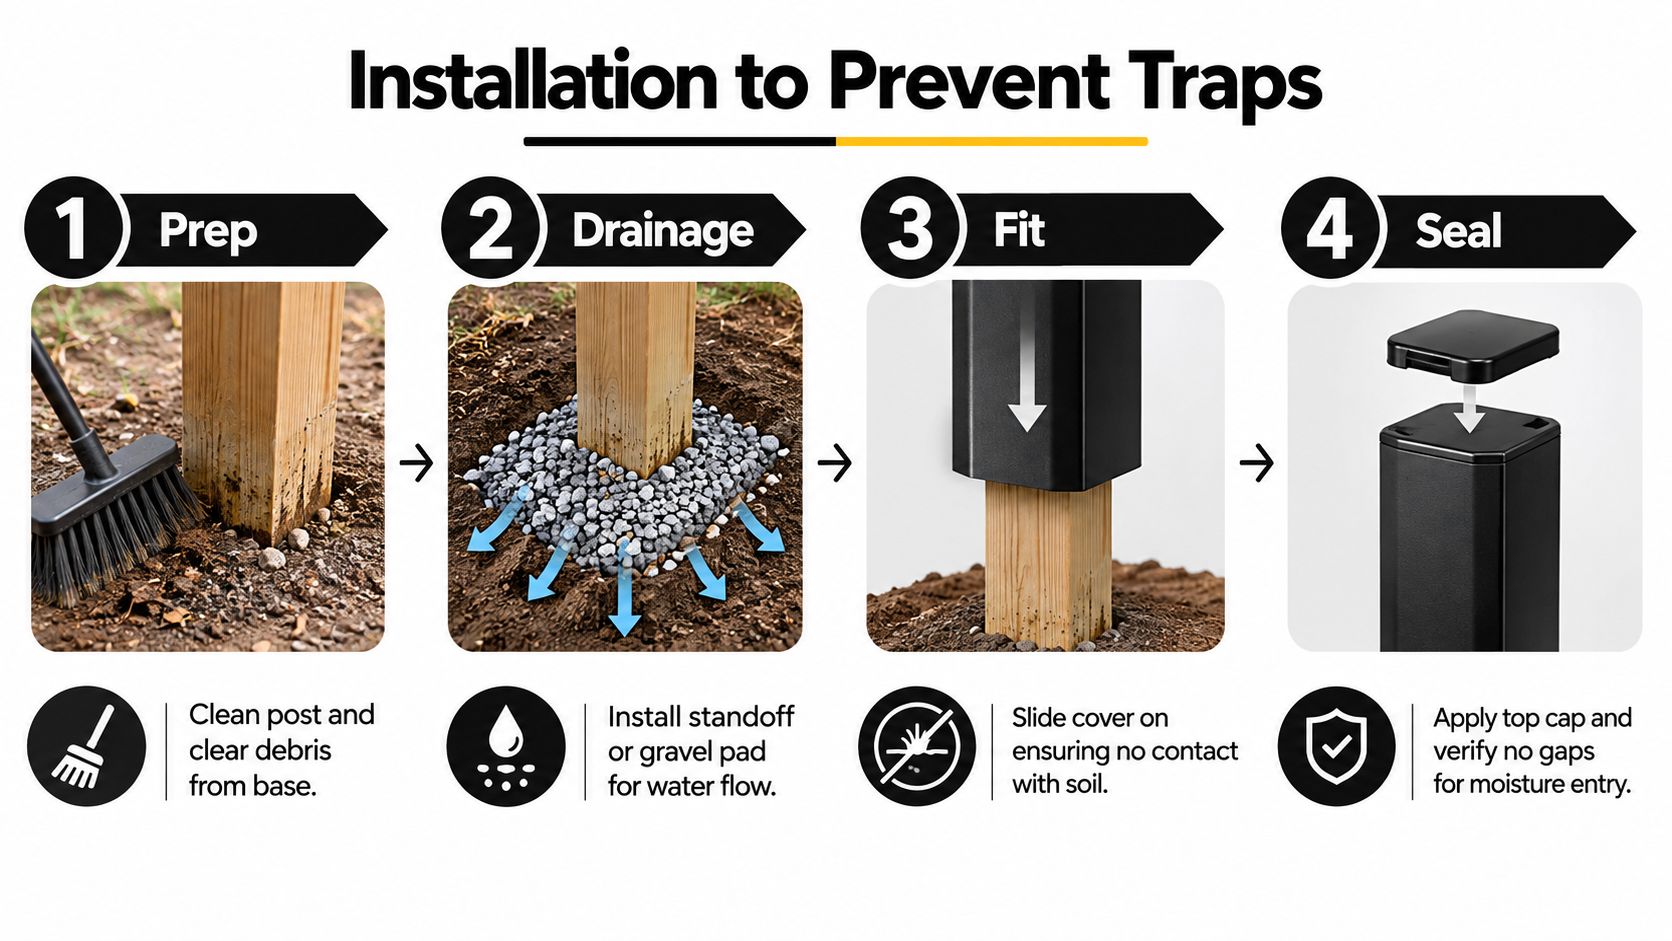
Installation Steps That Prevent Moisture Traps
A cover fails when it holds water against the timber. The installation should create a controlled path for rain and condensation to leave, while keeping soil and debris away from the sleeve opening.
Prepare the post and base
Start with a clean, sound post. Remove dirt, loose fibres, old sealant, and debris from the exposed surface. If the cover is a retrofit, inspect the lower section before sliding it into place. Don't seal over soft wood or rely on a sleeve to stabilise a leaning post.
Use a bracket or standoff where the design calls for one. A Canadian 4×4 post-base product provides a code-required 1-inch standoff to separate the wood from concrete, limiting direct moisture transfer at the base. The Simpson Strong-Tie standoff product shows the kind of separation that should be considered when planning the post and cover together.
Plan the hole and frost detail
For Ontario fence work, contractors commonly size the hole at about three times the post width. For a 4×4 post, that produces a hole of roughly 10 to 12 inches in diameter, as described in Ontario fence-post hole guidance. The cover doesn't determine the footing size, but it can affect access, clearance, and the final grade around the post.
In Ottawa-Gatineau, residential fence posts are commonly set at least 42 inches deep, with 48 to 60 inches recommended for taller or wind-loaded sections. The same regional guidance places the frost line at roughly 3.5 to 4 feet, and the hole should extend below it. Review Ottawa-Gatineau fence depth guidance and consult the applicable local requirements before digging. For a broader explanation of footing design, use Ultra Modern Rails' frost depth footing basics.
Set the post on an appropriate drainage or standoff detail rather than creating a sealed cup at the base. The cover should finish above soil and allow water to escape. For compatible bottom hardware, compare the sleeve profile with a 4×4 post base before installation.
Fit, fasten, and cap
Dry-fit the cover first. Confirm that it clears the post, bracket, rail connectors, and grade. Use the fasteners and adhesive specified for the material, and avoid drilling where water will be directed into the timber. Don't block a designed drainage opening with sealant.
At the top, install the cap so rain can't run directly into the cavity. Seal only the joints the product instructions call for. Over-sealing the bottom or filling every gap can trap condensation, while under-sealing the top can allow repeated water entry.
For a visual example of the installation sequence, review the embedded guide below.
Maintenance Practices for Long-Term Post Health
A 4×4 post cover reduces exposure, but it doesn't eliminate maintenance. Inspect the top cap, seams, lower edge, and surrounding grade at least during routine seasonal checks. Look for cracking, movement, staining, trapped leaves, soft timber, and water that remains after rainfall.
Clean vinyl, PVC, composite, and aluminum with mild soap and water and a soft brush. Avoid aggressive abrasion that can dull a smooth finish or damage a wood-grain texture. If a cover has split, pulled away from the post, or lost its top seal, repair or replace it before water reaches the structural member repeatedly.
A practical inspection list
- Check the lower edge: Keep soil, mulch, and grass from touching the sleeve.
- Test the post: Probe suspicious timber before deciding that a replacement cover is enough.
- Clear drainage paths: Remove leaves and sediment that can hold moisture.
- Inspect the cap: Look for open joints, loose fasteners, and water staining.
- Review the connection: Confirm that brackets and standoffs remain tight and unobstructed.
- Record changes: Note which posts need repair, replacement, or a new cover.
Untreated wood in soil contact can decay in Ontario test conditions, and a cover won't change the material's ground-contact rating. Canadian wood-preservation research and fence-repair guidance both support the same practical conclusion: drainage, treatment, and base protection matter more than appearance alone. If the ground line stays wet, the cover may only make the failure harder to see.
XTREME EDEALS INC. offers 4×4 post caps, post skirts, base covers, brackets, fasteners, and related deck and fencing hardware for DIY and professional projects. Visit XTREME EDEALS INC. to compare compatible finishing and support products, check fit details, and order the components you need before installation.