

The popular advice is to buy an attic ladder kit first and cut the opening afterwards. That order causes many of the failures I see in practice. The ladder is only one part of the job. The existing ceiling opening, joist direction, headroom, insulation, access route, and local code requirements determine whether the kit will fit, operate safely, and stay sealed against drafts.
A good installation starts with measurements and an honest assessment of the structure above the ceiling. If the opening is out of square, a duct blocks the ladder path, or the framing can't carry the assembly, a higher load rating won't solve the problem. Treat the project as a small building alteration, not a simple hardware purchase.
Why the Attic Opening Matters More Than the Ladder
Most homeowners compare ladder length, materials, and weight ratings before measuring the hole in the ceiling. That approach puts the most visible component ahead of the parts that control the installation. A standard attic ladder kit can be excellent and still be unusable if the rough opening is too small, the ceiling joists run the wrong way, or the ladder lands on an uneven floor.
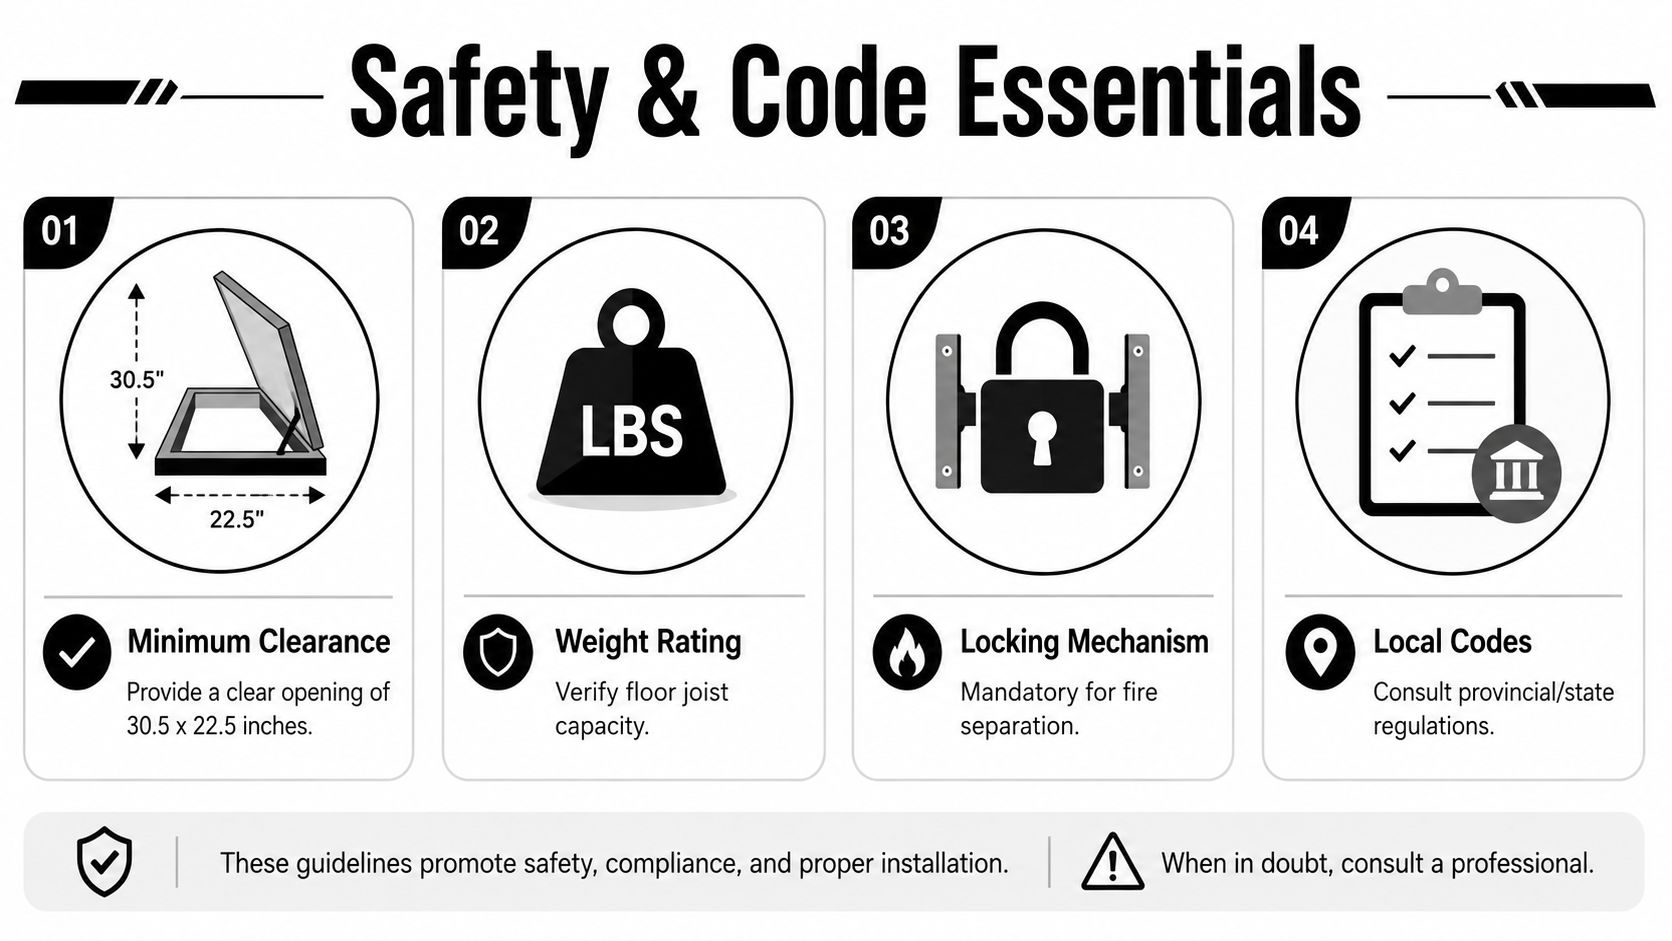
California's building code provides a useful example of why the opening comes first. Where a combustible ceiling or roof assembly creates an attic area with at least 30 inches of vertical height over 30 square feet, attic access is required, and the opening must be at least 20 inches by 30 inches under the 2022 California Building Code access provisions. The code also calls for 30 inches of clear headroom at or above the opening, a requirement that affects the location and style of the ladder, not just the hatch size.

Measure the space you already have
Measure the rough opening between the framing members, not the finished trim. Take the width at both ends, measure the length along both sides, and check the diagonals. Different readings usually indicate framing movement, uneven cuts, or trim that hides a problem. A commonly cited California-relevant baseline uses a rough opening of at least 22 inches by 30 inches, with 30 inches of unobstructed headroom above it, while a standard stock size is often 22.5 inches by 54 inches. These dimensions and the associated installation workflow are outlined in California attic ladder sizing guidance.
Before ordering, look upward with a bright work light. Identify HVAC ducts, plumbing, electrical cables, recessed fixtures, insulation depth, and any framing that would interfere with the folded ladder or the person climbing through it. A short opening in a convenient room may be a poor location if the climber must twist around a duct immediately after reaching the attic.
Decide what the access serves
An attic used only for occasional maintenance and storage isn't automatically treated like a habitable room. If people will use the space as living accommodation, the access, floor structure, headroom, fire separation, and egress expectations can change substantially. That distinction is why homeowners planning a larger conversion should review specialist advice such as attic stair help from Premier Builders before choosing a folding ladder.
Practical rule: If the kit requires major joist cutting, don't treat the alteration as a drop-in installation. Stop, document the framing, and get qualified advice before removing structural members.
Choosing the Right Attic Ladder Kit for Your Home
Once the opening and route are confirmed, compare the kit as a building-envelope component as well as a ladder. A cold or poorly sealed hatch can make the room below uncomfortable, introduce drafts, and interrupt the continuity of the ceiling insulation. Weatherstripping, an insulated cover box, and a door panel that closes firmly should be part of the initial selection, not an afterthought.
Compare materials honestly
Wood kits are familiar, can feel solid underfoot, and may suit occasional residential use. They're also heavier and can be less forgiving when the ceiling opening isn't perfectly aligned. Aluminium is lighter and resists corrosion, making it convenient when one person must position the frame, but thin components can feel less substantial if the assembly isn't well supported. Steel offers stiffness and durability, although its weight makes handling and overhead installation more demanding.
| Material | Weight | Durability | Cost Range | Best For |
|---|---|---|---|---|
| Wood | Heavier | Solid, but sensitive to moisture and finish quality | Varies by construction and insulation | Occasional residential access |
| Aluminium | Light | Corrosion-resistant and easy to handle | Varies by design and finish | DIY installation and regular access |
| Steel | Heaviest of the three | Rigid and robust when properly protected | Varies by gauge and features | Frequent contractor or service use |
The table helps narrow the field, but it doesn't replace the manufacturer's installation requirements. The frame, hinges, springs, door panel, and fasteners must work as a system. A strong ladder attached to weak or poorly supported framing is still an unsafe installation.
Treat insulation as a purchase criterion
A tight-closing door matters most where the ceiling separates heated rooms from a colder attic. Look for a continuous seal around the perimeter and a panel that doesn't flex away from the frame. If the kit leaves an exposed ladder cavity, an insulated cover box can help preserve the ceiling's thermal boundary, provided it doesn't obstruct the mechanism.
Choose the load rating for the actual task, including the person, clothing, tools, and anything carried through the opening. A kit for occasional access can prioritise light operation and a reliable seal. A contractor who climbs frequently may favour sturdier hinges, rails, treads, and hardware, but the supporting framing still has to match the demand.
For broader purchasing guidance on contractor-grade hardware and project components, the contractor recommendations can help you compare related requirements. Don't let a headline rating make the decision for you. Fit, sealing, safe footing, and structural compatibility come first.
Tools and Preparation Before You Start Cutting
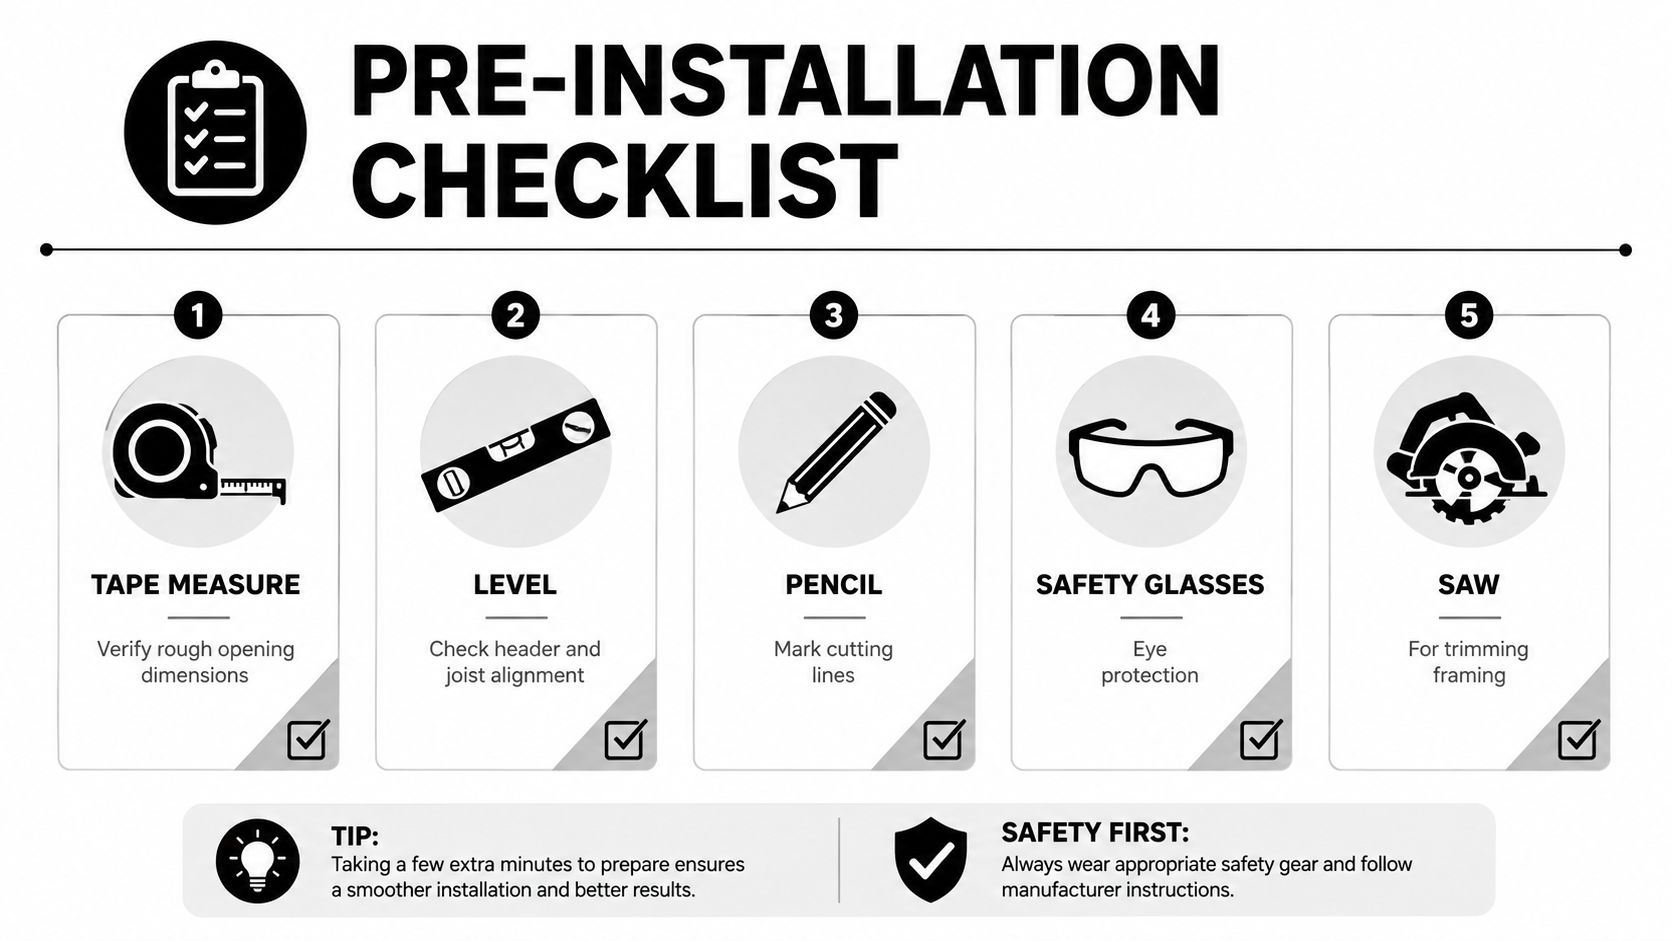
A clean installation depends more on preparation than on cutting speed. Gather the kit instructions, tape measure, level, framing square, pencil, drill, driver bits, suitable saw, shims, temporary support boards, safety glasses, work light, and a way to protect the room below. Keep the supplied fasteners nearby, then compare them with the framing material before drilling.
Verify the opening before committing to a cut
Start in the room below. Locate the ceiling joists with a stud finder, confirm their direction with small exploratory checks, and mark the proposed frame position. From the attic side, inspect for wiring, plumbing, ductwork, insulation, and bracing. Don't rely on a stud finder alone. It can identify framing, but it can't tell you whether a cable or pipe runs beside it.
The rough opening needs to be square and supported on all sides. Check both diagonals with a tape measure, place a level across the header and side supports, and use a framing square at each corner. If the measurements disagree, correct the framing before setting the kit. Shims can help with minor irregularities, but they shouldn't disguise a weak header or a badly altered joist system.
Build a safe work platform
Temporary support boards are not optional during the first fit. They keep the ladder frame from dropping through the ceiling while you align it, and they give you time to inspect the door swing, hinge clearance, and ladder extension. Leave them in place until the assembly is securely fastened and the operation has been tested.
Use fasteners appropriate for the actual framing, not whatever screws happen to be in the toolbox. A specialist collection of fasteners and fittings is useful when the supplied hardware doesn't suit the substrate, but substitutions must preserve the manufacturer's requirements and the framing connection.
Call a licensed contractor or structural engineer if installation requires cutting a joist, moving a header, altering engineered roof components, or working around uncertain electrical or plumbing services. A professional should also review situations where the opening is being relocated, the ceiling carries unusual loads, or the attic may become habitable space. Guessing above a finished ceiling is expensive, and a ladder kit isn't structural engineering.
Installing the Attic Ladder Kit From Start to Finish
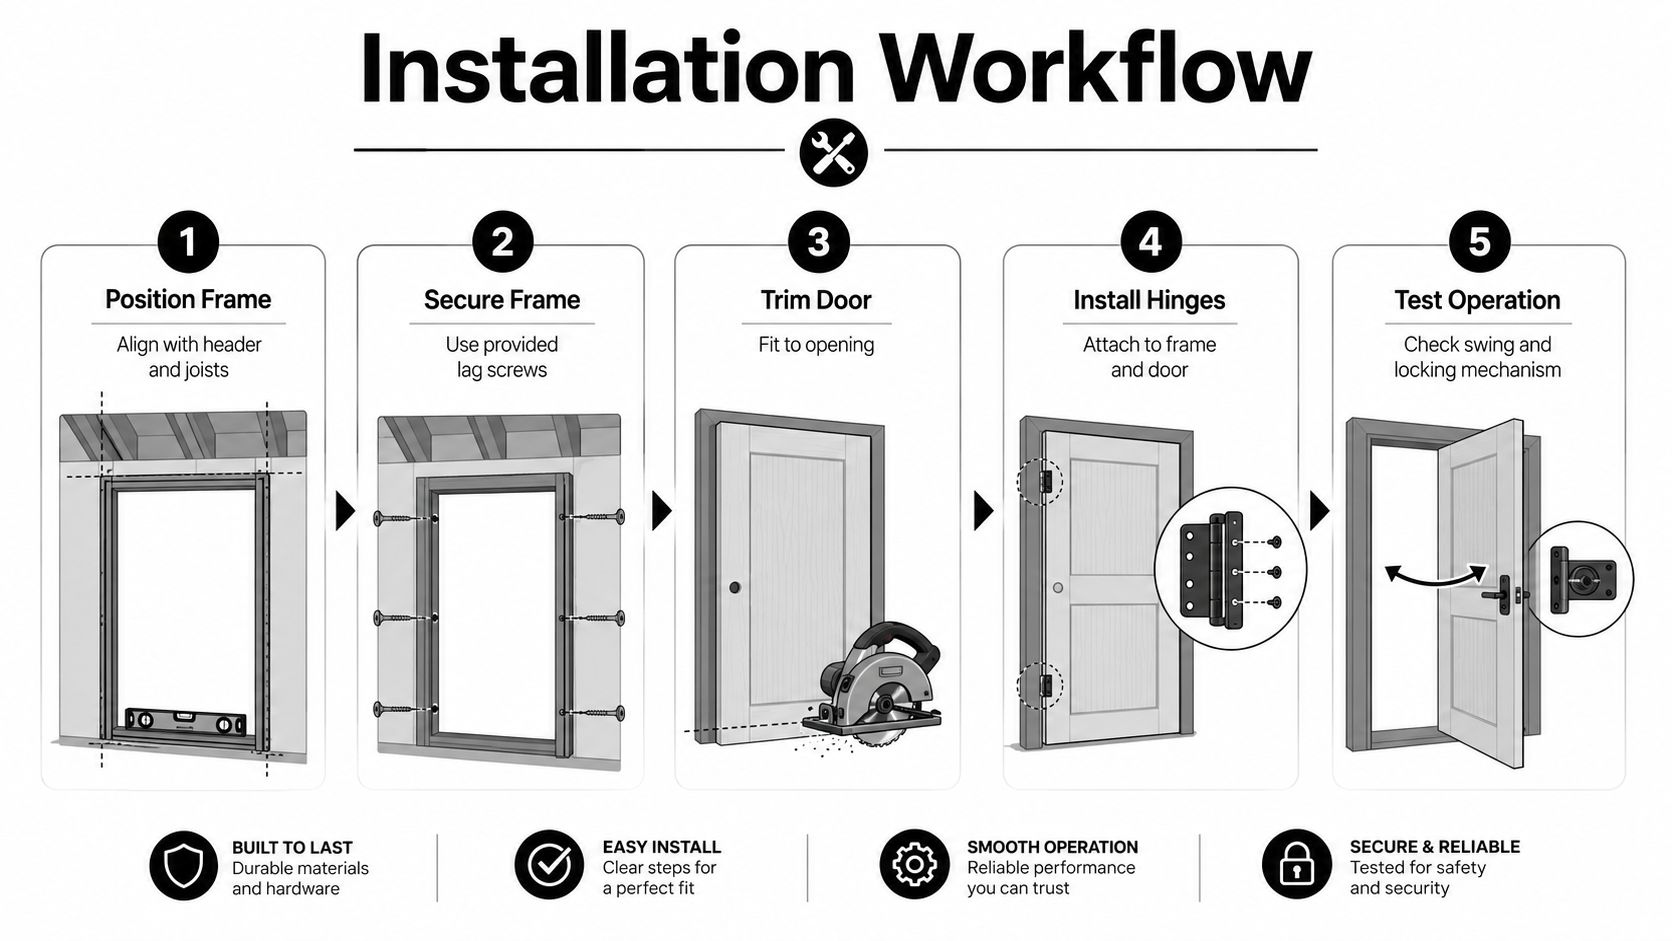
The best installations follow a controlled sequence. Position the frame, support it, check it, fasten it, and only then make final adjustments. Rushing to trim the ladder or remove the supports before the frame is square creates the wobble and binding that homeowners later blame on the kit.
Begin by placing the closed assembly into the prepared opening. Align the frame with the header and side supports, then use shims where necessary to bring the frame level and keep the corners square. The door should sit evenly against the frame without one corner lifting. A small alignment error at this stage can become a noticeable gap after the springs are tensioned.
Fasten the frame before adjusting the ladder
Use the specified fastening points through the frame into the header and side supports. Start with light, even tightening so the frame can still be corrected, then confirm level and diagonals before fully securing the connection. Over-tightening one side first can pull the frame out of square.
Operate the door while the temporary supports remain installed. Check that it opens without striking trim, insulation, wiring, or nearby framing. Extend the ladder carefully and confirm that each section moves freely. If the mechanism binds, don't force it. Recheck the frame for twist and inspect whether a hinge or spring has been loaded unevenly.
The ladder legs should be trimmed only after the unit is fully seated, extended, and aligned. Set the feet so they contact the finished floor properly rather than cutting to a rough measurement taken from the ceiling. Uneven older floors may require careful adjustment, but the feet must remain stable and the ladder must not rock under load.
A flush-looking frame isn't proof of a good installation. The real test is a square door, smooth extension, firm floor contact, and even spring action.
Adjust hinge position and spring tension only as the instructions allow. Keep hands clear of moving joints, and don't remove temporary supports until the ladder has been operated repeatedly and the fasteners remain tight. A non-standard ceiling height may require a compatible extension or a different kit, not an improvised splice.
For projects where access planning is part of a broader alteration, how to plan an addition to your home offers useful context about coordinating openings, structure, and room layouts. A short installation video can also help you visualise the relationship between the frame, supports, and ladder sections.
Troubleshooting Common Attic Ladder Problems
Most operational complaints have a visible mechanical cause. Start with the symptom, inspect the frame and hardware, and correct alignment before replacing parts.
Door won't close flush
A proud corner usually points to a twisted frame, uneven shimming, a displaced hinge, or insulation caught around the hatch. Open the door, inspect the perimeter seal, and check the frame with a level. Loosen the affected fastening slightly, realign the frame, add or remove a shim, and retighten evenly. Replace damaged weatherstripping rather than compressing it with excessive latch force.
The ladder binds or wobbles
Binding often means the frame isn't square or the ladder sections are rubbing against the opening. Wobble can come from loose fasteners, poorly trimmed legs, or feet landing on an uneven surface. Confirm that the ladder is centred, inspect each joint, and retest after correcting the frame. Don't sand or cut moving parts until you've ruled out an alignment problem.
Springs feel weak
Springs may appear weak when the ladder is too long for the installed height, the sections are misaligned, or the mechanism has been adjusted incorrectly. Check the manufacturer's adjustment points and inspect for stretched or damaged components. Never compensate for a structural or fit problem by adding unapproved spring tension.
Drafts appear around the hatch
Drafts usually enter at the perimeter seal, the door panel, or the unsealed ladder cavity. Look for compressed or missing weatherstripping, loose fasteners, and gaps around the frame. Install compatible sealing material or an insulated cover box without blocking the folding mechanism. The attic ladder troubleshooting guides can support a more systematic inspection.
At least once a year, operate the ladder, tighten accessible fasteners, lubricate hinges with a suitable product, inspect springs and feet, and check the seal. Seasonal temperature changes can reveal gaps that weren't obvious immediately after installation.
Safety and Code Considerations You Cannot Ignore
A safe attic ladder kit must provide more than convenient access. The opening, surrounding framing, climbing angle, landing condition, and intended use all matter. Canadian homeowners should confirm provincial and municipal requirements, while anyone working under California rules should review both building and workplace safety provisions.
The California-relevant guidance described earlier uses an attic opening of at least 22 inches by 30 inches where the attic exceeds 30 square feet and has at least 30 inches of vertical height, with 30 inches of unobstructed headroom above the opening. A separate California loft-access benchmark describes rungs at least 12 inches wide, rung spacing between 10 and 14 inches, uniform spacing within 3/8 inch, a capacity of 200 pounds per rung, and an installation angle between 70 and 80 degrees from horizontal. Review the loft-access requirements and commentary for the details relevant to the assembly being installed.
Access and egress need a safe route
California roof and attic work areas require a safe means of access and egress, including compliant stairways, ramps, or ladders. The state limits single-cleat ladders to 30 feet and double-cleat ladders to 24 feet where the specified traffic conditions apply, and side rails must extend at least 3 feet above the landing under the applicable safety rule. Those requirements show why fixed access can't be evaluated by the ladder component alone. The California roof and attic access safety order is the appropriate reference for that jurisdiction.
For Canadian work, ask the local building department whether a permit is needed before changing joists, headers, fire separation, or access to a space that may be used for more than storage. Keep the product instructions, opening measurements, framing photographs, fastener details, and final inspection information with your home records. If you sell, tell the inspector when the installation was completed and identify any structural changes rather than presenting the ladder as a standalone fixture.
Final check: The best kit is the one that fits the existing structure, preserves the ceiling seal, and provides a safe route for the way the attic is actually used.
XTREME EDEALS INC. offers practical home improvement hardware, fasteners, fittings, and project accessories for DIYers and contractors working on upgrades around the house. Visit XTREME EDEALS INC. to find dependable components for the framing and finishing work that makes an attic ladder kit perform properly.