

1/2 x 1/2 means either a square cross-section about 12.7 mm by 12.7 mm or a square mesh opening of that size, and the two readings aren't interchangeable. The common advice to “just buy half-inch material” misses the measurement that decides whether it fits.
A metal stop must fit against or inside another part. Mesh must control what passes through it. A plywood panel must provide the right thickness and coverage. Before buying, identify what the numbers measure, then check the details the label leaves out.
What 1/2 x 1/2 Means by Product
On solid stock, 1/2 x 1/2 describes the outside cross-section. On hardware cloth and welded wire, it usually describes the opening between the wires. Those measurements put your caliper jaws in different places.
A square bar has material throughout its cross-section. Square tube has an outside envelope and a hollow interior. Angle has legs rather than a closed square, so its paired dimensions describe the leg lengths.
Mesh reverses the question. You're measuring empty space, not the overall width of the material surrounding it.
How to read a 1/2 x 1/2 label
| Product | What 1/2 x 1/2 measures | Usual material | Not included in the label |
|---|---|---|---|
| Solid square bar | Outside width and thickness | Steel or aluminium bar | Length, alloy and finish |
| Square tube | Outside width and height | Hollow steel or aluminium | Wall thickness and inside opening |
| Angle | Length of each leg | Steel or aluminium angle | Leg thickness, which needs a third number |
| Hardware cloth or welded mesh | Clear square opening | Galvanized steel wire | Wire gauge, coating and roll size |
| Lattice sold by opening | Nominal square gap | Wood, vinyl or metal | Percent open area and slat thickness |
Consider a short steel spacer cut from square bar. Its outside faces determine whether it sits properly between adjoining components. The length you cut determines the spacing it creates, and that length isn't included in the cross-section label.
A square tube used as light trim presents a similar outside shape, but it isn't interchangeable with solid bar. Its hollow centre changes how you attach it, finish its ends and assess its suitability for a load.
Mesh used around a chick enclosure has a different job again. The gap must suit the animals being contained, while the wire and attachment method must resist pushing, pulling and damage.
Read the missing information
A third number on angle or tube supplies another dimension, usually material thickness. For example, a hypothetical 1/2 x 1/2 x 1/16 angle identifies the legs and their thickness; the paired numbers alone don't tell you how substantial the angle is.
A single half-inch callout belongs to another specification system. On plywood, it identifies nominal thickness. On a bolt, it generally identifies diameter, with thread and length information supplied separately.
Counter check: Name the product before naming the size. “Square tube” and “square mesh” require different measurements even when their labels look identical.
Match the product to the correct row before measuring. Outside jaws belong across solid faces; mesh measurements belong inside an opening.
How to Measure 1/2 x 1/2 Stock and Mesh
Use a caliper, rigid steel rule and tape measure together. The caliper checks small dimensions, the rule helps you see alignment, and the tape handles stock lengths and roll dimensions.
Clean off loose dirt and remove burrs that would hold the measuring jaws away from the actual surface. Don't grind away a protective finish just to obtain a reading.
The field check
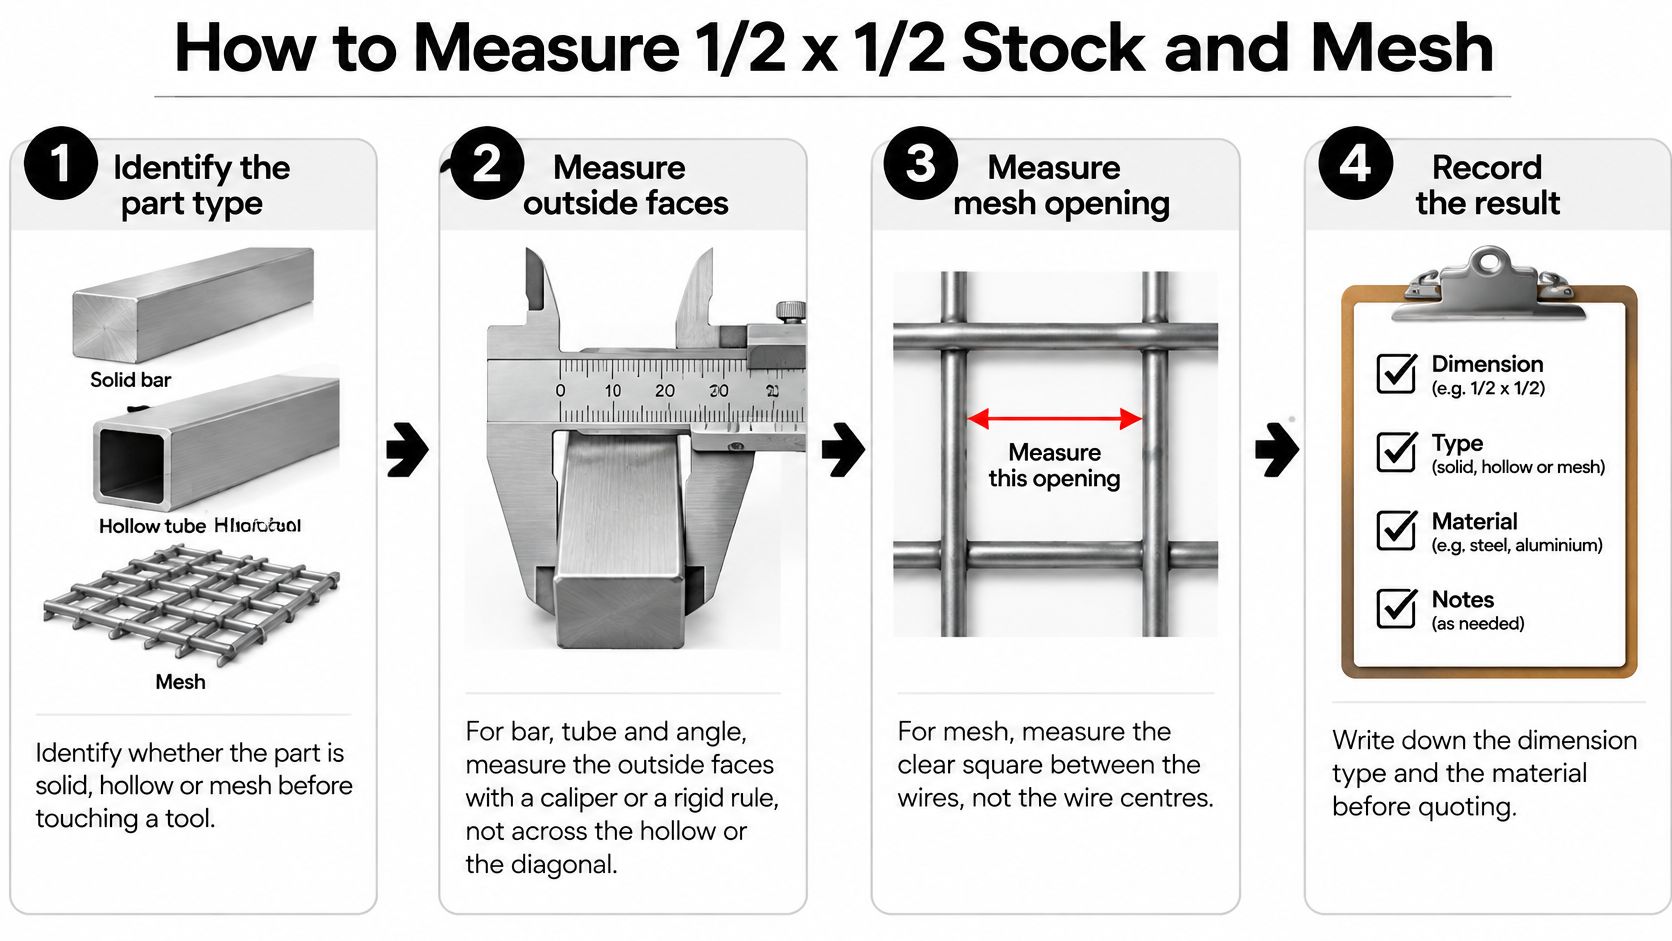
Identify the part first. Decide whether it's solid, hollow, angled or mesh before touching a measuring tool. If you're checking an installed piece, inspect an exposed end rather than guessing from its painted face.
Measure the outside faces of stock. Keep caliper jaws square to the material and away from rounded corners. Record both directions, because a hypothetical piece measuring 1/2 by 3/8 inch isn't square stock even if one face matches your shopping list.
Check the tube's usable interior. Subtract twice the wall thickness from the outside dimension to estimate the inside clearance. Internal weld seams, corner radii and coating can still prevent an insert from sliding through, so test the actual mating part.
Measure mesh between the wires. Put the rule or caliper across the clear square, then check another opening away from the cut edge. Measuring wire centre to wire centre gives pitch rather than clear opening, and a distorted end square can mislead you.
Resolve mixed units before ordering. When comparing a half-inch listing with a hypothetical 13 mm nominal import, don't assume the trade names guarantee identical fit. Put both readings into the same unit and compare the actual dimensions.
Record the remaining dimensions separately. Write down length, roll width, material thickness and finish beside the cross-section or opening. A nominal lumber stamp doesn't replace a measured edge thickness.
Decide what counts as a pass
Measuring diagonally across tube makes the section appear larger than its face-to-face size. Closing caliper jaws onto a rounded corner can produce an unstable reading. Repeat the measurement on straight, undamaged surfaces before rejecting a part.
For an informal sorting check, you might accept metal stock with both readings within about 1/32 inch of half an inch. That's a workshop screening allowance, not a manufacturing tolerance or a guarantee that an interference-sensitive assembly will fit.
A half-inch test block that just enters a mesh square can help check the opening, but don't force it and stretch the wires. For a specified maximum opening, use the applicable inspection method and reject oversized gaps rather than averaging them.
The final fit test is the mating part or governing specification, not a rounded display reading.
Hardware Categories That Use 1/2 x 1/2
The hardware aisle groups products by what they do, not by the numbers printed on their labels. Start with the job you need the material to perform.
Match the family to the job
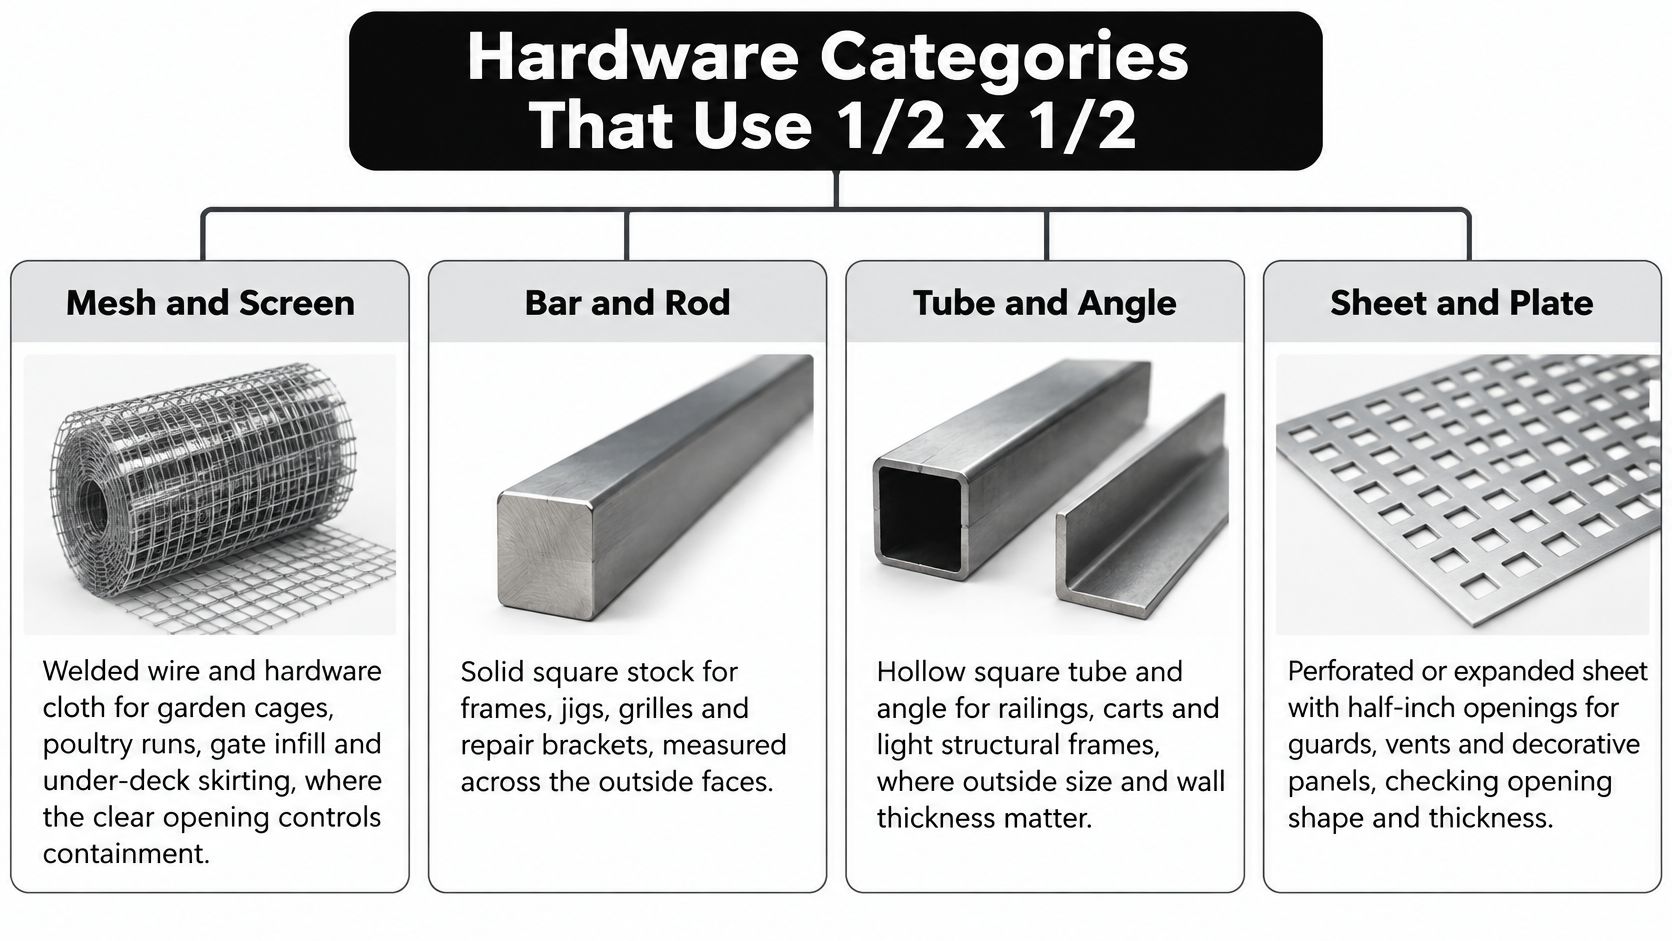
Mesh and screen include welded wire and hardware cloth for garden cages, poultry runs, gate infill and under-deck skirting. The opening controls passage, while the wire and supporting frame affect how well the barrier stays intact. The deciding question is: what must stay in or out?
Solid sections include square bar and small angle used for stops, repair brackets, jigs and light fabricated frames. These parts meet other components along faces or edges, making dimensional fit important. Ask: where must this part sit, and what must it bear against?
Hollow sections include square tube used for trim, plant supports and lightly loaded rails. A matching outside profile doesn't establish equivalent stiffness, and a decorative member isn't automatically suitable for a safety barrier. The question is: what span, attachment and load must this member handle?
Sheet and strip include plywood and boards carrying a thickness designation. Perforated and expanded metal also belong in the sheet aisle, but their labels may describe openings or patterns as well as material thickness. Ask: what area must the sheet cover, and how will its edges be supported?
Keep the assembly in view
A fence repair might need mesh for containment, angle for a mounting edge and a panel for a gusset. Buying all of them by a shared half-inch label would ignore their separate functions.
For broader context on selecting materials as an assembly, Aureli Construction's material choices for Boston renovations is a useful companion resource. Climate and construction details differ by location, so use that context to organise questions rather than importing specifications unchanged.
Use the detailed mesh, metal-section or plywood entry that matches your material. Don't borrow a requirement from another aisle just because the printed size looks familiar.
Fasteners are a separate fifth family. Their diameter, threads, head and length require their own reading, addressed in the label cross-reference below.
Welded Mesh With a 1/2 x 1/2 Opening
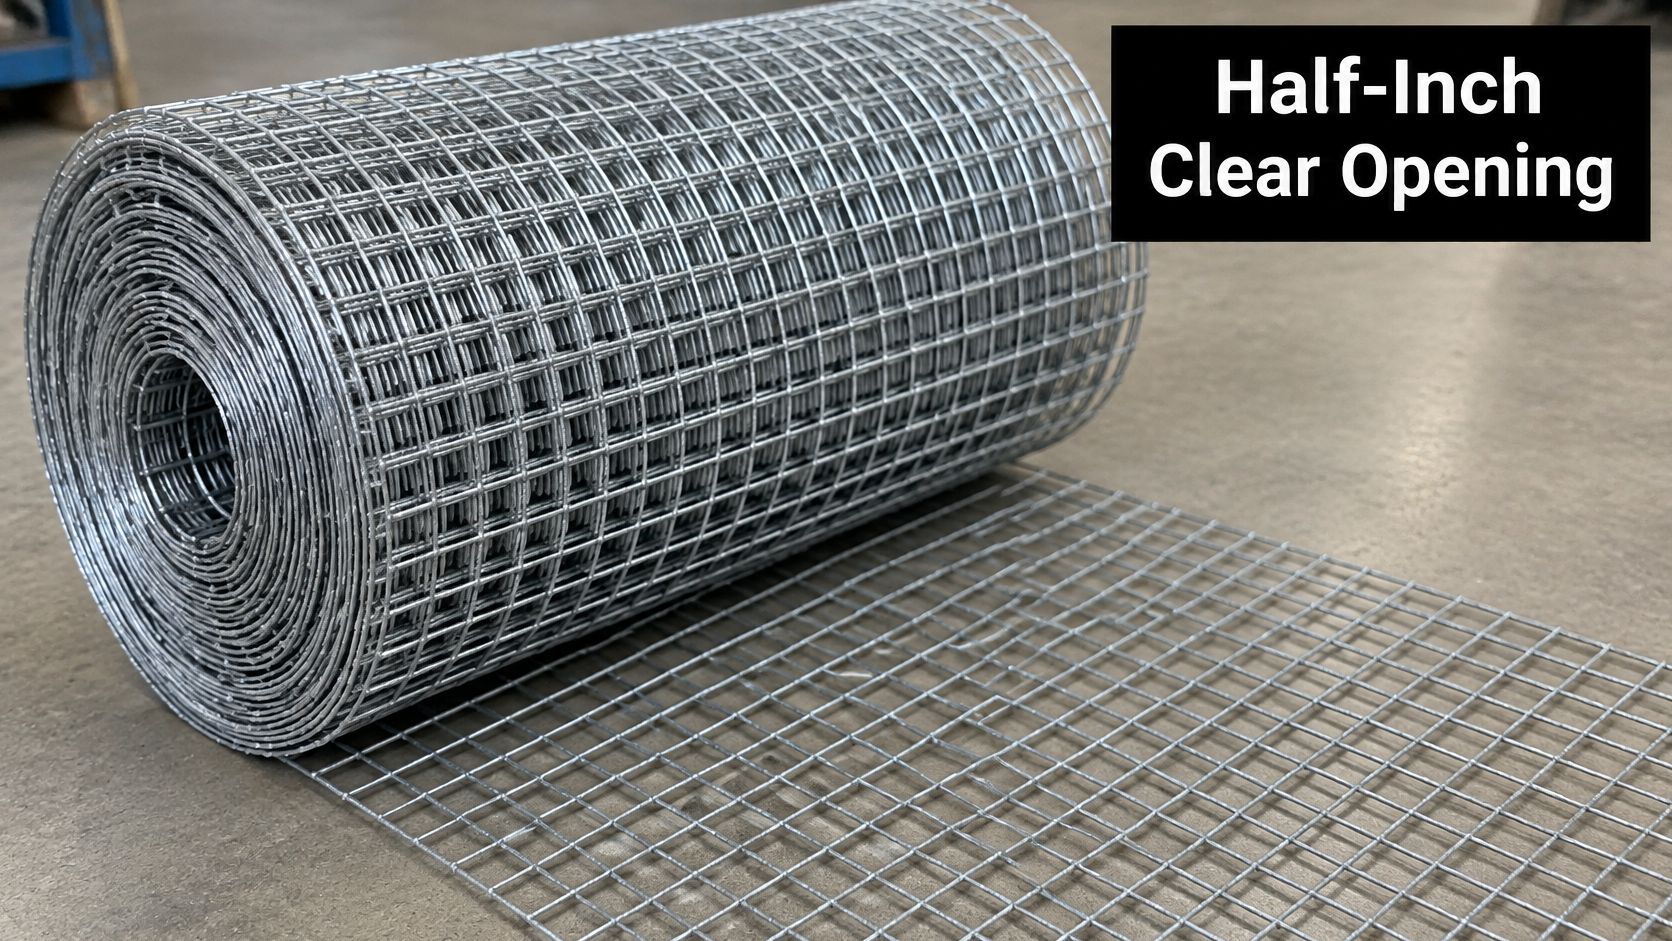
The useful measurement on welded mesh is the clear square inside the wires. That tells you about passage through the grid, but it doesn't tell you how rigid the roll is or how well its coating protects the welds.
A Canada-market example, the BMR Agrizone welded-wire mesh listing, specifies 1/2 x 1/2 openings, 20-gauge galvanized steel, a roll 24 inches wide by 50 feet long, and galvanizing after welding. This opening is substantially tighter than conventional 2-inch chain-link fabric, making the tighter grid useful for poultry containment, small-animal enclosures, garden protection and infill where passage matters.
Gauge and coating change the purchase
Two rolls can have matching openings and feel quite different when unrolled. Heavier wire generally resists bending better, while weld quality affects whether intersections survive handling and fastening.
Don't judge wire strength from a photograph. Look for the stated gauge or wire diameter, then consider how closely the frame supports the mesh. A loose panel spanning between distant fixing points behaves differently from mesh captured around its perimeter.
Galvanized after welding means the coating is applied after the grid is joined, protecting the weld intersections. Welding previously galvanized wire can damage zinc around those joints, so the coating sequence matters.
Check for broken welds, uneven squares, flattened wire and damaged coating before cutting. A neat roll edge doesn't prove the interior grid is sound.
Protect the installation details
Record these items on the material line:
- Wire specification: Gauge or diameter, steel type and any relevant product designation.
- Grid condition: Consistent openings and intact welded intersections.
- Coating method: Whether galvanizing occurred before or after welding.
- Roll dimensions: Enough width and length to suit the layout without awkward patches.
- Edge treatment: A compatible zinc-rich repair coating or a protective framed detail.
Field cuts expose vulnerable edges. Apply a suitable zinc-rich touch-up coating according to its preparation instructions, and capture sharp ends inside a hemmed or enclosed frame where practical.
For layout and attachment considerations, use the welded-wire fence material guide. Plan the support frame before cutting so you can position joins over something solid.
If a chick, mouse or scattering of seeds must not pass, check the actual animal or material against the finished opening. Don't promise rodent exclusion from the package photo alone. Ventilation, ember-protection and pest-control requirements may demand a finer barrier than a convenient general-purpose roll.
Square Bar Tube and Angle Sections
A solid square bar used as a stop is a different purchase from a hollow tube used as trim. They can present matching outside faces while requiring different cutting, fastening and end details.
Start with profile, then assess fit. Strength and suitability require the material, unsupported length, loading and connections as well.
Solid bar and hollow tube
Solid bar has no hidden wall thickness. It's useful for short spacers, keys, stops and welded tabs when the material and design suit the task.
Say a square bar must drop into a matching nominal slot. Equal labels don't guarantee a sliding fit: burrs, paint, corner radii and manufacturing tolerances can cause binding. Measure the slot at its narrowest point and check the bar at several locations.
Square tube introduces another boundary. The outside may fit a bracket while the inside won't accept an insert. On a hypothetical small tube listing, a wall might be given as 0.049 inch or 1.2 mm; those are illustrative callouts, not dimensions to assume when the listing omits them.
For a preliminary clearance estimate, multiply the stated wall by two and subtract it from the outside width. Then inspect the seam and corners. A flat-sided insert may clear the straight walls yet catch where the tube's inside corners curve.
A sleeve must fit over the bar's outside surface. Matching nominal sizes aren't a clearance specification.
Angle needs a complete callout
Angle has separate leg lengths and material thickness. A hypothetical 1/2 x 1/2 x 1/8 angle gives the fabricator a more complete description than the paired leg dimensions alone.
For a small mounting bracket, check both how far the legs reach and whether the selected thickness leaves room for screw heads or adjoining trim. The inside root radius can also prevent the angle from sitting tightly over a sharp corner.
A U-shaped profile isn't angle or square tube. If you need a channel that captures an edge, the galvanized U-channel guide helps distinguish that profile before you compare dimensions.
For fabricated work involving drawings and approvals, Black Badge Doors' submittal guide for architects and builders offers useful context for documenting the intended assembly.
Keep alloy and finish on separate lines: mild steel, stainless steel or aluminium; then mill finish, paint, galvanizing or anodizing as appropriate. End with an order description a shop can act on: profile, both outside dimensions, wall or leg thickness, cut length, alloy and finish.
Nominal Half-Inch Lumber and Plywood
A half-inch plywood panel isn't a 1/2 x 1/2 part. Its label identifies nominal thickness, not a square section, and ripping a narrow strip doesn't make the resulting piece accurately square.
In 2026, Home Depot Canada's Canadian-made plywood category categorised panels under a nominal 1/2-inch thickness. That's a retail thickness category, not a promise about every measured edge.
Measure the panel you will use
Sanded plywood can measure below its nominal designation. If you're using it as a pack-out or spacer, measure an undamaged edge with a caliper rather than relying on the shelf label.
Avoid crushed corners, splintered cuts and swollen areas. Take readings at several sound locations, keeping the jaws flat against the panel faces without squeezing into the surface.
Dimensional lumber uses nominal naming conventions too, but don't transfer those conventions indiscriminately to panels or small mouldings. A board name, a sheet thickness and a measured strip section are separate descriptions.
A strip ripped from plywood inherits the panel's actual thickness in one direction and your saw setting in the other. Blade wander, tear-out and sanding can change the finished result.
Match the material to its purpose
A plywood gusset in a fence assembly and a metal stop at a gate may share a half-inch description. They still differ in grain structure, edge durability, attachment and suitability for exposure.
Record the panel details that affect the installation:
- Nominal designation: The thickness printed on the panel or listing.
- Measured thickness: Taken where the panel is sound.
- Sheet dimensions: Width and length needed for the cutting layout.
- Grade or span rating: Appropriate to the intended use.
- Exposure and contact conditions: Interior use, exterior exposure or contact with treated material.
Don't assume a surface coating turns an unsuitable panel into an exterior structural component. Choose the panel construction and adhesive classification for the application, then detail the edges and attachments accordingly.
Two dimensions can describe a section or an opening. A single thickness on a panel doesn't describe either one.
Specifications and Job Lines Before You Buy
A useful shopping list reads like a small specification, not a search phrase. Mark each requirement yes or no before adding material to the cart.
Missing information isn't automatically evidence of a poor product. It does mean you don't yet have enough information to decide whether that product suits the job.
Check the listing in order
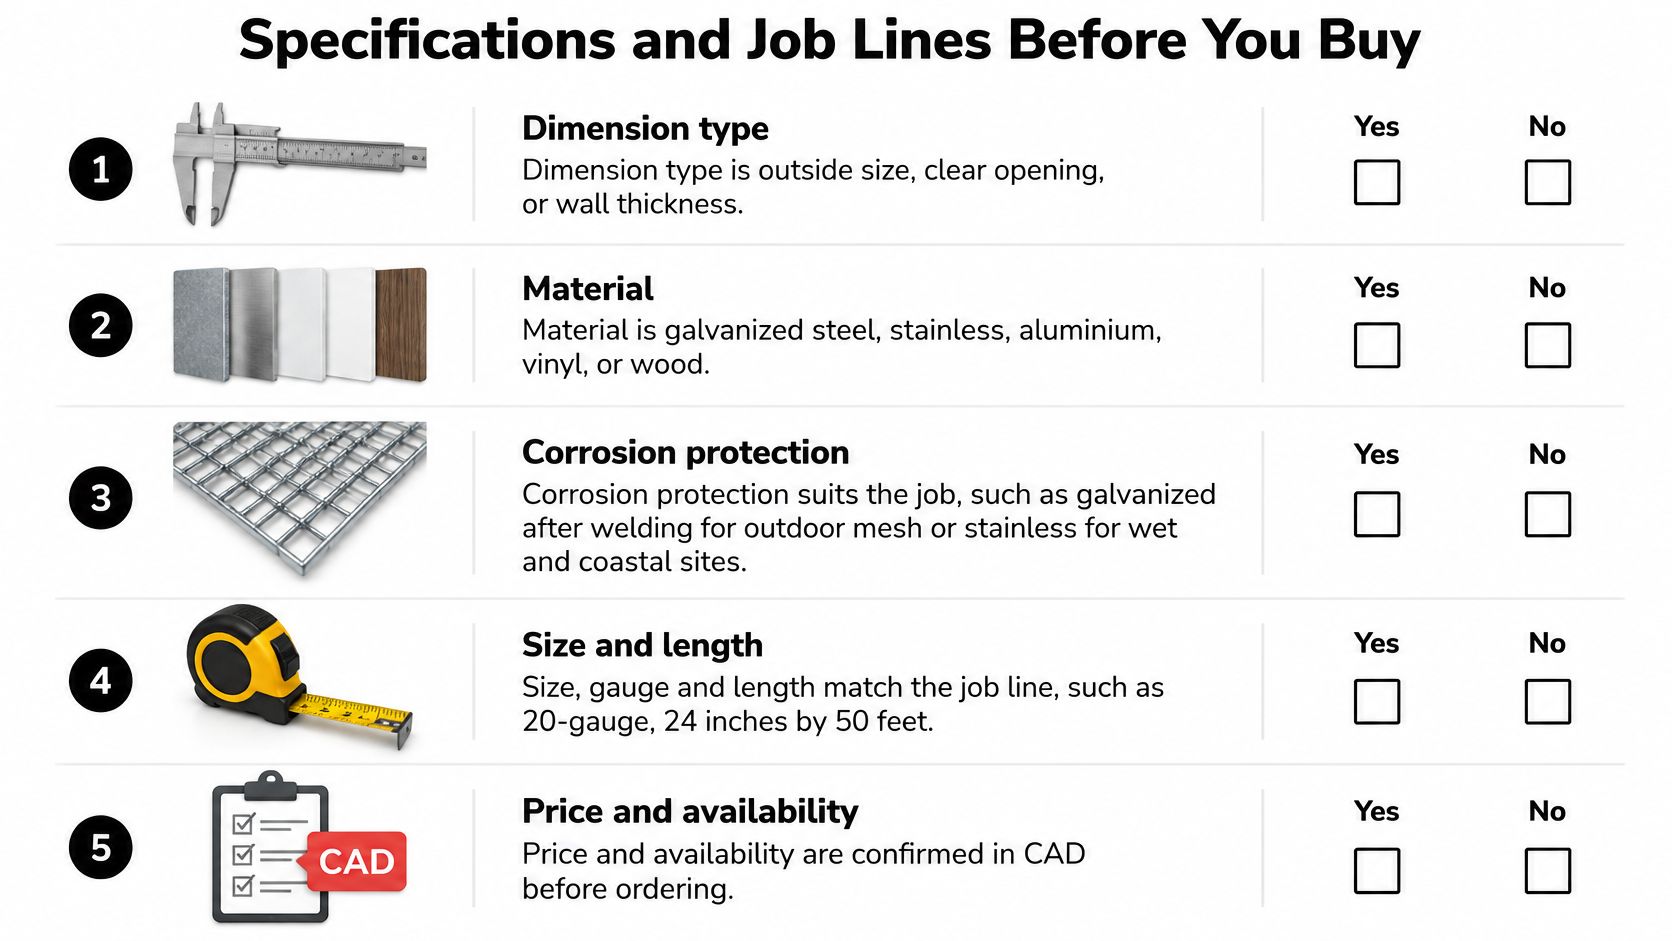
Dimension type is identified. The listing must distinguish outside size, clear opening and panel thickness. A photograph of a ruler lying nearby isn't an adequate dimensional drawing.
Material is named. Galvanized steel, stainless steel, aluminium, vinyl and wood aren't interchangeable choices. Match the material to the connection, exposure and intended function.
Corrosion protection suits the location. Wet Canadian winters, trapped moisture and salt exposure deserve attention at welds, cut ends and fasteners. For outdoor mesh, look for an explicit coating method rather than treating a silver appearance as proof of protection.
Gauge or wall is stated. Don't judge a rail or mesh panel by outside dimensions alone. If strength matters, obtain the missing section information and check the design.
Quantity is unambiguous. Confirm whether you're buying an individual length, a bundle, a sheet or a roll. Check usable dimensions against the cutting layout, including overlaps and waste.
Edges and connections are planned. Include cut-edge treatment, caps, framing or deburring in the purchase. An incomplete angle callout also needs its thickness resolved before fabrication.
Turn the job into an order line
For an enclosure, specify the intended animal or pest, the permitted clear opening, wire specification, coating and roll dimensions. Small animals can exploit loose perimeter gaps even when the mesh itself is suitable.
For a stop or slot-filling piece, specify solid square bar and the required measured outside fit. Include the cut length and whether the ends need to be square, deburred or otherwise finished.
For a light rail or trim member, specify square tube with a stated wall and connection detail. Don't treat a decorative tube as a code-compliant guard component without an appropriate design.
For a gusset, specify panel grade, exposure classification, actual thickness requirement and cut shape. Buying a panel doesn't remove the need to check fastener edge distances and support.
Before checkout: Write down what would make the product unacceptable. That turns a vague size preference into a usable inspection check.
Reject substitutions that change the product family, such as a bolt offered in place of square bar. Reject centre-to-centre mesh spacing presented as clear opening, and reject a general enclosure mesh when a project note calls for finer screening.
If the listing hides the wall, gauge, coating or opening definition, resolve that omission before ordering. Price comparisons only become useful after the specifications match.
Labels That Look Like 1/2 x 1/2
Nearby labels can describe threads, slopes, fire protection or open area rather than square stock. Read the unit and the product name together.
A 1/2-13 bolt identifies nominal diameter and threads per inch, with length supplied separately. Don't apply that reading to every lag screw or anchor, because their thread descriptions may use different conventions.
Callouts often confused with 1/2 x 1/2
| Label | What it specifies | Check before ordering |
|---|---|---|
| 1/2-13 x length | Bolt diameter and threads per inch | Length, head style and coating, not square stock |
| 1/2 inch level change | Abrupt vertical rise on an accessible route | Bevel from 1/4 to 1/2 inch; ramp above 1/2 inch |
| 1/2 inch per foot | Drainage slope away from a building | At least 30 inches of run and a 1.25 inch fall |
| 1/2 inch Type X gypsum | Fire-rated board thickness | Type X classification and required assembly |
| 1/2 or 5/8 inch ceiling board | Suspended gypsum thickness | Generally one layer and 4 pounds per square foot |
| 50 percent open lattice | Open-area ratio | Slat size as well as gap; permit over 7 feet in the cited local guidance |
| 1/8 inch mesh maximum | Least opening for specified ventilation | 1/2 x 1/2 cloth can be too coarse |
| Centre-to-centre wire spacing | Pitch including the wire | Clear opening is smaller by about one wire diameter |
Keep the code figures attached to their applications
The California accessibility construction checklist sets a 1/2-inch maximum abrupt change in level, requires bevel treatment between 1/4 and 1/2 inch, and calls for a ramp above that threshold. These are surface-transition requirements, not hardware dimensions.
San Mateo County's building regulations specify grading away from buildings at 1/2 inch per foot for at least 30 inches, equivalent to a 1.25-inch fall. Check the currently applicable local requirements before laying out drainage.
California's suspended gypsum-board ceiling interpretation recognises 1/2-inch or 5/8-inch board, generally a single layer, with total system weight limited to 4 pounds per square foot. That system weight includes the associated luminaires, services and devices.
- Local fire-protection notes: Daly City's plan requirements specify 1/2-inch Type X gypsum for garage walls and ceilings beneath attic spaces and for one-hour construction enclosing storage beneath an exterior main exit stairway.
- Tested thermal barriers: The California exterior-wall provisions identify 1/2-inch, or 12.7 mm, gypsum wallboard as a thermal barrier in certain insulated metal-panel assemblies, subject to the required fire-test performance.
- Fine ventilation screening: The Zone Zero deck and stair guidance discusses specified foundation-ventilation applications with corrosion-resistant mesh openings no greater than 1/8 inch. Confirm the governing provision rather than relying on a hardware-cloth label.
- Lattice and permits: The California deck-code reference discusses local distinctions including Santa Rosa's 50 percent net-open lattice and a building-permit requirement for fences over 7 feet. Verify those local rules directly before construction.
Open-area percentage requires both gap and material width. Likewise, post covers require a fit check against the post itself; the post-cover sizing guide addresses that separate matching problem.
Use the mesh, metal-section or panel guidance only when the product belongs to that family. If a carton prints only half an inch, the missing dimension is a reason to stop and identify the specification, not assume a square.
Order the Matching Hardware With the Size
Once the material is settled, write a separate line for its connectors. A fastener's diameter-and-length designation doesn't replace a square-stock specification, even when both start with half an inch.
Keep the intended connection in the cart notes: post attachment, bracket fixing or anchorage into a suitable substrate. Ledgers and other structural connections need the fastener type and installation required by the design, not merely a convenient matching diameter.
Separate the fastening line
Our neighbouring hardware includes the 1/2-13 x 10-inch Carriage Bolt, round head and hot dip galvanized, at $36.89 for a 20-piece box; 1/2 x 8-inch Lag Bolt Screws, hex head, hot dip galvanized and meeting ASTM A307, in 10-piece boxes; and 1/2 x 6-inch Sleeve Anchors at $21.99 for a 10-piece box. These are fastening products to evaluate for suitable post, ledger, bracket or anchoring details, not substitutes for a 1/2 x 1/2 cross-section.
For a different hardware context, The Cabinet Coach's hardware advice for South Jersey homeowners offers a companion reference for selection questions. Keep decorative cabinet hardware choices separate from structural outdoor fastening requirements.
- Material line: Opening or outside size, gauge or wall, finish, and cut length or roll dimensions.
- Fastener line: Diameter, thread where applicable, length, head, coating and quantity.
- Connection line: Substrate, attachment detail, edge treatment and any design requirements.
For exposed mesh frames and outdoor steel, prefer compatible hot dip galvanized hardware where appropriate to the materials and exposure. Don't mix unfinished interior fasteners into a wet fence or deck assembly, and check compatibility where treated wood or dissimilar metals are involved.
XTREME EDEALS INC. offers deck and fencing accessories, fasteners and home-improvement hardware for assembling and finishing your project. Bring your measured opening or outside-size specification to XTREME EDEALS INC., then pair the material with suitable bolts, anchors and outdoor hardware before ordering.