
You've finished a deck or staircase upgrade, the new rail is in place, and the balusters are waiting on the floor. Then the problems appear: the last opening looks wider than the others, a spindle twists when someone leans against it, or an inspector flags the layout after you've already drilled every hole. Balusters installation isn't a decorative afterthought. Material, spacing, rail height, and attachment method all affect safety, inspection, stability, and the amount of rework you'll face.
Introduction to Balusters Installation and Why It Matters
A railing may look straight from across the room and still fail during inspection or everyday use. A loose baluster can rattle when someone leans against it. An oversized end opening can force a second layout. On stairs, an inaccurate angle or length leaves the infill leaning instead of fitting cleanly beneath the handrail.

Balusters provide the visual rhythm of a railing, while their working role is to limit open space and help the assembly withstand normal use. California residential work requires the layout, guard, and handrail arrangement to meet applicable safety requirements. Exact opening and height dimensions belong in the spacing and code check below. Confirm them before drilling, because a material choice or mounting method that looks acceptable can still create movement, inspection problems, or costly replacement work.
A deck guard, stair guard, and handrail combination each present different installation conditions. A stair run follows a slope, so balusters may require angled cuts or fittings designed for the rake. Landings also create transitions that need more planning than a straight bay between two posts. The mounting system must suit the rail geometry, not just the baluster's appearance.
Plan before cutting
Measure the finished rail opening, confirm post positions, select the infill system, and identify the hardware before cutting stock. Check how the chosen material will attach, since drilled holes, brackets, shoes, and angled fittings do not all allow the same adjustment after installation. A renovation company such as dated stairway renovation company can help when existing newel posts, rails, or stair geometry require more than a simple replacement.
For DIYers, use one measured bay as the control point. For contractors, that same check prevents callbacks. Xtreme EDeals carries balusters and related hardware, including options for iron stair systems, shoes, and mounting accessories, allowing the product and attachment method to be selected together rather than after the rail has been prepared.
Practical rule: Never cut a full batch of balusters until one complete bay has been measured, dry-fitted, and checked for plumb.
Choosing the Right Baluster Materials and Styles for Your Project
The right baluster is the one that suits the railing structure, the environment, and the installer's ability to mount it securely. Style matters, but it should follow those practical decisions.

Wood
Wood balusters work well in traditional interiors and timber decks because they can be painted, stained, shaped, or matched to existing trim. They're forgiving to cut and easy to adapt when stair openings vary slightly. The trade-off is ongoing maintenance. Exterior wood needs a suitable finish, and end grain must be protected from moisture before it's installed.
Wood also makes sense when the top and bottom rails already use mortised holes. A dowelled or tenoned connection can look clean, but the holes must be drilled consistently. A loose fit creates movement that glue alone may not solve.
Metal
Metal balusters deliver a slimmer profile and suit both contemporary and classic railings. Powder-coated iron or steel can provide a crisp contrast against painted or stained timber, while decorative profiles can add detail without making the stair feel heavy.
The installation is less forgiving than wood. Metal usually needs a metal-cutting blade, compatible shoes or brackets, and careful attention to burrs and cut ends. A surface-mounted system can simplify retrofits, but the fasteners still need to be placed into sound rail material or approved structural supports.
Decorex Hardware styles available through Xtreme EDeals are useful when a project needs coordinated baluster profiles and finishing accessories. Installers comparing brands may also want to review Nuvo Iron balusters as an alternative range, particularly when matching straight and decorative components.
Composite
Composite infill is attractive for exterior projects where low maintenance matters more than traditional joinery. It can coordinate with composite decking and resist the routine moisture exposure that challenges unfinished timber.
The main question is compatibility. Composite balusters and rails often rely on a proprietary system, so mixing parts from different manufacturers can create poor fits or untested connections. Confirm the intended brackets, caps, and fasteners before ordering.
Structural glass
Glass panels preserve an open view and suit modern interiors, decks, and properties where sightlines are important. They also introduce a different engineering problem. California residential guidance requires the top rail or handrail to be supported by at least three glass balusters, or the system must be engineered to remain in place if one panel fails, as described in the California glass and glazing code provisions.
The glazing specification matters too. Handrail and guard glass must meet laminated safety-glass requirements, including Category II of CPSC 16 CFR Part 1201 or Class A of ANSI Z97.1. Glass isn't automatically simpler because it has fewer visible pieces. Its clips, panels, rail, and failure redundancy all need to work as one tested assembly.
Measuring Spacing and Code Essentials Before You Cut
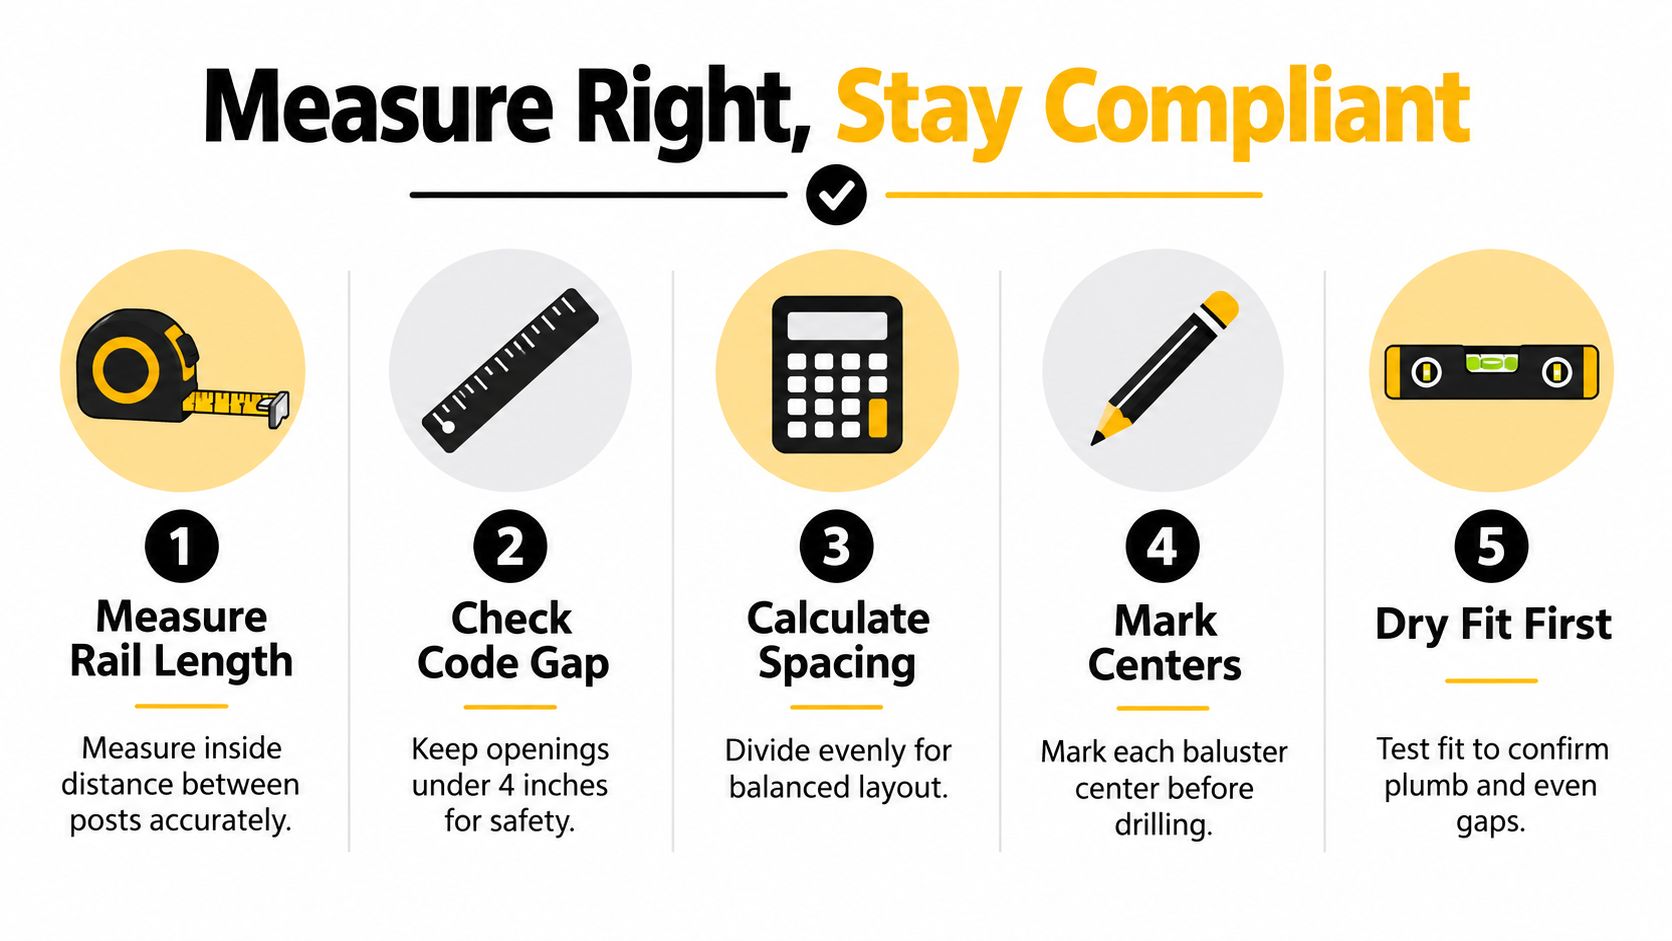
A railing can look evenly spaced and still fail inspection if the layout started from the wrong measurement. Measure the clear distance between the posts or newels, not the rail's overall length. The posts consume part of the run, and overlooking that space often leaves an awkward final opening that requires recutting or repositioning balusters.
California residential guard and stair-opening rules use the 4-inch sphere test as the primary safety check. Common dimensions associated with that framework include a 42-inch guard height and a stair handrail range of 34 to 38 inches above the nosing line, as outlined in the California railing spacing guidance. A deck guard and a stair system follow different layouts, so confirm the railing's function before ordering or cutting balusters.
Use a repeatable layout
-
Measure the clear run. Record the inside distance between posts or newels. On stairs, measure along the actual rail line and account for the changing relationship between tread, riser, and handrail.
-
Choose the baluster width. The gap means the clear opening beside the baluster, not the centre-to-centre distance. Include the baluster's actual width when checking the 4-inch sphere requirement.
-
Divide the run into equal bays. Select a layout that keeps every opening within the applicable limit without creating a narrow or oversized end bay. If the calculation leaves an awkward remainder, change the baluster count and recalculate. Forcing the last piece into place usually creates visible inconsistency and extra work.
-
Mark centres on both rails. Transfer each centre mark carefully so the upper and lower holes align. A story stick or shop-made template keeps the positions consistent and is faster than measuring every location independently.
-
Dry-fit before drilling all locations. Place the first, middle, and last balusters, then check the line with a level and inspect the spacing from several angles. Use this baluster spacing code guide while comparing the proposed layout with the applicable rule.
Mark the baluster centre, then select a drill size that matches the manufacturer's connection detail. Hole depth is not universal. A stair baluster may require an angled cut, swivel shoe, or different top connection than a level metal picket. Confirm those details before drilling the full run, because replacing a miscut baluster is cheaper than repairing a rail full of misplaced holes.
California workplace provisions also show why open space is treated as a safety matter rather than a style choice. In certain industrial railing contexts, intermediate vertical members must leave no openings greater than 19 inches, and non-private stair rails and handrails must extend at least 12 inches beyond the top and bottom risers, according to California Code of Regulations Title 8, section 1620. Those provisions do not replace the residential guard check, but they reinforce the practical rule: the railing's function determines the layout.
How to Mount and Secure Balusters Without Wobble
A straight baluster can still feel loose if the connection doesn't control rotation. The mounting method should match the material and rail construction, not just the appearance shown in a product photograph.
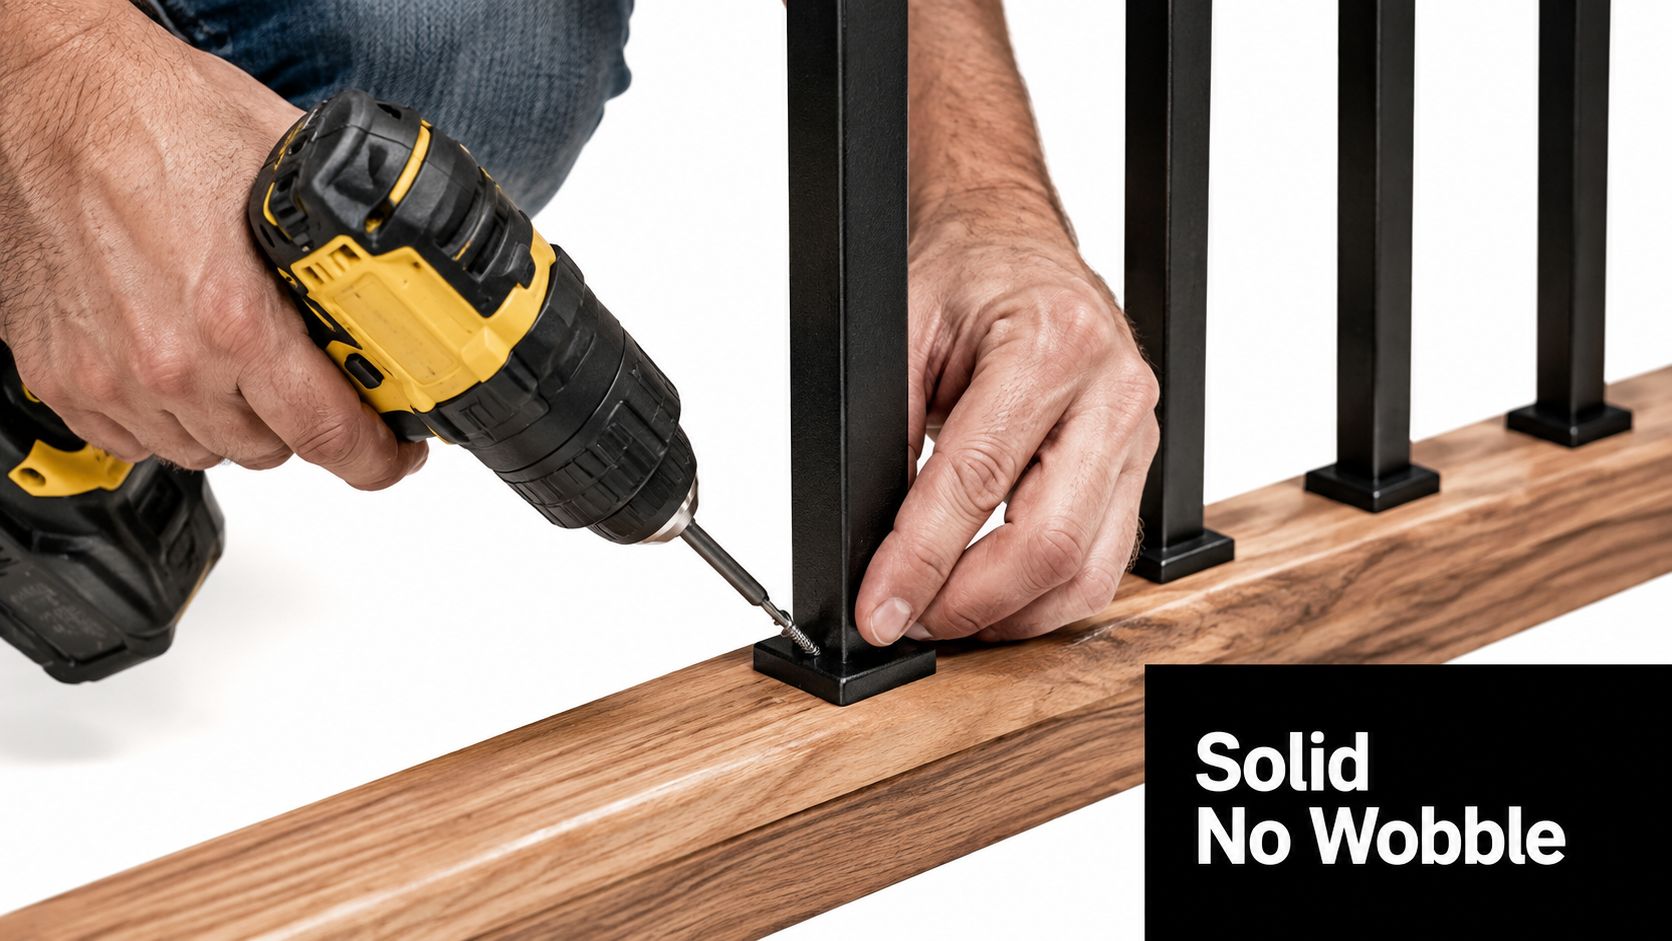
Start by checking the rails themselves. A top rail that flexes or a bottom rail that isn't firmly supported will transfer movement into every baluster. Repair the structure before installing the infill. Balusters aren't a substitute for sound posts, blocking, or rail connections.
Pick the connection that suits the rail
Top and bottom rail systems are efficient for repeated vertical balusters. Mark both rails from the same layout line, drill square to the rail faces, and use a depth stop so the holes remain consistent. Metal balusters often slide into predrilled openings and are finished with shoes, set screws, or compatible adhesive.
Mortised wood rails create a traditional appearance and can hold wood balusters securely when the mortises fit accurately. A loose mortise invites rattle, while an overly tight opening can split the rail during assembly. Dry-fit every joint before applying glue.
Shoe blocks and surface-mounted brackets suit retrofit work where the rails don't have suitable holes. They also help conceal cut ends and simplify replacement. Use the fastener type specified for the bracket and drive it into substantial rail material, not just thin trim.
Before installing metal balusters, deburr every cut. A burr can prevent a shoe from seating fully, damage a finish, or leave a sharp edge where hands and clothing pass. On stairs, cut each baluster to its own position when the rise, rail angle, or hole depth varies. A single production length rarely fits a stair run cleanly from end to end.
Keep the run aligned
A simple drilling jig pays for itself in accuracy. Clamp a guide over the rail, use a level to establish the correct orientation, and test the first few openings before continuing. For a stair system, the jig must follow the rail angle while the baluster remains visually aligned with the tread and handrail.
Set screws should be tightened after the baluster is plumb, not before. If the shoe has a swivel feature, hold the baluster in position while the fitting is adjusted, then check the assembly again after tightening. A small amount of movement at the first connection can become noticeable across the whole run.
For exterior railings, select fasteners and anchors suitable for the substrate and exposure. The outdoor handrail hardware collection at Xtreme EDeals includes hardware categories relevant to rail connections, but the installer still needs to verify substrate, corrosion compatibility, and the manufacturer's installation requirements.
The following video provides a visual reference for assembling railing components. Watch the fastening sequence closely, then adapt it to the specific baluster and rail system being installed.
Finish one complete bay before repeating the process. Check that the baluster is plumb, the shoe is seated, the fastener is tight, and the rail doesn't shift when the assembly is tested by hand. That small pause catches alignment errors while they're still easy to correct.
Finishing Touches and Pro Tips for a Lasting Result
A professional railing doesn't end when the last baluster is fastened. The final work controls how the system looks, how it handles moisture, and whether small sources of movement become future callbacks.
Pre-finish wood balusters where practical, especially the end grain and any area that will become difficult to reach after installation. Sand raised fibres, remove dust, and apply a compatible stain or exterior coating before final assembly. If you're matching an existing handrail, test the finish on an offcut first because the same colour can look different on a new surface.
Metal needs a different routine. Clean cut ends, touch up damaged powder coating with a compatible product, and keep moisture from sitting around shoes or brackets. Don't bury a wet or contaminated connection under a decorative cover.
Small checks that prevent large repairs
- Check plumb regularly. Recheck alignment after every third baluster, particularly on stairs where a minor drift becomes obvious near the landing.
- Protect finished surfaces. Cover decking and rails while drilling, cutting, and applying adhesive. Metal filings can stain or scratch timber.
- Hide, don't ignore, connections. Shoe covers can improve the appearance, but they must not conceal a loose fitting or an improperly seated baluster.
- Test for movement. Push each baluster from different directions. A rattle usually points to a poor fit, insufficient fastener tension, or movement in the rail itself.
- Keep the finish sequence organised. Complete messy cutting and drilling before final touch-up, then clean the assembly before applying visible coatings.
A polished finish can't rescue a weak connection. Secure the structure first, then spend time making it look finished.
Troubleshooting Common Balusters Installation Issues
Adhesive is not a repair for a loose or poorly planned railing. It may quiet minor noise, but it cannot correct an oversized opening, a weak rail, or a fitting that lets the baluster rotate.
Uneven spacing usually comes from changing reference points during layout. Re-establish the clear run between posts, decide how many balanced bays fit, and move the marks before drilling more holes. If the rail already has misplaced holes, a compatible shoe or replacement rail component is often cleaner than forcing a baluster into the wrong location.
For a spinning or squeaking baluster, inspect the shoe, set screw, hole fit, and rail movement. Tighten or replace damaged hardware. Avoid packing the joint with scraps or random filler, since that material can loosen and leave the connection unstable.
A bowed rail must be corrected before the infill is installed. Check the rail support, blocking, and post connection, then bring the rail back into position. Balusters installed against a moving rail will follow the defect and may need to be removed and reset.
Stair balusters that lean often indicate inconsistent cuts or holes drilled at the wrong angle. Measure each position, use a drilling guide, and dry-fit every piece before applying adhesive. A swivel shoe can accommodate an angled installation, but it cannot compensate for a weak rail or an insecure fastener.
For oversized openings, recheck the gap against the 4-inch sphere requirement detailed earlier in the Measuring section. Correct the layout by relocating the baluster, adding a properly secured infill member, or replacing the affected rail component. Do not hide the gap with a decorative cover. Glass systems require separate review because panel failure provisions may call for three supporting glass balusters or an engineered alternative.
California statewide code updates took effect on January 1, 2026. Confirm that the selected balusters, shoes, fasteners, and mounting method work together under the current code cycle. Glass, decorative infill, and traditional pickets are not interchangeable. Replacement parts from Xtreme EDeals can address a local failure without rebuilding the full rail, provided the components match the existing system.
XTREME EDEALS INC. offers iron stair balusters, baluster shoes, swivel shoes, fasteners, and other deck and railing hardware for DIY and trade projects. Visit XTREME EDEALS INC. to compare compatible balusters and mounting parts before you cut, drill, or order replacement pieces.