
You're standing on a deck with a tape in one hand and a cut list in the other, and the first rail already looks a little wrong. The posts never seem as square as the drawing, the opening isn't as clean as you hoped, and the rail needs to fit brackets at both ends without fighting you. That's why how to cut aluminum deck railing starts with layout, not the saw.
Why Cutting Aluminum Deck Railing Starts Before the Saw
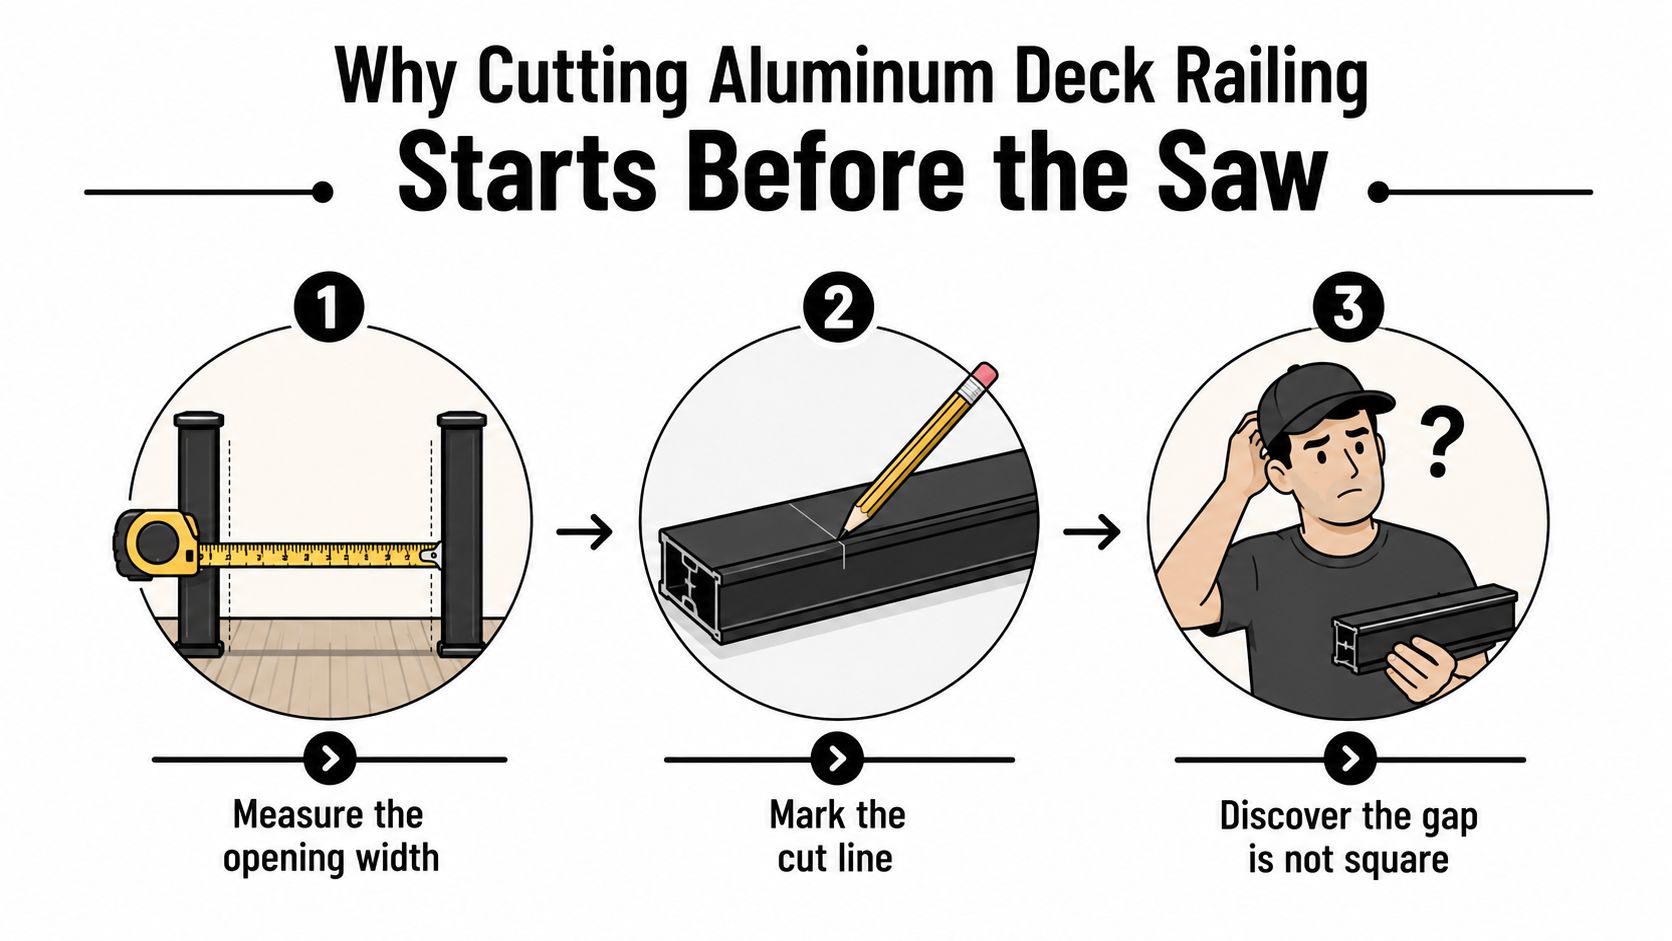
The first time a rail comes out of the box, one might measure only the clear opening and call it good. On site, that's usually where the trouble starts. The rail often needs to be cut slightly shorter than the measured opening because bracket thickness eats up space, and the safe move is to measure the top and bottom before a single line goes on the metal manufacturer guide.
A rail between two posts can look square and still be wrong. Posts move, framing shifts, and a small lean at one end changes the cut enough to force rework. The same guide says to shim if needed and then divide the distance between the posts by two to find the railing centre, which keeps the cut balanced across the span manufacturer guide.
Practical rule: if the opening changes between the top and bottom, trust the rail location, not the first tape reading.
That mindset matters on demanding California-style work because a rail that fits loosely or lands out of line is more than an annoyance, it becomes a fix-it job after fabrication. I've seen solid rails ruined by a half-checked opening, then saved only by trimming again and redoing the setup. For a related hardware layout on outdoor projects, selecting aluminum gates and fences is worth a look because the same measuring discipline shows up there too. If you're gathering materials, the matching hardware and trim pieces at XTREME EDEALS INC. deck materials fit naturally into that planning step.
Choosing the Right Saw for the Job
A rail that looks simple on the floor can turn fussy fast once you put a tool on it. A 12-inch miter saw is the usual shop and field choice for square cuts because it holds the profile steady and gives you the cleanest crosscut when the rail is already measured and marked correctly. A circular saw has its place when the rail is too long, awkward, or already installed in a way that makes the miter saw the wrong tool for the setup. A jigsaw is for the odd cut that needs to dodge a bracket or trim a small section without chewing up the rest of the profile.
An angle grinder stays at the bottom of the list for most railing work. It will cut aluminum, but the edge is harder to control, and once the wheel starts drifting, you pay for it in fit-up time. On site, that usually means the cut might look close until you try to seat the rail and find the corner hanging up or the line not matching the post layout. For a straightforward overview of the railing install steps that usually lead to this stage, the deck railing installation guide is a useful reference.
A good field rule is simple, use the saw that gives the rail the most support during the cut. The 12-inch miter saw is the better choice for repeatable square work. The circular saw is better when reach matters or the rail has to be cut where it sits. The jigsaw handles detail work, not production cuts.
Cut quality starts with control, not horsepower.
On mixed jobs, that difference shows up fast. A rail cut with the wrong tool can seem acceptable on the bench, then stop short once it meets the bracket and needs to sit flush.
Picking a Blade That Actually Works on Aluminum
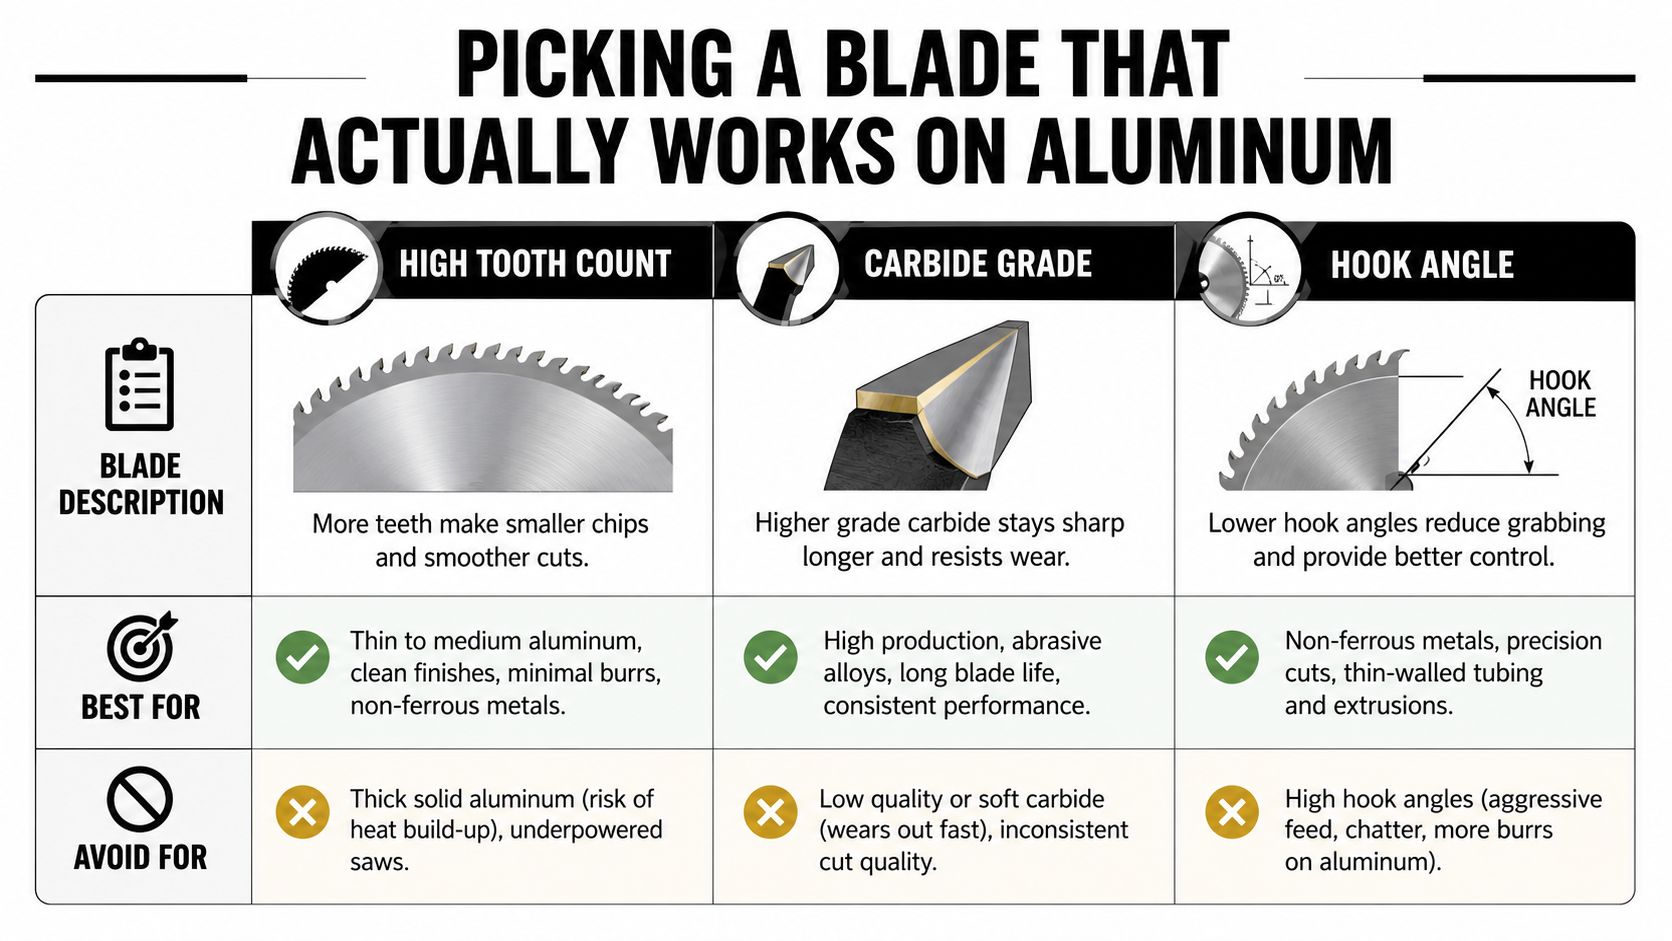
A clean aluminum cut starts with the blade, and the wrong blade shows up fast on the edge. For a 12-inch miter saw, the practical target is an 80 to 100 tooth carbide-tipped blade, which gives the smaller bites aluminum needs if you want a square edge instead of chatter and burrs Decks.com. On railing jobs, I want a blade that cuts the profile cleanly the first time, because a rough edge usually means extra filing, a bad fit, or both.
A standard wood blade is where people start guessing, and that guess can cost time. A fine-tooth carbide wood blade can work if the feed is slow and the rail is clamped well, but a coarse framing blade will tear the profile instead of cutting it cleanly Decks.com. If the package does not clearly show a fine tooth count and carbide construction, I leave it on the shelf. For a broader look at tool kits that support this kind of work, Trademaster Construction's tool guide is a useful reference.
Blade speed and feed matter just as much as the blade itself. A technical guide for aluminum railing work puts miter-saw cuts in the 3,000 to 5,000 RPM range, with a slow, steady feed to keep burrs and binding under control The Jimbo Slice Workshop. That matches what holds up on site. Keep the rail clamped, let the blade do the work, and do not force it through the cut.
What to look for on the package
- High tooth count: better for rail profiles, less tearing.
- Carbide tips: hold up better than cheap general-purpose blades.
- Nonferrous rating: the clearest sign the blade is meant for aluminium.
- Fine kerf and steady cutting action: helps reduce chatter on thin sections.
If the blade description sounds vague, keep looking. Rail work punishes guesswork.
The decision tree is simple. Use a dedicated nonferrous-metal blade when you have it, use a fine-tooth carbide blade when the tool list is limited, and skip anything coarse or abrasive. The cut edge tells the truth quickly. A good blade leaves a clean line that needs very little touch-up, while the wrong one leaves burrs, drag marks, and a rail that fights you during fit-up.
Measuring, Marking, and Setting Up for a Square Cut
A clean cut starts before the saw ever touches the rail. Measure the opening at the top and bottom, because posts are not always perfectly level, then account for bracket thickness before you lock in the length manufacturer guide. If the span sits off centre, shim until the layout makes sense, then divide the post-to-post distance by two so both sides stay balanced.
I also want the rail marked where I can trust it. Use a sharp pencil or fine-tip marker, then carry that line across both faces with a speed square. A mark on only one side is how a lot of clean-looking cuts turn into bad fit-ups, because the blade can follow a slightly different path than your eye expects. If the line is on both faces, you know the cut is staying true before the rail ever goes under the blade.
Clamping is part of the cut
Set the rail on a stable bench or a pair of sawhorses and clamp it so it cannot walk. A non-slip mat under the profile helps keep the piece from twisting while you line up the saw. Before you switch on the saw, check that the blade is lined up on the mark, not just close to it.
That last check saves rails. A cut that starts a hair off-line can still look fine at the saw, but the bracket and cap will show the mistake when they try to close the gap. If you need a visual walkthrough of the setup rhythm, this reference video is a useful companion:

Making the Cut and Finishing the Edge
Once the rail is clamped, the cut itself should feel controlled, not aggressive. The blade should extend only slightly below the material, just enough to clear the profile without digging too far into the bench or creating extra chatter The Jimbo Slice Workshop. Feed the blade slowly and steadily, because forcing it is what leaves burrs, wandering lines, and that rough edge that later fights the connector.
A bad cut usually announces itself while it's happening. Chatter sounds harsh, the rail can shift if the clamp is weak, and a curved path tells you the blade or the setup is wrong. I'd rather stop early and reset than try to save a bad pass with more pressure.
The cleanest field trick for matching top and bottom rails is simple. Cut both rails together with a leftover baluster piece as a spacer so the spacing stays identical and both cuts stay aligned matched-cut webinar. That keeps the two rails the same length and avoids the headache of one rail fitting while the other ends up short.
After the blade stops, deburring is not optional. File or sand the edge to remove the sharp burrs that can catch skin, snag a cap, or keep a connector from seating properly Decks.com The Jimbo Slice Workshop. Painter's tape on the factory finish helps reduce clamp marks before the rail ever touches the saw, and it's cheap insurance when the powder coat has to stay clean.
A good cut is quiet, straight, and easy to deburr.
That's the standard I use on every rail. If the edge needs rescuing, the setup, not the finish work, is where the mistake happened.
Handling Stair Angles and Irregular Deck Layouts
Straight rails are forgiving. Stairs and odd corners are not. On a stair run, the first job is reading the rise and run off the actual stringer and transferring that angle to the saw before the first cut touches the aluminum rail Alumiguard Mfg. If the deck is irregular, the post spacing can drift just enough that a standard measurement won't land where the bracket expects it.
A bevel gauge or angle finder makes the layout honest. Set it against the installed condition, not the drawing, then test the angle on a scrap piece before cutting the finished rail. That small test is cheaper than a ruined profile and tells you whether the line you marked matches the stair geometry.
Keep the angle honest
- Measure the stair angle on site: don't trust a theoretical number if the framing has moved.
- Transfer the angle to the saw carefully: a wrong miter setting gives you a rail that looks close and fits badly.
- Use a scrap test cut: confirm the fit before touching the final piece.
- Recheck off-spacing posts: a footing hit or framing quirk can change the end condition enough to need a different cut.
For stair-specific layout and mounting details, this railing stairs installation guide is a practical companion when the run stops being square. The same slow feed and deburring habits still apply, only now the geometry is the part that needs the most attention.
Angled work doesn't need a different standard. It needs a more careful setup.
That's where a lot of first-time installers lose time. They cut the right profile with the wrong angle, then spend the rest of the day trying to make brackets forgive the mistake.
Troubleshooting Bad Cuts and Finishing the Install
A rail that comes out too long is frustrating, but it's usually salvageable if you stay calm. The cleanest fix is to trim a hair from each end rather than taking one heavy bite from a single side, because that keeps the cut centred and preserves the balance at the brackets. If the cut came out slightly curved because an abrasive wheel or the wrong blade was used, recut it with a proper carbide-tipped nonferrous blade instead of trying to force the bent line into place.
Burrs are the other common problem, and they show up exactly where you don't want them, around bracket holes, caps, and connectors. File the edge first, then test-fit the hardware before the rail is fully seated. If a burr keeps catching, don't muscle the part together, because that usually just scars the finish and bends the connector.
Job-site safety and finish discipline
- Wear eye protection: aluminium chips are small, fast, and sharp.
- Use hearing protection: cutting rail is louder than it sounds in a closed space.
- Keep gloves under control: good grip matters, but loose material near the blade does not.
- Clear offcuts immediately: a small scrap underfoot becomes a trip hazard fast.
For the rest of the build, the finish hardware matters as much as the rail. Brackets, deck screws, carriage bolts, post base brackets, and post caps in pyramid, ball, and decorative styles, from 2×2 through true 6×6, are the pieces that make the install look complete. XTREME EDEALS INC. carries the kind of outdoor hardware that fits those finishing steps, which is useful when you're trying to keep the whole job moving without chasing parts across town.
A practical truck checklist looks like this, prep, measure, mark, clamp, cut, deburr, protect the finish. Keep that order, and most bad cuts never reach the deck.
If you're putting together an aluminum railing job, XTREME EDEALS INC. has the deck and fencing hardware, fasteners, and finishing pieces that help you get from rough layout to clean install without scrambling for missing parts. Visit XTREME EDEALS INC. to line up the brackets, post caps, and build hardware you need before the next cut goes on the saw.