
A joist end bearing on wood or metal needs at least 1.5 inches, while masonry or concrete requires at least 3 inches. If that bearing isn't available, an approved joist hanger is the code-backed alternative, but you don't automatically need hangers on both sides of every joist.
So, do you need joist hangers on both sides? The better question is whether each end of the joist has code-compliant support through direct bearing, an approved hanger, or another approved connector. One end might sit on a beam with adequate bearing, while the other end frames into the side of a ledger and needs a hanger. Treating both ends as identical can lead to unnecessary hardware in one location and an unsafe connection in another.
California's deck and floor provisions make this end-by-end reasoning especially important. Joists framed into the side of a beam or ledger board must be supported by approved joist hangers, while joists with proper end bearing aren't automatically required to have hangers on both sides. The connection has to carry the load, control movement, and match the framing condition shown in the plans. California floor framing provisions provide the starting point for that evaluation.
What Joist Hangers Actually Do
A joist hanger isn't just a piece of metal that keeps a board from falling over. It's a structural connector designed to transfer forces between the joist and the supporting beam, ledger, rim, or header. Ordinary nails or screws may hold framing temporarily, but they don't automatically create a tested connection with the required load capacity and restraint.
A properly selected hanger performs three related jobs:
- Transfers vertical load: It routes the joist's weight and the loads placed on the floor or deck into the supporting member.
- Controls lateral movement: It helps stop the joist from sliding or pulling away from the support.
- Restrains rotation: It limits twisting at the joist end, particularly when the joist is deep, loaded unevenly, or connected on only one face.
Direct bearing handles downward force because the joist rests on a beam, wall plate, or other support. Bearing alone doesn't necessarily prevent the joist from shifting sideways, lifting, or rotating. A hanger, rim board, blocking assembly, strap, or another approved connector may be needed to address those forces.

A simple deck example
Suppose a deck joist rests on top of a beam. Gravity pushes the joist down, and the beam carries that force through its posts and footings. In that arrangement, adequate bearing may support the vertical reaction without a hanger.
But the connection still experiences other forces. Foot traffic can create local movement, wind can produce uplift, and the deck can rack from side to side. A hanger or another approved restraint can help keep the joist aligned and connected during those conditions.
For a joist framed into the side of a ledger, the situation changes. There's no broad surface beneath the joist end to carry the load, so the hanger becomes the direct load path. That's why California code requires approved hangers where joists frame into the side of a ledger or beam. If you're comparing products, start with the joist hangers for decks category, then match the connector to the actual support condition.
Practical rule: Don't count hangers first. Identify the load path at each joist end first.
California's code framework also treats hanger performance as more than a visual inspection of the steel. The California Building Code requires joist hangers to comply with ASTM D7147, and California Department of General Services guidance for wood I-joists refers to ASTM D7147 and evaluation reports indicating compliance with ICC-ES AC13. Those criteria address vertical load, torsional moment, and deflection characteristics, which are directly relevant to both support and rotation control. California DGS hanger interpretation also distinguishes hangers designed only for prefabricated wood I-joists. Those hangers may be exempt from torsional testing under ICC-ES AC13 Section 3.4.1, but they aren't considered effective for preventing joist rotation.
Three Support Conditions at Each Joist End
A joist end usually falls into one of three practical support conditions. The important point is that the left end and right end can belong to different categories.
Full bearing
With full bearing, the joist sits on top of a beam, wall plate, or dropped ledger. The support surface carries the downward reaction through direct contact. In California, the minimum bearing is 1.5 inches on wood or metal and 3 inches on masonry or concrete under the residential floor provisions.
A hanger may still be specified for uplift or lateral restraint, but the joist isn't relying on the hanger alone to carry gravity load. Check the plans and the approved connector schedule before deciding that the hanger is optional.
Side framing
Side framing occurs when the joist butts against the face of a ledger, beam, rim joist, or header without sitting on a supporting surface. The hanger carries the vertical load into that member, so an approved hanger is required for the connection.
This is the familiar deck condition where a ledger is fastened to a house and the joists hang from its face. It's also common with flush beams, where the beam and joists align at the top rather than placing the joists on top of the beam.
Hybrid support
A hybrid connection combines partial bearing with a mechanical connector. For example, a joist may land on a narrow ledge or flush beam while a hanger is also fastened to the carrying member. The bearing carries part of the downward reaction, while the hanger helps maintain the connection and resist movement.
| Support Condition | Typical Location | Hanger Required? |
|---|---|---|
| Full bearing | Joist resting on a beam, wall plate, or dropped ledger | Not automatically, if required bearing and restraint are provided |
| Side framing | Joist attached to the face of a ledger, beam, rim, or header | Yes, use an approved hanger or approved engineered connector |
| Hybrid | Partial bearing combined with a hanger or other connector | Depends on the approved detail and calculated connection needs |
Ask two separate questions at the jobsite: What supports this end vertically? and What prevents this end from moving or rotating? If direct bearing answers the first question but not the second, add the restraint shown in the plans or approved details.
For joists framing from opposite sides over a bearing support, California provisions require the joists to lap at least 3 inches and be fastened together with at least three 10d face nails. A wood or metal splice with equal or greater strength is also permitted under that provision. California wood floor framing guidance describes that lapped condition separately from a hanger connection.
Reading the Code for Bearing and Side Framing
Code language becomes easier to apply when you turn it into a load-path question. First, find the point where the joist ends. Then determine whether the joist rests on something or is attached to the side of something.
Bearing length means the amount of joist end physically supported by the member below it. California's residential provisions require at least 1.5 inches where the joist bears on wood or metal, and at least 3 inches where it bears on masonry or concrete according to California deck guidance. If the joist doesn't meet that bearing condition, the connection needs an approved hanger or another approved support method.
Side framing uses a different logic. When the joist frames into the side of a beam or ledger, the code identifies approved joist hangers as the support method. The hanger transfers the reaction through its seat and fasteners into the carrying member, so the connector must be listed for the joist material, support material, fasteners, and installation orientation.
Don't overlook restraint
Vertical support is only one part of the connection. A joist can sit on a beam and still twist if the framing lacks blocking, rim support, or another restraint. California provisions also address lateral restraint where hangers or blocking provide it. The required restraint depth must be at least 60% of the joist depth under California's floor framing provisions.
That rule matters for deeper solid-sawn joists and engineered members. A connector that carries vertical load but doesn't control rotation may not solve the whole problem. California DGS guidance treats hangers as engineered connectors that provide lateral and rotational support, and it places the support location no more than 12 inches from the bearing point for the applicable wood I-joist guidance. The DGS structural interpretation explains why connector selection depends on the complete framing condition.
If your plans call for a hanger, install the specified hanger even if the joist appears to bear. The drawing may be addressing restraint, uplift, load concentration, or inspection requirements that aren't obvious from the framing alone.
For decks, also separate ordinary joist support from header-to-trimmer conditions. California guidance requires approved hangers when a header joist span exceeds 6 feet, and San Diego County guidance notes that tail joists longer than 12 feet need support at the header from framing anchors or 2×2 ledger strips within the applicable roof and ceiling framing provisions. Those are specific conditions, not a general rule that every joist needs a hanger on both sides.
Choosing the Right Hanger and Fasteners
Which hanger fits the connection at this joist end? The answer depends on more than whether a hanger appears on one side or both. Match the connector to the joist, the supporting member, the load direction, and the way that end receives bearing or restraint.
Check the joist dimensions, wood type, depth, and support material before installation. The support may be solid lumber, engineered wood, steel, or masonry, and each condition can require a different listed connector.
A standard face-mount hanger sits against the face of a ledger or beam. A skewed hanger fits a corner where the joist approaches at an angle. A slopeable hanger fits a sloping frame. Selecting the shape is like setting a bracket on the same path as the load: forcing a standard hanger into a skewed or sloped condition can misalign the seat, holes, and fasteners.
Fastener selection is part of the design
Use only the fasteners listed in the hanger's evaluation report and installation instructions. Structural connector screws belong in the specified holes, while hanger nails belong in the required nail holes. For compatible connector screws and related hardware, review joist hanger screws. The fastener errors that cause field failures are addressed in the checklist below.
The product label should identify approved lumber and support applications. An ICC-ES evaluation report, where the project requires one, helps confirm that the connector was evaluated for the intended use. California's ASTM D7147 requirement reinforces this approach. The model number matters, not just the broad category of “joist hanger.”
| Framing Situation | Recommended Hanger Type | Key Fastener Note |
|---|---|---|
| Joist square to a ledger or beam | Sized face-mount hanger | Follow the listed joist and header fasteners |
| Joist at an angled corner | Skewed hanger | Use the specified holes and approved fasteners for the skew |
| Sloping deck frame | Slopeable hanger | Confirm the permitted slope range before fastening |
| Engineered wood I-joist | Hanger approved for that I-joist | Check the evaluation report and rotation requirements |
| Tight clearance or special load | Engineered connector or approved splice solution | Use the manufacturer's complete fastening schedule |
A joist-location device or supplemental connector may address shear nailing, top-flange support, uplift, or rotation at one end. It does not automatically replace the primary hanger, and it does not decide whether the opposite end needs its own support. Products such as XJD or LSC belong only where their listed application matches the framing detail.
XTREME EDEALS INC. offers hanger and fastening products. The final selection still has to follow the connector manufacturer's approved schedule and the project plans, independently at each joist end.
Alternatives to a Hanger on the Second Side
A second hanger isn't the only way to restrain a joist end. The alternative must still provide the required vertical support, lateral restraint, and rotation control for that exact framing arrangement.
A continuous rim joist can enclose the joist ends and provide permanent lateral restraint. On an interior floor, where the rim is properly fastened to the joist ends, that assembly may remove the need for a second side-mounted hanger. The rim doesn't eliminate the need for a hanger where the joist is hanging from a ledger. It addresses a different part of the connection.
A ledger strip or ribbon board can provide bearing when it's properly attached to the supporting structure. In a cast concrete wall or pocket, an embedded ledger arrangement may carry the joist reaction while a hanger handles the opposite connection. The detail needs to show how the ledger transfers load into the wall, not merely that a board is present.

Blocking and engineered connections
Solid blocking between joist ends can stiffen the assembly and help prevent rotation. A common field detail uses two 16d nails on each side and a face nail through the block, but the connection still has to suit the plans, joist size, material, and loads. Blocking is not a universal substitute for a hanger where the joist has no bearing.
Engineered splice plates and joist-to-beam connectors can solve tight-clearance conditions when a conventional hanger won't fit. A properly designed saddle connection to a steel or LVL beam may provide approved bearing without a second hanger, provided the saddle and support detail are approved for the load.
Keep the distinction clear:
- Rim support controls movement along a line of joist ends.
- Blocking stiffens adjacent joists and limits rotation.
- A ledger strip creates a bearing surface.
- A splice plate or specialty connector transfers force through an engineered connection.
- A second hanger provides another mechanical connection, but it's not automatically superior if the framing already has compliant bearing and restraint.
Use this video as a visual reference for how different joist connection arrangements can be organised.
Common Mistakes That Compromise the Connection
Most hanger problems come from installation details, not from the basic idea of using a connector. A hanger that's the right size can still fail inspection or perform poorly when the installer uses the wrong fasteners, leaves gaps, or ignores the joist's need for restraint.
The fastening errors
Fill the required holes shown in the manufacturer's installation schedule. Don't assume that a few nails are enough because the hanger feels tight. The tested capacity depends on the complete fastening pattern, and the joist-side holes are just as important as the holes into the ledger or beam.
Wrong fasteners create another hidden problem. Drywall screws, generic deck screws, and unlisted nails may not have the required shear or withdrawal properties for the hanger. Use the specified connector nails or structural screws, and verify that the fastener length won't miss the support or penetrate into a location where it can cause damage.

The support errors
Toe-nailing a joist into a ledger may look acceptable from below, but it doesn't create the same positive connection as an approved hanger. If the joist is side-framed with no bearing, skipping the hanger leaves the vertical load path dependent on fasteners that may not be approved for that use.
Rotation creates a separate failure point. A joist can remain seated while twisting under uneven loads, especially when the connection has open space beside the joist. Add the blocking, rim support, strap, or approved hanger detail required to control that movement.
Back-to-back joists around a concentrated load also need careful attention. Two single hangers pushed together aren't automatically equivalent to one connector rated for the combined reaction. Use the approved connector and fastening arrangement for the actual load.
Material compatibility
Treated wood can corrode unprotected metal connectors. Match the hanger coating and fasteners to the treatment and chemical exposure. A corrosion-resistant coating such as ZMAX or hot-dip galvanizing may be specified for the condition, but use the connector manufacturer's compatibility guidance rather than choosing by appearance.
For the correct connector nails and related fastening options, see joist hanger nails. Before closing the framing, inspect every hanger for full contact, correct alignment, complete fastening, and the absence of split wood around the nails.
A tight-looking hanger isn't proof of a compliant hanger. The model, orientation, bearing condition, and fastener schedule all matter.
Putting It Together With a Decision Checklist
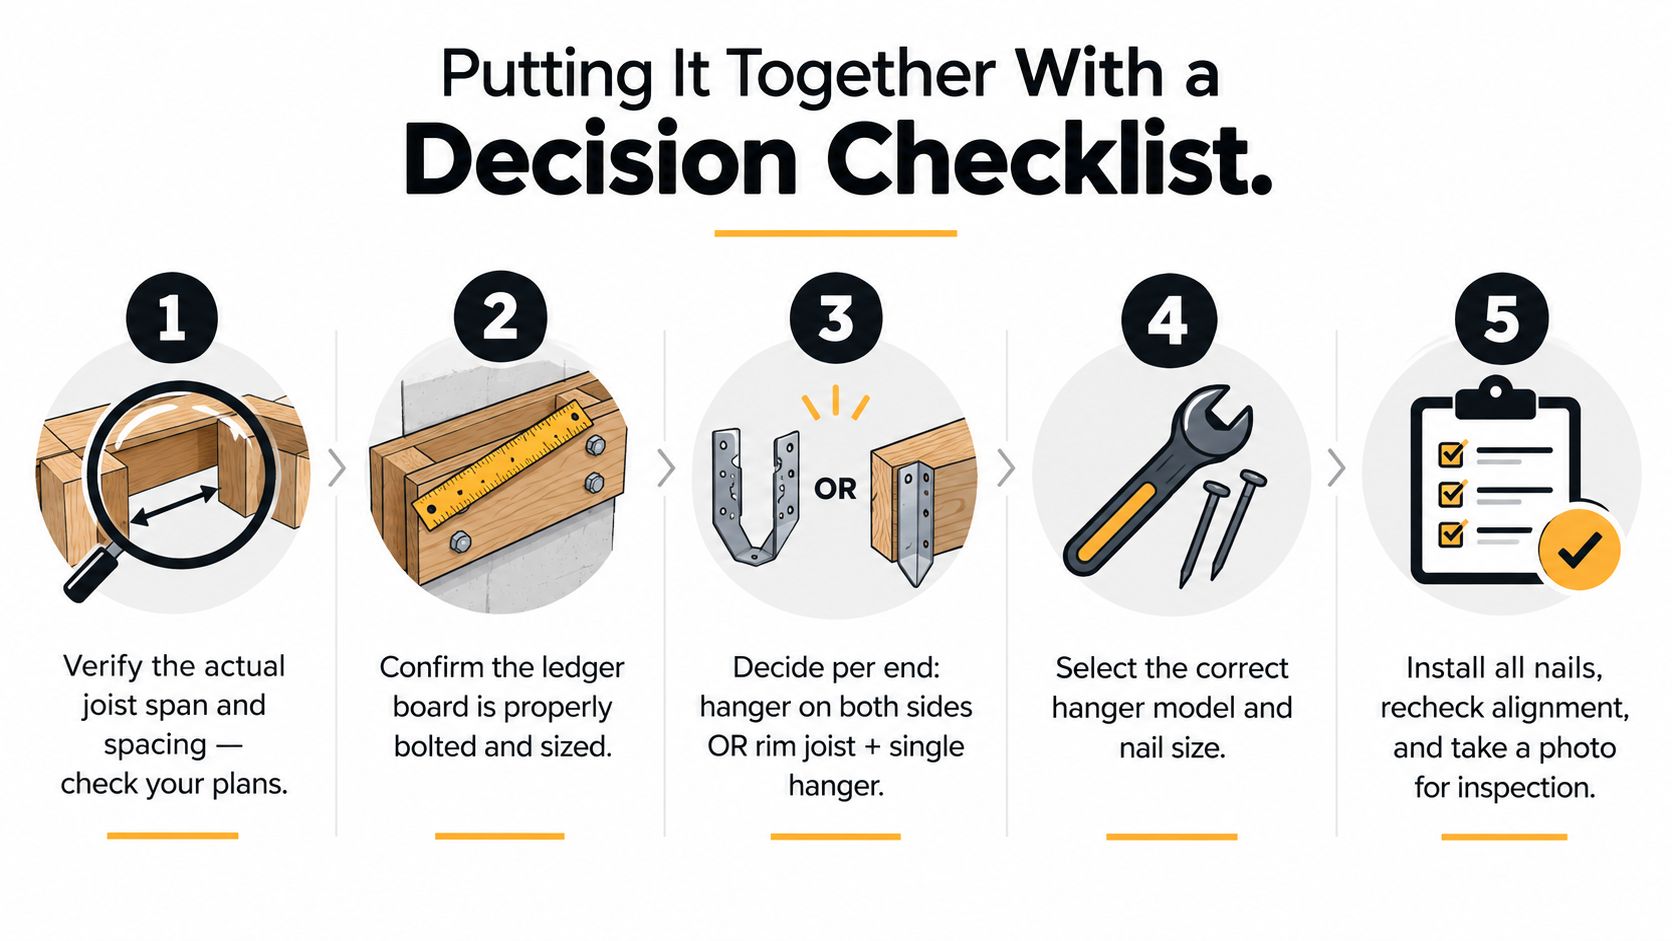
The phrase “both sides” can send a DIYer looking for a yes-or-no answer, but joist support rarely works that way. Evaluate the two ends separately, then verify that the complete floor or deck has a continuous load path.
Identify the actual support at each end. Is the joist sitting on a beam, wall, or ledger? Is it framed into the side of a member? Is there a rim, blocking, or hybrid detail? Mark the left and right ends separately.
Confirm bearing where bearing is being used. Measure the actual contact and compare it with the applicable California requirement. Wood and metal require at least 1.5 inches, while masonry and concrete require at least 3 inches under the California residential floor provisions. If the bearing isn't there, use the approved connector shown for the condition.
Choose the connector by application. Match the hanger to the joist size, depth, species, engineered-wood type, support member, angle, and load. A connector intended for one framing condition isn't automatically valid for another.
Follow the complete fastening schedule. Use the nails or structural screws listed for that hanger. Install the required fasteners on both the carrying-member side and the joist side, and keep the hanger tight against the framing.
Address rotation and lateral movement. Where the joist lacks wood on both faces, determine whether a rim joist, solid blocking, strap, or approved hanger provides the required restraint. California provisions refer to restraint depth of at least 60% of the joist depth where hangers or blocking provide lateral restraint in the applicable floor framing rules.
Check the local approval path. Review the applicable deck or floor provision, the project drawings, and the connector evaluation report before installation. If the condition involves a flush beam, unusual load, steel, LVL, I-joists, or limited bearing, ask the building department or a qualified designer to confirm the detail.
The practical answer is simple: use a hanger at every joist end that relies on side framing, but don't add a second hanger merely to make the connection look symmetrical. If one end has compliant bearing and adequate restraint while the other end hangs from a ledger, the two ends have different requirements.
XTREME EDEALS INC. offers joist hangers, structural screws, hanger nails, and other deck framing hardware for projects that need properly matched connection parts. Visit XTREME EDEALS INC. to compare compatible products before you start fastening, and confirm every selection against your plans and the manufacturer's approved installation details.