
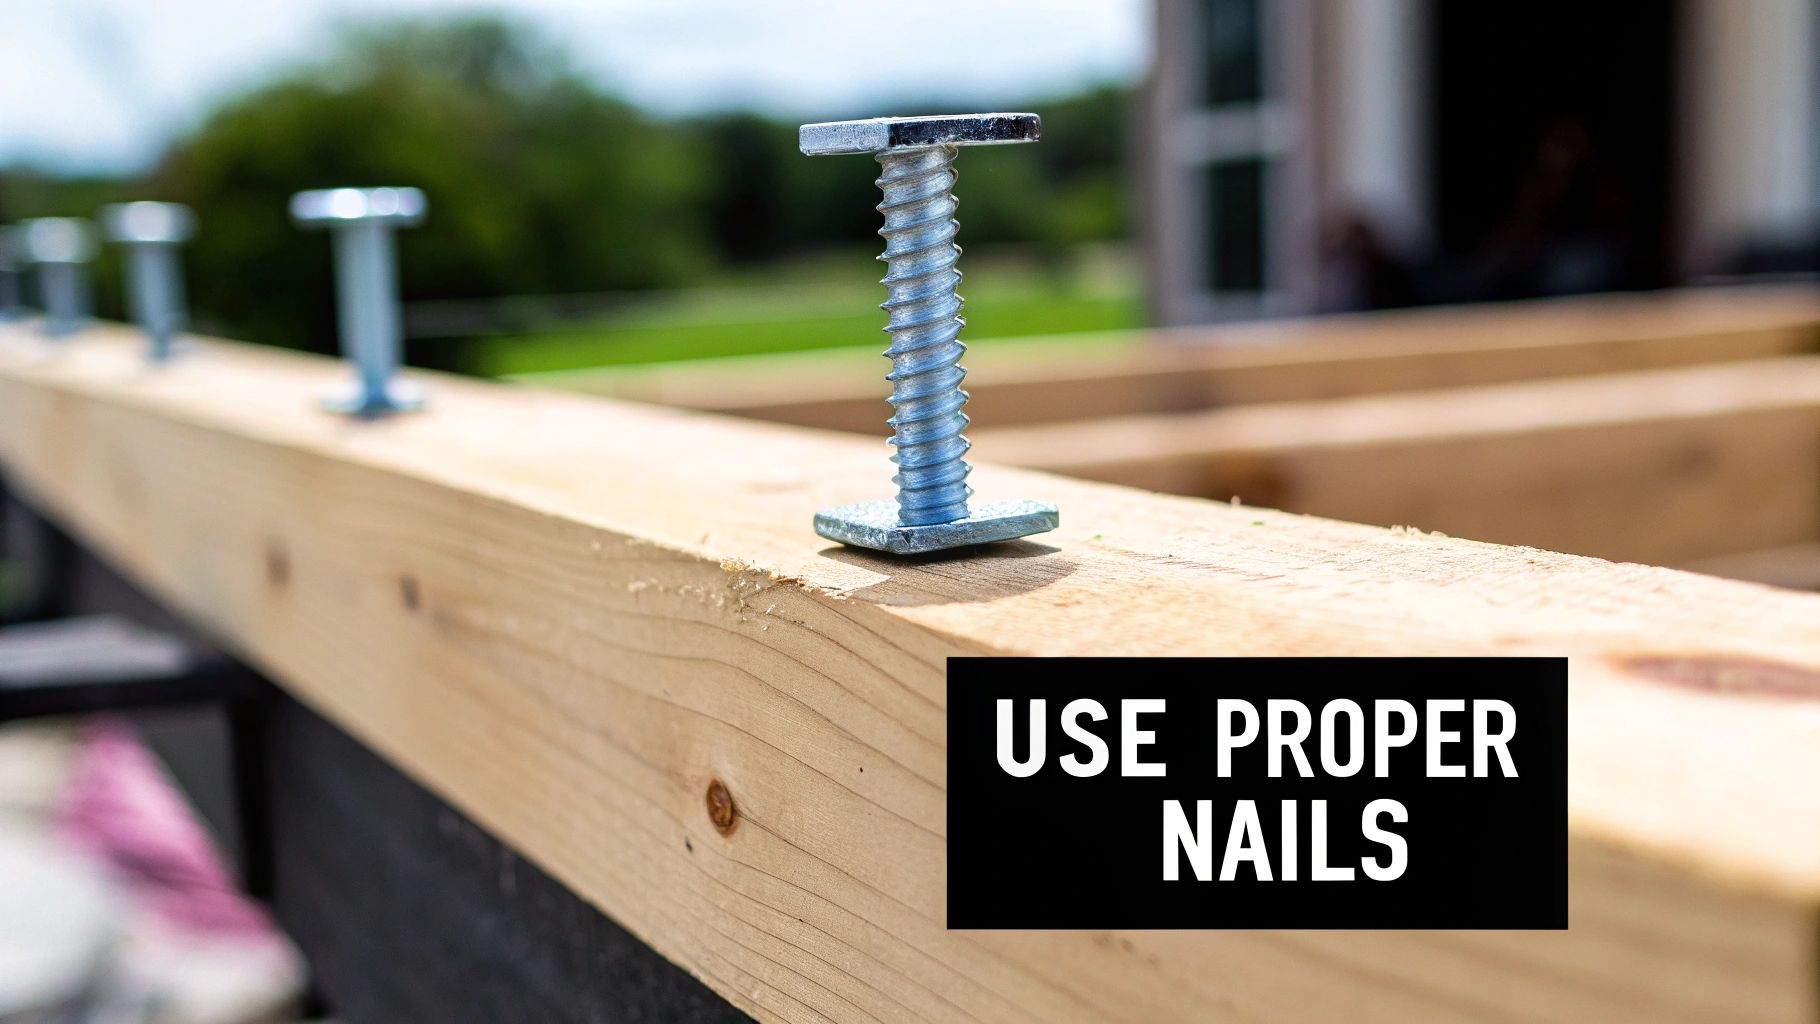
Joist hanger nails aren't just any old fastener you can grab from your tool belt. They're heavy-gauge, specially engineered nails built to handle the intense sideways (shear) forces that structural connections have to put up with.
Let's be clear: you cannot swap these out for common nails or screws. Their specific length, diameter, and hardened steel makeup are all critical for creating a safe, code-compliant connection between a joist and a beam. When it comes to the integrity of your structure, using the right nail is non-negotiable.
Why the Right Joist Hanger Nail Is Non-Negotiable
It might seem small, but the nail holding your deck or floor frame together is one of its most vital safety components. I've seen it time and time again—builders, from seasoned pros to weekend warriors, making the dangerous mistake of grabbing any nail that fits the hole. It’s a gamble you simply can't afford to take.
A structure like a deck isn't just fighting gravity. It’s constantly under attack from shear forces, which is the sideways pressure that tries to slice a connection apart. This is especially true where a joist meets a ledger board or beam. Your average nail or screw just isn't designed to handle that kind of stress.
The Science of a Secure Connection
Joist hanger nails are a different beast entirely. They're designed with a much thicker shank and are made from a type of steel that can actually bend a little under extreme loads without snapping. Common screws, on the other hand, are brittle. When they face serious shear forces, they can fracture suddenly—and that can lead to catastrophic failure.
Think of it as a chain. The hangers and nails work together to create a secure "load path," transferring the weight from your joists, through the hanger, into the nails, and finally onto the main support beam.
When you install a joist hanger correctly with the manufacturer-specified nails, every part of that system shares the load exactly as it was engineered to. If you substitute the fasteners, you break that chain, putting an incredible amount of stress on points that were never meant to handle it.
More Than Just a Recommendation
This is about more than just a best practice; it's a matter of safety and building code compliance. Hanger manufacturers put their products through rigorous testing to figure out the exact type and number of nails needed to meet their published load ratings. Using anything else instantly voids those ratings and puts your project—and the people on it—at risk.
Take trusted brands like Nuvo Iron, whose products we proudly stock. Their hangers are designed with these strict standards in mind. The only way to build a foundation that's truly safe and built to last is by pairing them with the correct, code-compliant joist hanger nails. A solid understanding of deck support is the first step in any successful build.
Getting the Right Nail for Your Joist Hanger
Walking into the hardware aisle for joist hanger nails can feel a bit overwhelming. You’re hit with a wall of options—weird designations like ‘10d’, different lengths, and various coatings. It’s tempting to just grab whatever looks close enough, but getting this choice right is about more than just finding a nail that fits the hole. It's about making sure your deck or framing is safe, solid, and up to code.
Your first and most important move is to check the joist hanger’s data sheet or the information right on the box. Manufacturers like Simpson Strong-Tie or Nuvo Iron aren’t just making suggestions; they’ve tested their hangers to handle specific loads with specific fasteners. The moment you use a nail they haven’t approved, you’ve essentially tossed those load ratings out the window.
Making Sense of Nail Specs
To pick the right nail, you have to speak the language. The big three specs you'll see are length, shank diameter, and the material coating. These elements work together to create a connection that can handle the intense shear forces that joist hangers are subjected to.
You'll often see something like a "10d" nail called for. This is a throwback to the old pennyweight system, and while the term has stuck around, modern packaging usually spells out the actual length and diameter. For most joist hangers, you’re looking for something like a 10d x 1-1/2" nail. This means it has the thicker shank diameter of a standard 10d common nail but is much shorter, specifically to prevent it from blasting through the other side of a typical double 2x header.
Joist hanger nails are not just any old nail. They're a highly specialized fastener where following the manufacturer's specs is non-negotiable. Every single hole in that hanger needs a nail—no exceptions. Skipping even a few holes drastically weakens the connection, and using the wrong size is a recipe for structural failure. It's a critical detail that keeps your structure standing.
To help you get a quick handle on what's what, here's a look at some common joist hanger nail sizes and where you'll typically use them.
Common Joist Hanger Nail Sizes and Their Applications
| Nail Designation | Typical Length (inches) | Typical Diameter (inches) | Common Application |
|---|---|---|---|
| 10d x 1-1/2" | 1-1/2" | 0.148" | The workhorse nail. Used for attaching single joist hangers to headers, beams, or ledger boards. |
| 9ga x 1-1/2" | 1-1/2" | 0.148" | Essentially the same as a 10d x 1-1/2", just designated by gauge instead of the "d" system. |
| 10d Common | 3" | 0.148" | Used for the angled "double shear" holes on a hanger, driving through the joist and into the header behind it. |
| 16d Sinker | 3-1/4" | 0.148" | Sometimes specified for heavier-duty hangers or connecting larger dimensional lumber like 4x material. |
This table is just a general guide, of course. Always, always double-check the specs for the specific hanger you're installing.
Don't Let Your Nails Corrode
The material your nail is made from is every bit as important as its size, especially when you're working with today's pressure-treated lumber. The copper-based chemicals used to treat wood will chew right through unprotected steel. That's why the right coating is essential.
Hot-Dip Galvanized (HDG) Nails: This is your go-to for pretty much any outdoor project using treated wood. The thick zinc coating provides a tough barrier against corrosion, making sure your fasteners last. For decks, pergolas, and any outdoor framing, this is the standard choice.
Stainless Steel Nails: If you're building near the coast or in any environment with high humidity and salt in the air, you need to step up to stainless steel. Yes, they cost more, but they offer the ultimate protection against rust. In harsh conditions, it's cheap insurance against premature failure.
Here's a rule of thumb I live by: your fastener's protection level must match (or exceed) the demands of the environment and the lumber you're using. Grabbing a cheap electro-galvanized nail to use with treated lumber will lead to a rusted, dangerously weak connection in just a few years. Don't do it.
At the end of the day, choosing the right joist hanger nail isn't about guessing. It's about carefully following the manufacturer's directions. Match the length, diameter, and coating to your project, and you’ll build something that’s not just strong, but safe and durable for years to come. Here at Xtreme eDeals, we carry a huge range of code-compliant fasteners and fittings to make sure you have exactly what you need to do the job right.
Proper Installation Techniques for a Rock-Solid Connection
You can have the best joist hangers and the perfect, code-compliant nails, but if you don't install them correctly, you're seriously compromising the connection's strength. Proper technique is what turns a pile of hardware into a rock-solid structural system. Getting it right ensures every single nail can contribute its full, engineered strength to the joint.
First things first, you have to position the hanger correctly. Tack it in place using the designated tacking holes, making sure it’s sitting perfectly flush against the bottom and face of the header or ledger board. This initial placement guides the rest of the installation, so take a moment to get it just right before you start driving the main fasteners.
This simple flowchart breaks down the nail selection process you should follow before you even pick up a hammer.
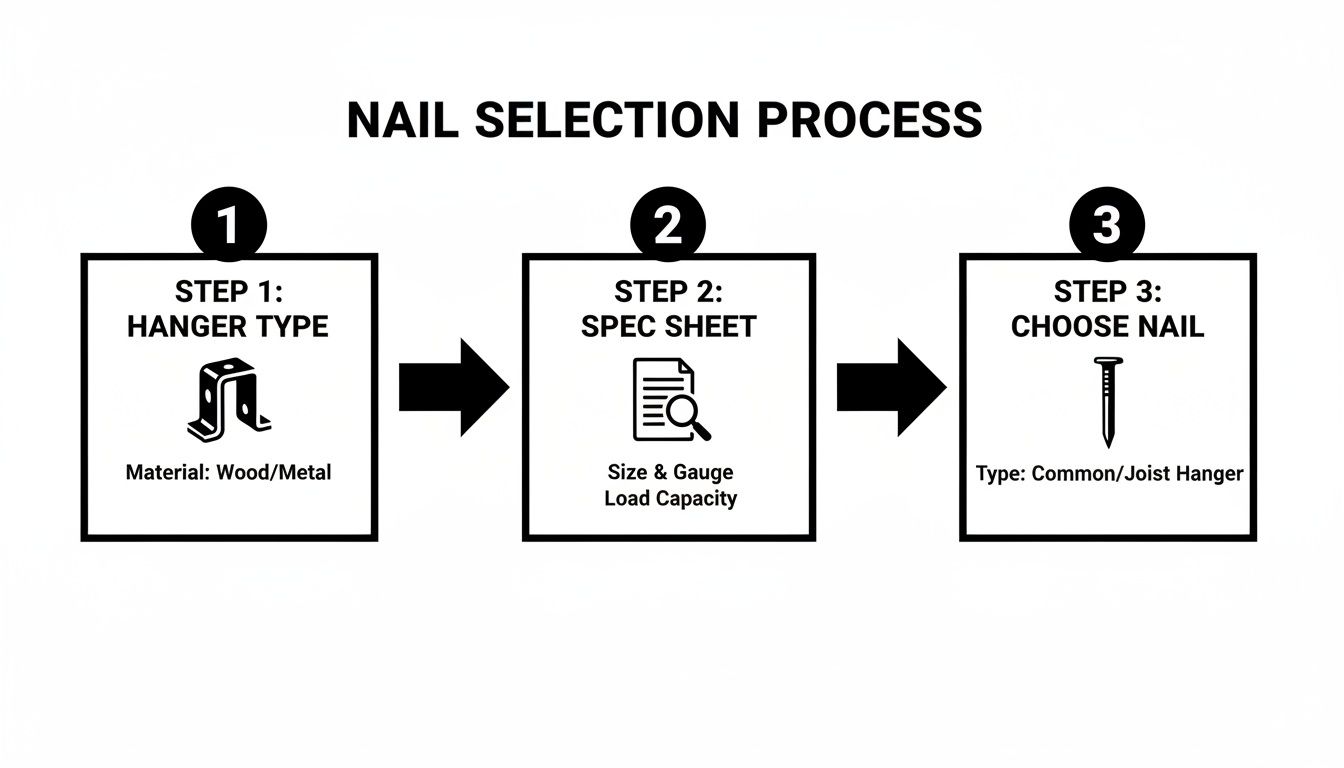
As you can see, the process always starts with the specific hanger you're using. From there, you consult its spec sheet and then—and only then—do you choose the exact nail required by the manufacturer.
Understanding Face Nails vs. Shear Nails
Joist hangers have two different kinds of nail holes, and each plays a critical, distinct role. Knowing what each one does is key to building a powerful connection.
Face Nails: These are the nails you drive straight into the header board through the hanger's flanges. Their main job is to handle the direct downward load, transferring the weight from the joist, through the hanger, and into the supporting beam. For these, you'll almost always use the specified 1-1/2" joist hanger nails.
Angled Shear Nails: Many hangers also have angled holes for what's called "double-shear" nailing. These require longer nails (often 3" 10d common nails) driven at a 45-degree angle. The nail goes through the hanger, then the joist itself, and finally bites into the header behind it. This technique dramatically increases the connection's ability to resist uplift and lateral forces, basically locking the joist in from multiple directions.
A common mistake is thinking you can skip the angled nails if the face nails feel secure. The manufacturer's load rating is calculated with all specified nails installed. Failing to install the double-shear nails can slash the connection's strength in a big way.
Tips for a Perfect Installation
Driving nails correctly is a skill. You want the nail head to sit perfectly flush with the hanger's surface. If it's left sticking out, the connection is loose. If you overdrive it, you can dent the metal and crush the wood fibres underneath, creating a weak spot. Go for firm, consistent hammer strikes.
Working in the tight space between joists can make swinging a hammer frustrating, if not impossible. This is where a palm nailer becomes your best friend. It’s a small pneumatic tool that fits in your hand and uses rapid pulses to drive nails precisely in tight spaces. For any serious deck builder, it's a worthwhile investment.
Finally, be mindful of the hanger's galvanized coating. A misplaced hammer blow can easily chip this protective layer, exposing the raw steel underneath to corrosion.
If you're looking for alternatives that might simplify the installation, you might be interested in our guide on joist hangers and structural screws, which covers code-compliant screw options.
Remember, every single hole designed for a fastener must be filled with the correct nail. No exceptions. It’s this meticulous attention to detail that separates an adequate structure from one that is exceptionally safe and will stand the test of time.
Why Choosing the Right Fastener Suddenly Matters So Much
If you’ve been in the building game for a while, you know the demand for quality structural fasteners—like joist hanger nails—has gone through the roof. And for good reason. Across Canada, we’re in the middle of a massive boom in both new home construction and major renovation projects. That flurry of activity has, quite rightly, led to stricter building codes to keep homeowners and their investments safe.
Suddenly, the humble joist hanger nail isn't just another piece of hardware; it’s a critical component in a much larger safety system. These evolving standards mean using properly rated fasteners is no longer just a best practice—it's a non-negotiable legal and safety requirement. For any pro builder or serious DIYer, this reality check highlights just how crucial it is to buy your materials from a supplier who actually gets it and stocks the right, code-compliant gear.
What's Fuelling the Demand?
This isn't just a blip on the radar; it’s a major market shift. The entire construction nails market, where joist hanger nails play a starring role, is seeing some serious growth across North America. The global market was pegged at around USD 14.5 billion and is on track to hit USD 21.8 billion by 2030. That’s a whole lot of new construction. If you want to dive deeper, you can check out the full construction nails market report to see how these trends are shaking up material costs and availability.
All this growth explains why having a go-to, trustworthy source for your fasteners is so important. When demand spikes, it's tempting for some suppliers to cut corners with cheaper, non-compliant alternatives. But your project’s structural integrity—and your reputation—is riding on you using the exact components specified for the job.
Sourcing from a knowledgeable supplier like XTREME EDEALS protects your investment and, frankly, covers your backside. Using the wrong hardware can get you a failed inspection, void an insurance claim, and force you into costly rework. Worse, it creates serious safety risks. It’s a gamble that’s just never worth taking.
How On-Site Trends are Changing the Nails We Use
This market shift isn't just about codes getting tighter; it's also about working smarter and faster on the job site. The move towards pneumatic tools has completely changed fastener design, leading to some brilliant innovations that make a contractor's life easier.
The perfect example? Collated joist hanger nails. Instead of fumbling with individual nails, you get them in convenient strips made for positive placement nailers. These are specialized nail guns designed to fire the nail perfectly into the hanger's pre-drilled holes, every single time.
This one innovation brings a few massive wins to any framing job:
- Speed: It blows manual hammering out of the water, especially when you're framing out an entire floor system or deck.
- Accuracy: The tool’s tip guides the nail right where it needs to go, so you're not damaging the hanger's protective coating with a misplaced hammer strike.
- Consistency: You get the perfect drive depth every time. No overdriving or underdriving, which means every single connection meets the manufacturer’s specs for maximum load-bearing strength.
As the industry keeps pushing forward, you'll see more and more products designed to hit that sweet spot between bulletproof safety standards and job-site efficiency. Keeping up with these trends is how you build better, safer, and smarter.
Costly Mistakes to Avoid with Joist Hanger Nails
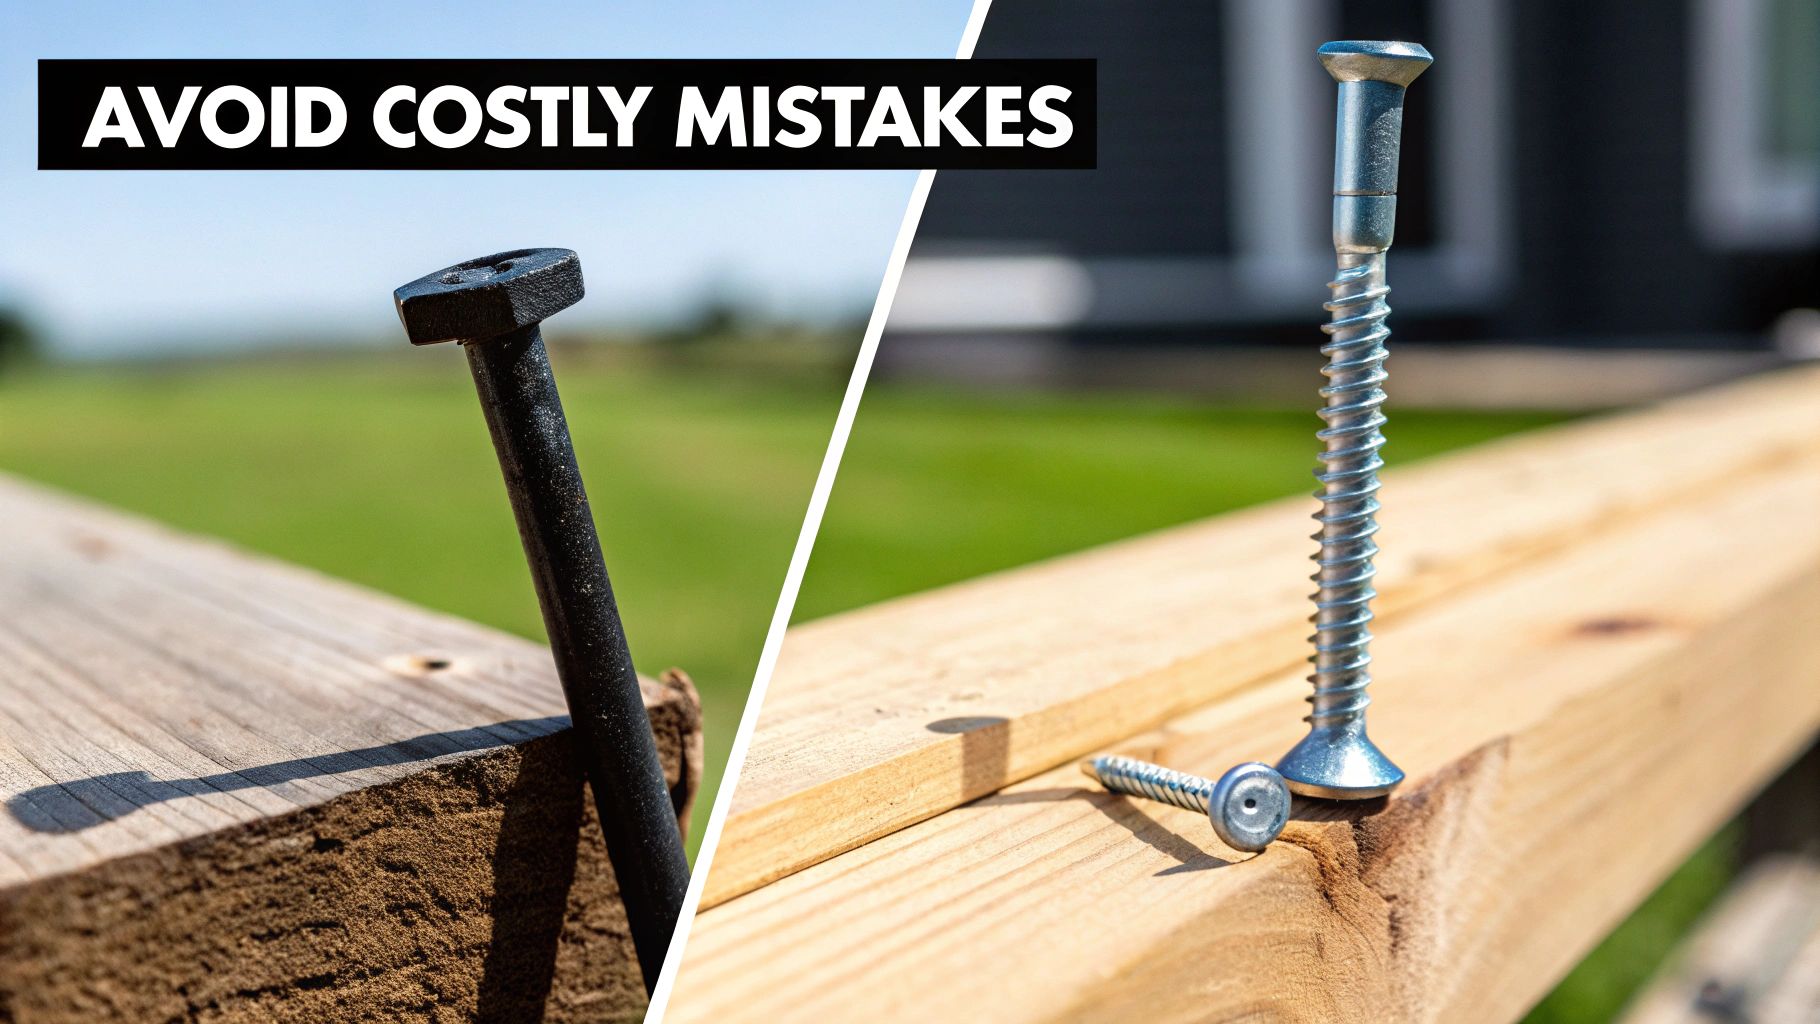
You can plan a project down to the last detail, but a few simple installation mistakes can bring the whole thing crashing down. When you’re working with joist hangers, these slip-ups aren't just about looks—they create serious structural weak points that can lead to expensive, and dangerous, failures.
The number one mistake I see people make is grabbing the wrong fastener for the job. It's so tempting to just use whatever screws or nails you have lying around in the workshop, but that’s a shortcut you absolutely cannot take. Using anything other than the joist hanger nails or rated structural screws specified by the manufacturer is a fast track to violating building codes and putting safety at risk.
The Problem with Improper Substitutions
Different fasteners are built for different kinds of stress. Joist hangers have one main job: resisting shear load. That’s the force trying to slice a fastener clean in half. It's a huge amount of downward pressure, and most common fasteners just aren't up to the task.
Here’s why some of the usual suspects are a terrible idea:
- Standard Deck or Wood Screws: These are brittle. They're designed to resist being pulled out (tension), not to withstand shearing forces. A regular wood screw can snap like a twig under the weight of a loaded joist, often without any warning.
- Roofing Nails or Common Nails: The problem here is usually the size. The shank is often too thin to properly fill the hole in the hanger, or they're too short to get a deep enough bite into the ledger board. Either way, you're left with a dangerously weak connection.
- Undersized Nails: If you use a nail shorter than the required 1-1/2 inches for face nailing, you're cheating yourself out of the necessary embedment. That drastically cuts down how much weight the connection can actually hold.
Joist hangers themselves were a game-changer, becoming a non-negotiable part of modern framing. That standardization brought with it very strict rules for the joist hanger nails used with them. Building codes now mandate exactly which nails to use and where to put them to ensure the load is transferred safely. You can get a good sense of how these standards developed by checking out Simpson Strong-Tie's anniversary page.
Installation Errors That Weaken Your Structure
Beyond just using the wrong nail, how you install them matters just as much. A few common installation blunders can completely undermine the strength of the connection, creating weak points that will fail over time.
Forgetting to fill every single hole in the hanger is a critical error. The manufacturer's load ratings are based on a full set of nails. If you skip even one or two, you've significantly weakened the connection and voided the warranty.
Another classic mistake is overdriving the nails. If you swing the hammer so hard that you dent the hanger and crush the wood fibres underneath, you've just created a compromised spot. You're aiming for a snug, flush connection, not a crater.
Finally, you can’t ignore the lumber you're working with. Modern pressure-treated wood is incredibly corrosive to plain steel. You absolutely must use hot-dip galvanized (HDG) or stainless steel fasteners, like those in our Decorex Hardware line. If you don't, the nails will rust away and fail in just a few years.
Frequently Asked Questions About Joist Hanger Nails
When you’re framing a deck or floor system, it’s the little details that separate a solid, safe build from a disaster waiting to happen. After years in the field, we've heard just about every question there is about joist hangers. Here are the straight answers to the most common ones we get.
Can I Use Screws Instead of Joist Hanger Nails?
This is a big one, and the answer is almost always no. Your standard deck or wood screws are not designed for this job. They're brittle and excellent at resisting pull-out forces, but they have very poor shear strength—the sideways force that joist hangers have to handle. Under that kind of load, a regular screw can snap clean off, which could lead to a catastrophic failure.
The only exception is if you use structural screws specifically engineered and rated by the manufacturer for use in joist hangers. Otherwise, stick to the nails specified for the hanger you're using.
What Happens If I Don't Fill Every Hole?
Think of each hole in a joist hanger as part of a team. The manufacturer’s load ratings—the numbers that tell you how much weight that connection can safely hold—are calculated assuming every single specified hole is filled with the correct fastener.
Skipping even a few holes throws that whole calculation out the window. It dramatically weakens the connection, creating a dangerous point of failure.
Every hole is there for a reason. To meet building codes and ensure the structure is safe, you have to fill every single one. There are no shortcuts when it comes to structural integrity.
This isn’t just about following rules; it’s about making sure the load is distributed exactly how the engineers designed it. A full nailing pattern prevents stress from concentrating in one spot, which is what leads to connections giving way over time.
Do I Need Special Nails for Pressure-Treated Wood?
Yes, absolutely. This is non-negotiable for any outdoor project. The copper compounds used in modern pressure-treated lumber are highly corrosive to plain steel. If you use the wrong nail, it will rust away surprisingly fast, compromising the safety of your entire structure.
You must use fasteners with a corrosion-resistant coating. Look for nails that are hot-dip galvanized (HDG) or, for the ultimate protection, stainless steel. Anything less, like electro-galvanized nails, just won't last. Our selection of Decorex Hardware fasteners includes properly coated options designed for exactly this situation.
How Do I Know What Nail Size My Hanger Needs?
The joist hanger manufacturer makes this part easy. You don't have to guess. The exact nail size you need, like 10d x 1-1/2", will be stamped right on the hanger, printed on the box, or listed in the technical data sheet on the manufacturer's website.
Following those instructions is the only way to be certain you’re achieving the hanger's engineered load values and staying compliant with local building codes. It’s a simple step that guarantees you're building it right.
For a complete selection of code-compliant joist hanger nails and other essential hardware, visit XTREME EDEALS INC. We have the professional-grade fasteners you need to build with confidence. Find everything for your project at https://www.xtremeedeals.ca.