
You're standing at the house wall with a ledger board in your hands, and that's the moment the whole deck gets serious. The framing may look straight, the layout may be square, but the connection between deck and wall is where water tries to win. Get deck flashing installation right here, and the deck ages well. Get it wrong, and the first sign is often stained sheathing, swollen trim, or rot where you can't see it.
That's why flashing isn't a decorative trim piece. It's part of the wall-to-deck water management system, and California builders treat it that way because the state's code-driven practice expects flashing to work with the ledger, the WRB, and the fastening system as one assembly. If you want a plain-English reference on the broader role of flashing in construction, Arizona Roofers' guide to flashing is a useful companion read, but the lesson is simple, water always follows the easiest path, so every overlap, fold, and seam has to force it outward.
If the deck is part of a larger build, keep your details organised and your support hardware close at hand with deck support resources. The best time to think about water is before the ledger goes up, because once the board is fastened, every mistake becomes harder and more expensive to fix.
The Most Important Connection Your Deck Will Ever Make
A ledger board can look solid and still be a weak link. The deck may feel rigid underfoot, but the ultimate test is whether the house wall can stay dry where the deck meets it, and that's where failures usually begin. California practice has moved steadily toward code-based flashing details because ledger problems don't stay small, they spread into the rim joist, the wall assembly, and the structure behind the finish.
That's the part most DIYers underestimate. They see flashing as a bent strip of metal and forget that it's there to create a controlled path for water, not just cover a seam. Fine Homebuilding's deck-flashing guidance shows the modern approach clearly, cut back siding and WRB, slide in the flashing behind the ledger, then reinstall the assembly so water gets routed outward instead of trapped behind the wall finish. You can also see the same thinking in the broader building trade, where layered protection matters more than any single piece.
Practical rule: if the ledger attachment and the flashing are treated as separate jobs, water usually finds the gap between them.
That's why a deck can look finished and still be failing. The fasteners may be tight, the boards may be level, and the surface may pass a casual glance, but the hidden joint is where the damage starts. In my experience, the crews that save the most repair time are the ones who treat the ledger connection like a wall penetration that must shed water cleanly, not like a cosmetic band line.
Choosing Your Armour Flashing Materials and Essential Gear
The material choice should match the transition you're trying to protect, not just whatever sits in the truck. Rigid metal flashing works well where you need a durable top cap at the ledger, while self-adhered membrane is better for sealing seams, corners, and penetrations that need a tighter wrap. For complex transitions, liquid-applied products can help conform to awkward shapes, but they still need sound prep and sensible sequencing.
Fine Homebuilding specifies a minimum 7-inch-wide upper leg for deck-ledger flashing, and it also says the wall sheathing area should be exposed by removing siding at least 8 inches above the ledger location, 2 inches below, and 3 inches from each end. That matters because flashing needs room to lap correctly, and there's no substitute for enough exposed surface to work on. In California, where conditions can swing from coastal moisture to mountain freeze-thaw, the assembly has to move water consistently, not just look tidy on install day. Fine Homebuilding's deck-ledger flashing detail is worth studying if you want the dimensions in one place.
For fasteners, don't skimp. The ledger is structural, so the screws or lag bolts need to be appropriate for the load path, and the flashing itself needs compatible metals so you don't build in corrosion. If you're sourcing reliable hardware for the fastening side of the job, stainless steel fasteners are the kind of detail that pays off later when the deck is still tight and the wall is still dry.
What I'd have on site before touching the wall
- Tape measure and chalk line, for clean layout and spacing.
- Level and straightedge, so the ledger line doesn't drift.
- Utility knife and snips, for membranes and metal cuts.
- Caulk gun, for sealant at the few transitions that need it.
- Drill, driver, and approved structural screws or lag bolts, because the ledger can't be treated like trim.
- Safety gear, including gloves and eye protection, since sharp metal and old siding are a bad mix.
Use the flashing system that fits the transition, not the one that's easiest to install. Easy today can mean wet tomorrow.
Preparing the Wall for a Watertight Seal
The wall prep decides whether the rest of the job has a chance. Cut too little siding back and the flashing can't lap properly. Cut too much in the wrong place and you create a sloppy opening that's harder to seal cleanly. The goal is a controlled clearance zone where the ledger, flashing, and WRB all overlap in the right order.
Trex's installation method uses a three-line layout on the wall, tacks the flashing in place, covers the top edge with 3 inches of WRB, and overlaps flashing seams by 3 inches when the ledger runs longer than one piece. That sequence matters because water doesn't care how neat the framing looks, it only cares whether the layers force it out and down. If you want a practical visual companion for the transition details at the wall, joist tape for deck is the sort of accessory that helps protect exposed surfaces where moisture tends to linger.
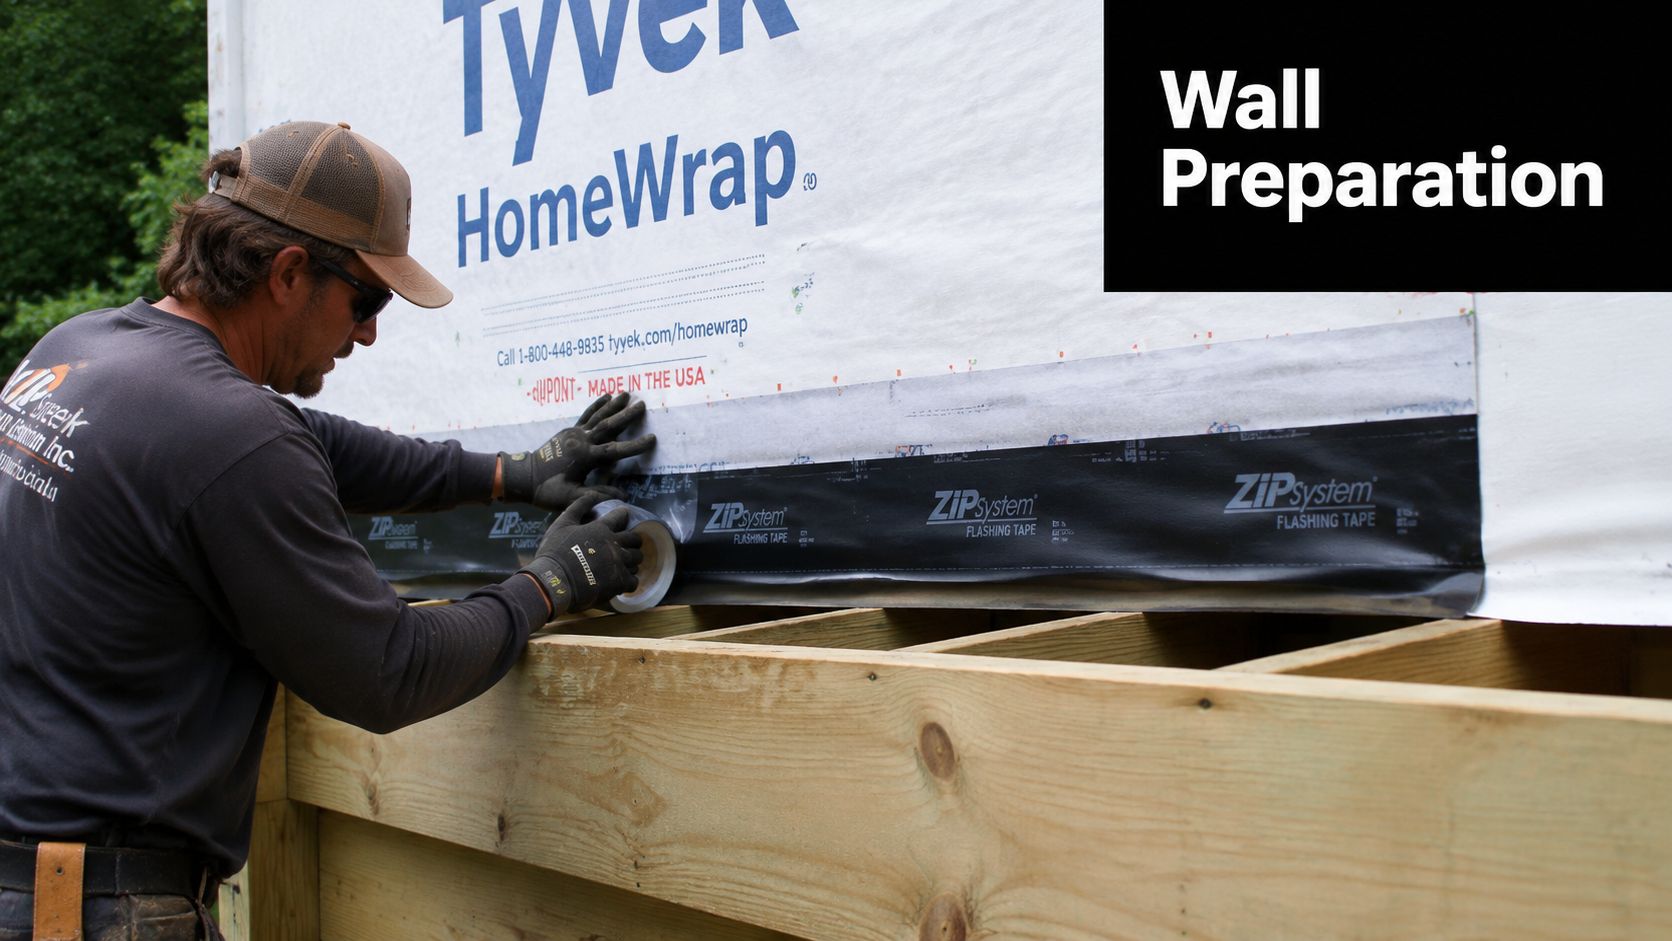
Mark the wall before you cut anything
Snap the ledger line first, then establish the clearance above and below it. That gives you a clean reference when the siding type changes, whether you're dealing with vinyl, wood, or fibre cement. The point isn't just neatness, it's making sure the flashing can tuck behind the wall finish without fighting a crooked cut or a trapped edge.
Handle the WRB like part of the system
The weather-resistant barrier isn't an extra layer you ignore, it's part of the water path. Cut it back carefully, then fold it so the new flashing can lap in the correct direction. If the WRB ends up trapped, wrinkled, or cut short, water has more chances to sit where it shouldn't, and that's exactly what you're trying to avoid.
The Core Installation Attaching Ledger and Flashing
The ledger and flashing need to go up in the right sequence, and once you understand the order, the logic is straightforward. Bottom flashing goes first, ledger attachment follows, and the upper flashing then caps the assembly so water can't run behind the board. That's the difference between a deck that sheds water and a deck that feeds it into the wall.
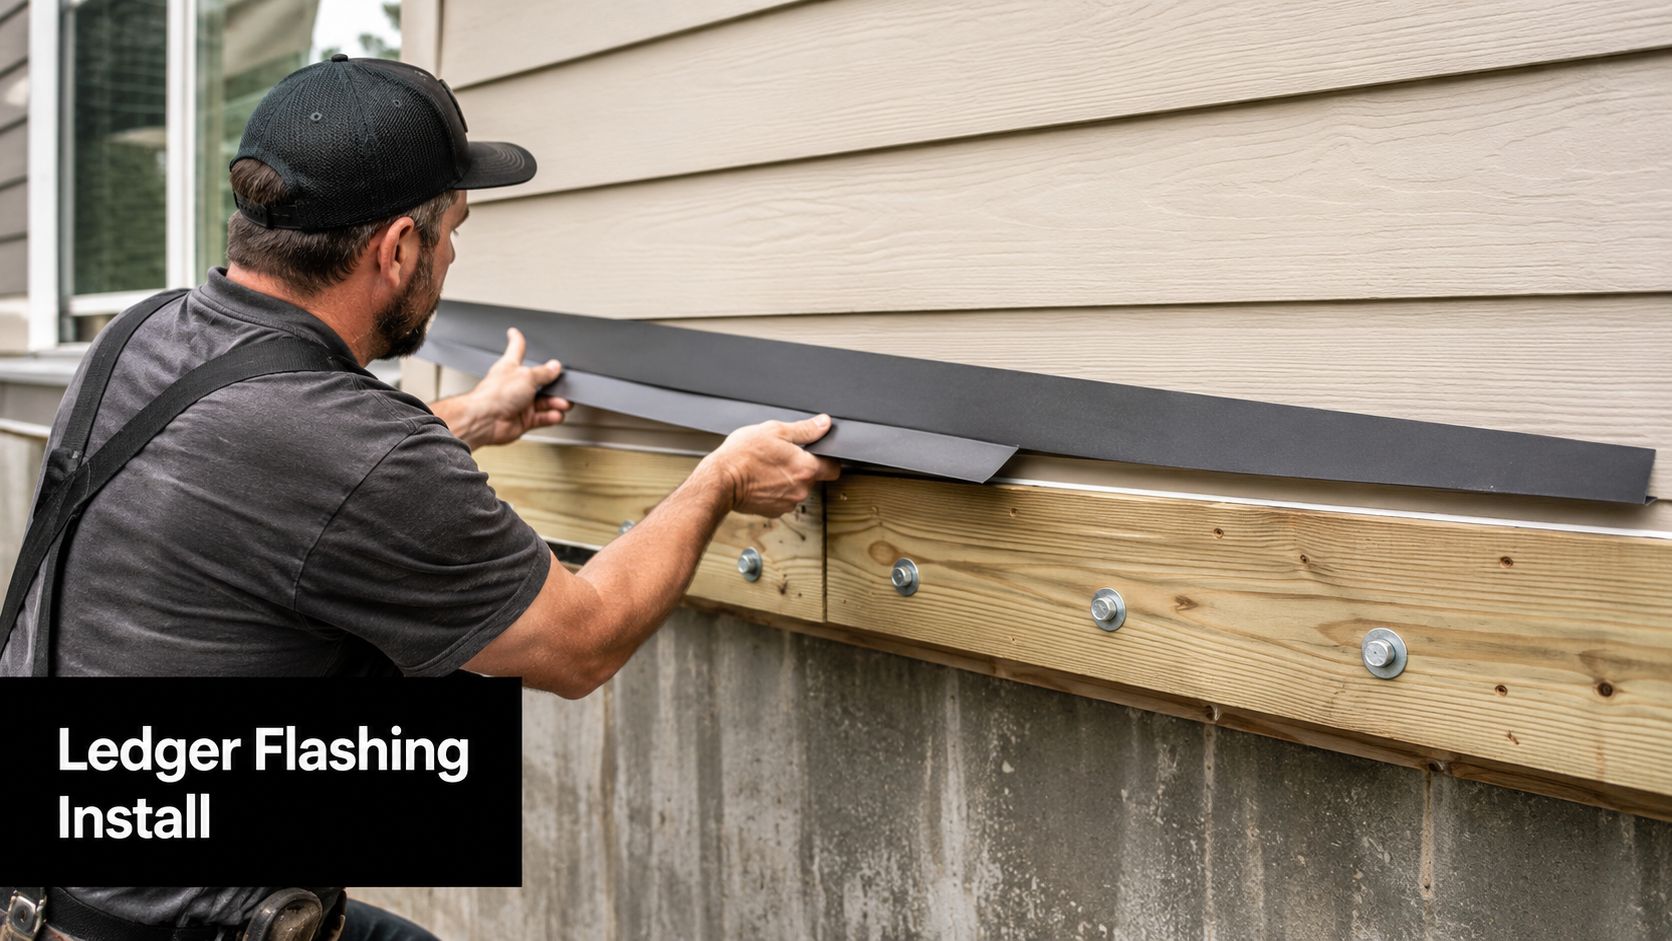
Trex's guide lays out the wall, tacks the flashing in place, covers the top edge with 3 inches of WRB, and overlaps seams by 3 inches where the ledger needs more than one piece. Decks.com pushes overlap further, recommending at least 4-inch overlaps. Those numbers matter because the seam is where water usually wins, and a short overlap can turn a good install into a leak path. Decks.com's ledger flashing guidance is a good place to compare seam handling and fastening order.
After the bottom piece is in, set the ledger with approved structural screws or lag bolts, and don't treat the flashing like a spacer or a place to drive random fasteners through. Fine Homebuilding notes that ledger reattachment should use new lag bolts or structural screws spaced according to DCA 6 or the IRC, which shows the flashing and fastening details are part of one structural plan, not two separate tasks. That's also why I like keeping a builder's eye on the roof-style water logic that shows up in other trim work, and this expert drip edge flashing guide reinforces the same principle, continuous laps and clear drainage beats improvisation every time.
Halfway through the setting process, check that the top edge is still protected and that no fastener heads are fighting the flashing. If the wall gets crowded, stop and fix the sequence rather than burying a compromise under trim. The cleanest jobs are boring to watch because every layer ends up where it belongs.
Once the ledger is secure, cap it with the top flashing and any compatible tape required at the transition. The job isn't to seal every inch with caulk, it's to give water a gravity-assisted route back out. The fewer places you force sealant to act as the primary defence, the longer the assembly usually lasts.
Avoiding Costly Leaks Common Mistakes and Pro Fixes
Most flashing failures don't come from a missing part, they come from a bad transition. Corners, doors, siding joints, and interruptions in the wall plane are where installers lose the battle because the path stops being simple. The work looks fine in the open middle of a wall, then falls apart where the geometry gets awkward.
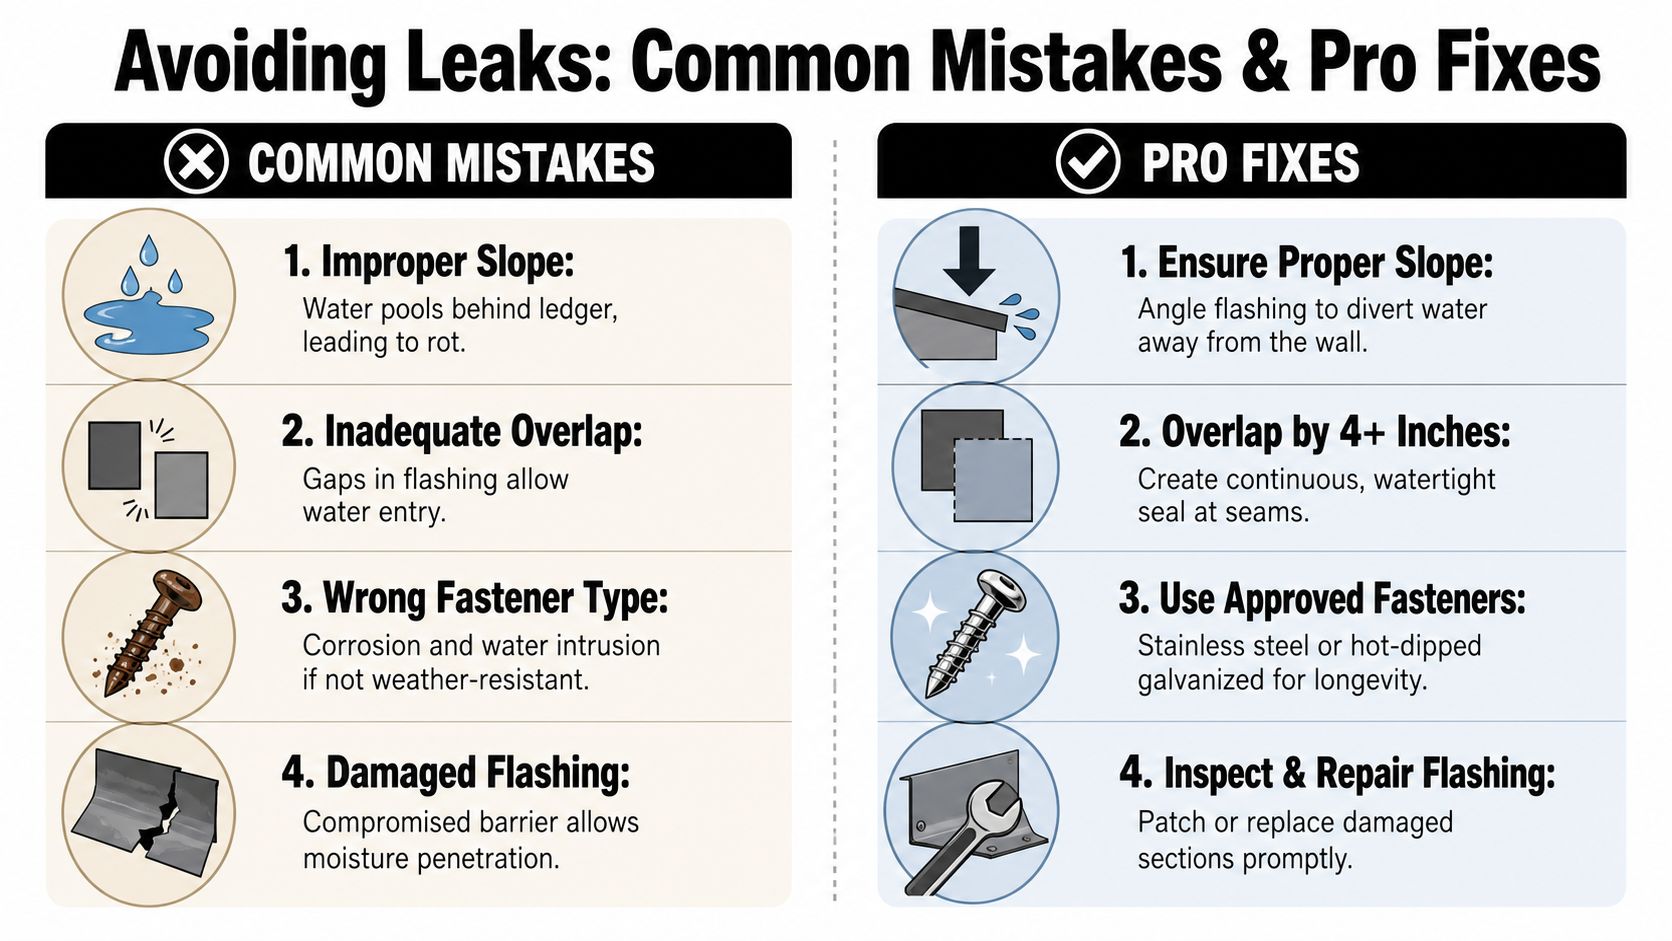
The mistakes that cause the headaches
Fastener placement is one of the fastest ways to ruin a good flashing run. Guidance from deck-flashing installers warns not to drive nails through the flashing, not to over-tighten slotted fasteners, and to seal non-overlapping joints with gutter caulk or silicone. If you pierce the water-control layer in the wrong place, you've created a leak point that no amount of tidy trim will hide.
Another common mistake is trusting caulk to do a job that belongs to overlap and slope. Caulk has a place, but it's a helper, not the foundation of the system. Recent instructional material also shows installers still adding silicone or tape at joints, under doors, and where flashing meets other trim because those are leak-prone transition points, which highlights that the essential task is managing risk at details, not pretending sealant fixes a flawed layout. Construction How's deck flashing install notes are blunt on that point.
What a pro does instead
A pro looks at every break in the wall and asks the same question, where will the water go if this seam gets wet? If the answer isn't “back out and down,” the detail needs another lap, another fold, or a better transition piece. That's especially true at door thresholds and trim changes, where the wall assembly stops behaving like a simple flat plane.
Sealant helps at transition points, but it can't rescue a flashing layout that sends water the wrong way.
For difficult siding profiles, don't force a universal detail. Build the path with the materials that belong there, then use sealant only where the design needs it. That mindset keeps the flashing system honest, and honesty is what keeps the wall dry.
Beyond the Build Inspections and Long-Term Maintenance
The deck isn't finished when the last screw goes in. The real test begins with inspection, because the details that look fine from five feet away can still fail once someone checks the ledger edges, overlaps, and exposed fasteners. If you're ever unsure how a finished assembly should be reviewed, a certified roof inspection mindset is useful here, because good inspectors look for water paths, not just neat workmanship.
California-specific attention matters because flashing problems are often discovered only after water has already moved into the wall. That's why the practical question isn't just whether flashing exists, but whether the transitions are still doing their job after weather, movement, and seasonal changes. The same caution shows up in recent instructional material that notes installers still add silicone or tape at joints, under doors, and where flashing meets trim, since those are the spots most likely to need a second look.
Keep maintenance simple. Clear debris from ledger lines, check for cracked sealant at the few places it's used, and look for lifted edges after storms or freeze-thaw cycles. If you see a damaged section, repair it promptly instead of waiting for staining inside the wall or rot at the rim joist.
The smartest deck owners treat flashing like a serviceable component, not a one-time event. Spend the time to install it cleanly, then check it before problems spread, and the deck will keep protecting the house instead of threatening it.
If you're planning a new build or fixing a ledger detail that never looked quite right, get the flashing, fasteners, and support pieces together before you start. A careful pass through the transition points now will save you from tearing into the wall later, and for practical hardware and deck accessories, visit XTREME EDEALS INC..