
Yes, you can usually attach a fence to an existing fence, but only when the existing post is sound and the fence sits on land where you have the right to build. Start with the deciding test: if the post moves when you push it, don't attach the new section to it.
You might be closing a gap beside the garage, extending a backyard run or adding privacy beside a patio. Using the fence that's already there looks cheaper than digging another hole, but the saving disappears if the connection pulls an old post loose. The post, its footing and the property line matter more than the bracket you buy.
When Attaching to an Existing Fence Works
Can you attach a new section? Verdict by fence situation
| Situation | Attach directly? | Why | Do this |
|---|---|---|---|
| Sound post and footing, same height and material | Usually yes | Post carries the added load | Fasten with structural screws or through-bolts into the post |
| Rotted, leaning or cracked post | No | Old post cannot take the lateral load | Set an independent new post and footing at the junction |
| Taller or solid privacy panel | Check first | Raises wind area and overturning load | Size the posts for the taller section |
| Different material, such as wood to metal | Yes, with a transition | Limits racking at the joint | Use a transition post |
| Fence on or along the shared boundary | Only with written consent | Neighbour may share cost and notice obligations | Verify the line and get agreement in writing |
| Fence meets the house in a fire-prone area | Check local fire rules | Combustible links near structures are restricted | Use noncombustible material at the connection |
A new fence section acts like a lever pushing against the junction post. The post must resist that push and transfer it into the ground through its footing. Adding stronger screws won't strengthen decayed wood or an undersized foundation.
A sound junction with matching materials is the simplest arrangement, but matching appearance isn't proof of capacity. San Diego's standard fence criteria illustrate why soil, wind exposure, post support and foundation details belong in the decision, rather than treating attachment as a hardware-only job.
Where the simple answer stops
A solid privacy panel catches more wind than an open fence. Even a lightweight covering can change the load significantly, so don't judge suitability by how easily you can lift the panel.
A transition post gives dissimilar materials or changing fence directions a deliberate junction. It also lets you choose connections suited to each material instead of improvising a joint through thin boards.
Boundary fences and house connections require separate permission and fire-safety checks. A structurally workable connection can still be the wrong project to build.
Practical rule: A push test can reject a bad post. It cannot prove that an otherwise sound post is designed for a taller, heavier or more wind-exposed extension.
If the post moves when you push it, stop planning an attachment and plan an independent post instead. That extra excavation is generally a better use of money than brackets attached to a support you already know is unreliable.
How to Test the Existing Post Before You Attach
Take a screwdriver, tape measure, level and a clear view of the post base. Don't test an obviously unstable fence by pulling it towards yourself, and don't assume a neatly painted surface means the timber underneath is sound.
The inspection follows the load path from the proposed connection down to the ground.
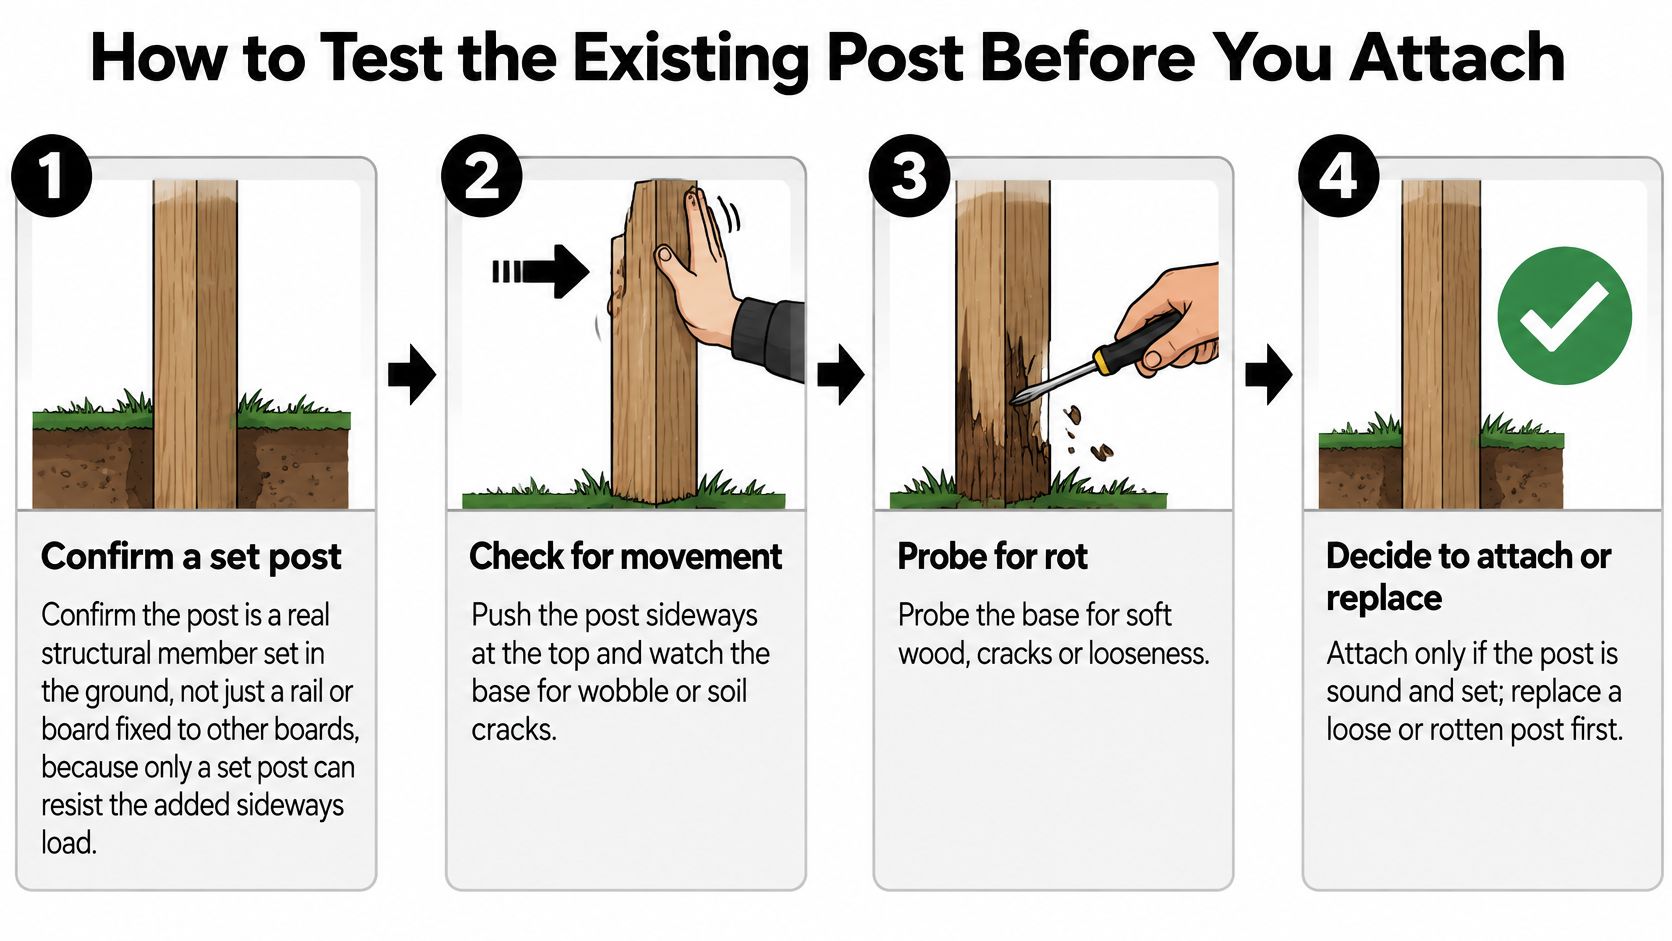
Confirm you've found a structural post. Trace the member down to where it enters the ground or meets its designed base connection. A vertical trim board screwed across rails isn't a substitute, and mistaking it for a post leaves the new section hanging from cladding.
Push the post and watch its base. Apply controlled sideways pressure near the top, then check lower down for looseness at the ground or footing. Movement can indicate decay, loose soil or a failed connection, so don't dismiss it just because the neighbouring rails hold the fence roughly upright.
Probe the wood at ground level. Press a screwdriver into suspicious areas and compare them with sound timber higher up; soft, crumbling wood is a rejection sign, while dark colour alone isn't conclusive. The common slip is checking only the dry, visible face and missing deterioration behind soil, mulch or a decorative sleeve.
Inspect the footing and surrounding ground. Look for heaving, significant cracks, separation around the post and soil gaps that open when it moves. Don't cover these symptoms with fresh concrete and assume the support has been repaired.
Measure the actual connection. Record post width, board or rail thickness, available fastening faces and the proposed panel dimensions. Nominal lumber descriptions and a screw's overall length don't tell you how much sound wood the fastener will engage after passing through the attached member.
Make the attachment decision. Proceed only when the inspection passes and the post's capacity suits the proposed section; otherwise, install an independent support. A change in height or material deserves a transition detail, not a convenient bracket that happens to fit.
What a healthy post looks like
- Upright: No unexplained lean or distortion at the junction.
- Stable: No rocking at the base under controlled pressure.
- Sound: Firm timber at ground level, without soft pockets.
- Supported: An intact footing or suitable designed base connection.
The most misleading result is a rigid top rail over a rotten post base. For a replacement timber post, use these fence-post rot prevention practices to address drainage and ground-level exposure rather than rebuilding the same weak detail.
Property Line Rules, Consent and Local Height Limits
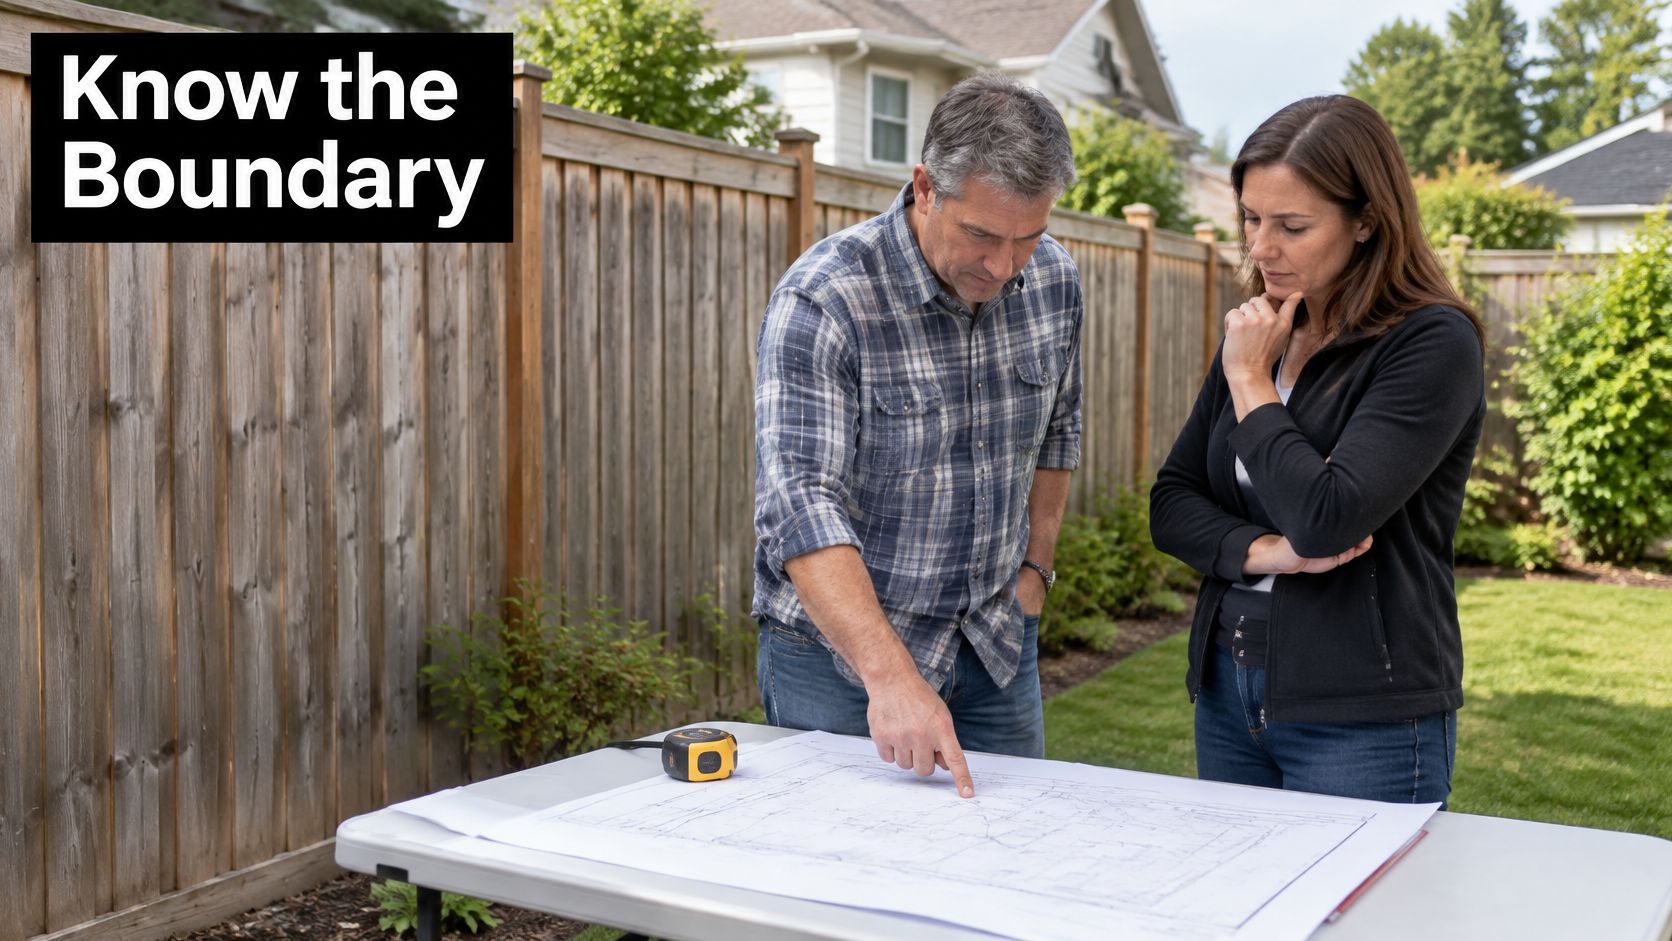
Where is the legal boundary? Check your survey and title documents before assuming the existing fence marks it. The local planning office can explain municipal requirements, but a disputed boundary may require a surveyor rather than an interpretation of where the lawn ends.
The Ontario government's Line Fences Act guidance distinguishes boundary line fences from fences entirely on one owner's land. It also explains that municipalities and fence-viewers don't settle the underlying location of a property boundary.
Lay out the proposed junction against the property documents before choosing its position.
Put permission and scope in writing
For a shared fence, obtain written agreement before adding rails, panels or loads. Take dated photographs of both accessible faces and record existing lean, splits and damage so the new work doesn't become an argument about an old defect.
The agreement should identify the work, access arrangements, finishes, maintenance responsibilities and any agreed cost split. Permission to attach a panel isn't automatically an agreement to pay for it.
Follow this order:
- Locate the line: Establish where construction can lawfully sit.
- Confirm the fence arrangement: Identify ownership and existing maintenance agreements.
- Check municipal rules: Confirm height, setback, visibility and permit requirements.
- Record the agreement: Settle the scope and financial responsibilities before construction.
Under section 3, the Ontario Line Fences Act requires a fence-viewer award to conform to an applicable municipal by-law prescribing fence height or description. A taller privacy screen therefore needs a local check, not an assumption that provincial legislation authorizes it. Use our fence height requirements guide to prepare the questions for your municipality.
Pool fences need a continuous-barrier check
The Ontario Building Code provisions for public pools require lockable doors or other barriers capable of preventing public access to the pool deck. Don't apply that public-pool provision as a universal residential specification; confirm the municipal pool-enclosure by-law and the property's applicable requirements.
Inspect the finished enclosure as a whole. A gap at the junction, climbable rail, loose gate or misaligned latch can compromise it, even if each fence run looks acceptable separately.
Where practical, give the extension its own posts on an approved alignment rather than borrowing support from a neighbour's aging panels.
Connection Methods That Hold Up Over Time
Connection methods at the junction
| Method | Best for | Main check |
|---|---|---|
| Exterior structural screws into the post | Light added panels on a sound post | Screw length reaches past the board into the post |
| Through-bolts | Heavier or solid sections on a sound post | Bolt size matches the post and holes are drilled through the post |
| Transition post | Change of height, material or direction | Post sits in its own footing and is not attached only to boards |
| Independent new post and footing | Existing post rotted, leaning or cracked | New footing is set and the old post is not used to carry load |
Screwing into fence boards is the classic weak connection. Face boards can split or pull away from their rails, leaving the new section unsupported even though the screws remain embedded in wood. Connect the new rail or its rated bracket to the structural post.
Exterior structural screws suit straightforward timber connections when their published application and load rating match the job. Ordinary decking screws aren't automatically interchangeable with structural screws because both are sold for outdoor use.
Bolts, brackets and separate supports
Through-bolts provide a connection through the post, with suitable washers distributing pressure beneath the head and nut. They require access to both sides, and tightening them excessively can crush timber rather than improve the joint.
A bolt also doesn't approve the panel's wind load. A solid section may still require a larger post, a different footing or a designed connection despite having substantial hardware.
For timber rails meeting steel posts, choose a bracket made for the post profile and rail arrangement. Our guide to fence brackets for metal posts helps distinguish a purpose-made connection from a flat strap forced around the wrong shape.
More metal at the joint won't compensate for less sound wood behind it.
Use corrosion-resistant exterior hardware compatible with the treated lumber and other metals in the assembly. Keep holes back from post edges, follow the fastener manufacturer's spacing instructions and drill appropriate pilot holes where specified.
Poor hole placement, not pre-drilling itself, causes avoidable splitting. Driving a large fastener near the end without a suitable pilot hole is another common mistake.
Choose screws for an appropriately rated light connection, bolts where the connection design calls for them, and a separate post where the support or geometry demands it. Compare the complete cost, including access, excavation, concrete and possible fence repairs, rather than choosing by the price of a packet of screws.
Three Common Extensions Worked Through
The same desire for more privacy can produce very different junction details. These hypothetical jobs show why the inspection and property checks decide what gets built.
Plan the connection before bringing the new panel into position.
A modest panel on the owner's land
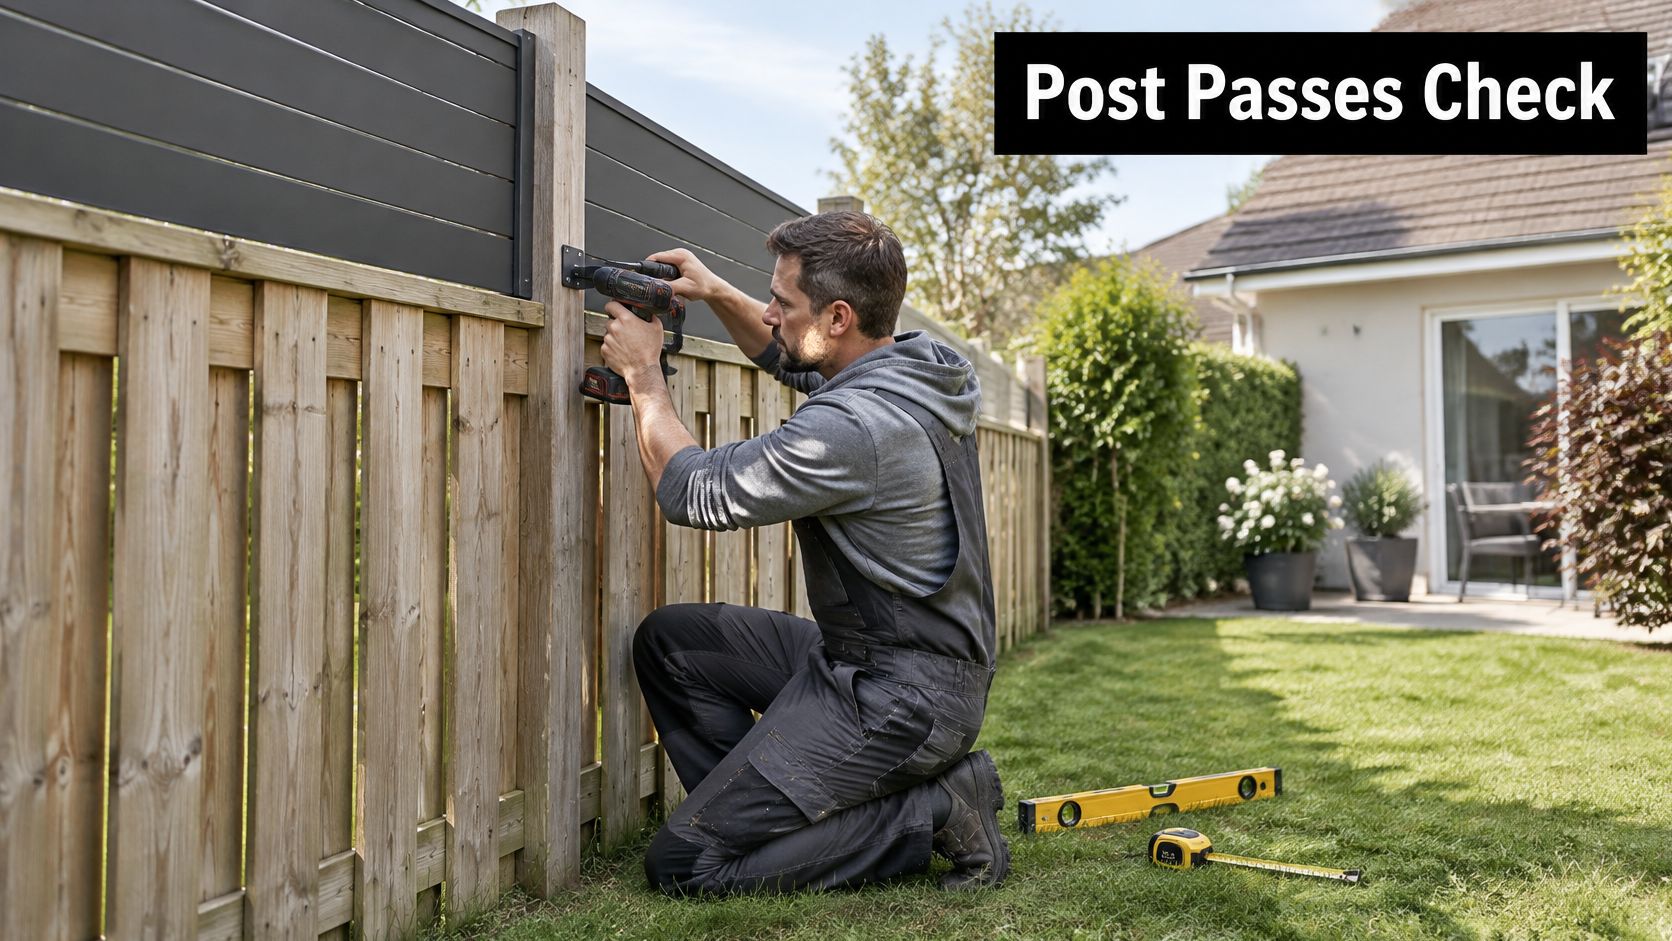
Say a homeowner wants a 1.2-metre privacy panel beside a straight fence entirely on their property. The junction post passes inspection, the local rules allow the work and the proposed panel fits the verified support capacity.
The decision is to connect the panel framing with rated exterior structural screws into the post. The homeowner sizes the addition to the available support rather than buying a larger panel and hoping extra screws will make it suitable.
A shared corner with rot
Another homeowner wants a new run to meet a shared fence, but the corner post is soft at ground level. The decision is an independent post and footing, with photographs taken before excavation and any shared repair costs agreed separately.
Ontario's Line Fences Act regulation on cost disputes describes a formal process involving three fence-viewers when owners cannot agree on cost apportionment. That process isn't a reason to assume the neighbour owes for an optional extension.
For an additional installation reference, watch the fence-work demonstration below.
Wood meeting metal near the house
Consider a California property where a proposed wooden section meets metal fencing beside the back door in a wildfire-prone area. The decision is a transition post with noncombustible material at the house connection, subject to the applicable local requirements.
CAL FIRE's defensible-space guidance distinguishes new combustible fences or gates within five feet of a structure from existing fencing and permitted repair work. Confirm the current local adoption and enforcement schedule before purchasing materials; don't treat an existing wooden fence as permission to extend combustible material continuously to the house.
Buy Fasteners Sized to the Confirmed Post
Buy hardware after confirming the post, alignment and connection method. Measure the actual post and attached rail thickness, then select a fastener with suitable engagement, exterior protection and a published rating for the intended connection.
For a light panel, choose rated structural screws rather than assuming any long screw will work. For a heavier assembly, use the specified lag bolts or through-bolts, with compatible washers and correctly placed holes. A lag bolt uses a pilot hole; a through-bolt passes through the post.
Make the order match the drawing
Write the connection method, fastener specification and quantity on your plan. Include brackets, washers and nuts where required, and allow access for drilling and tightening before deciding which side receives the hardware.
At XTREME EDEALS INC., our fastener selection includes deck screws, construction screws, lag bolts and anchors. We serve deck builders, fence installers, contractors, lumber yards and homeowners doing the work themselves.
If the old support failed, purchase for the independent-post design rather than buying longer fasteners for deteriorated timber. An anchor or post base must suit the actual supporting surface and fence loads.
Check dimensions before altering anything. Installed, cut, painted or modified items cannot be returned, so settle shared-fence consent and verify your hardware schedule before ordering.
XTREME EDEALS INC. offers fencing accessories, brackets, fasteners and anchors for planned fence junctions and independent supports. Visit XTREME EDEALS INC. with your post measurements and connection list to select the hardware for your confirmed design.