
You're standing on a finished deck frame with a tape in one hand and a cart open on your phone. The balusters look right, the colour matches, and the price seems fair. Then you check the gap between two posts and realise you don't know whether you need 18, 20, or 24 pieces for that run, or whether the spacing will pass inspection once they're installed. That count isn't a guess. It's set by the clear opening after installation, and that's where you should start.
What Aluminum Balusters Are and How They Compare
A homeowner picks a railing in a showroom because the black finish looks sharp against cedar decking. At home, the first run goes up and the gaps look wider than they did on the display. They are, because the display used shorter bays between posts. Looks don't set spacing. Guard rules do.
Aluminum balusters for deck railings are the vertical members that fill the space between the top rail and bottom rail. Most are 3/4 in (19 mm) or 1 in (25 mm) square or round extruded aluminum, usually hollow, with a powder-coated or anodized finish. Think of them as the teeth of a comb. They let light and air through while stopping a fall or a small child from slipping through.
Where Aluminum Earns Its Price
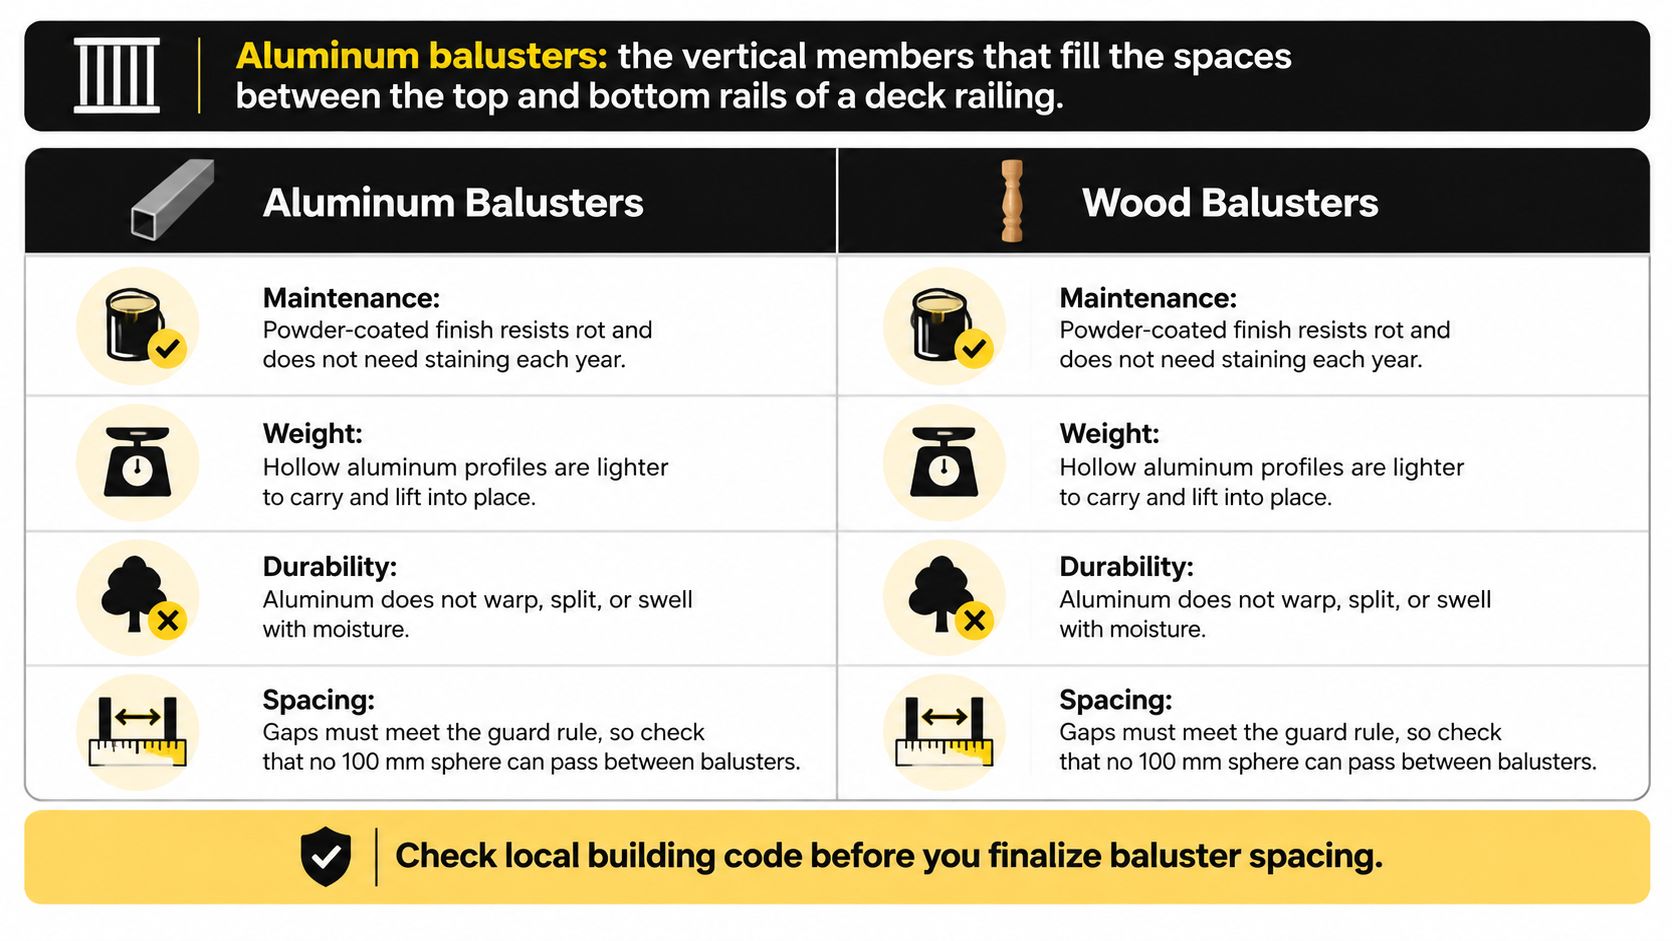
- No rot or rust: Aluminum won't rot, splinter, or warp the way wood can.
- Light to handle: Hollow profiles are easy to carry up stairs and hold in place alone.
- Slim sightlines: Narrow members block less of the view than chunky wood spindles.
- Low upkeep: You rinse and inspect rather than sand and stain.
Where It Falls Short
- Higher first cost: You'll pay more upfront than for pressure-treated wood.
- Dents on impact: A hard hit from furniture or a dropped tool can mark a hollow profile.
- Finish quality varies: Cheap coats fade and chalk sooner, especially in strong sun.
- Contact with treated lumber: Bare aluminum against treated wood needs isolation to prevent corrosion.
| Material | Upfront cost | Upkeep | Best fit |
|---|---|---|---|
| Aluminum | Mid to high | Low, rinse and inspect yearly | Modern decks wanting low upkeep |
| Pressure-treated wood | Low | High, stain or seal regularly and replace split pieces | Tight budgets and traditional looks |
| Vinyl (PVC) | Mid | Low, wash; can yellow in strong sun | Simple, wipe-clean rails with wider posts |
| Steel | Mid | Medium, touch up cut edges and chips | Long spans and strength-critical designs |
| Cable | High | Medium, check tension and fittings | Open views where balusters block the view |
| Glass | High | Low to medium, clean regularly | Views and wind protection on premium decks |
I would choose aluminum where upkeep over 15 years matters more than the first invoice. If the budget alone decides, pressure-treated wood still wins, and there's no honest way around that.
Styles and Finishes That Change the Look
Pick the profile before you lay out spacing. A wider baluster changes both the look and the centre-to-centre math, so swapping profiles after you've counted pieces means recounting every run.
Three Profile Families
Plain square or rectangular profiles suit a modern deck. The flat faces catch light evenly and pair well with straight top rails and minimalist post caps. They're also the easiest to keep aligned, because a square seated in a square socket doesn't rotate.
Round profiles suit a traditional or coastal look. They soften the railing line and read lighter from a distance. From the street, a round baluster run looks less like a fence and more like a classic porch rail, which suits older houses.
Decorative or ornamental profiles use scrolls, twists, baskets, or a wood-look texture for a heritage home. They cost more and collect more dust, but they keep a newer deck from clashing with older trim work.
If you're weighing glass instead for a balcony section, it's worth seeing how framed glass systems handle the same sightline problem when you find balcony glazing in Harrogate through Glass Tech. The comparison helps you decide whether you want members you see through or panels you clean.
Finishes and Colour Behaviour
Powder coat in black, bronze, white, and sandstone tones is the most common and most durable choice. It's baked on, so it resists chips better than paint. A black aluminum deck railing layout shows why black dominates. It recedes against most decking and makes the view beyond the rail stand out.
Anodized finishes look metallic and thinner. They suit contemporary houses but show scratches differently, since the colour sits in a thin oxide layer rather than a thick coat. Textured wood-look coats try to bridge both worlds, though up close they rarely fool anyone.
Dark colours run hotter in full sun. That's worth knowing if kids lean on the top rail in July. Lower-grade coats also chalk sooner in coastal air, leaving a white residue on your hand.
Match the baluster finish to the rail, post caps, and any gate hardware so the railing reads as one system. Buyers comparing profiles, post caps, and finials can browse aluminum balusters at XTREME EDEALS (xtremeedeals.ca), where the catalogue lists balusters beside matching post caps and finials.
Order one sample baluster in your chosen finish first. Check it against your deck colour in daylight, not under store lighting, before you commit to the full run.
Spacing, Height and Code Limits That Set Your Layout
The guard height and opening limit set the layout before you order. A baluster's catalogue spacing does not tell you whether the finished railing meets code. The clear opening between installed members does, so confirm local requirements first. A wrong guard height is difficult to correct by changing balusters alone.
California examples show how much local rules can vary. The San Bruno 2025 residential deck requirements require a guardrail on decks over 30 inches above grade, set its height at 42 inches, and limit openings so a 4-inch sphere cannot pass through. Santa Cruz County deck construction guidance also specifies a minimum guard height of 42 inches, measured from the walking surface or stair-tread line to the top of the guard. Canadian rules differ. Use the deck railing height code overview as a starting point, then confirm the requirement with your local building department.
| Item | Why it matters |
|---|---|
| Guard trigger, more than 600 mm (24 in) above grade in many Canadian residential cases, 30 inches in the California examples | Sets when balusters must be part of a guard |
| Guard height, Canadian residential, commonly 900 mm (36 in) under National Building Code Part 9 | Measured from the walking surface to the top rail |
| Guard height, US jurisdictions, varies: 36 in is common under model residential codes, while 42 in is required in some places, including the California examples above | Confirm the local height before buying |
| Maximum clear opening, 100 mm (4 in) sphere must not pass | Sets the spacing limit, regardless of appearance |
| 3/4 in (19 mm) square baluster, centre spacing near 119 mm at the limit | Sets the number of bays in each run |
| Design margin, about 116 mm centres | Allows for installation drift and rounding |
| Post spacing, confirmed against manufacturer tested span | Longer spans can deflect more under load; check the tested span |
The Calculation That Sets Your Count
Start with the permitted clear opening, then account for the baluster's width. With a 100 mm opening limit and a 19 mm square baluster, centre-to-centre spacing cannot exceed about 119 mm. Set the layout closer to 116 mm to leave room for sockets, post faces, and small installation errors.
For an 8 ft (2440 mm) run between posts, divide 2440 by 116. That gives just over 21 bays, so use 21 bays and 20 balusters. The resulting centre spacing is about 116 mm, and the clear opening is about 97 mm. Check the actual opening after installation, between the finished faces of adjacent balusters.
A 1 in (25 mm) profile allows centre spacing of about 125 mm at the same clear-opening limit because the wider member fills more of each bay. That does not make wider spacing a good default. Stretching the layout leaves less tolerance for drift and can make the final gaps uneven.
Practical rule: Measure the finished clear opening after installation. That is the gap that matters, not the spacing printed on the box.
Post faces, rail sockets, and posts that are out of plumb can all change the final gap. Measure each run between its own posts, including runs around corners. This keeps the end bays consistent and prevents a last opening from ending up wider than the rest.
Structural Loads, Fire Zones and Permits
Treat the guard as a safety assembly. Under California Residential Code provisions summarized in the City of Berkeley decks, porches and stairs guidance, the top rail and its connections must resist a 200-pound concentrated load applied in any direction. Balusters and other infill must resist a 50-pound horizontal load over a 1-square-foot area. That infill requirement affects the baluster count and layout: catalogue spacing alone does not establish compliance. A strong baluster cannot make up for weak screws, undersized posts, or poor connections to the framing. Specify posts, brackets, fasteners, rails, and balusters as one compatible assembly.
Check permit requirements before changing the railing. The St. Helena deck submittal handout says construction or modification of any deck requires a building permit. Plans must include guard dimensions, openings, and applicable seismic, wind, live, and dead loads. Replacing or reconfiguring an existing deck railing usually counts as a modification, so ask the local building department what documents it requires.
Wildfire rules add a separate material check in California. The state's guidance on building in the Wildland-Urban Interface directs owners and contractors to check whether an address is in a designated hazard zone and consult the Office of the State Fire Marshal's Building Materials Listing. CAL FIRE and local wildfire rules may require ignition-resistant or noncombustible railing materials, as well as flashing at deck-to-wall junctions. Aluminum is noncombustible, but that alone does not certify the full deck assembly.
These examples are California-specific. In Canada and elsewhere, confirm the applicable load, permit, and fire requirements with the local building department before ordering.
What Aluminum Baluster Railings Cost
Price depends on what you're buying. Balusters alone for an existing frame cost far less than a complete kit, and a complete kit costs far less than a professionally installed railing with stairs and corners. Regional and brand variation in CAD per linear foot is wide, so check current listings before you lock a budget, and use a structured project cost estimation approach rather than a single guessed total.
| Cost item | Budget formula |
|---|---|
| Balusters only | Run length in linear feet × balusters-only price from current listings |
| Complete aluminum railing kit | Run length × kit price per linear foot from current listings |
| Professional installation | Run length × installer rate; higher for stairs and corners |
| Custom colour finish | Quoted premium over the standard finish |
| Respacing after a code failure | Removal labour plus replacement parts |
| Contingency | 10% of the subtotal |
What Drives the Spread
Profile size matters first. A 1 in baluster uses more metal than a 3/4 in one, and decorative profiles cost more than plain squares. Finish grade comes next, then bulk packs, which lower the per-piece price if your count is high enough to use them.
Rail and post hardware is where budgets grow without much notice. Connectors, post caps, brackets, and stainless or coated fasteners add up across a long run. Site access matters too. A second-storey deck with no yard access costs more to install than a ground-level platform you can reach from a driveway.
A custom colour match adds a premium over a standard finish. I'd only pay it when you're matching existing window trim or an existing railing section you're keeping.
The expensive mistake isn't overpaying per baluster. It's a spacing error found after installation, which can cost more than the original order because balusters must be removed, rails may need new holes or sockets, and finish damage follows.
Budget this way. Take your total run length, multiply by the kit range you've priced from current listings, add installation, then add 10% contingency on the subtotal. Mark any line you can't price yet as unknown in your spreadsheet rather than guessing a low number to make the total feel better.
Confirm Your Baluster Count Before You Order
Match the setup to your deck type first, then to your budget. The same baluster doesn't suit every situation.
- Ground-level deck: If you're under the guard trigger, you may need no guard at all, so balusters become optional for looks.
- Standard single-level raised deck: You need a full guard sized with the clear-opening calculation for each run.
- Multi-level decks and stairs: Angled rails, stair connectors, and extra post checks apply, and counts change per run.
- Coastal decks: Specify marine-grade finishes and isolate aluminum from treated framing.
- Retrofits over old framing: Get a structural check before you fix any new rail, since old framing may not carry guard loads.
If you're still shaping the deck itself, an ai deck design tool from OutdoorBrite can help you test layouts and railing runs before you measure for real. Use it for layout ideas, then verify every dimension on site.
Budget tiers break down into three clear levels. A basic tier uses 3/4 in profiles, a stock finish, and kit hardware. A mid tier moves to 1 in profiles with matching post caps. A premium tier uses custom colour or swaps some sections to glass or cable infill.
Say you have a 12 ft by 16 ft raised deck with 24 ft of guard in three 8 ft runs. Each run gives 21 bays and 20 balusters, so that's 60 balusters. Add 6 spares and you order 66 total.
Pre-Order Checklist
- Measure each run between post faces, not overall deck width.
- Apply the clear-opening target and bay count to each run separately.
- Confirm permit and fire-zone status for your address.
- Choose one finish across rail, posts, and caps.
- Order together from xtremeedeals.ca, balusters, post caps, and fasteners in one shipment, using your spare count.
How to Install Aluminum Balusters Step by Step
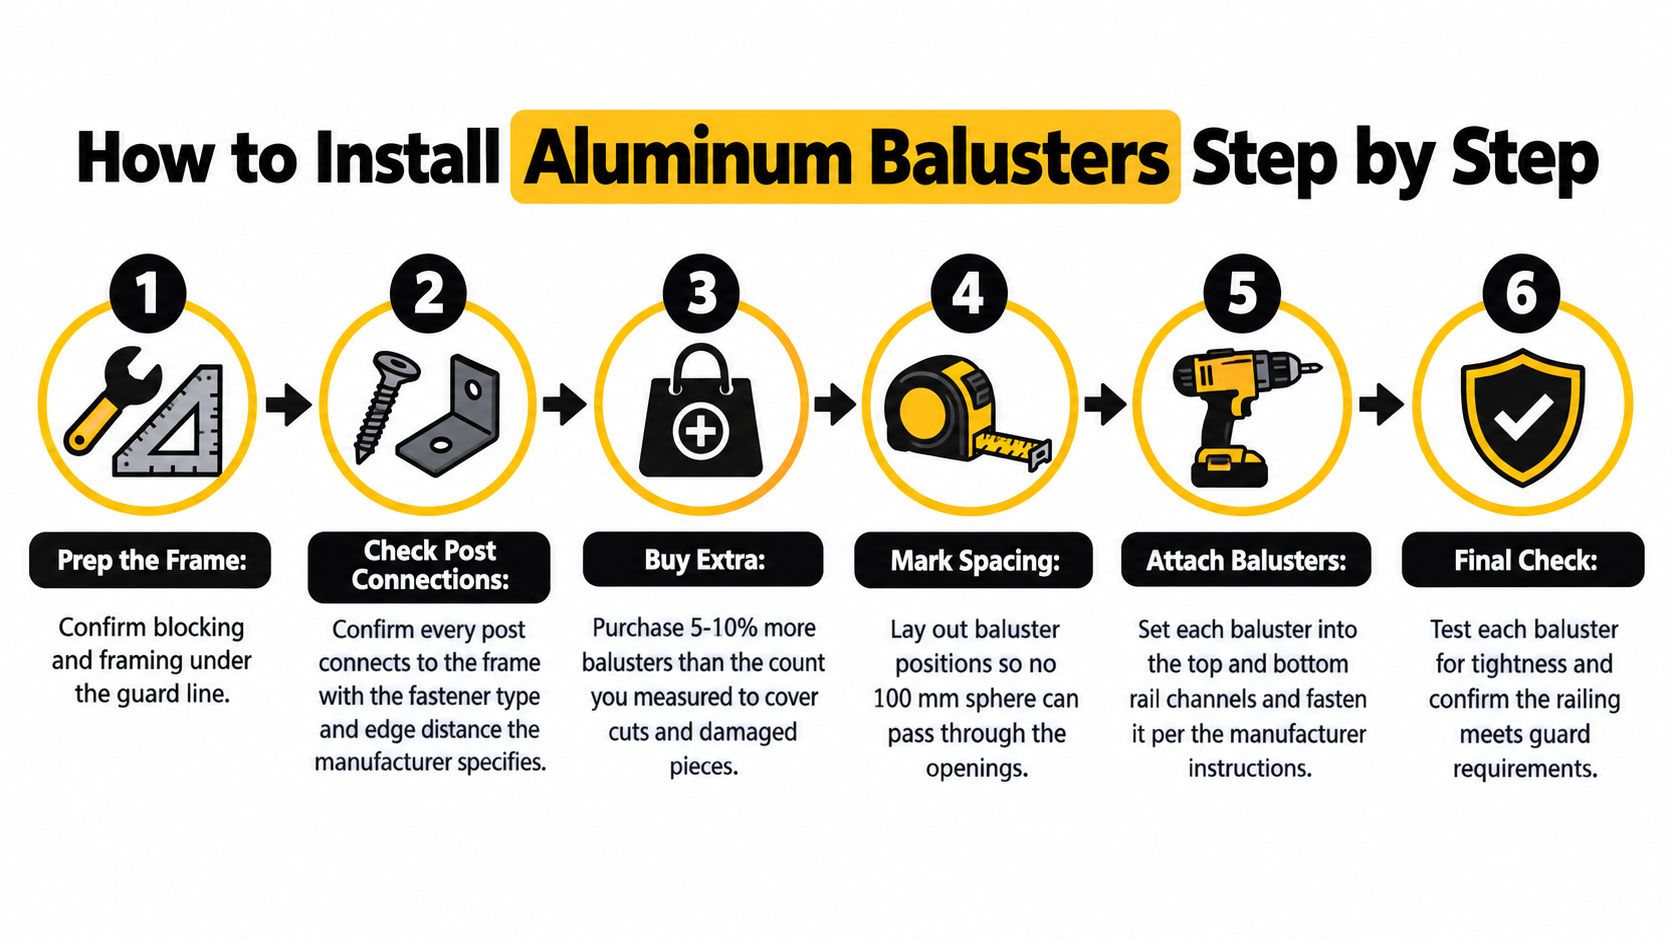
Prep decides whether installation day goes smoothly. Confirm blocking and framing under the guard line, and check that every post connects to the frame with the fastener type and edge distance the manufacturer specifies. Buy 5 to 10% extra balusters for cuts and damaged pieces. Place a rubber or tape barrier between aluminum and any pressure-treated lumber, because treated wood can corrode aluminum over time.
The sequence below shows the prep and layout stages before any baluster goes in.
Installation Steps
- Confirm limits first. Check guard height and opening limits with your building department so you're building to the right numbers.
- Set posts plumb. Brace each post, check connections to the frame, and don't rely on fascia or end grain alone.
- Mark rail lines. Snap a level chalk line for the top and bottom rails so both runs stay parallel.
- Cut rails cleanly. Use a fine-tooth blade, support the rail so it doesn't chatter, and deburr every cut end.
- Lay out with a spacer block. Cut a block to your calculated centre spacing and work from the centre of the run outward, so end bays stay even.
- Seat each baluster. Drop it into the bottom rail socket first, then into the top rail, keeping square profiles from rotating.
- Secure as specified. Tighten the supplied set screws or pre-drilled fasteners, using stainless or coated fasteners that suit the site.
- Check the finished guard. Test the clear opening with a 100 mm sphere, measure rail height, and confirm everything is plumb.
- Touch up cut edges. Apply matching paint to any exposed aluminum so corrosion doesn't start at the cut.
If you want a second walkthrough with photos before you start, a spindle installation guide for DIYers from Ultra Modern Rails covers the same seating and fastening logic in a different system. Reading two methods helps you spot which steps are universal and which belong to your kit.
The video below shows the handling and fastening pace on a real run, which is useful if you've never seated balusters into rail sockets before.
The common slip is fixing the top rail before checking the bottom socket gap. If the bottom rail sits slightly high or low, balusters get pushed out of line as you force the top rail down, and the whole run leans. Dry-fit one bay at each end first. If both seat without force, the rest will follow.
The sphere check at the end isn't paperwork. It's the moment you find out whether your layout math survived contact with real posts and rails.
Workplace rules show why assembly strength matters beyond spacing. California's Division of Occupational Safety and Health states in Title 8 section 1620 that railing systems and their anchorage must withstand at least a 200-pound force at the top rail. Your residential numbers differ, but the principle is identical. Connections carry the load, not the baluster alone.
Maintenance and Realistic Lifespan
Powder-coated aluminum can last many years with routine care. The coating usually shows wear before the metal does. Once it breaks down, exposed aluminum can oxidize, and the railing becomes harder to clean.
A Simple Care Schedule
Rinse the railing with mild soapy water in spring and fall. In coastal areas, rinse monthly to remove salt before it sits on the finish. Use a soft brush. Abrasive pads can scratch the coating and give grime a place to collect.
If you use a pressure washer, keep the tip moving and stand back. A stationary jet can drive water into hollow profiles and rail sockets, where it can remain against fasteners.
Check set screws, post fasteners, and rail sockets for looseness each year. A rattling baluster may have a loose set screw, which can often be tightened with a hex key. Inspect the bottom rail for dents from feet, chair legs, and pets, since contact damage tends to collect there.
For a chip or scratch, clean the spot, let it dry, then apply a thin coat of matching touch-up paint. Covering the exposed edge helps keep corrosion from spreading under the surrounding finish.
Warning Signs to Act On
- White chalky oxidation: The finish is breaking down, often from sun or salt exposure.
- Bubbling or flaking coat: Moisture may have reached the metal beneath the finish.
- Wobbling balusters: Check the set screws and sockets for looseness.
- Dark spots at cut ends: The exposed edges may be corroding because they were not sealed.
Regular cleaning and prompt touch-ups help preserve the finish and keep the railing easier to maintain. Leave a damaged coating exposed, and corrosion can spread beneath it. Routine care also helps aluminum balusters for deck railings keep their appearance over the years.
Ready to order after confirming your count, spacing, and finish? XTREME EDEALS INC. carries Decorex Hardware balusters, along with matching connectors, post caps, brackets, and fasteners. Check that the components suit your railing system, then order the parts you need together.