
You've got four weathered porch steps, a loose 2×4 that's doubling as a handhold, and guests coming on Saturday. The plan sounds simple. Buy a metal kit, screw it on, and stop worrying every time someone carries a tray outside. That's exactly where most failed weekend jobs start, because the carton looks complete while the stair still needs answers about height, grip, posts, and the open side.
What an Exterior Stair Railing Kit Is For
A five-riser stair has grey wood treads and a handrail that shifts when someone leans on it. An exterior railing kit may arrive with a rail, brackets, posts or mounting shoes, screws, and balusters. Those parts are a starting bundle, not a finished system for every stair.
A kit is a parts package, not code approval. Its rail may follow the stair's slope while its posts miss solid framing. Balusters can close the open side, yet the rail profile may be awkward to grip. The stair still needs parts that fit its dimensions and a secure attachment to its structure.
What the Kit Has to Decide for You
Before drilling, identify the sloped rail length, bracket locations, end treatment, and whether the parts are designed for stairs or a level deck. These details show whether one kit suits the job or whether separate components are needed.
Five choices shape the purchase:
- Measure first: Count the risers and measure along the line connecting the tread nosings.
- Separate the functions: Determine whether the stair needs a graspable handrail, a barrier at the open edge, or both.
- Match the exposure: Choose steel, iron, aluminium, wood, cable, or glass with wetting, sun, and salt air in mind.
- Plan the attachment: Check that posts and brackets can fasten to sound framing rather than a flexible surface.
- Set the project limits: Turns, stair height, damaged wood, and permit requirements can change whether a DIY installation is practical.
Practical rule: Treat “universal” as a fit claim to check against your stair, not as approval for your address.
Before buying, check the local building department's handout for the requirements that apply to your project. A manufacturer packages components for sale; the local authority decides whether the installed work meets its requirements. A short worksheet of actual dimensions helps you compare kits and identify missing pieces before you commit.
Why One Kit Rarely Covers Handrail and Guard
At a five-riser stair beside a wall, a graspable handrail may be the only railing system needed. Add an open edge, and a second job appears: stopping someone from falling. A handrail supports the hand; a guard blocks the open side. One assembly can do both only if it meets both functions.
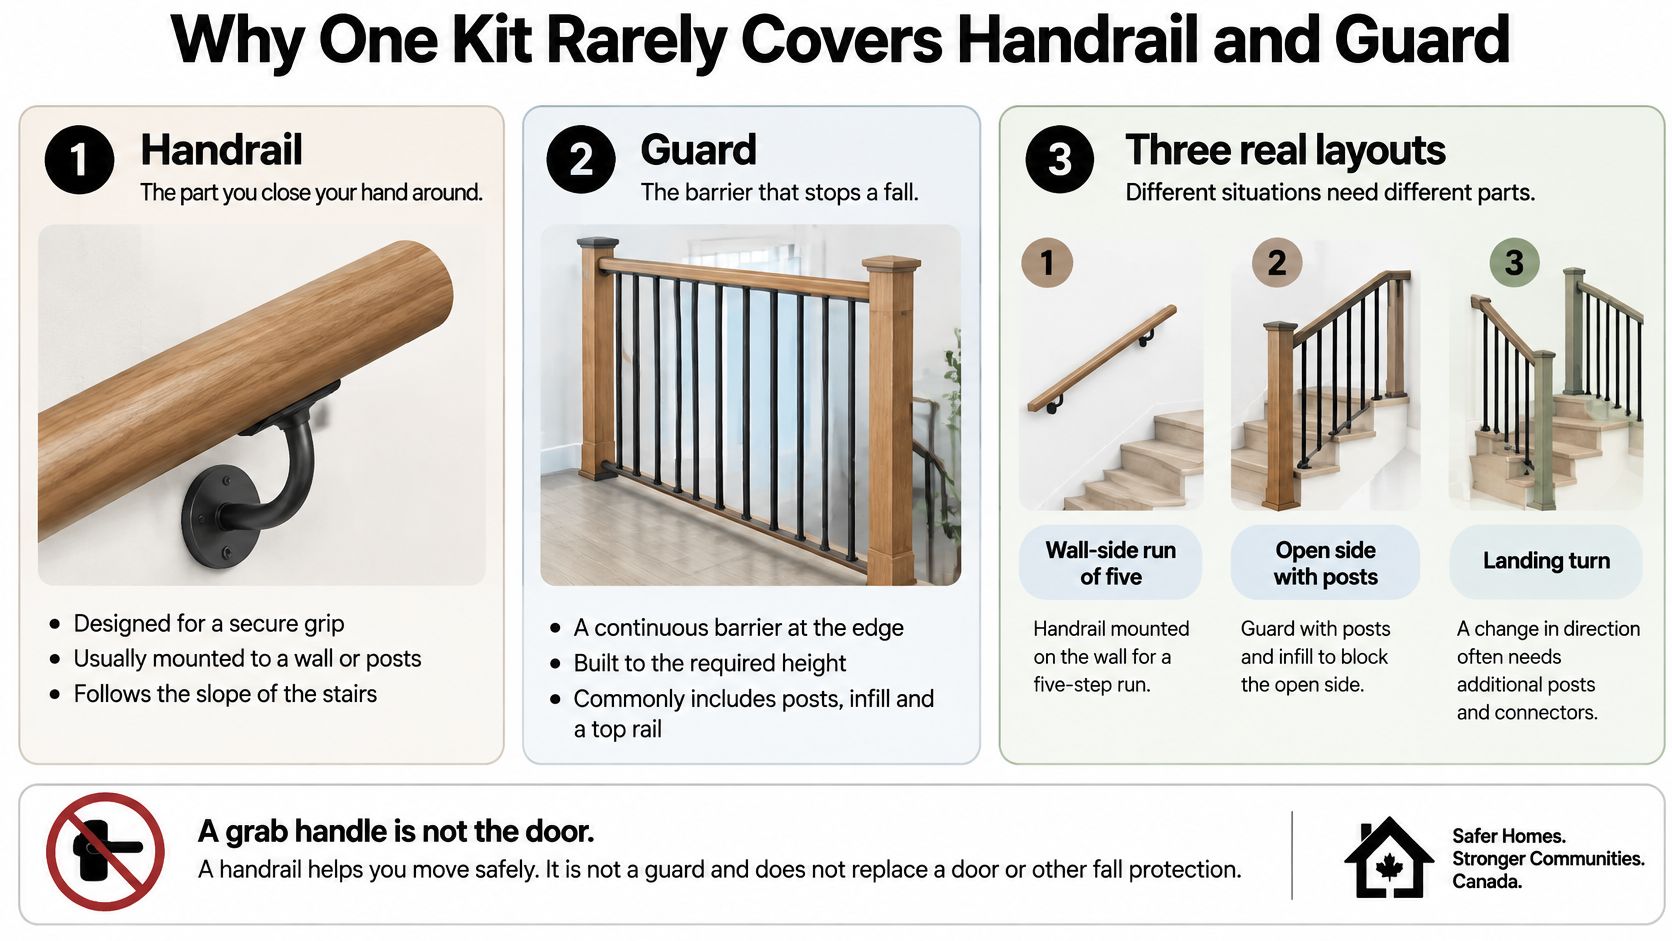
California's residential handrail guidance calls for a handrail on at least one side of a flight with four or more risers, 34 to 38 inches high, measured vertically from the sloped plane at the tread nosings. It also specifies a continuous rail from above the top riser to above the bottom riser. A wall-side rail needs at least 1.5 inches of clearance, and its ends must return toward a wall, connect to a guard, or terminate at a post.
Three Layouts That Expose the Gap
A wall-side run of five risers needs a graspable rail with suitable clearance and finished ends. A wall kit may suit that run, but it does not protect an open edge.
An open deck stair may need both a grip and infill to block a fall. A top rail that works as a barrier may be too wide or awkward to grasp. A narrow, comfortable handrail may sit too low to serve as the guard. Check each function separately before treating a single kit as a complete solution.
A landing turn brings another fit problem. The rail needs a planned connection around the corner, such as a joint, gooseneck, or separate flight. If the connection leaves a gap at the newel, the handrail stops where support matters most. Detail the turn before ordering straight sections.
Grasp, height, openings, continuity, and post attachment are separate checks. A pass on one does not establish a pass on the others.
The distinction applies beyond homes. Material Handling USA guardrails and handrails shows how workplace barriers and handrails are treated as separate protective systems. A residential railing kit may not suit a commercial stair or another setting with different requirements. Confirm the applicable rules with the local authority, which has the final say. California's code cycle took effect on January 1, 2026, so check the current local requirements before choosing parts.
Once you know whether the stair needs a handrail, a guard, or both, sort out the brackets and end treatments. The outdoor handrail hardware options can help frame those choices. If the stair needs both functions, plan either a system designed for both or coordinated components, such as a guard panel with a separate graspable rail.
Measure Your Stairs and Build the Kit Worksheet
Build the worksheet before you open a catalogue. Copy the same numbers onto your order list, and you'll stop guessing in the aisle. The checks below come first because each one changes a part, a post location, or whether you need a second system.
Stair checks that change the kit
| Check | Target to plan for | What it changes on the order |
|---|---|---|
| Riser count | 4 or more risers | Handrail on at least one side |
| Handrail height | 34 to 38 inches from the nosing plane | Rail, brackets and post height |
| Continuity | Full flight, top riser to bottom riser | No gaps at landings or newel posts |
| Wall clearance | At least 1.5 inches | Bracket standoff and return style |
| Open side above grade | More than 30 inches | Separate guard, often not the handrail |
| Guard height | About 42 inches on walks; open stairs may be 34 inches | Taller posts or a second system |
| Circular grasp | 1 1/4 to 2 inches outside diameter | Reject oversized tube sold as a grip |
| Noncircular grasp | Perimeter 4 to 6 1/4 inches; max 2 1/4 inches across | Profile must be specified, not guessed |
| Concentrated load | 200 pounds at the rail | Post spacing, fasteners and solid framing |
The City of Capitola residential stair, handrail and guard quick guide states that California residential guidance generally requires a handrail on at least one side of a flight with four or more risers, with the gripping surface 34 to 38 inches above the stair nosings. It also notes that open-sided walking surfaces more than 30 inches above grade generally require guards, typically 42 inches high, while open stair guards may be 34 inches high. The same guide notes the 2025 California Building Standards Code was published July 1, 2025, and became effective January 1, 2026.
The Ten-Line Worksheet
- Count risers, not treads. Write the number for each flight. Four or more triggers the handrail decision, and a landing splits one long stair into separate flights to measure.
- Measure the sloped length. Run your tape along the nosing line from directly above the top riser to directly above the lowest riser. Note whether ends return to a wall, connect to a guard, or terminate at a post, with no long tail past the last support.
- Check height vertically. Drop a tape from the planned grip to the nosing line at several treads. You're confirming the gripping surface, not the top of a post cap or a decorative cover.
- Confirm wall clearance and bracket angle. Hold a bracket against the wall on the rake and check standoff. A level-deck bracket forced onto a slope is a common mismatch that leaves screws biting at an angle.
- Mark every open side. Measure from the walking surface and stair edge down to grade. Write yes or no for a separate guard on each side, because that answer changes post height and infill.
- Record the grip profile in numbers. Write diameter for round rail, or perimeter and widest dimension for noncircular rail. If the seller can't publish a cross-section, that's a reason to pass.
- Place posts on framing you can identify. Probe for rot, check stringer and rim size, and set spacing from the maker's diagram. Photograph underside blocking before you order surface-mount shoes.
- Count infill per tread and per run. For baluster layouts, count pieces per tread, add extras for cuts and mistakes, then confirm the local opening limit with your building department. Don't space by eye to make a box divide evenly.
- Match connectors and screws to exposure. Structural screws, post bolts, and anchors need ratings for the substrate and outdoor use. A bright interior screw in a wet post base is a slow failure.
- Photograph everything. Shoot the stringer, substrate, landing turn, and spacing diagram. Those photos answer store questions better than memory.
Structural attachment is where kits that look identical separate. The City of Elk Grove residential landings and stairs guidance identifies a 200-pound concentrated-load benchmark for guard and handrail construction, meaning posts, brackets, fasteners, and supporting framing must transfer a localized force without excessive movement or failure. It also calls for exterior-suitable materials, such as approved decay-resistant wood or other approved materials. A rigid rail on widely spaced posts screwed into a weak rim will still deflect, because the load path ends at the framing, not at the powder coating.
Check before ordering: Wrong shoe diameter, posts that miss framing, and a grip profile with no published size are three returns waiting to happen.
While you're measuring, look at the treads themselves. A secure rail beside slick, worn concrete only solves half the fall risk, so it's worth learning how to improve traction on worn concrete stairs if the surface is polished, spalling, or holding water. Fix drainage and loose nosings now, while posts aren't in your way. Then recheck the worksheet top to bottom. If any line is blank, you're not ready to buy, you're ready to measure again.
Materials and Designs That Hold Up Outside
Material choice is not just about colour. It affects how the grip feels in rain, whether cut ends rust, how posts handle pressure, and whether the assembly is suitable for a fire-prone area. Compare families based on those characteristics first, then pick a finish.
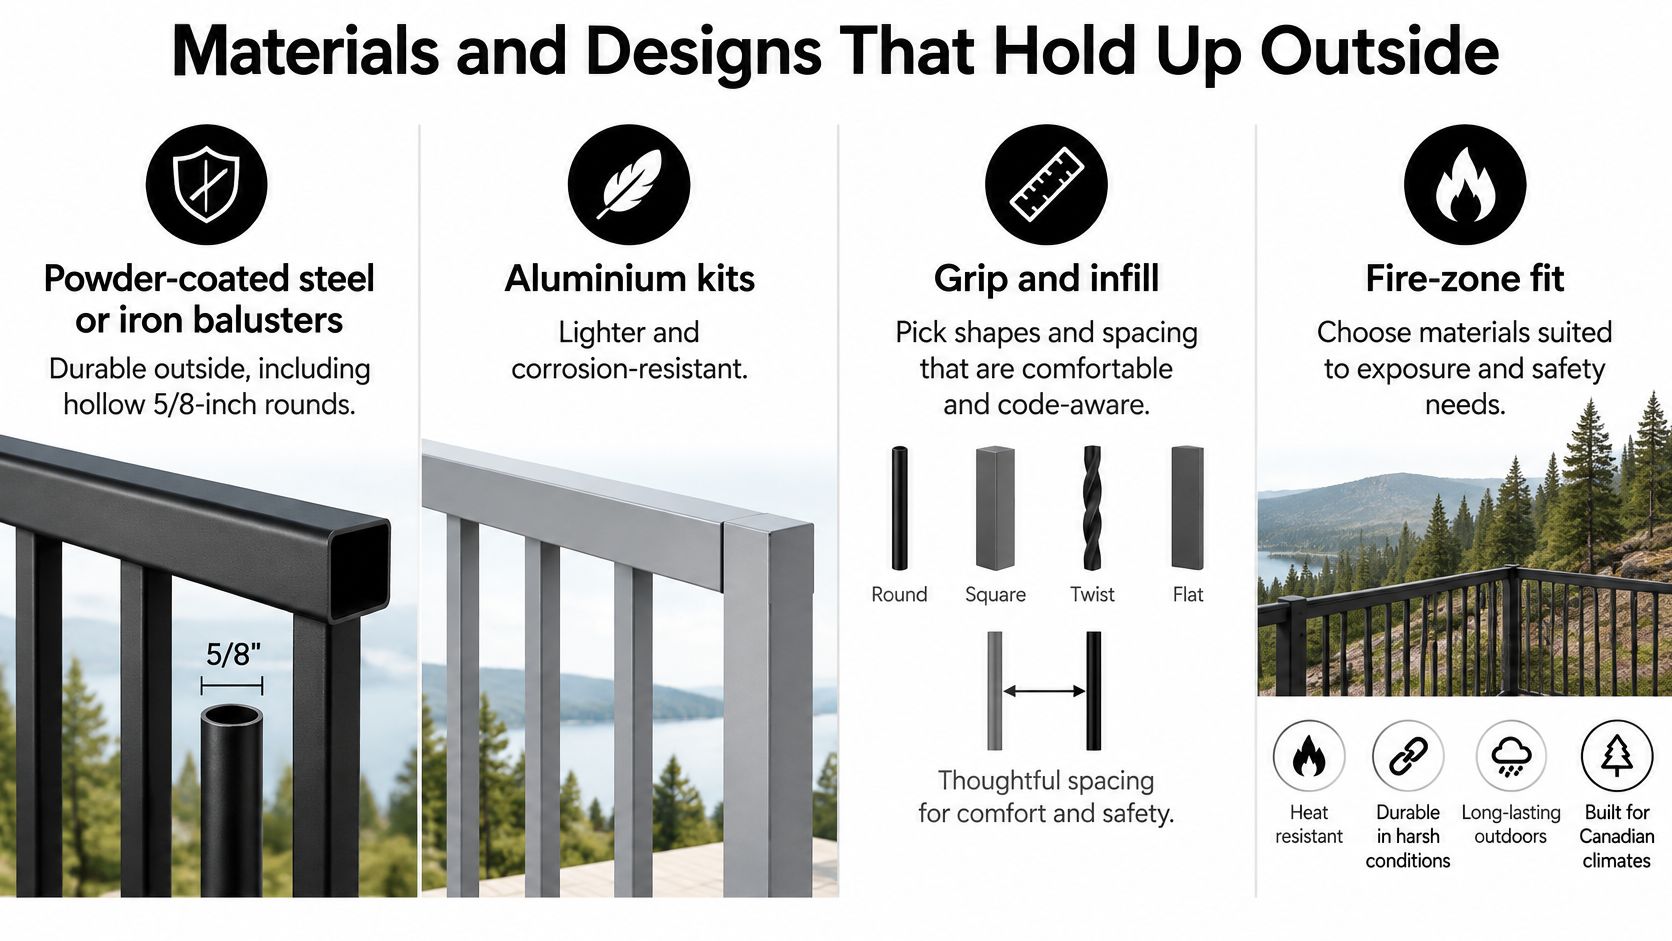
Exterior kit materials at a glance
| Material | Weather behaviour | Grasp and infill | Watch-out |
|---|---|---|---|
| Powder-coated iron or steel | Strong; coating fights rust until it is cut or chipped | Round 5/8-inch balusters infill a guard; rail must still be graspable | Salt air and bare cuts |
| Aluminium | Light and corrosion resistant | Easy kits; oversized square tube may be too big to grasp | Soft posts if spacing is wide |
| Exterior wood | Can match the porch; moves with wet and sun | Often too large unless a code grip is added | Rot at post bases |
| Cable | Open look; metal is noncombustible | Not a hand grip by itself | Tension and leaning posts |
| Tempered glass | Noncombustible infill; shows dirt and spray | Pair with a separate graspable rail | Impact and trapped debris |
Powder-coated steel or iron gives you the classic black look and a stiff feel. Hollow round balusters keep weight down and accept shoes and connectors cleanly. The weakness is any cut, drilled hole, or chipped edge left bare, especially near coastal salt. Touch up cuts, keep water out of open tubes, and don't buy a finish that's already flaking in the box.
Aluminium stays lighter, shrugs off rust, and suits a wet stair where steel maintenance would be constant. It's also easier to handle on a slope by yourself. The trade-off is stiffness over long spans, so post spacing matters more, not less. If you're leaning that way, compare profiles in our aluminium staircase railing guide and check the grip size, because a sleek square tube can be too large to qualify as the handrail.
Wood matches a timber porch and feels warm in winter. It also swells, checks, and rots at post bases unless the species or treatment is rated for exterior wetting and sun. A chunky 2×6 cap may look right on a deck, but it rarely works as the graspable element on a stair. Use wood as structure or cap where allowed, then add a proper grip if the numbers require it.
Grasp Size Is a Specification, Not a Style
California's Title 25 handrail dimension rules state that a circular handrail must have an outside diameter of at least 1 1/4 inches and no more than 2 inches. A noncircular profile must have a perimeter between 4 inches and 6 1/4 inches, a maximum cross-sectional dimension of 2 1/4 inches, and edges with at least a 0.01-inch radius. The same rules require handrail ends to be rounded and not to project more than 3 inches beyond the last handrail support post. Reject ornamental timber or thick tube that can't meet those limits, no matter how good it photographs.
Hardware deserves the same scrutiny as the rail. In wet or coastal exposure, learning where A4 stainless steel for outdoor hardware fits helps you judge whether included screws belong outside or in a junk drawer. Mixed metals, thin brackets, and unrated anchors undo a good material choice at the joint.
The Wildfire Question
Cable and tempered glass read open and modern, and both can serve as guard infill with a separate graspable rail above or beside them. Cable needs tension hardware and end posts that won't lean as you tighten. Glass needs cleaning and is a poor pick where tools, stones, or sports gear hit the stair often.
In wildland-urban interface areas, noncombustible infill is only part of the answer. FEMA's wildfire construction guidance for builders recommends replacing combustible railings with noncombustible railings and identifies metal, cable, or tempered glass as possible railing materials. A metal rail over combustible posts, stringers, and debris-catching shoes doesn't make the whole stair fire-safe. Ask your fire and building officials how mapped-area rules apply to your permit before ordering wood.
My short pick is simple. Wet or salted sites favour coated metal or aluminium with rated fasteners. A graspable wood cap can sit over a metal guard when dimensions allow, but don't let porch matching override grip, rot resistance, or fire exposure.
When DIY Works and When to Hire
DIY works best on a straight residential flight with sound stringers and no surprises under the treads. If your worksheet says handrail only, or the guard infill is in the same engineered kit, a careful owner can drill, level, and torque structural screws without inventing details. You save labour and can finish in a weekend, provided posts land on framing you have seen.
The photo below shows the scale of job that suits that approach, a short straight run with clear access to the substrate.
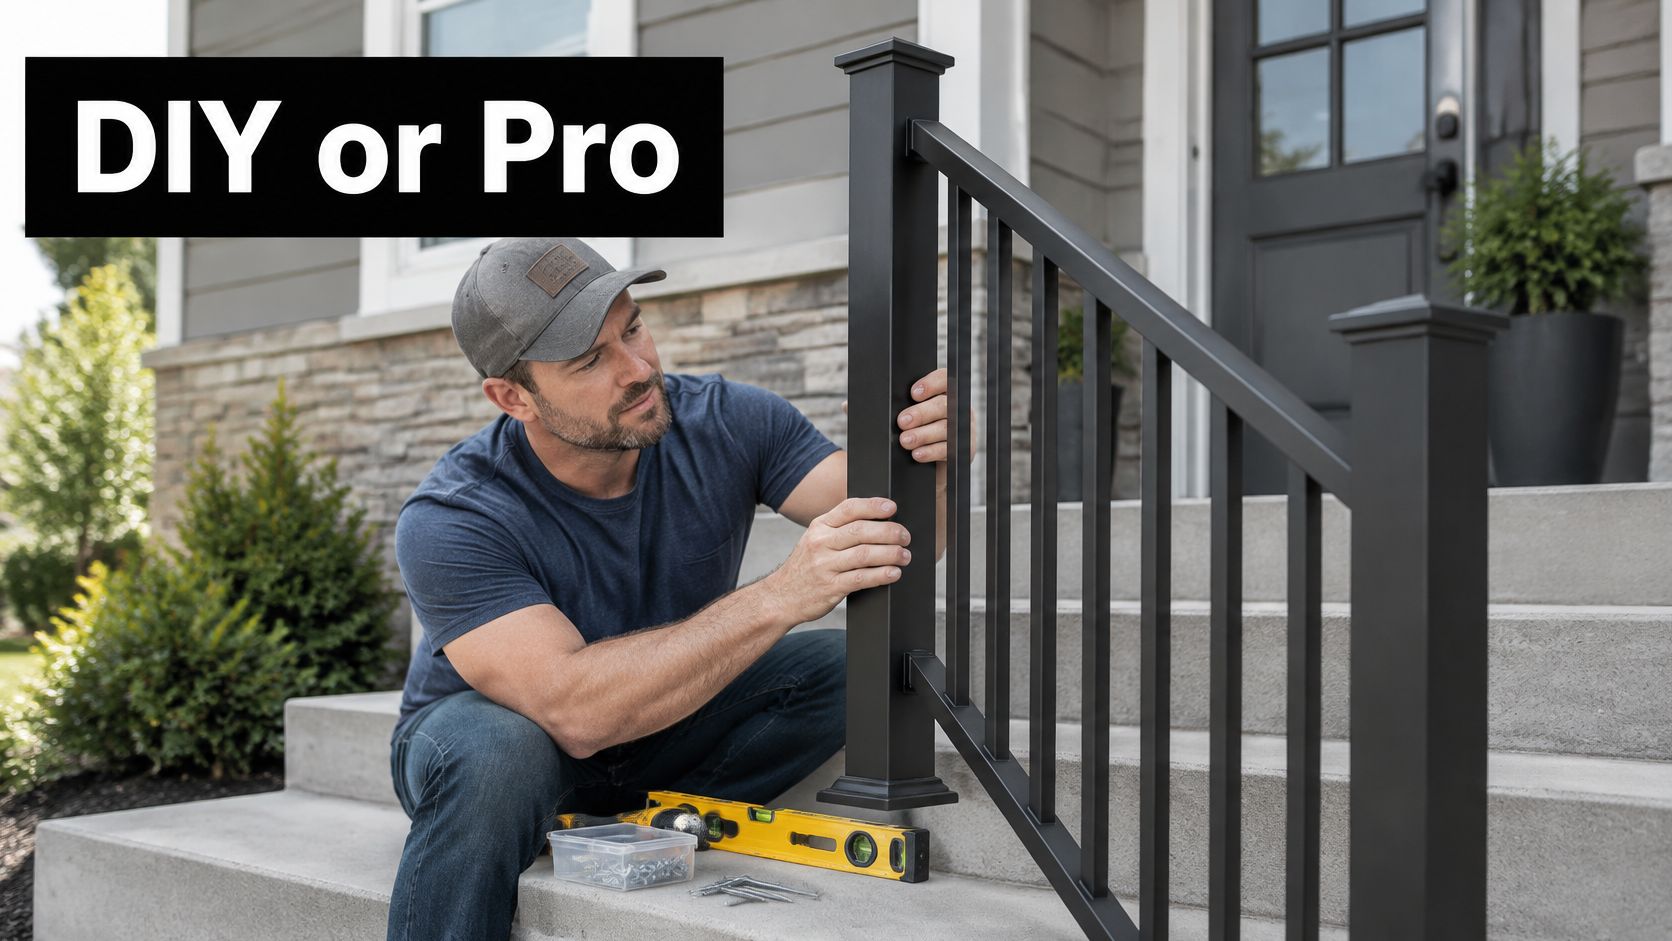
You'll still need the right sequence. Dry-fit the rail at height, mark brackets on the slope, predrill where the substrate demands it, and confirm returns before final tightening. Our stair railing installation walkthrough is a useful rehearsal before holes become permanent. Stop and remeasure if a post shoe covers a joint, a bracket hits hollow siding, or the rail would need shims the maker never showed.
Hire It Out When the Stair Stops Being Simple
Hire a carpenter or railing installer when the stair is high, turns at a landing, or mixes existing wood posts with a new metal kit. Hire when the property sits in a wildfire zone, needs a permit drawing, or serves tenants, multiple units, or a commercial exit. Those jobs add inspection, liability, and details a house kit may not cover, including protection a simple top rail doesn't provide.
Also hire if posts would land on a skimpy rim joist, if the old rail was stiffening a wobbly stair, or if removing it exposes rot in the stringer. A pro can add blocking, sister framing, or change post locations without turning every hole into a patch. That judgement is what you're buying, not just a drill driver.
The kit is usually the smaller cheque. A failed inspection, a leaned post, or a water-stained stringer costs more than a carpenter's day.
Watch a full install before you decide, paying attention to layout and fastening rather than speed.
Hand any pro the same targets you'd use yourself, including height, continuous ends, corrosion-resistant fasteners, and a clear load path into framing. Experience doesn't replace the local sheet, and a good installer won't mind showing how each post is anchored. Ask what happens at the landing turn and at the bottom return before work starts. Vague answers there predict gaps later.
I would use one rule to draw the line. DIY stops at the first detail the instructions do not show. If you have to invent a connection, bury a bracket in trim, or guess whether a guard is required, put the drill down and get the layout reviewed.
Pick the Kit and Fill the Gaps
Start from the worksheet answer, not from a sale page. If it says wall-side handrail only, buy a graspable rail with a published size, slope-ready brackets, and returns that finish at the wall or a post. Don't pay for balusters you don't need, and don't accept a wide decorative tube as a substitute grip.
If the open side needs protection, add a guard at the height your local sheet names and treat the handrail as a separate requirement. That may mean taller posts, infill panels, or a second rail mounted to the guard. Pretending one piece does both jobs because it sits between two heights is how inspections fail.
A Simple Buying Order
- Choose the system by exposure: Powder-coated metal or aluminium suits stairs that stay wet, while wood needs a stronger maintenance plan.
- Confirm posts against visible framing: Change spacing on paper if shoes would land on unsupported decking or a thin rim.
- Ask the fire question early: In a mapped interface area, confirm noncombustible infill and adjacent components before ordering timber parts.
- Count the small parts twice: Shoes, connectors, end caps, and structural screws are where otherwise good kits come up short.
Kits often omit exactly those finishing pieces, or include too few for cuts and layout changes. We have sold deck, fence and railing hardware online since 2010 to homeowners and deck builders, so we stock the gap fillers as separate, matchable parts. Our Iron Stair Balusters, 30 pieces of 5/8-inch classic black powder-coated hollow iron at 44 inches, are $125.99. Nuvo Iron stair rail connectors are $18.49 for a four-piece pack, and a 10-pack of screw-down flat shoes for 5/8-inch balusters, satin black DH-55, is $28.79.
Use those kinds of components to finish infill and joints the carton skipped, not to improvise structure the kit never engineered. Match shoe diameter to baluster diameter, connector angle to your stair rake, and screw length to the framing behind the shoe. A neat joint that only bites into decking is still a weak joint.
Take the final layout, post locations, and product dimensions to your local authority before you call the job passed. That visit feels slow when guests are coming, but it's faster than removing a finished rail. Buy for the stair you measured, fill only the gaps you can name, and you'll end up with a rail people trust without thinking about it. That's the true test. A hand should find support, the open side should stop a fall, and neither job should depend on hope.
Shop balusters, stair connectors, shoes, post caps, and corrosion-ready fasteners for your exterior stair railing kits at XTREME EDEALS INC., where deck builders and DIY homeowners can fill the missing pieces without rebuying a whole kit. Bring your worksheet, match each diameter and angle before you add to cart, and order the small hardware that makes the installed rail solid.