

You've just finished a fence or deck and bought caps labelled 4×4, expecting them to slide neatly over the posts. Instead, one cap rocks, another won't seat, and a third leaves an awkward gap around the corners. The problem usually isn't the cap. It's the difference between the size lumber is called and the size it measures.
A reliable 4×4 post cap starts with accurate measurement, but fit is only part of the decision. The cap's material, fastening method, compatibility with pressure-treated wood, exposure to moisture, and role in the load path all matter. The right choice protects the post end, gives the project a finished appearance, and avoids hardware problems that become expensive after installation.
Understanding 4×4 Post Cap Basics
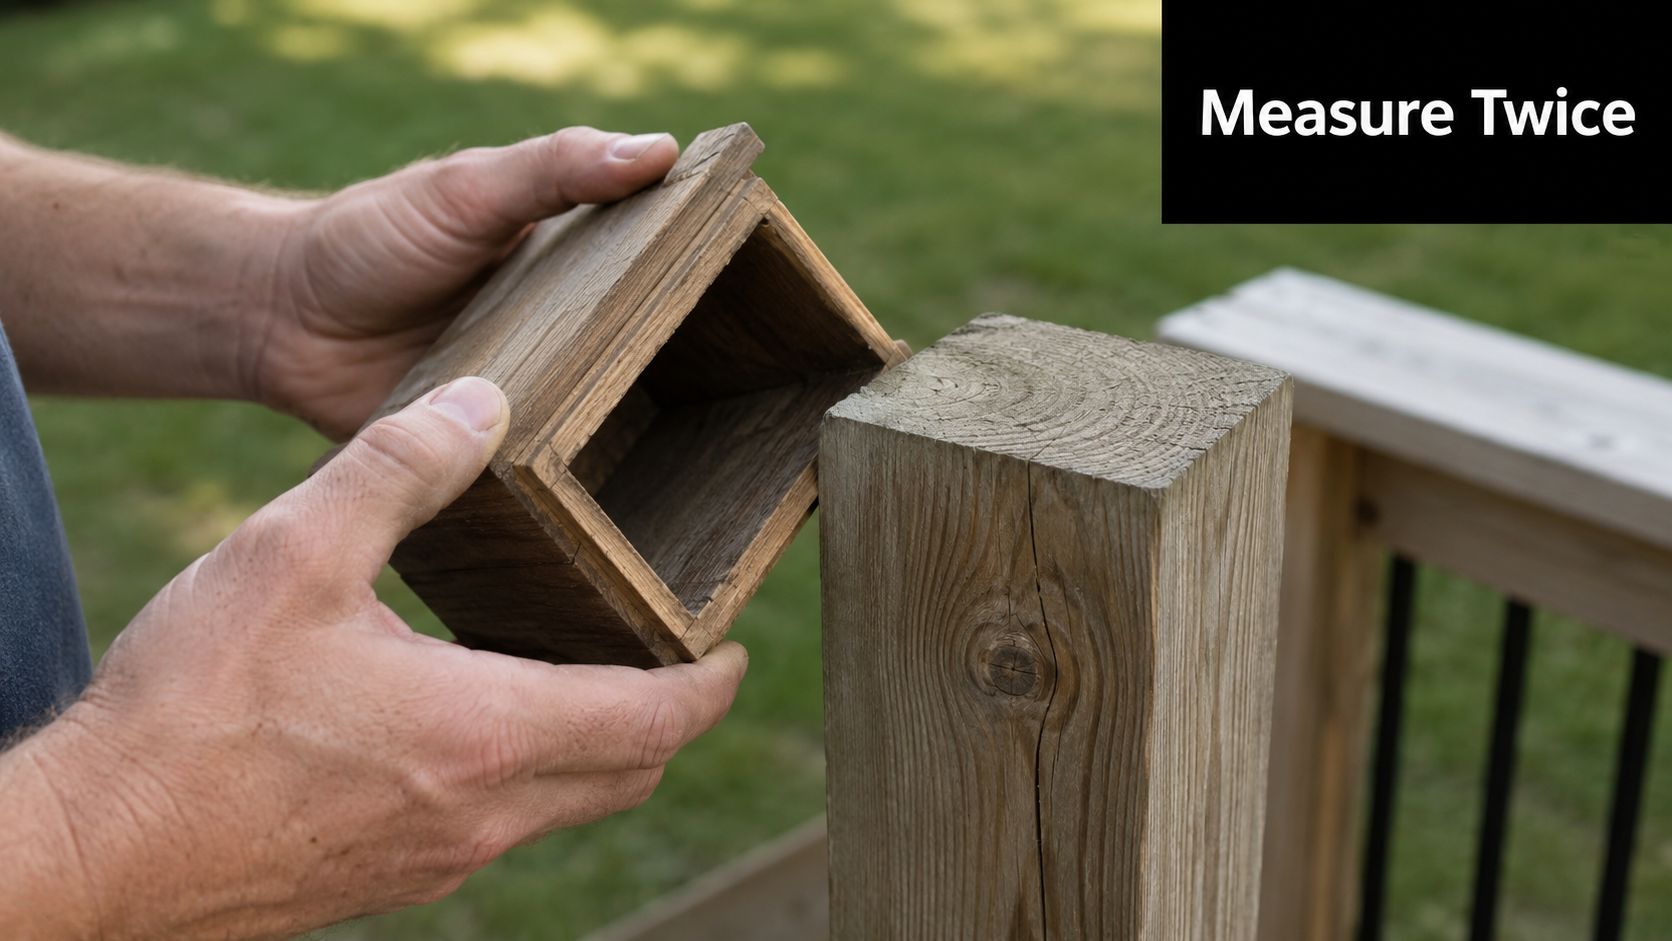
A homeowner recently brought back a box of caps that were marked for 4×4 posts. The posts looked like ordinary treated fence posts, yet the caps either rattled or stopped before reaching the shoulder. The label had been treated as a measurement, when it was really a nominal lumber size.
A nominal 4×4 post typically measures about 3.5 inches by 3.5 inches after the lumber has been processed. That's why a cap advertised as “4×4” can still be the wrong product. Some caps are made for the common finished dimension, while others are made for a true 4-inch post, rough-sawn timber, or a post wrapped with another material.
Why the 4×4 reference matters
The 4×4 format is widely used in California fence work and other wood applications. California Department of Transportation guidance lists 4×4 among approved post types for roadside sign structures, with post-selection parameters ranging from 4×4 up to 6×8 and supplied wood post lengths from 20 to 40 feet in 4-foot increments, depending on the type. These infrastructure references help explain why 4×4 remains a familiar foundation for residential fences, decks, and light structural work. California post and fence guidance
That consistency makes standardised caps commercially useful, but it doesn't eliminate the need to measure. A cap must match the actual outside dimensions, not just the name printed on the post or product package.
Before ordering, measure across the top of the post in both directions. If the post is painted, stained, sleeved, or unusually rough, measure the finished surface that the cap will contact. For broader deck and railing hardware comparisons, a selection of deck post caps can help you compare styles and fitting approaches without assuming every 4×4 label means the same thing.
Nominal vs True Size Differences
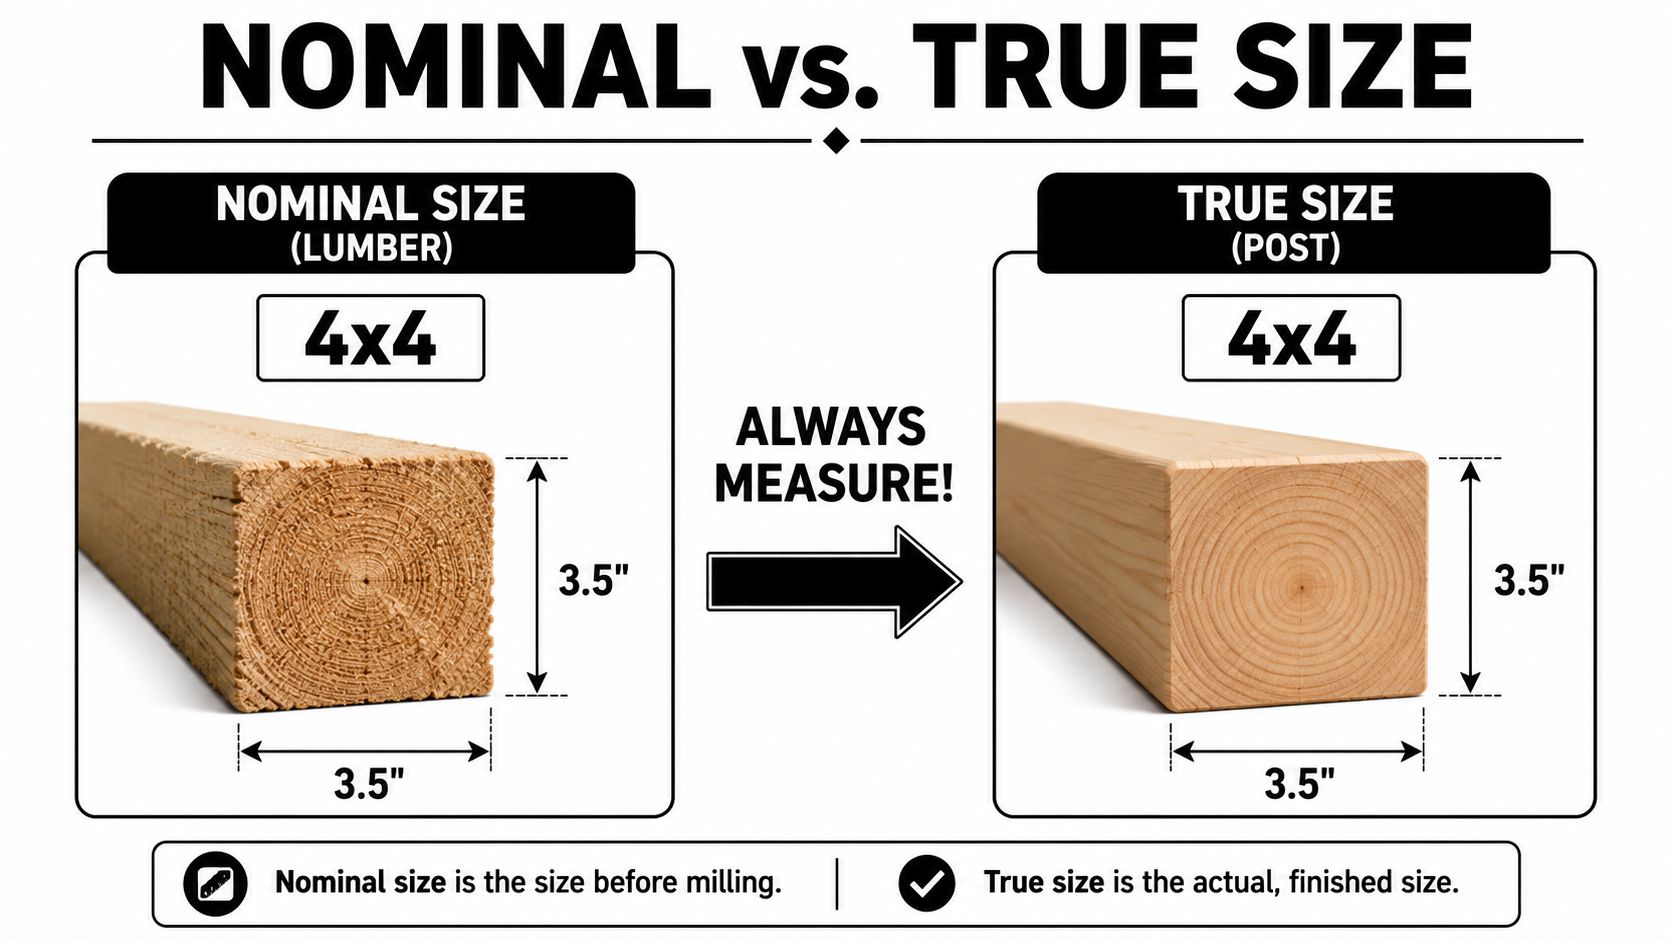
Construction lumber uses two size descriptions. Nominal size is the trade name used when the material is sold, while true size is the dimension you can verify with a tape measure or caliper after manufacturing.
For a standard 4×4, the nominal description is 4 inches by 4 inches, while the typical finished section is about 3.5 inches by 3.5 inches. That difference affects the cap's internal opening, not merely its appearance. A cap designed for the smaller finished section can sit firmly on a normal dressed post, while a cap made for a true 4-inch post may be loose on that same piece.
Measure the post, then compare the opening
Use a rigid tape measure for a quick check, or a calliper where the fit is tight. Measure width and depth separately at the top, because a post can be slightly out of square after weathering, staining, or years of exposure. Check more than one post if you're capping an existing fence. Repairs and replacement sections often use timber from different batches.
Paint and heavy stain can affect the fit, especially with a slip-on cap. Remove loose buildup and check whether the cap's stated size refers to the inside opening or the nominal post category. Product listings that distinguish nominal from true dimensions are much more useful than listings that show only “4×4”.
California-oriented fence guidance continues to specify 4-inch-by-4-inch posts for taller assemblies, including fences over 6 1/2 feet to 8 feet in Federal Heights' California-style standards. The same guidance highlights the importance of engineered footing and post-base details. For residential fence layouts, post holes are often about three times the post width, which commonly places a 4×4 post hole around 10 to 12 inches, while many fences use 6 to 8 foot post spacing. Fence post materials and installation guidance
If your project uses a different nominal size, compare the same measurement principle with this 4×6 post cap reference, but don't substitute a cap until the post itself has been measured.
Common 4×4 Post Cap Styles and Materials
The cap profile changes the character of a fence quickly. A pyramid cap gives a straightforward traditional finish and sheds water away from the post top. A ball cap adds a more decorative, formal appearance, while an ornate finial works best where the fence, gate, or deck already has architectural detail to support it.
Match the material to the exposure
Wood caps blend naturally with cedar, treated pine, and painted timber, but exposed end grain needs regular finishing. A wood cap can look excellent when maintained, yet it's a poor choice for an owner who wants a fit-and-forget accessory.
Aluminium is light, clean-looking, and available in finishes that suit modern fences. Steel feels substantial and can work well where impact resistance matters, but the finish and fasteners must be suitable for outdoor exposure. Vinyl and composite caps offer low-maintenance alternatives with consistent colour, although brittle products can crack if forced over an uneven post.
Solar caps add lighting as well as a finished top. They can suit gates, paths, and entertaining areas, but the light assembly introduces additional components that need protection from weather and accidental impact.
| Cap type | Practical advantage | Main trade-off |
|---|---|---|
| Pyramid | Simple profile and broad compatibility | Less decorative than a ball or finial |
| Ball | Strong visual accent | Can look oversized on a plain fence |
| Wood | Natural appearance | Needs ongoing coating and inspection |
| Aluminium | Light and corrosion-conscious when correctly specified | Must be checked for treated-wood compatibility |
| Vinyl or composite | Low routine maintenance | May not tolerate forced installation |
| Solar | Adds low-level outdoor lighting | Requires more components and care |
A cap isn't automatically interchangeable just because the post is called a 4×4. California Residential Code deck-post tables limit 4×4 use according to height, species, and tributary area. A 4×4 Southern Pine post can reach about 14 feet in the least-demand case, while allowable height decreases as load and tributary area rise, and Douglas fir, hem-fir, and spruce-pine-fir options are more restrictive. California deck-post provisions
For more visual direction, review these fence post cap ideas before choosing a profile that competes with the rest of the structure.
A decorative cap can finish the project, but a manufactured connector cap on a deck or patio cover may also form part of the load path. Choose by application first, then by appearance.
Mounting Methods and Hardware Guide
A slip-on cap is quick, but it still needs a stable fit. Screw-mounted caps offer a more dependable retrofit, while bolted connections suit heavier metal hardware or situations where the manufacturer specifies through-fastening.
Start by checking the cap instructions and the post material. Don't drill randomly through a connector that may be carrying beam or railing forces. California deck guidance calls for approved manufactured post-cap connectors in some assemblies, and Los Angeles County details pair a 4×4 PT post with a post cap in the load path. Millbrae deck submittal requirements
A dependable installation sequence
- Confirm the fit. Dry-fit the cap and check that it seats evenly without hammering it into place.
- Prepare the post. Level high spots, remove loose fibres, and clear dirt from the top surface.
- Mark the holes. Use the cap's existing holes as a template. Keep screws centred so they don't break through the post edge.
- Drill pilot holes. A pilot hole reduces splitting, particularly near corners and in dry timber.
- Use suitable fasteners. Match screw length and head style to the cap manufacturer's instructions.
- Tighten carefully. Bring the fastener head snug to the cap. Over-tightening can distort thin aluminium, crush vinyl, or pull a decorative cap out of alignment.
- Check drainage. The cap should shed water rather than trap a puddle against the end grain.
Pressure-treated wood changes the hardware decision. Canadian preservation guidance identifies hot-dipped galvanised or stainless-steel fasteners for ACQ and copper-azole treated products. MCA is described as less corrosive than untreated wood, but manufacturer recommendations and applicable code still govern the choice. Treated-wood hardware compatibility guidance
Aluminium caps also deserve a compatibility check, particularly in coastal or persistently damp locations. A matching post-base bracket or related connector can be reviewed through this 4×4 post base selection, but the cap and base should be treated as parts of one hardware system, not isolated accessories.
Selection Checklist for Your Project
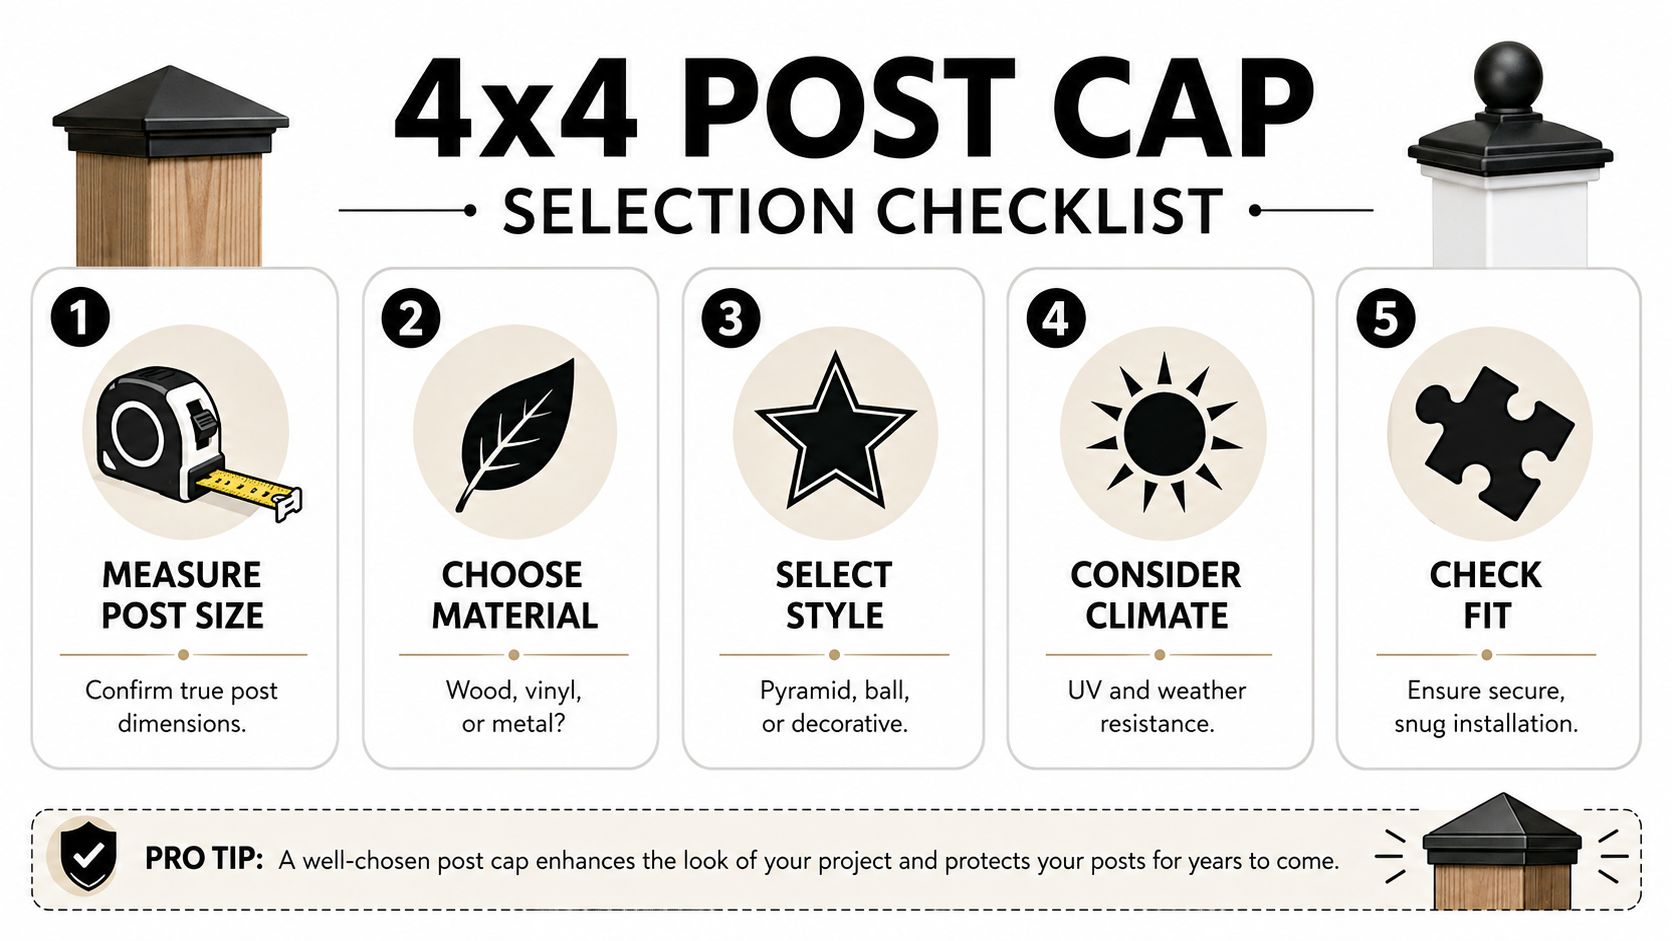
The fastest way to choose a cap is to make the decision in the right order. Measure first, then match material, style, exposure, and fastening method. Starting with colour or price often leads to a cap that looks right in the listing but fails at the post.
Use the project to narrow the choice
- Fence: Confirm each post's true top dimension, then select a cap that sheds rain and suits the fence profile.
- Deck: Verify whether the cap is decorative or part of an approved connector and load path. Don't replace specified structural hardware with a trim-only cap.
- Railing: Prioritise secure fastening, clean alignment, and compatibility with the railing material.
- Pergola: Check the design loads and connector details before treating the cap as an appearance upgrade.
The post itself may need attention before the cap. Canadian guidance requires preservative treatment for wood in ground contact, and also for wood within 150 mm of the ground, unless specified damp-proofing exceptions apply. Wood durability codes and treatment guidance
That matters at the post top because a cap won't correct decay already present in the end grain, nor will it make an untreated post suitable for an exposed assembly.
| Decision | What to verify |
|---|---|
| Size | Actual width and depth, including coatings or sleeves |
| Material | Treated-wood compatibility and climate exposure |
| Style | Pyramid, ball, decorative, or lighting profile |
| Fastening | Slip-on, screw-mounted, or specified connector |
| Condition | Sound, level post top without rot or loose fibres |
If the post is soft, split, or repeatedly wet, upgrade the post material and fastening system before buying an accessory. The cap is the final part of the decision, not the first.
Installation Overview and Best Practices
A clean installation begins with the post top, not the cap. On a new fence, cut the post square with a sharp blade and check it from two directions. On an older fence, use a straightedge to identify high corners, then remove only enough material for the cap to sit flat.
Keep a tape measure, pencil, drill, pilot bit, driver, level, screws approved for the treated wood, and a stable ladder or work platform nearby. Wear eye protection when cutting or drilling. A cap that looks simple can still require awkward overhead work, so don't balance on a rail or the fence itself.
New work and retrofit work differ
For new construction, dry-fit the cap before the fence boards or rail system crowd the post. A temporary placement reveals whether the post was cut square and whether the cap's overhang looks consistent across the project.
Retrofits need more patience. Remove old fasteners, scrape away loose paint, and inspect the post for cracks or decay. If the cap binds on one corner, don't force it with a mallet. Correct the post top or choose a cap with an appropriate internal opening.
Professional habit: Set every cap dry before fastening the first one. Repeating a small mistake across an entire fence makes the final correction much harder.
Centre screw holes carefully and drive fasteners until the cap is secure, not crushed. For vinyl, composite, or thin metal, hand-finish the last part of the tightening. A level confirms the cap is aligned, while a visual check from the gate or deck approach confirms the row looks intentional.
A cap should direct water away from the post. If the design traps moisture, the post top remains vulnerable even when the accessory is firmly attached. Structural deck and patio-cover applications also need the connector detail confirmed against local requirements. California building standards are locally amended for state-specific concerns, so city and county handouts can affect which manufactured cap or connector is acceptable. California building standards information
Maintenance and Finishing Tips
A post cap isn't automatically maintenance-free, and installation isn't purely cosmetic. The common assumption that every cap fits every 4×4 post causes poor seating, loose hardware, and water-catching gaps. The other mistake is treating a decorative cap as a substitute for an approved structural connector where the post supports a deck, patio cover, guardrail, or other loaded assembly.
Clean the cap according to its material. Wash vinyl and composite surfaces gently, inspect aluminium for finish damage, and remove surface dirt from wood before recoating. Avoid aggressive tools that scratch protective finishes or open fresh paths for moisture.
Finish the cap and post as a pair
A wood cap should receive an exterior-appropriate stain, paint, or protective coating suited to the post material. End grain deserves particular attention because it can absorb water more readily than the side faces. Aluminium and steel caps need inspection around fasteners, seams, and cut edges, where coating damage can become the starting point for corrosion.
Seasonal checks don't need to be complicated:
- After wet weather: Look for standing water, movement, and darkened end grain.
- During dry periods: Check for splitting, shrinkage, loose screws, or newly exposed wood.
- Before refinishing: Clean the surface, remove failed coating, and confirm the cap still fits securely.
- After storms: Inspect decorative, solar, and lightweight caps for impact or displacement.
Pressure-treated wood and cap hardware should be reviewed together, especially in coastal or high-moisture areas. If corrosion appears, replacing only the visible screw may not solve the problem. Inspect the cap, fastener hole, surrounding wood, and any connected bracket before choosing replacement hardware.
A well-fitted 4×4 post cap improves water shedding and appearance, but it works properly only when the post is sound, the dimensions are confirmed, and the material and fasteners suit the exposure. Measure every existing post, verify whether the cap is trim or structural hardware, and follow the manufacturer's installation requirements.
XTREME EDEALS INC. offers pyramid, ball, and decorative post caps for wood and metal posts, including options for nominal and true 4×4 dimensions, along with compatible deck and fencing hardware. Visit XTREME EDEALS INC. to compare cap sizes, materials, fasteners, and post-base components before you place your order.