
You've tightened every screw on a new deck, but the guard still shifts when someone leans against it. Or perhaps a fence post looks perfectly solid in the lumber yard, then starts rocking after a wet season. In both cases, the 4×4 post may not be the weak point. The connection between the post, beam, floor, footing, or rail may be carrying the wrong load through the wrong hardware.
A 4×4 post connector isn't a decorative add-on. It forms part of the load path that keeps a structure upright, resists sideways movement, and helps separate wood from moisture. The right choice depends on the project, the connection, the exposure, and the fastening schedule. This guide maps those decisions to common Canadian deck, guardrail, pergola, and fence applications.
Why Your 4×4 Post Is Only as Strong as Its Connector
A homeowner often notices the failure as movement. The guardrail flexes when someone leans on it, a deck-edge post twists slightly, or a pergola column shifts when wind catches the roof. The post may still look straight and sound. The weak point is often lower down, where an unsuitable bracket, missing blocking, weak fastener pattern, or damaged base has broken the load path.
A strong post cannot compensate for a loose or corroded joint where it meets a beam, rim joist, deck surface, footing, or rail. The connector must keep these parts working together as one assembly while transferring the forces that reach the post. Its shape, bearing surfaces, holes, and fasteners all affect whether the connection stays aligned.
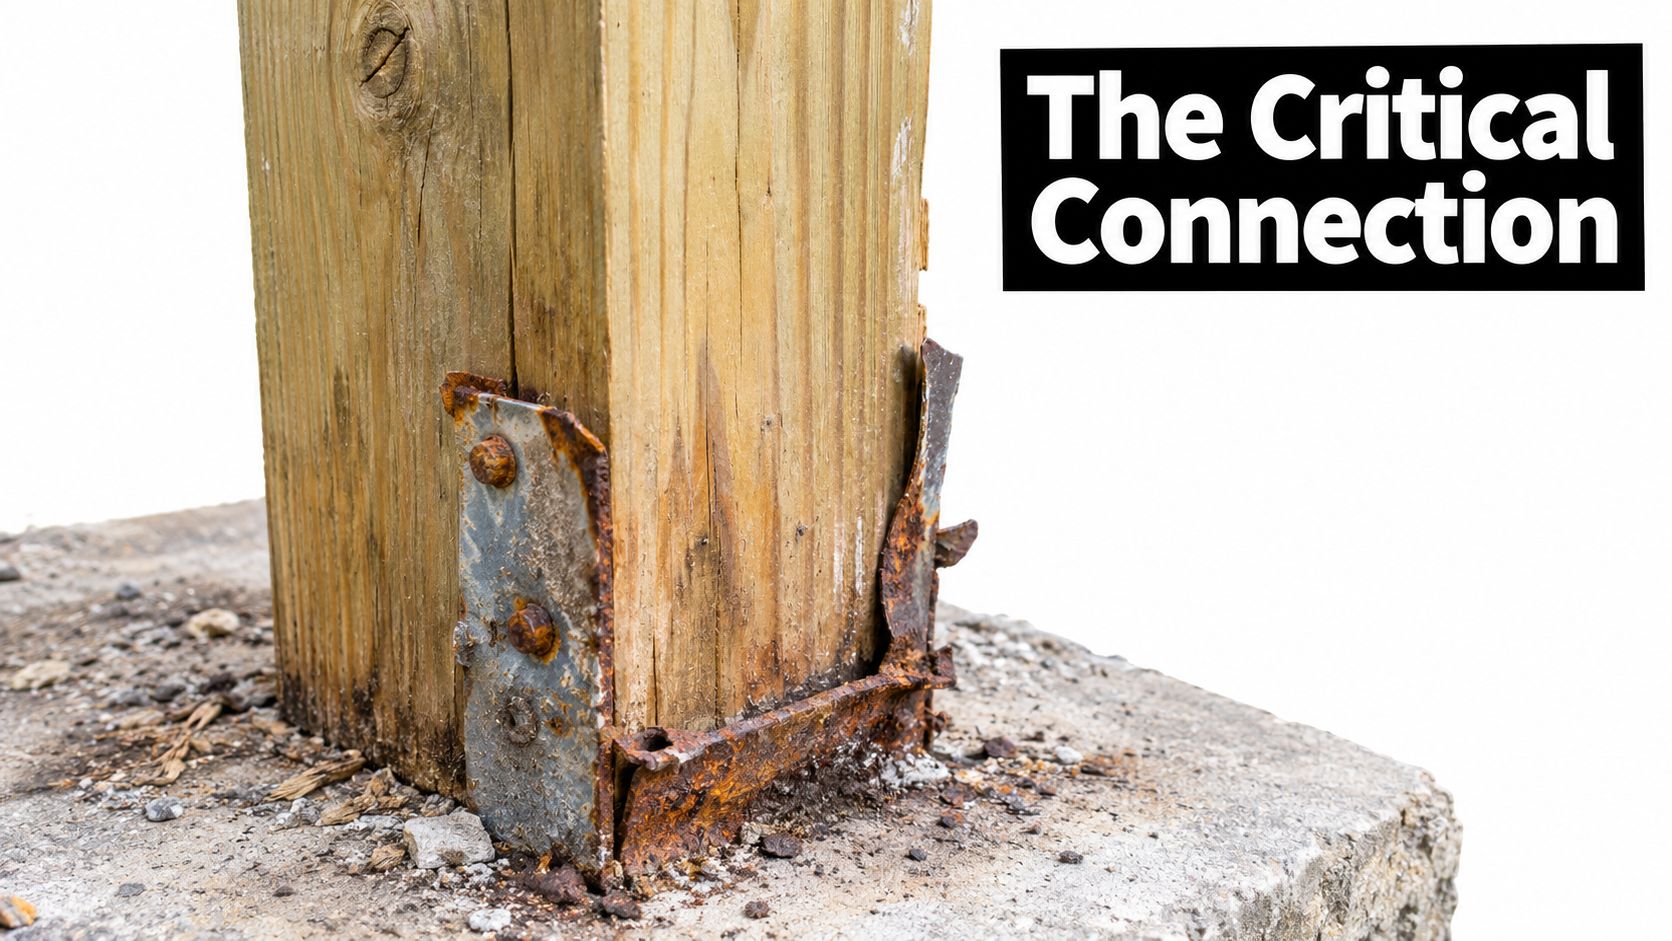
Exposure can turn a suitable bracket into a poor connection over time, particularly where water, road salt, treated lumber, or freeze-thaw movement affects the assembly.
Job-site rule: Choose the connector as part of the complete post system, not as a separate piece of hardware.
Canadian guidance matters for decks and guards above grade. Ontario deck details refer to the Ontario Building Code and Supplementary Standard SB-7 for exterior guardrail post-connection types. Municipal guidance also distinguishes rail connections from post-to-floor and post-to-beam connections. A connector made for attaching a rail may not provide the structural support needed at the base of a primary post.
That distinction prevents a common ordering mistake: selecting hardware by the post size alone. A guardrail post, deck support post, pergola column, and fence post may all use nominal 4×4 lumber, yet each connection can face a different direction of force and exposure.
The finished connection should feel quiet and firm. It should not wobble when the guard is pushed, depend on an improvised screw pattern, or leave the post in a pocket where water cannot drain. Before buying, identify what the post supports, where the force travels, and what separates the wood from the ground or concrete.
What 4×4 Post Connectors Do and How They Work
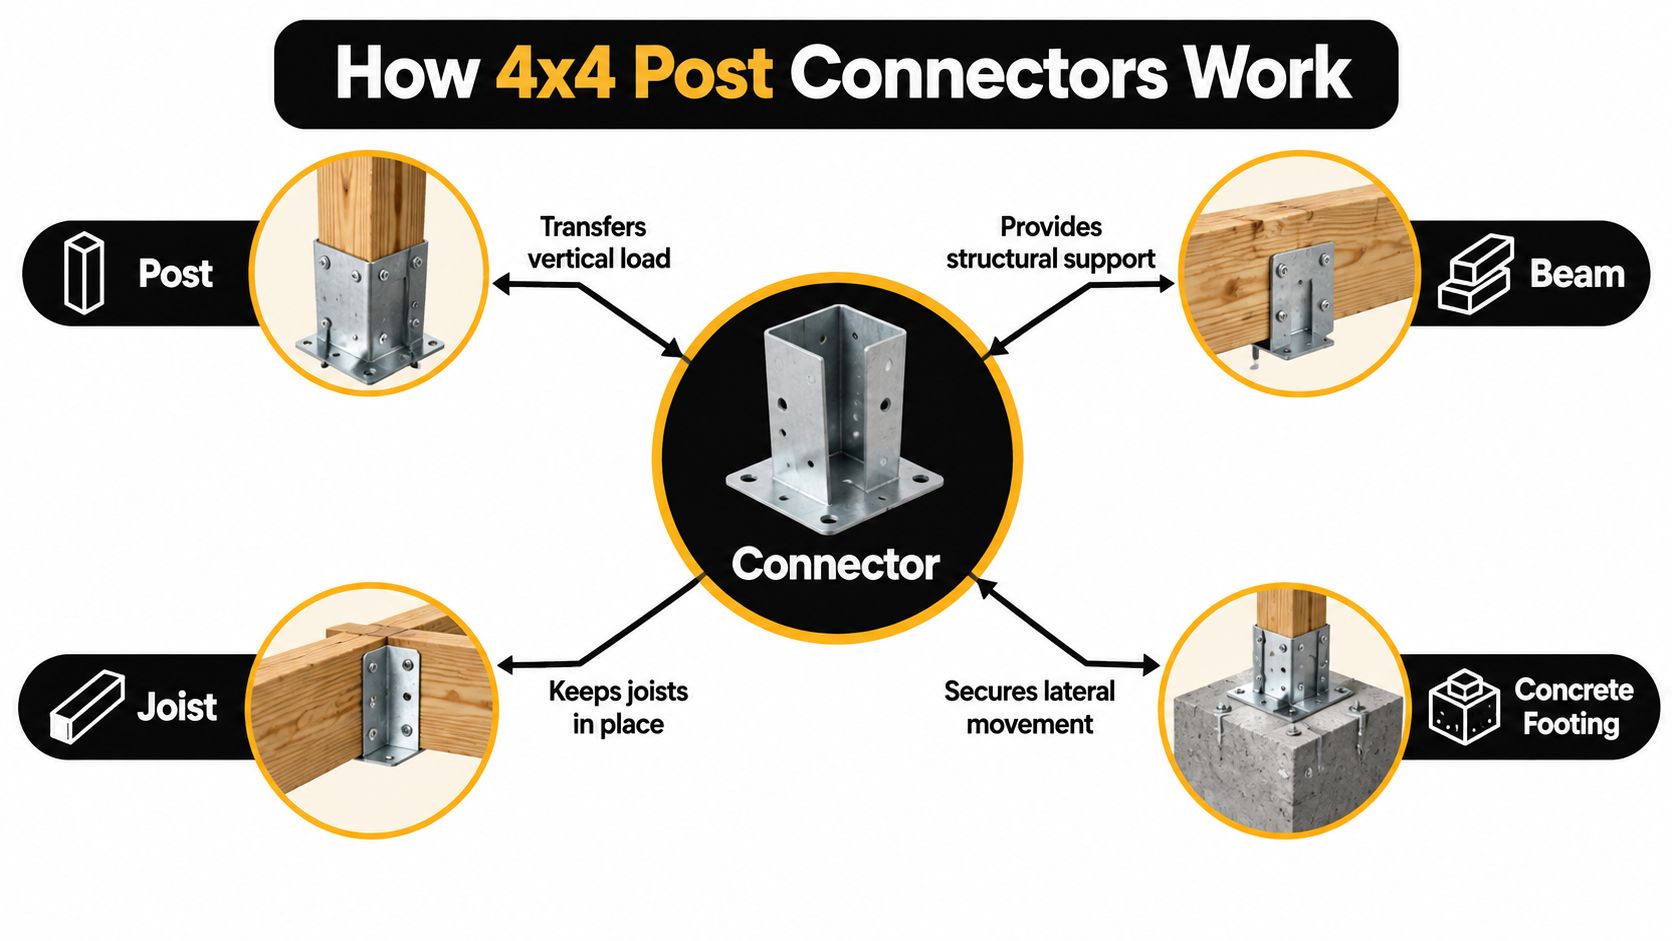
A 4×4 post connector joins a nominal 4×4 post to another structural component. That component might be a beam, joist, rim joist, deck surface, concrete footing, or guardrail assembly. The connector's shape is only part of the system. Its holes, folds, bearing surfaces, and specified fasteners must work together to transfer force safely.
Start by tracing the load path:
- The post receives force. A deck post carries vertical weight. A guard post also faces sideways pressure and movement.
- The connector gathers that force. Its plates, tabs, sides, or seat help stop the wood from sliding, rotating, or lifting.
- Fasteners transfer the force onward. Screws, bolts, nails, or anchors connect the metal to surrounding timber or concrete.
- The supporting member spreads the force. A beam, joist, rim board, or footing must be able to receive the load delivered by the connector.
The connector must align the post and beam while keeping fasteners loaded in the direction the product was designed to resist. A bracket can look heavy and still perform poorly if the joint applies force from an unintended angle, or if the supporting wood cannot carry the load.
A nominal 4×4 label does not guarantee a universal fit. Products made for 4×4 posts still have specific dimensions, hole layouts, beam arrangements, and installation requirements. The Canadian limit-states connector catalogue lists 4×4 products such as UB44HDG and UB44RHDG. For the listed installation, it specifies 1/4 inch by 2 inch connector screws rather than lag screws, because the fastener choice affects load performance in that assembly. The catalogue also notes a minimum 3 inch side cover on concrete. That detail connects the footing, anchor location, and connector selection. The Canadian structural connector catalogue provides the product and installation context.
A guardrail-only attachment usually secures a top or bottom rail to the side of a post. A structural post base or post-to-beam connector supports the post itself. Ontario and municipal deck guidance treats these as separate connection questions. Ask what member the hardware connects and what load that connection must resist.
For a visual introduction to structural hardware, this decking resource on choosing charred timber decking can help place the post connection within the wider outdoor construction project. The decking surface and post connection serve different jobs, and each must suit the exposure and assembly.
Types of 4×4 Post Connectors and When to Use Each
The easiest way to shop is by connection job, not by bracket shape. A post base, cap, angle, and strap may all be made from metal, but they don't transfer force in the same way.
Match the connector to the connection
Post bases and adjustable bases sit beneath a post or hold it above a concrete or surface-mounted support. They're the usual category for post-to-footing work, where separation from moisture and a stable bearing surface matter.
Post caps and beam saddles sit at the top of a post and connect it to a beam, double beam, or rim assembly. They help locate the post and transfer vertical and lateral forces into the supported member.
Face-mount and wrap-around brackets attach a post against the face of a beam or joist. They're useful where the post can't sit directly on top of a beam, but the fastener pattern and supporting timber must match the connector's intended use.
T-straps and L-angles reinforce a joint from one or two faces. They can help with lateral restraint or uplift, but they aren't automatically a substitute for a purpose-designed post base or beam connector.
Flange plates and anchor plates spread the connection over a surface. They're common where the post needs to connect to concrete, masonry, or a prepared mounting surface, subject to the anchor and edge requirements for the specific product.
Ontario and municipal deck guides repeatedly separate rail-to-post details from post-to-floor and post-to-beam systems. That distinction is easy to miss in a product search. Once a deck walking surface is more than 600 mm above grade, Ontario-focused guidance treats the assembly as a structural element with guard requirements, so a shopper needs code-specific connection advice rather than a generic “4×4 bracket” label. Ontario deck guidance shows why the post's role matters.
| Project Scenario | Best Connector Category | Key Check Before Buying |
|---|---|---|
| Elevated deck guard post | Code-rated post-to-floor or post-to-beam system | Confirm the guard load path, blocking, and approved fastening pattern |
| Deck post supporting a beam | Post base, cap, or beam saddle | Check whether the connector supports the beam arrangement and footing |
| Pergola or shade-structure post | Structural base and top connection | Account for vertical bearing, lateral movement, and uplift |
| Fence post | Base anchor or suitable surface-mounted bracket | Confirm whether the post is decorative, privacy-related, or carrying a gate |
| Guardrail face attachment | Guardrail-specific bracket or through-bolted detail | Don't substitute a rail attachment for a structural post base |
For a range of post brackets and related options, review the 4×4 wood post bracket selection after identifying the project type. The product category is only the starting point. The post position, supporting member, exposure, and fastener requirements determine whether a particular bracket belongs on your build.
Materials Coatings and Corrosion Protection for Canadian Conditions
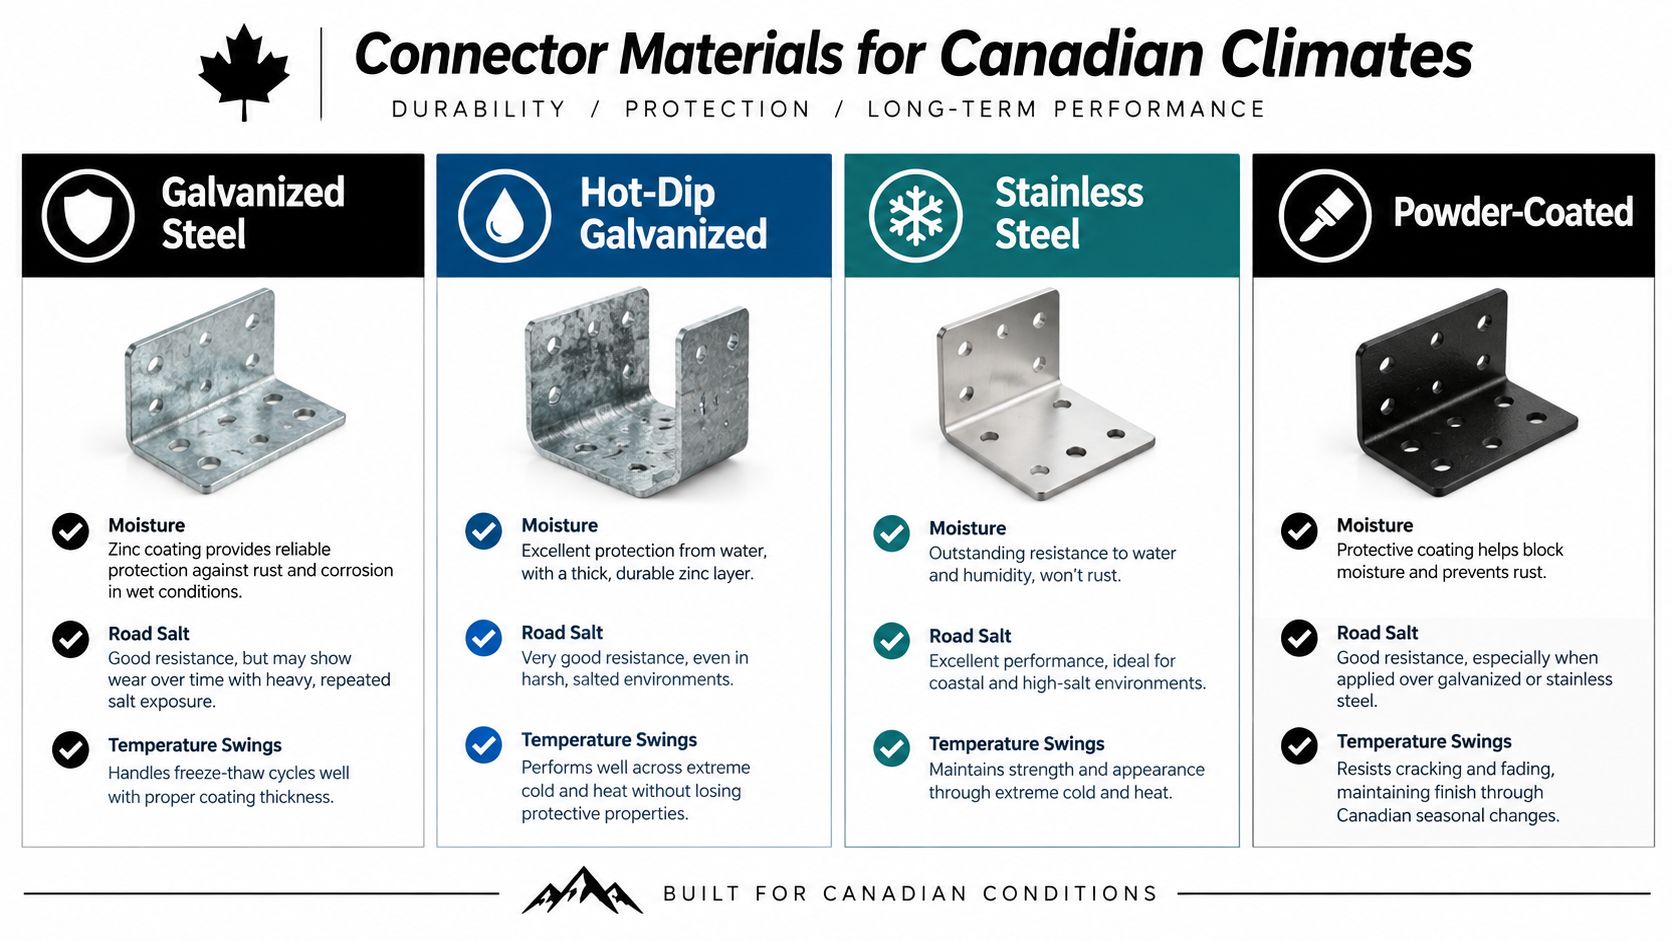
A connector's finish should match the place where it will work. An inland garden fence, an exposed lakeside deck, and a coastal structure don't face the same moisture and salt conditions. The right question isn't just whether steel is strong. It's whether the coating and fastener system can remain compatible with the wood, concrete, water, and chemicals around it.
Galvanized steel is a common choice for general outdoor work. Hot-dip galvanized finishes provide a heavier protective coating and may suit more demanding exterior exposure. Stainless steel is often considered where moisture, salt, or treated lumber chemistry creates a more aggressive environment. Powder-coated steel can offer a finished appearance, but the coating must remain intact and the product must be intended for the exposure.
Keep moisture out of the connection
A post that touches concrete can draw moisture into its end grain. Water can also sit beneath a base plate, inside a bracket pocket, or around a fastener hole. Raising the post above grade, allowing drainage, and using flashing where appropriate often matter more to service life than choosing a larger-looking bracket.
For wet, salty, or freeze-thaw locations, inspect the entire assembly:
- Post position: Keep wood above grade rather than burying the connection in a wet pocket.
- Drainage: Avoid details that trap water against the post or base.
- Separation: Use a base designed to separate wood from concrete where the application requires it.
- Finish: Match the connector and fastener corrosion protection to the exposure.
- Maintenance: Look for coating damage, rust, standing water, and loosened fasteners during routine inspections.
Treated wood adds another compatibility question. California's Division of the State Architect requires prefabricated wood construction connectors to use fasteners that meet the manufacturer's requirements and evaluation report, including nail gauge, length, and corrosion-resistant coating requirements. For connectors touching preservative-treated or fire-retardant-treated wood, the same guidance requires the protective coating or corrosion-resistant material to be compatible with the treatment chemicals and used according to the manufacturer's recommendations. The Division of the State Architect guidance is a useful reminder that the fastener is part of the corrosion system, not an afterthought.
Material check: Read the connector instructions and treated-lumber requirements together. A compatible bracket with an unsuitable screw can still create a weak or corroded connection.
Sizing Load Ratings and Footing Compatibility Made Simple
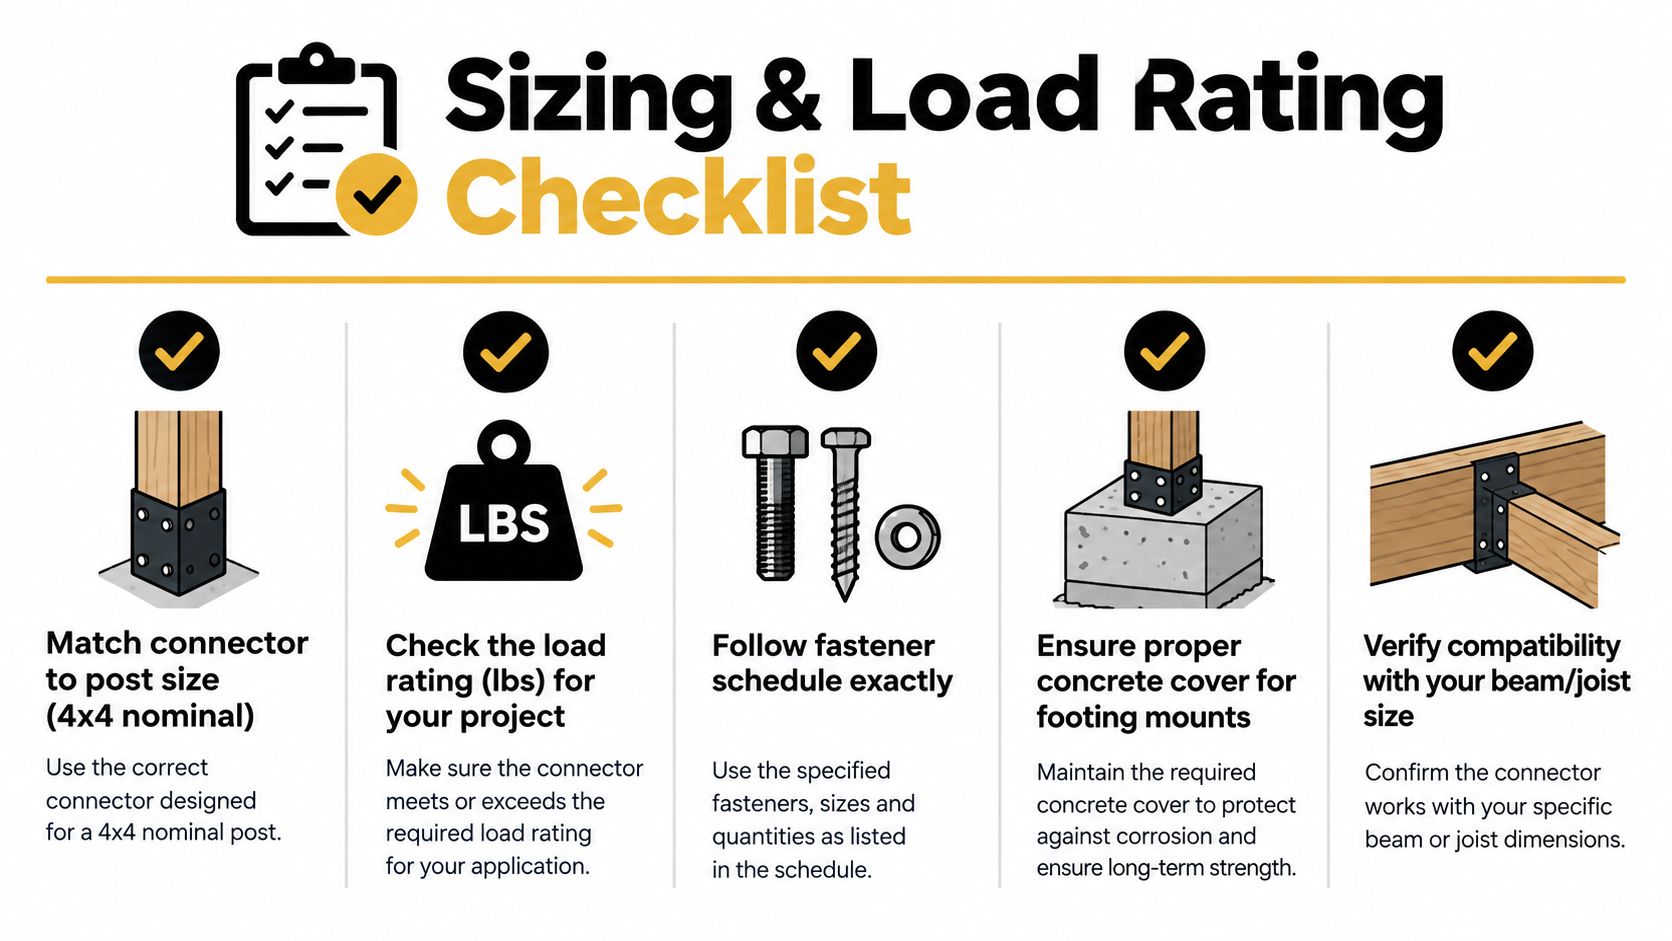
A 4×4 connector may fit the timber and still be wrong for the job. A fence post, an Ontario deck guard post, and a beam-supporting post carry different forces, so sizing must follow the complete load path from the supported member down to the footing.
Use this sequence before buying or drilling:
- Confirm the post size. Measure the actual timber and check the product instructions, rather than relying on a similar-looking label.
- Classify the application. Decorative fencing may need a different connector category from a structural deck guard or beam support. Guardrail-only hardware should not be treated as a structural post connector.
- Identify the load direction. Gravity, lateral movement, and guard impact place different demands on the connection.
- Check the supporting member. The beam, rim joist, or blocking must be large enough and properly supported to receive the transferred force.
- Verify the footing. Match the connector and anchor arrangement to the concrete, surface, edge distance, and post position.
Fastener schedules also matter. As noted earlier, use the manufacturer-specified connector screws, bolts, nails, or anchors, and verify concrete cover and installation limits in the product instructions. A fastener that fits through a hole is not automatically an approved substitute.
Ontario deck and guard details reference the Ontario Building Code and Supplementary Standard SB-7 for exterior guardrail post connections. They illustrate the difference between a decorative bracket and a code-related structural connection, including assemblies that use full-section 4×4 posts with through-bolting or rated bracket systems. The Ontario post-connection details show why bolt count, diameter, and connection layout belong to the design, not to a quick choice from leftover hardware.
For a surface-mounted deck, compare 4×4 post base options only after confirming the footing and load path. A surface base may suit one supported-post arrangement, while another may require through-bolting, blocking, or a tested connector assembly. If the post is exposed to guard loads, select a structural detail rated for that use rather than a guardrail-only fitting.
Installation Best Practices Fasteners and Mistakes to Avoid
A good installation starts before the drill comes out. Lay out the post, check the supporting member, confirm the connector orientation, and mark every hole from the manufacturer's template or instructions. Hold the post plumb while the connection is assembled, because forcing a leaning post into alignment after fastening can twist the bracket and load the fasteners unevenly.
Install the assembly in the right order
- Dry-fit the parts. Set the post, connector, beam, blocking, or base together without tightening everything. This exposes interference early.
- Check bearing and drainage. Make sure the post bears where it should and that water won't collect at the base.
- Use the specified fasteners. Connector screws, bolts, nails, and anchors aren't interchangeable because they fit through the hole.
- Drill accurately. Use the correct bit for wood or concrete, keep holes square, and avoid enlarging openings unless the instructions allow it.
- Tighten without crushing the wood. Over-tightening can deform the connector or compress the post fibres.
- Recheck plumb and alignment. Inspect the post from more than one direction before completing the surrounding framing.
For concrete-mounted work, the anchor type must suit the concrete and the connector. Wedge and sleeve anchors may be appropriate in some assemblies, but the product instructions control the hole size, embedment, spacing, and edge conditions. Don't move a base closer to a concrete edge just because the post looks better in that position.
Guardrail connections deserve extra care. A Millbrae, California residential deck permit requirement calls for a minimum 4×4 post bolted with a 1/2-inch diameter bolt to resist a 200-pound load applied to the top of the guardrail, and it requires an approved manufactured post cap metal connector for the wood post. The Millbrae deck permit requirements demonstrate how a guard post can have a defined load requirement and a specified connector category.
Common mistakes include:
- Wrong screw substitution: Using general-purpose deck screws where the connector requires structural connector screws.
- Missing blocking: Fastening a face-mounted post to a thin board without the backing needed for the connection.
- Mixed metals: Combining finishes that can accelerate corrosion in a wet environment.
- Buried wood: Allowing the post end or connector to remain in direct, persistent contact with wet concrete or soil.
- Skipped inspection: Never checking for rust, loosened bolts, cracked wood, or blocked drainage.
Keep the appropriate fasteners and fittings with the connector, and verify every substitution before installation. A professional-looking bracket won't compensate for a missing fastener, incorrect length, or unsupported connection face.
Buyer Checklist for Choosing 4×4 Post Connectors at Xtreme eDeals
Start with the project role. Is the post supporting a beam, forming part of a guard, holding a pergola, carrying a gate, or finishing a fence? That answer determines whether you need a structural base, post cap, beam saddle, face-mount bracket, anchor plate, or guardrail-specific attachment.
Then check the conditions around the connection:
- Load path: Identify where vertical, lateral, and uplift forces travel.
- Post fit: Confirm the connector is intended for the 4×4 post and the exact framing arrangement.
- Exposure: Choose a finish suited to moisture, road salt, and freeze-thaw exposure.
- Treated lumber: Confirm that the connector coating and fasteners are compatible with the wood treatment.
- Footing: Check concrete cover, anchor position, drainage, and separation from grade.
- Fasteners: Follow the specified type, size, quantity, and installation pattern.
- Maintenance: Leave access for inspection and avoid details that trap water.
Canadian product literature and connector catalogues show several 4×4 configurations, including post caps and base connectors that attach 4×4 posts to double 2x beams or rim joists. That range reinforces the central buying lesson: choose by connection and exposure, not by post size alone. This Ontario deck-post guide also highlights why corrosion rating, separation from concrete, and keeping the post above grade deserve attention in wet and freeze-thaw conditions.
At XTREME EDEALS INC., shoppers can compare post bases, post caps, anchor options, joist hangers, carriage bolts, lag bolts, nails, washers, and related deck and fence hardware. The catalogue includes Decorex Hardware products with CAD pricing and multi-pack choices, and Nuvo Iron provides another brand to compare for compatible decorative and surface-mounted hardware. If you're still refining the overall layout, you can also ask Outdoor Leisure Living about decks for broader deck planning inspiration before finalising the connection details.
Measure the post and supporting member, photograph the footing or mounting surface, record the exposure and lumber treatment, then compare those details against the manufacturer's instructions before checkout.
XTREME EDEALS INC. offers 4×4 post bases, brackets, caps, fasteners, anchors, and related deck and fence hardware for DIY projects and professional installations. Visit XTREME EDEALS INC. to compare compatible connector categories, check product details, and assemble the hardware package for a strong, durable Canadian outdoor structure.