
You’re probably looking at a fence that’s either being built right now or already standing there with bare post tops, and you’re wondering whether caps are just a finishing touch or something you need. That’s the right question.
A lot of homeowners start with the look. Black pyramid caps, copper tops, ball finials, solar lights. Contractors usually start with fit, weather exposure, and callback risk. The smart choice sits in the middle. The best fence post cap ideas don’t just improve the line of a fence. They stop water from getting into the most vulnerable part of the post and help the whole job last longer.
That matters in climates like Ontario and New York, where rain, snow, freeze-thaw movement, and summer sun all work on the same fence year after year. If you choose the cap style first and ignore material, fit, and fastening method, you can end up with something that looks good for one season and causes trouble after that. If you choose only for function, you can miss the chance to give a plain fence a clean, finished look.
The right cap does both. It protects the post and completes the build.
Why Every Fence Post Needs a Cap
An exposed fence post is vulnerable from the top down. On a wood post, the end grain takes in water far more easily than the sides. Once moisture gets in, the cycle starts. Swelling, drying, checking, splitting, then rot. In a cold climate, freeze-thaw makes it worse.
An uncapped post is a lot like a house without a roof. The structure might still stand for a while, but the most exposed surface is taking the hit every day. Rain sits on top. Snow melts into the grain. Sun bakes it dry. Then the next storm starts the cycle again.
Ontario data makes the case clearly. The Canadian Home Builders' Association Ontario Division's 2024 Fencing Durability Report says properties using quality fence post caps on wood posts see a 500% increase in lifespan, from 5 to 10 years without protection to 50 years, and the same report found a 71% rot failure rate in uncapped posts due to water ingress, versus 4% in capped ones.

What actually fails first
The top of the post usually shows trouble before the rest of the fence does. You’ll see hairline cracks, soft fibres, dark staining, and the start of splitting around fastener points. If the fence has rails and pickets that still look decent but the post tops are deteriorating, that’s the warning sign.
A cap changes that in a simple way. It sheds water away from the top surface, limits direct exposure, and reduces the amount of moisture that can sit where decay begins.
Practical rule: If you paid for good posts, don’t leave the most exposed surface unprotected.
Why caps make financial sense
Most fence replacements don’t start with every part failing at once. One or two posts go soft, lean, or split. Then sections loosen. Then somebody has to pull panels, dig out old concrete, reset posts, and patch the line. That’s where a cheap omission turns into an expensive repair.
For DIY homeowners, that means redoing work you thought was finished. For contractors, it means callbacks nobody wants. For property managers, it means repeating maintenance on the same asset.
Caps also solve a visual problem. A raw cut post top rarely stays neat. It weathers unevenly, stains, and starts to look older than the rest of the fence. A properly fitted cap gives the run a consistent finish from the first week onward.
If you’re collecting fence post cap ideas, treat protection as the first filter and style as the second. That order saves fences.
A Visual Guide to Post Cap Styles
Style matters more than people think. Post caps sit at eye level across the whole fence line, so they affect the rhythm of the build. A cap that suits the house and the fence profile can make a standard installation look intentional. A cap that fights the design can make even good materials look mismatched.
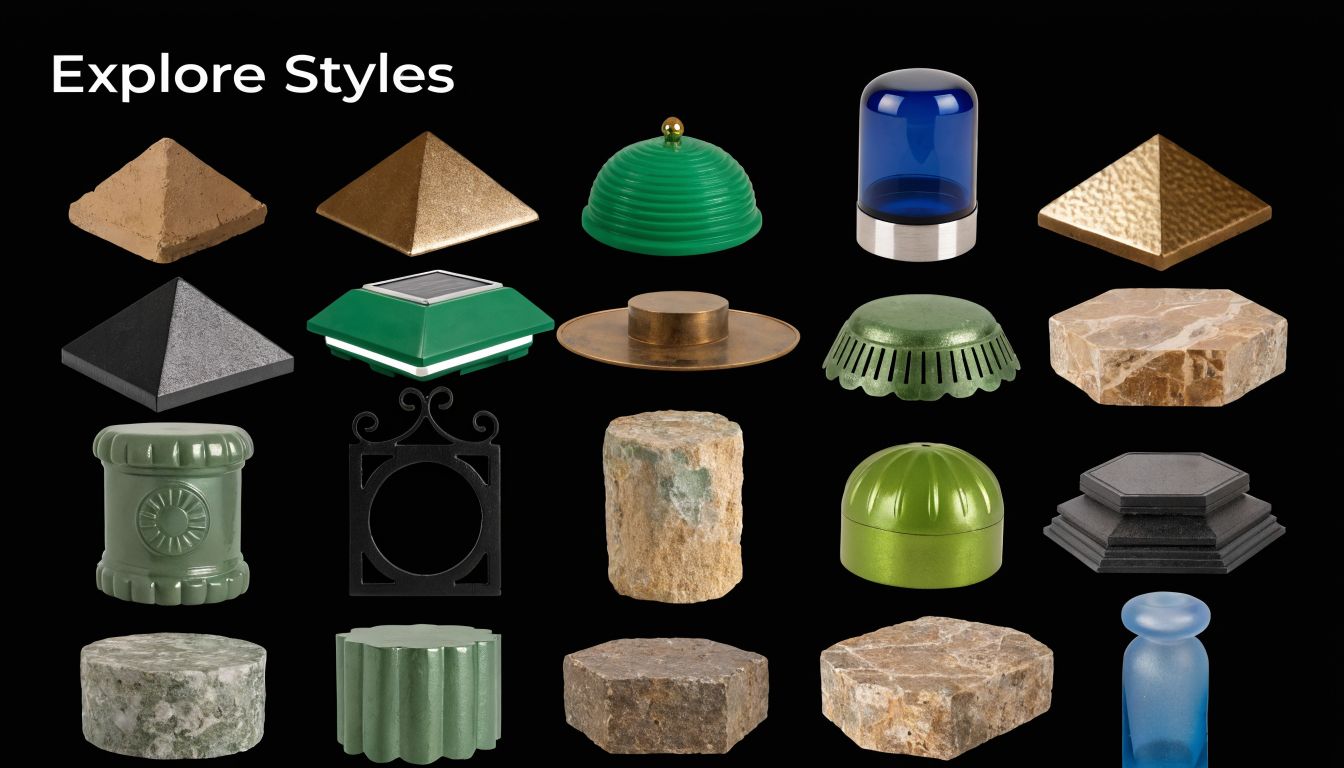
Pyramid caps for the broadest fit
If a customer asks for one safe choice that works on almost anything, pyramid caps are usually it. They suit privacy fences, perimeter fences, gate posts, and deck-adjacent runs. The sloped faces help water shed cleanly, and the shape looks right on both traditional and newer homes.
Black pyramid caps are especially easy to work into modern exteriors. They pair well with black hardware, gate hinges, and darker pickets. On pressure-treated wood, they add contrast. On composite and vinyl systems, they sharpen the lines without looking fussy.
These are often the easiest recommendation when the goal is simple: protect the post and make the fence look finished.
Ball tops and finials for older homes and statement posts
Ball caps and finial styles are more decorative, but that doesn’t mean they’re impractical. They work well on front yard fencing, gates, and heritage-style homes where the fence is part of the curb appeal rather than just a boundary.
Use them selectively. A full run of ornate tops can look busy on a plain suburban fence. On the other hand, using a decorative cap only on gate posts or corner posts can create a strong focal point without overdoing it.
On a simple fence, the cleanest move is often decorative accents on the main posts and quieter caps everywhere else.
Flat top caps for modern builds
Flat caps are the most restrained option. They suit horizontal slat fences, minimalist gardens, newer infill homes, and projects where the fence already has strong geometry. They don’t draw attention to themselves, which is exactly why they work.
The trade-off is practical. A perfectly flat cap has less visual water-shedding than a pyramid profile, so fit and material matter even more. On modern work, I’d rather see a well-made flat metal cap than a cheap plastic one trying to imitate the look.
Lighted caps for ambience and wayfinding
Lighted caps solve two jobs at once. They finish the post and add evening visibility. On decks and shared backyard spaces, they help define edges. Along pathways or gate entries, they make the fence useful after dark.
There are two common routes:
- Solar lighted caps are easier for most DIY jobs. They’re a good fit where you get decent sun and don’t want to run wire.
- Low-voltage lighted caps make more sense when you want a more controlled, coordinated lighting plan across a larger yard.
They work best when used with restraint. Every post doesn’t always need a light. Lighting selected posts, like gate entries, corners, and main sight lines, often looks better than turning the whole fence into a row of bright points.
Matching style to fence material
Some combinations are naturally stronger than others:
- Wood fence plus pyramid or ball cap gives a classic North American look.
- Vinyl fence plus flat or low-profile cap keeps the finish clean.
- Composite fence plus metal cap adds contrast and makes the top line feel more deliberate.
- Decorative metal fence accents plus finial cap tie the hardware language together.
Brands such as Nuvo Iron offer styles across classic, decorative, and clean-lined categories, which helps when you want the cap to match the hardware rather than feel like an afterthought.
The best fence post cap ideas start with the house, but they finish with restraint. A cap should complete the fence, not compete with it.
Choosing the Right Material and Finish
Material choice decides whether your cap becomes long-term protection or just short-term decoration. Many purchasing errors arise during the selection process. People choose by shape, then sort by colour, then realise later that the cap doesn’t suit the post, the climate, or the amount of maintenance they’re willing to do.
The practical way to buy is to work backwards. Start with the post material, then the local weather, then the finish you want to live with.
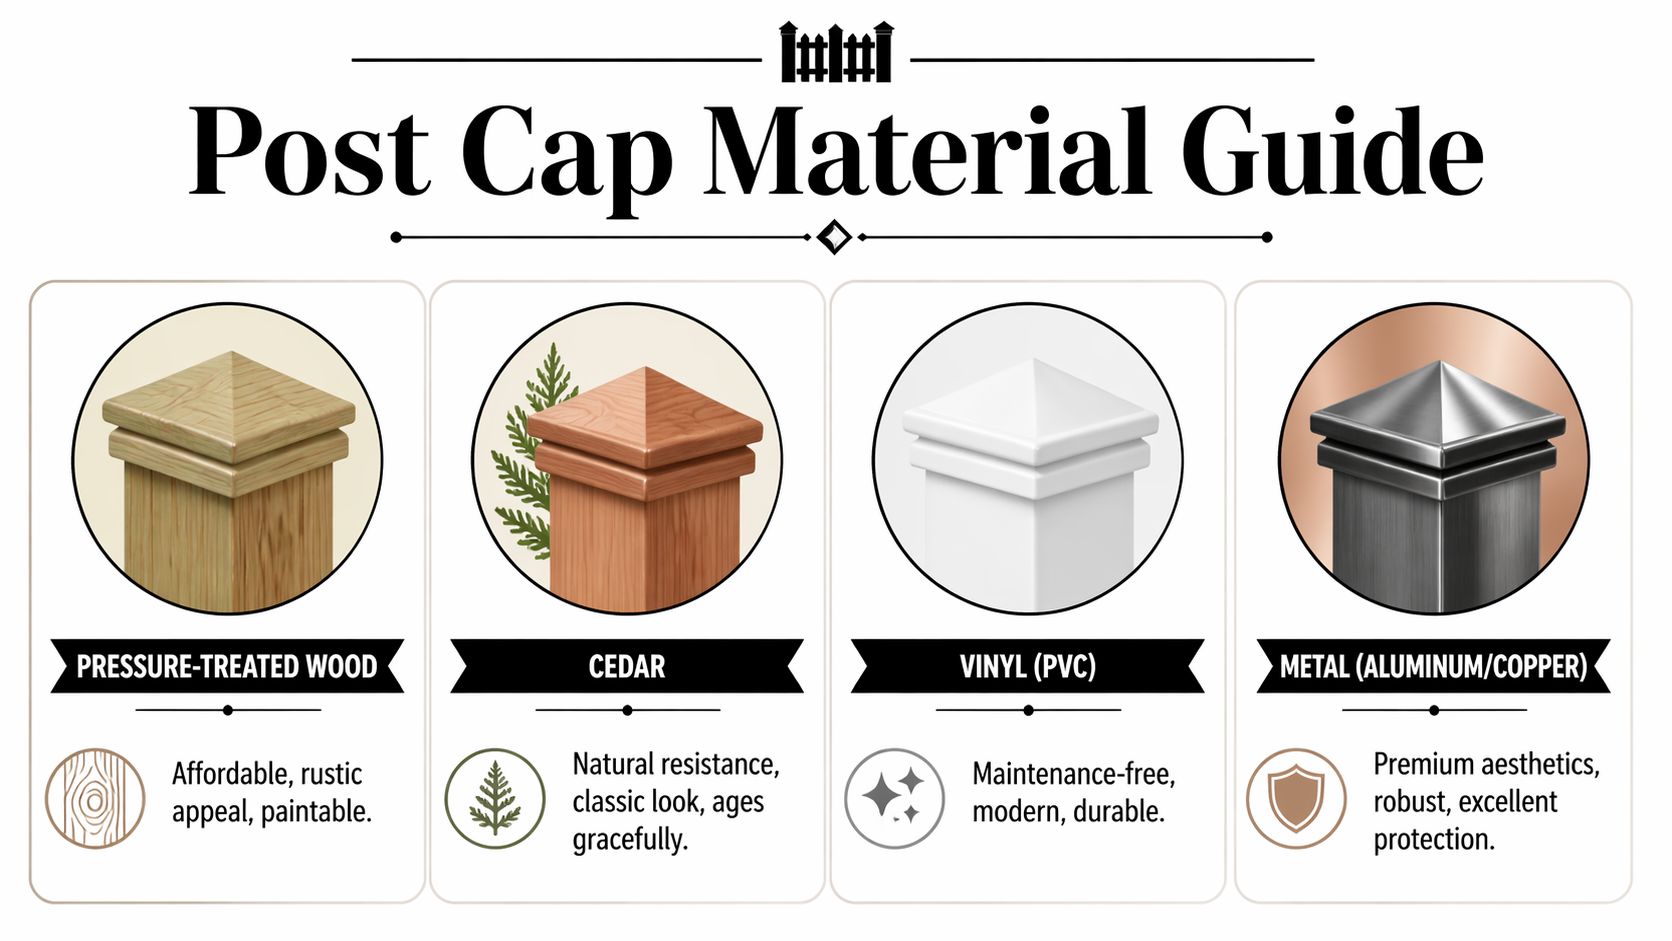
Wood and cedar caps
Wood caps can look right on rustic fences, ranch-style properties, and cedar builds where you want a fully natural finish. They blend in well and can be stained with the rest of the fence.
The downside is upkeep. Wood caps still weather, still move with moisture, and still need sealing or staining if you want them to stay tidy. If the goal is low maintenance, wood caps usually aren’t the answer.
Cedar performs better visually over time than many cheaper wood options because it ages more gracefully. But it still needs attention. On a decorative fence where natural appearance matters, that trade-off can be worth it. On a long perimeter fence, it often isn’t.
Vinyl caps
Vinyl caps appeal to buyers who want easy maintenance and a clean, consistent finish. They’re common on vinyl fencing systems and can work well when the fence itself already has a bright, smooth, manufactured look.
Their weak point is that some lower-grade vinyl caps can look light-duty beside a heavy timber post. If the fence is substantial, a flimsy cap stands out fast. Vinyl is usually a better fit on matching vinyl systems than on big wood posts where the rest of the fence has more visual weight.
Powder-coated aluminum and copper
For metal posts, technical guidance on post cap materials and performance states that powder-coated aluminum or copper post caps offer superior durability against freeze-thaw cycles and corrosion, and that they reduce structural failure risk by 40% over uncapped designs by distributing post-top loads evenly to help prevent splitting. That same source adds that, for wood posts, high-strength galvanized steel caps reduce moisture-induced rot and cracking by over 80%, extending post lifespan by up to 50% in regions with significant annual precipitation.
Powder-coated aluminum is one of the easiest materials to recommend when the customer wants a durable, sharp-looking cap with less worry about corrosion. It suits a broad range of homes and usually pairs well with modern black hardware.
Copper looks excellent on the right property. It belongs on homes where warm metal tones already appear elsewhere, such as lighting, roofing details, or door hardware. If copper is the only warm metal on the exterior, it can feel disconnected.
Material should match the site first and the style second. A beautiful cap in the wrong material is still the wrong cap.
Galvanized steel and stainless steel
Galvanized steel is a strong practical choice for wood fence posts. It has the visual weight many fences need, especially on larger posts, and it’s a better fit than lightweight plastic when the job calls for a more solid finish. It’s particularly sensible where moisture protection is the main concern.
Stainless steel is the premium practical option when exposure is severe, or when road salt and constant wetting are part of the environment. It doesn’t fit every budget, but it solves a lot of problems before they start.
A retailer such as XTREME EDEALS INC. carries post caps in common sizes, including options like a 4 x 4 cap range and larger 6 x 6 formats, along with brands such as Nuvo Iron and Decorex Hardware, which makes it easier to match material choice to actual post size instead of settling for a close-enough fit.
Finish matters as much as base material
Colour and coating affect how the cap ages. Matte black often hides dirt and blends with other hardware. Gloss finishes can look sharper on day one but show scratches sooner. Raw-looking metals can suit a specific design language, but they need to be chosen intentionally.
If the fence has black gate hardware, black balusters, or dark inserts, matching the cap finish usually creates the cleanest result. If the fence is warm cedar, black can still work, but copper or softer metallic tones may feel more integrated.
Fence Post Cap Material Comparison
| Material | Durability | Maintenance | Best For | Average Cost |
|---|---|---|---|---|
| Pressure-treated wood | Moderate | Higher | Rustic fences, stain-matched projects | Budget to mid-range |
| Cedar | Moderate | Moderate | Natural cedar fences, heritage look | Mid-range |
| Vinyl (PVC) | Moderate to good | Low | Vinyl fence systems, low-maintenance builds | Budget to mid-range |
| Powder-coated aluminum | Good to high | Low | Modern fences, metal posts, wet climates | Mid-range to premium |
| Galvanized steel | High | Low to moderate | Wood posts needing strong weather protection | Mid-range |
| Stainless steel | High | Low | Harsh exposure, salt-heavy conditions | Premium |
| Copper | Good to high | Moderate | Decorative projects, traditional homes | Premium |
The right finish is the one that still looks appropriate after weather, dirt, and seasons have had a say in it.
Getting the Perfect Fit by Measuring Your Posts Correctly
Most returns and ordering mistakes come down to one issue. People buy for the label on the post, not the actual size of the post.
A 4 x 4 wood post usually isn’t a true 4 inches by 4 inches. It’s typically smaller in actual measurement. That difference matters because a cap has to fit the actual post, not the nominal name. This is comparable to buying a shirt; the tag size gets you close, but the actual measurement is what determines whether it fits properly.
How to measure without guessing
Use a tape measure and check the top of the post, not the middle or bottom. Measure across one side, then the adjacent side. If the post has weathered, swollen, or shrunk slightly, the top is still the only dimension that matters for the cap.
Follow this sequence:
- Clean the post top so dirt, splinters, or old sealant don’t interfere with the reading.
- Measure side to side across the widest points at the top.
- Measure both directions because older posts aren’t always perfectly square.
- Check for damage like rounded corners, mushrooming, or cracks that may affect cap fit.
- Compare against actual cap dimensions in the product listing, not just the nominal post label.
If you’re replacing old caps on an existing fence, don’t assume every post matches. Some older fences include a mix of post sources, site trimming, or swelling from years of exposure.
Why snug fit matters
A loose cap doesn’t just look sloppy. It can let water sit, shift in wind, or leave gaps that defeat the whole purpose of the cap. Too tight is a problem too, especially on coated metal caps, because forcing them on can damage the finish or split wood fibres at the top.
For anyone also planning a new fence build, this guide to correct fence post installation is useful because post layout, plumb alignment, and clean post tops all affect how neatly caps fit at the end.
If you’re buying a standard wood-post size, a product page built around the actual fit is the easiest place to start, such as this 4 x 4 fence post cap option. The key is still the same. Measure first, order second.
A cap should seat cleanly without wobble, rocking, or being hammered on with force.
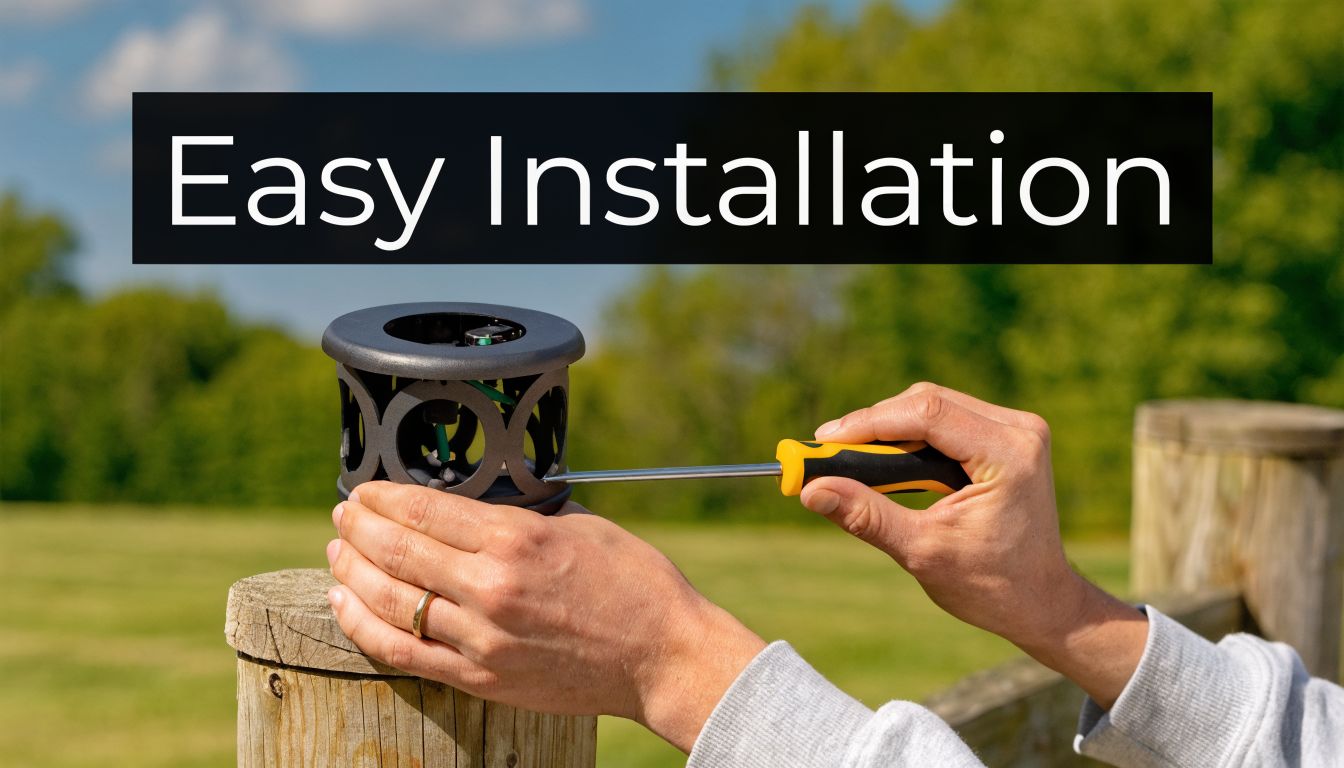
Installing Your Post Caps and Wiring for Lighted Models
Installation is usually straightforward, but the method should match the cap and the job. The mistake I see most often is treating every cap the same. Some are designed to press on cleanly. Others need screws. Others benefit from adhesive in the right setting. If you choose the wrong method, you either fight the install or make future maintenance harder than it needs to be.
Standard cap installation
For plain non-lighted caps, start with a dry, clean post top. Any sawdust, old caulk, peeling stain, or raised wood fibres can affect fit. Test the cap first before adding fasteners or adhesive.
Here’s the practical breakdown:
- Press-fit caps work well when sizing is precise. They’re quick and tidy, but only if the cap is made for the actual post dimension.
- Screw-fixed caps are reliable on gates, taller fence runs, or exposed sites where movement matters. Use corrosion-resistant screws and keep placement symmetrical.
- Exterior adhesive helps when you want a cleaner look without visible screws, but it’s less convenient if the cap ever needs to come off for repair or replacement.
Don’t overdo adhesive. A small, controlled bead is enough. Too much creates squeeze-out and traps mess around the top edge.
Solar lighted caps
Solar caps are the easiest way to add evening light without opening up the project into electrical work. They’re popular on deck posts, gate posts, and feature sections of fence where soft light is more useful than raw brightness.
Set them where they’ll get regular sunlight. If a fence line sits under heavy tree cover or on the wrong side of a building, the performance can be disappointing even with a good product. Clean the panel before final installation and check the switch position if the model has one.
If you’re planning the wider yard around the fence, these backyard lighting ideas can help you decide where post-cap lighting works best and where path or wall lighting would do a better job.
Low-voltage lighted caps
Low-voltage caps take more planning, but they give a more consistent result across larger spaces. You’ll need a transformer, low-voltage cable, and a clear route for the wire. The cleanest jobs plan the wire run before caps go on.
Keep the basics in order:
- Dry-fit every cap first before committing to wire routing.
- Protect cable paths so the wire doesn’t get pinched at the post top.
- Follow the fixture instructions for connection and polarity.
- Test the full run before final fastening.
A larger format such as a 6 x 6 post cap category is often where lighted models really stand out, because the scale suits the visual weight of the illuminated cap.
This walkthrough gives a useful visual reference for installation steps and fit:
What works and what doesn’t
What works is simple. Clean surfaces, measured posts, dry-fitting first, and using the fastening method the cap was designed for.
What doesn’t work is forcing an undersized cap, burying everything in adhesive, or running lighting wire as an afterthought. Those shortcuts show up later as loose caps, chipped finishes, dead lights, or difficult repairs.
Long-Term Care and Weatherproofing Your Caps
A good cap reduces maintenance, but it doesn’t eliminate it. The right mindset is simple: install once, inspect occasionally. That’s enough to avoid most problems.
In Ontario, post protection has been a long-standing practical concern. According to historical and building-code context compiled in this review of fencing history and post protection practices, Ontario Building Code data from 2012 revisions shows 78% of residential fence failures in the GTA stem from untreated post tops, leading to rot in 62% of cases within 7 years. The same source notes a 145% surge in post cap sales in the region, and states that caps can reduce replacement costs by up to 85%.
Material-specific upkeep
Different cap materials need different levels of attention.
- Wood caps should be checked for finish wear, especially on the upper face and edges. Re-stain or reseal when the coating no longer beads water consistently.
- Vinyl caps benefit from simple washing to remove surface grime, mildew film, and staining from trees or irrigation.
- Powder-coated and galvanized metal caps should be wiped down periodically and inspected for coating damage, especially where tools may have scratched the finish during installation.
- Solar caps need their panels kept clear of dirt, pollen, and leaf film if you want reliable charging.
Small checks that prevent bigger repairs
Most fence owners don’t need a full maintenance routine. They need a short seasonal check.
Use this list:
- Look for movement after wind or freeze-thaw periods.
- Check the seal line if adhesive was used.
- Inspect screw heads for looseness or early corrosion.
- Clear debris that traps moisture around the cap edge.
- Touch up coating damage before bare metal sits exposed.
If you’ve installed metal caps and want a deeper primer on coatings, cleaning, and surface protection, this guide on how to protect metal from rust is a helpful reference.
Regular maintenance on caps isn’t about the cap alone. It’s about protecting the post underneath, which is the expensive part to replace.
Weatherproofing that actually helps
The best weatherproofing starts before the cap goes on. Make sure the post top is clean, square, and not already split. If the post has developed checks at the top, address that before capping it. Don’t trap an existing problem under a new accessory.
After installation, the biggest win is consistency. Clean lighted caps so they keep working. Reseal wood when needed. Touch up damaged coatings early. That’s how a cap becomes a long-term protection detail instead of just a decorative purchase.
Your Ultimate Fence Post Cap Buyer's Checklist
Use this as your final screen before ordering:
- Measure the actual post top. Don’t buy from nominal size alone.
- Match the cap style to the fence and house so it looks intentional, not added later.
- Choose material for the climate. Wet and freeze-thaw conditions usually call for metal over decorative wood.
- Check the finish against your hardware. Black, copper, and brushed tones should relate to hinges, inserts, and nearby fixtures.
- Decide how you’ll install it. Press-fit, screws, or adhesive each have different trade-offs.
- Think about maintenance. If you don’t want upkeep, skip wood caps.
- Use lighted caps selectively for entries, corners, and feature posts.
- Buy from a category that clearly lists fit and type, such as these post caps for deck and fencing projects.
A short checklist prevents most expensive mistakes.
Frequently Asked Questions About Fence Post Caps
Can I paint plastic or metal post caps
You can, but it only works well when the surface is prepared properly and the coating is compatible with the material. In practice, it’s usually better to buy the finish you want from the start. Factory finishes tend to last longer and look cleaner than field-painted caps.
What’s the difference between a post cap and a finial
A post cap is the top piece that covers and protects the post. A finial is a decorative top element, often more ornamental, that may be integrated into or mounted on the cap. All finials are decorative. Not all post caps are.
Are solar post caps bright enough for security
Usually, no. They’re better for ambient light, edge definition, and helping people find their way around the yard after dark. If your goal is security lighting, use dedicated fixtures and treat solar caps as accent lighting.
How do I remove an old glued-on cap
Start by scoring around the joint carefully with a utility knife. Then work the cap gently from multiple sides instead of prying hard from one corner. If the adhesive bond is stubborn, slow and controlled removal is better than tearing fibres out of the post top.
Are decorative caps worth it on a basic fence
Yes, if the decorative choice still suits the fence scale and the house. The best results usually come from moderation. Use statement caps where the eye naturally lands, such as gate posts or end posts, and keep the rest of the run simpler if needed.
Do I need caps on every post
If the posts are exposed to weather, capping every post is the safer move. Mixing capped and uncapped posts often looks inconsistent and leaves the most vulnerable wood still exposed.
If you’re choosing between styles, sizes, or materials, XTREME EDEALS INC. offers post caps and related deck and fencing accessories in common formats for wood and metal posts, including decorative, pyramid, and larger-size options that can help you match protection to the look of the project.