

A U-channel post is a ribbed, open-back steel post that's usually driven into the ground, and some sign-support systems use an 18-inch U-channel base rather than burying the entire upper post. Go straight to the size table below if you're comparing lengths, but choose the post around the ground and the load, not just the height on the label.
You might be replacing a leaning parking sign, fencing a side yard, or standing in front of a rack of nearly identical green posts. The cheaper driven option can work well. It can also twist under a panel or move through a Canadian winter if you buy the steel before checking the site.
What a U-Channel Post Actually Is
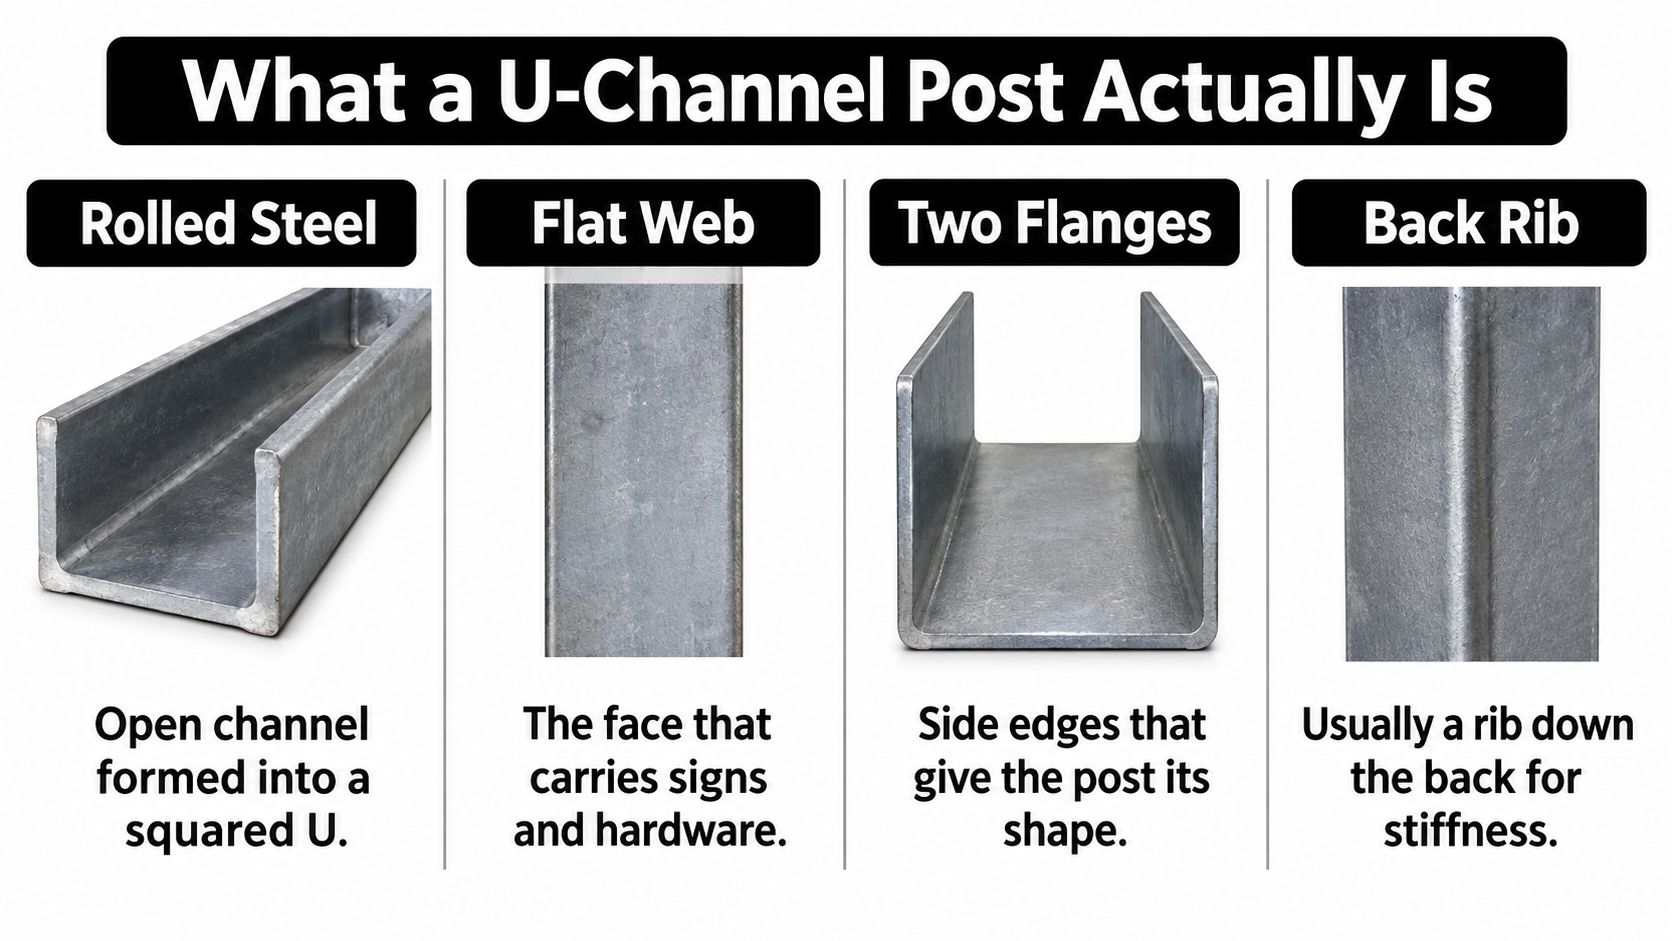
Pick up a U-channel post and look at its end. The rolled-steel section resembles a squared letter U, with a flat web, two side flanges and, commonly, a reinforcing rib along the back. It isn't a hollow tube with a face missing.
The rib matters because shaping thin steel increases its resistance to bending, much as a folded card stands upright when a flat sheet flops. That doesn't make the post equally strong in every direction. An open channel is still easier to twist than a suitable closed section.
These are the features to identify before comparing catalogue descriptions.
Read the shape before the product name
A counter person might call it channel bar, flanged channel, a rib-back signpost, or a delineator post. Those names can describe related products, so take the section dimensions and intended use more seriously than the nickname.
Factory-punched holes let you bolt a sign to the web without drilling every connection. Compatible channels can nest for transport and overlap for a designed splice. Neither feature makes an improvised assembly a certified roadside support.
- Flat web: Provides the mounting face for signs, brackets and compatible fence hardware.
- Flanges and rib: Give the section its stiffness, but don't eliminate torsional weakness.
- Punched holes: Simplify positioning, provided the bolt diameter and mounting pattern match.
- Open back: Makes inspection easy, while leaving edges and coating damage exposed.
An established sign-support shape
The scale of sign maintenance explains why this modest section remains useful: Caltrans reports approximately 500,000 traffic signs on California's state highway system, including about 480,000 ground-mounted signs.
Caltrans' Signing and Delineation Materials Authorized Material List includes products using 18-inch U-channel bases. That's evidence of an established support method, not permission to copy a roadside assembly without its specifications.
For a homeowner, the useful distinction is simpler. U-channel belongs with signs, light mesh and replaceable markers, not deck columns or heavy gate leaves. The buying words are length, pounds per foot, hole pattern and coating. Start with weight class, then check whether the section suits the connection.
Lengths Weights and Hole Patterns
Common U-channel lengths and weight classes
The following is a worked buying comparison, not a universal stock list or a load-rating chart. Treat each row as an example specification to compare with the seller's actual drawing.
| Length | Weight class | Typical section | Hole pattern | Usual job |
|---|---|---|---|---|
| 6 ft | 1.12-2 lb/ft | About 2 in flange, light rib | 3/8 in holes on 1 in centres | Yard signs, short delineators |
| 8 ft | 2 lb/ft | About 2-2.5 in flange | 3/8 in holes on 1 in centres | Standard signs and light fence |
| 10 ft | 3 lb/ft | Wider ribbed flange | Full-length punch | Taller signs, deeper drive |
| 12 ft | 3-4 lb/ft | Heavy ribbed channel | Full-length punch | Windier sites, lap splices |
| 14 ft | 4 lb/ft | Heaviest channel in this comparison | Full-length punch | Maximum driven height in this comparison |
Read a row as a complete specification
Say you're considering the example 8 ft, 2 lb/ft post. The length tells you how much steel you have to divide between buried support and exposed height. Pounds per foot describes the section's linear weight, not the weight of sign it can safely carry.
In that hypothetical row, the post weighs approximately 16 lb before hardware, calculated from its length and linear weight. That's useful for handling and ordering. It isn't a structural capacity.
The hole pattern answers a different question: will the sign and bracket land where you need them? Check hole diameter, spacing, punched length and end clearance. A post punched only near the top offers fewer mounting and splice options than a compatible full-length pattern.
Buying rule: More steel per foot can help, but it doesn't replace a load check, adequate ground support or a sound connection.
Allow for the part you bury
For a preliminary layout, a buyer might start with roughly one-third of the overall length embedded. That's a planning assumption, not a Canadian frost-depth rule or an engineered minimum. Ground conditions, exposed height, sign area and the manufacturer's installation requirements can require a different arrangement.
For example, burying 30 inches of an 8 ft post leaves 66 inches above grade. Both measurements belong to this hypothetical layout, and neither establishes that the post will resist your site's wind or frost.
Use these checks before ordering:
- Exposed height: Measure to the actual attachment points, not just the top of the post.
- Weight class: Compare like-for-like sections, including flange width and rib geometry.
- Splice allowance: Deduct the designed overlap from the combined lengths.
- Finish: Specify the coating rather than ordering by colour alone.
A taller post gives you room for deeper embedment, but height also increases force above ground. Don't automatically choose the longest channel when the problem is a wide sign or a connection that twists. Sometimes the correct upgrade is a different post shape.
Fences Signs and Temporary Barriers
A parking sign, a dog run and an event boundary can all use channel posts, but they don't impose the same load. Choose the assembly for the job rather than copying the nearest installation.
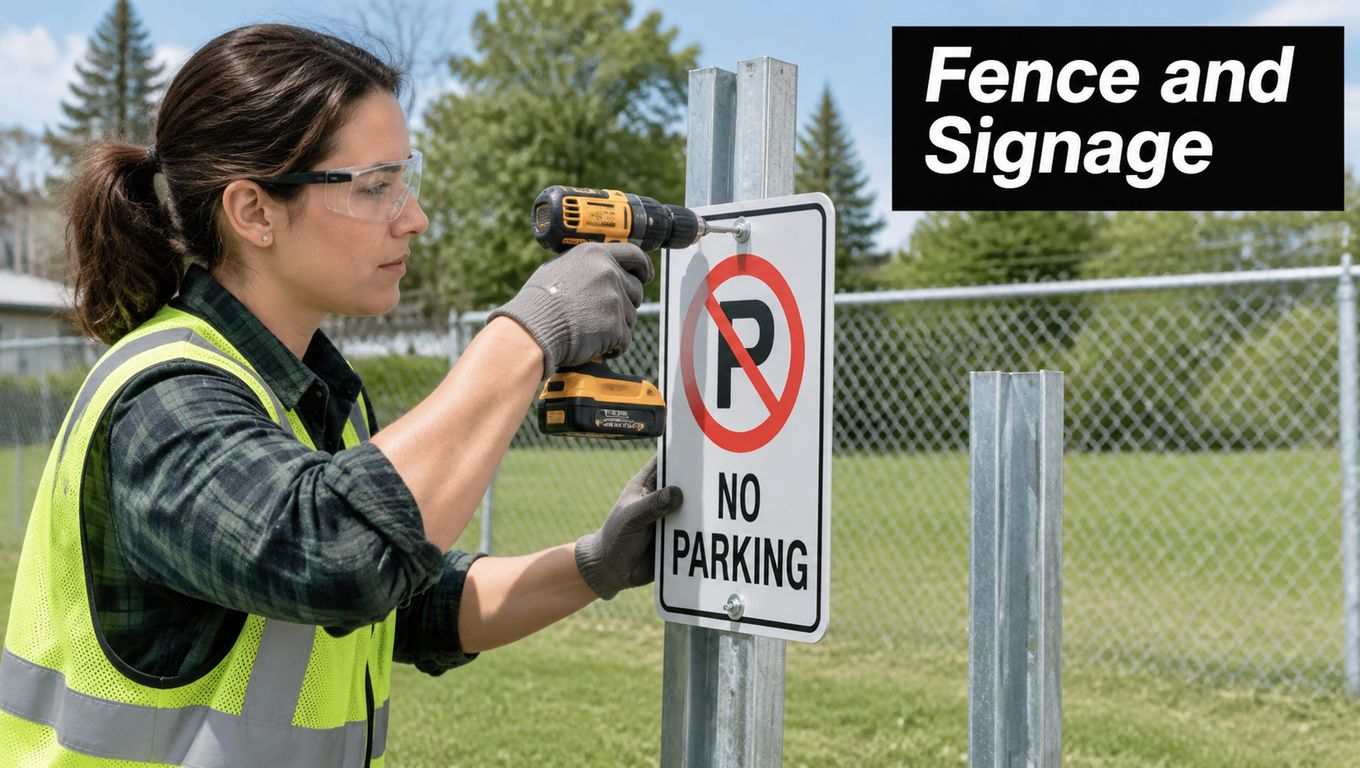
For a sign, the mounting face should sit square against the web, with hardware that won't work loose as the panel moves.
A parking sign beside an exposed lot
Consider a hypothetical 24 by 36 inch parking sign on an 8 ft, 2 lb/ft post. That's a starting proposal to check, not a recommended capacity. The same panel beside a sheltered building and beside an open lot can demand different support.
Check the sign material as well as the steel beneath it. Evright Industrial's guide to material choices for industrial safety signs is useful when comparing the face material with the exposure and service conditions.
For a modest, single-facing sign, a sign-grade U-channel assembly is a sensible candidate. Public-road installations need the applicable approved support and breakaway details.
A mesh run beside the house
Say you're planning a dog run using hypothetical 8 ft channel posts and open mesh. The mesh allows more air through than a solid screen, but tension still loads the ends and corners. A dog jumping against it adds another load the bare post doesn't reveal.
Use channel as a possible light-duty line post, with more substantial end and corner supports where needed. Work out the layout using the fence post spacing guide, then check the mesh manufacturer's requirements rather than choosing spacing by appearance.
Don't turn the line-post detail into a gate detail. A swinging leaf applies torque that the open section handles poorly.
A removable event boundary
An event aisle marker needs visibility and convenient removal. Compatible overlapping channels can help with transport and assembly, but any splice still needs a defined overlap and fastening detail.
Use light, removable channel assemblies for markers and low-load boundary lines. They aren't vehicle barriers, fall protection or substitutes for a trench-protection system.
Keep the intended assembly in mind when reviewing an installation demonstration.
Pull temporary posts out when the job ends. Cutting them off can leave a sharp obstruction and a buried problem for the next person working there.
U-Channel Posts Compared with Other Posts
U-channel against the posts people substitute
These cost descriptions are buying guides, not quotations. Section size, finish, local stock and installation work can change the final order cost.
| Post | Best job | How it is set | Strength limit | Relative cost |
|---|---|---|---|---|
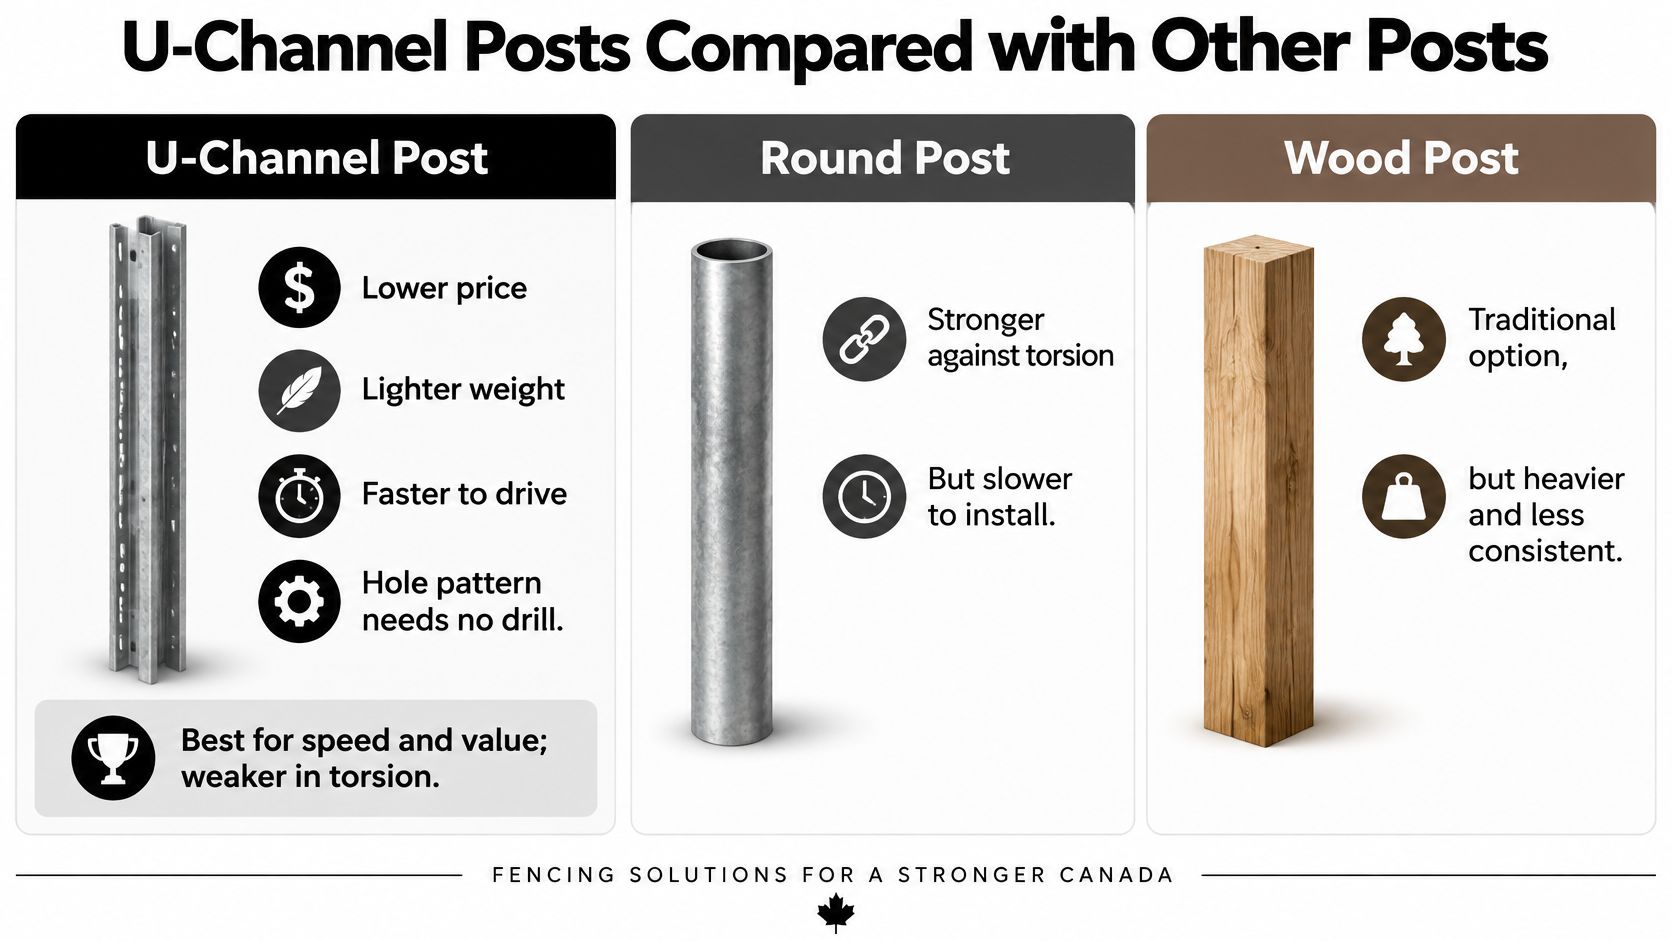
| U-channel | Signs, light mesh, temporary barriers | Driven, sometimes lap-spliced | Bends; weak in torsion | Low-cost fabricated sign-support option |
| Square tube | Larger signs, specified breakaway supports | Driven sleeve or direct bury | Higher load and twist capacity with a suitable section | Generally higher than channel |
| Wood 4×4 or 6×6 | Privacy fences, gates | Dug hole, often concrete | Can decay at grade; heavy to handle | Include timber, excavation and footing work |
| Round pipe | Chain-link lines and terminals | Driven or concreted | Section and connections govern capacity; slower to alter | Compare complete installed assembly |
| T-post | Farm wire and mesh | Driven | Poor mounting face for flat signs; can twist | Economical for agricultural wire work |
Choose the section for the force
For a replaceable sign, favour U-channel when its approved capacity and connection suit the panel. The punched web makes a straightforward bolted assembly. You're not paying for a closed section where the job doesn't need one.
For a large sign or mounting faces pointing in different directions, consider square tube. Its closed shape offers a better starting point for resisting twist. You still need to compare actual sections, because the words square tube don't specify wall thickness or load capacity.
For a fence that acts as a structure, select the fence system first. Wood suits many privacy-fence details, while round pipe fits chain-link fittings and tensioning arrangements. A farm T-post is useful for wire, but its studs and profile are awkward for keeping a flat sign square.
This comparison highlights the broad differences in shape and installation.
Compare installed work, not bare posts
A low-priced post stops being economical when you repeatedly straighten it or remake its connections. Include the driver or auger, concrete where required, brackets, fasteners, removal work and access to the site.
For timber projects, understand what a 4×4 post spike does before treating it as interchangeable with an embedded post or designed footing. The support method has to match the soil and the load.
Deck guards belong in a separate category. Utah Deck Supply's railing options for decks can help you compare railing systems, but a light fence post isn't automatically a suitable guard post.
Buy the support that handles the job's hardest load, not the one that's easiest to carry from the truck.
A post that carries mesh adequately may fail at a corner, gate or solid infill panel. Those transitions deserve their own support detail rather than a heavier version of an unsuitable line post.
Steel Coatings and Freeze Thaw Ground
No concrete isn't a universal advantage. It's an installation choice that works only when the soil, load and maintenance expectations support it. A quick drive into wet clay can become a seasonal straightening job.
Start with the ground, not the coating. After utility clearance, probe the intended location with a bar and assess resistance, drainage and signs of disturbed fill. A post that drives easily may be entering weak ground rather than ideal ground.
Check the soil before committing
Hard refusal needs investigation. Don't keep striking a post that has met rock, buried concrete or a substantial root, and don't cut the post shorter just to make the finished height look right.
- Firm, well-drained ground: A driven installation may be practical when the post and load suit it.
- Wet clay or loose fill: Reconsider embedment and footing design before hanging the panel.
- Corners and loaded ends: Provide support for tension and lateral loads, not just vertical alignment.
- Previously moving ground: Ask a local installer about the soil profile and local frost conditions.
Embedding a post below local frost depth can help a properly designed installation, but it doesn't guarantee immunity from movement. Frozen soil can grip the shaft, and poor drainage can undermine an otherwise substantial footing.
Site decision: Stop driving when continuing would damage the post or conceal an inadequate foundation.
Protect the coating and check the rules
Green enamel can suit a comparatively dry, sheltered location. Hot-dip galvanizing is a stronger candidate where road salt, persistent moisture or repeated wetting makes coating damage more consequential. Neither finish excuses a badly scarred installation.
Use the correct driver head, keep the top from mushrooming, and repair damage promptly. Clean and dry the affected area, remove loose corrosion, and apply a compatible coating repair. For galvanized steel, use a zinc-rich repair product intended for that application.
Shape the surface so water drains away instead of collecting around the post. Don't pile wet soil, mulch or grass clippings against the steel and expect the coating to compensate.
Municipal limits are separate from structural capacity: Hamilton's residential fence guidance generally limits residential and commercial fences to 2 m and addresses street-side visibility restrictions. Edmonton uses different yard categories and permitting requirements, so check the municipality where the fence will stand rather than borrowing another city's rule.
Use the guide to fencing in Canada to organise the project questions, then confirm your property's applicable restrictions. A post available for sale isn't automatically acceptable at the height or location you intend.
How to Set a U-Channel Post
Have the post driver, level, measuring tape, marker, spanners and coating-repair materials ready before starting. Wear eye, hand and hearing protection, and keep helpers clear of the driver's travel.
The basic sequence is straightforward, but the checks between operations prevent most avoidable mistakes.
Work from layout to loaded alignment
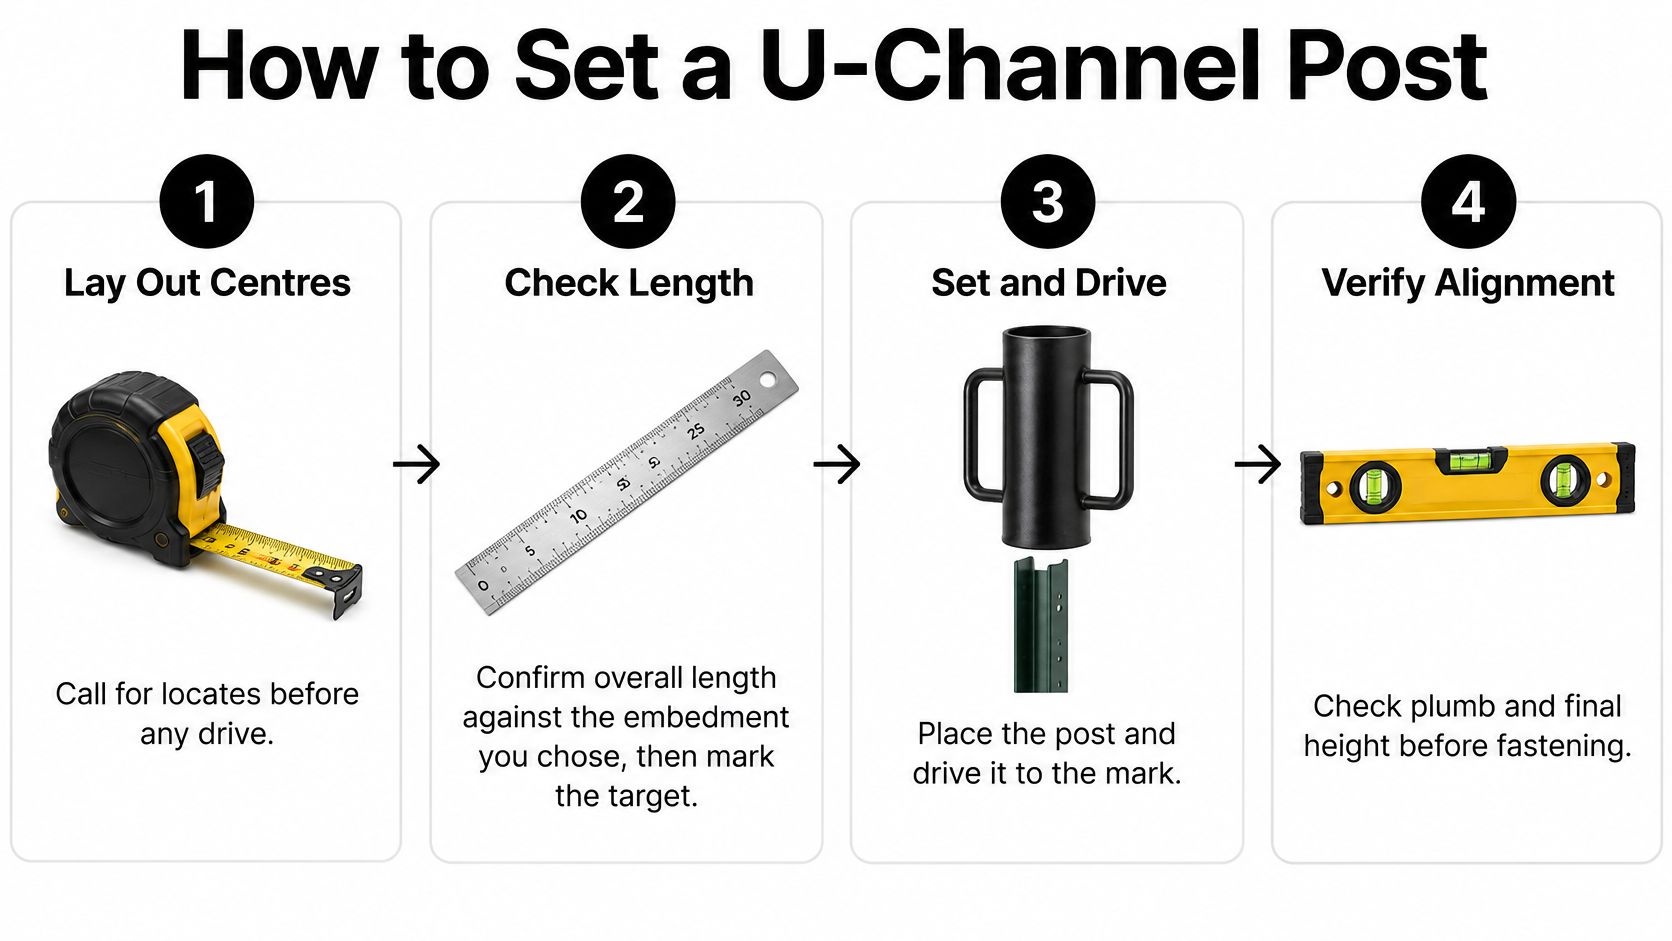
Lay out centres and obtain utility locates. Confirm property boundaries, access and the sign's intended sightline before marking the ground. Driving first and checking later risks buried services and a misplaced installation.
Confirm length and mark embedment. Measure from the point to the intended ground line with a permanent marker. Without a visible depth mark, it's easy to stop early and mistake correct exposed height for adequate support.
Orient the channel before driving. Face the web and flanges to suit the sign, mesh or bracket. Rotating a seated ribbed post can tear its coating and disturb the ground gripping it.
Drive while checking plumb in both directions. Use a suitable post driver or manufacturer-compatible protective cap with a sledge. Stop if the head deforms, the section bows or the point meets hard refusal; harder blows won't correct a damaged member.
Excavate when driving can't achieve the design. Remove the obstruction where practical, then use the specified backfill or footing arrangement. Don't substitute a shallow setting because the remaining length looks tidy.
Assemble a splice to its specified detail. Align the required hole pairs and use the designated overlap, bolt arrangement and tightening procedure. Keep a serviceable joint accessible where the design calls for it, but don't call an improvised lap splice breakaway hardware.
Attach the sign or rail through suitable existing holes. Use compatible bolts, washers and locking nuts without crushing the channel or distorting the sign. Unnecessary drilling through the rib damages both the section and its protective finish.
Check alignment with the panel installed. Confirm plumb, face direction and connection tightness after the load is attached. A square-looking bare post can reveal a poor connection once a broad panel starts applying force.
Inspect before leaving the site
A finished installation has the intended depth mark at grade, an undamaged or repaired finish, and a panel sitting square without a twisted web. Remove sharp burrs and collect loose fasteners before opening the area.
Where excavation leads to a concrete footing, estimate from the actual designed dimensions rather than guessing bag quantities. Contractors managing several footing types can use Exayard for concrete estimating to organise take-offs, but estimating software doesn't establish the footing design.
Recheck the assembly after the ground has settled or conditions have tested it. If the post moves, investigate the support instead of tightening the sign harder.
Match the Post to the Job and Finish It
Buy according to the hardest part of the job, then order the finishing hardware with it. A complete connection matters more than saving a little on the bare steel.
- Small signs and light mesh: Choose a compatible sign or line-post section after checking ground support and attachment details.
- Exposed panels and difficult ground: Assess the whole assembly, including embedment and splice design, before increasing channel weight.
- Gates, privacy panels and twisting loads: Change to a suitable structural fence post rather than forcing channel into the wrong role.
Finish the post you actually selected
Our Gate & Fencing category covers gate hardware and chain-link accessories, and our Fasteners category includes hardware for completing the connections. For a square-tube alternative, the Decorex Hardware 3 x 3 inch aluminium pyramid post cap is white, pressure fit, product code DHPPC30WF, and costs $8.09 CAD. It fits the specified metal post, not an open U-channel.
For timber elsewhere in the project, our 3.5 x 3.5 inch heavy duty aluminium pyramid cap fits an actual 3.5 inch wood post, not an actual 4 x 4 inch post. Measure the post itself before ordering.
Keep caps, connectors and bolts matched to the selected material. Confirm the permitted height and location before driving the first point.
XTREME EDEALS INC. offers deck and fencing accessories, gate hardware, post caps and fasteners to finish the support system you've chosen. Visit XTREME EDEALS INC. with your post dimensions and hardware list to select compatible finishing parts and connection hardware for your project.