
You've measured the run, bought the posts, and you're standing in the yard wondering whether the usual “just space them out evenly” advice is good enough. That's the point where a lot of fence jobs often go wrong. The line may look straight on day one, but a fence with poor post spacing starts showing its weaknesses fast through sagging rails, leaning sections, rattling gates, and posts that move when the ground shifts.
A solid fence starts with the spacing plan, not the boards, not the panels, and not the concrete. Post spacing controls how the whole structure handles weight, wind, movement, and time. Get that right and everything else installs cleaner. Get it wrong and you end up fighting the project from the first hole onward.
Why Correct Fence Post Spacing Is Non-Negotiable
You see the first spacing mistake after the fence goes through a season of wind and rain. One bay starts to belly out. A gate post shifts just enough to drag. The line still looks close to straight from the driveway, but the structure has already started giving up ground.
Post spacing sets the workload for every post, rail, fastener, and footing on the line. Spread posts too far apart and each section carries more weight, more wind load, and more movement than it should. Pull them tighter where the site demands it and the whole fence stays straighter, quieter, and easier to keep in service.
A lot of DIY builds get planned around material economy. Fewer holes, fewer posts, less concrete. That savings disappears fast if the fence is tall, fully enclosed, built on soft ground, or broken up by gate openings. Those conditions add stress, and stress always shows up at the spans first.
What spacing actually controls
On a real job, spacing is doing more than dividing a run into equal sections.
- Load on rails and fasteners: Longer spans put more strain on horizontal members and the screws or brackets holding them together.
- Wind behavior: Solid panels act like sails. The wider the gap between posts, the more force each post has to absorb.
- Post movement in poor soil: Clay, wet ground, and frost-prone areas let marginal layouts fail sooner.
- Performance at high-stress points: Corners, ends, and gate posts take concentrated force and usually need a tighter plan, heavier posts, or better anchoring.
That last part gets missed a lot.
A fence is only as stable as its weakest transition point. If a straight run is acceptable at one spacing, that does not mean the same spacing belongs beside a gate, halfway down a slope, or on an exposed side yard that takes the full wind. Those are the spots where I shorten spans and decide early whether the build needs stronger pressure-treated wood fence posts, post bases, or anchors instead of hoping concrete alone will make up the difference.
Good spacing also affects how cleanly the build goes together. Panels fit better, rails land where they should, and posts stay under less constant strain. That is the difference between a fence that still feels solid years later and one that starts asking for repairs long before the boards wear out.
Standard Fence Post Spacing for Different Materials
Set wood privacy posts too far apart and the problem usually shows up before the fence is even finished. Rails start carrying more span than they should. Panels feel springy. Then the first hard wind exposes every shortcut. Material changes the spacing plan because each fence system loads posts in a different way.
Recommended Fence Post Spacing by Material
| Fence Type | Typical Post Spacing | Notes |
|---|---|---|
| Wood privacy fence | 6 to 8 feet | Heavier panels usually hold up better at the shorter end |
| General-purpose residential fence | 8 to 10 feet | Common for lighter, more open layouts |
| Agricultural line posts | 16 to 20 feet | Standard runs where terrain and livestock demands allow |
| High-tension agricultural systems | Up to 25 to 30 feet | Works only where the fence design is built around wire tension |
| Hilly agricultural sections | 8 to 12 feet | Shorter spans help the fence track the grade and stay stable |
Those agricultural ranges come from this farm fence spacing reference.
Wood fencing needs tighter control
Wood privacy fencing gives very little forgiveness. The boards, rails, and hardware all add weight, and a solid face catches wind across the full panel. In practice, 6 to 8 feet is the range that works for most residential wood fences, with the safer choice usually closer to 6 feet if the fence is tall, exposed, or built with heavier material.
Post strength matters as much as spacing. A layout that looks acceptable on paper can still fail early if the posts are undersized for the load. Using properly sized pressure treated wood fence posts gives the fence a better chance of staying straight once the ground starts cycling through wet seasons, frost, and summer drying.
I shorten spans first when a client wants full privacy, taller sections, or a yard that gets hit by open wind. That costs more up front. It usually saves repairs later.
Why lighter residential fences can go wider
Open picket fences, spaced-board designs, and other lighter residential styles do not load posts the same way a solid privacy wall does. That is why many of them work in the 8 to 10 feet range, assuming the rails, post size, and footing depth all match the job.
The trade-off is simple. Fewer posts lower material and digging costs, but each rail covers more distance and each post absorbs more movement. On a sheltered property, that can be a reasonable choice. On a long exposed run, I would rather add posts than ask light hardware to do heavy work.
Agricultural fencing follows different rules
Farm fencing is designed around tension, animal pressure, and ground changes more than panel weight. Standard line posts often run 16 to 20 feet apart, and some high-tension systems stretch farther where the wire system, bracing, and terrain all support it. On hills or uneven ground, spacing usually tightens because the fence has to follow the grade without losing control between posts.
That is the part many DIY builds miss. A wire fence can use wide spacing on the easy sections and still need a much tighter layout at dips, rises, corners, and any point where the line wants to move.
A practical starting point
Use the material to choose your starting range, then adjust for the actual site.
- Solid wood privacy fence: Start at 6 to 8 feet, and lean shorter for taller fences, windy yards, or heavier boards.
- Open residential fence: 8 to 10 feet can work if the design carries less wind load.
- Agricultural wire fence: Base spacing on the fence system, bracing method, and terrain, not on residential rules.
- Mixed conditions on one property: Change spacing where conditions change. Do not force one number across the whole run.
Good spacing is not about hitting a standard number everywhere. It is about matching the span to the load, the ground, and the weak points that usually fail first.
How to Accurately Measure and Mark Your Fence Line
A good layout saves hours of correction later. A bad layout locks mistakes into concrete. The cleanest fence lines come from simple tools used carefully, not from guessing and adjusting as you go.

Start with corners and endpoints
Set the outside limits first. That means corners, ends, and any fixed gate opening locations. Those points define the run. If they're off, every in-between post will also be off.
Use stakes that won't move when you pull a string line tight. On longer runs, I prefer setting reference stakes slightly outside the actual hole centres so the line stays undisturbed while digging.
Use string, not your eye
Eyeballing a straight fence almost always produces a slight wave, and slight waves become obvious once rails or panels go on. Run a mason's line between your corner markers and keep it taut.
Then measure along the line, not across the grass. On uneven ground, that keeps your references consistent and avoids a fence that starts straight but drifts off visually.
If you're gathering layout tools, markers, line, anchors, and other essentials in one order, fence building supplies are the kind of items worth lining up before you break ground. Stopping mid-layout because you're missing string line or marking paint slows the whole job.
Mark centres, not rough locations
A common DIY mistake is marking “about where the post goes.” That's not enough. Mark the centre of each post hole. Your rail lengths, panel widths, and gate openings all depend on centre-to-centre accuracy.
Use this sequence:
- Measure the full run
- Confirm your target spacing
- Adjust the layout so the sections finish evenly
- Mark each post centre on the string line
- Recheck corner and gate locations before digging
Don't start digging after the first measurement pass. Walk the line again and verify every mark before the auger comes out.
Handle corners and transitions carefully
Corners need exact placement because they set two runs at once. If one corner shifts, both fence lines inherit the error. The same goes for transitions near a gate or a change in slope.
On custom layouts, it often makes sense to leave the last regular section slightly adjusted rather than forcing one awkwardly narrow panel at the end. Small corrections spread across a run look intentional. One undersized section looks like a mistake because it is one.
The cleanest installs come from treating the layout like a blueprint on the ground. Once the marks are right, the rest of the build gets much easier.
Adjusting Spacing for Wind, Height, and Ground Conditions
A fence can look straight on install day and still be headed for trouble. The runs that fail early are usually the ones built with one spacing rule for every part of the property, even though wind exposure, fence height, and soil conditions are different from one section to the next.

Wind puts the real load on solid panels
Wind is hard on any fence, but it is hardest on tall privacy runs with very little airflow. A solid panel catches force across its full face, then transfers that load into rails, fasteners, and post holes. On exposed sites, I often shorten spacing from the standard layout rather than asking each post to carry too much span.
That matters most on long straight runs with no shelter from buildings, trees, or changes in grade. If the top of the fence starts flexing in gusts, the problem usually shows up later as loose fasteners, sagging rails, or posts that start working in the hole.
Height changes the spacing math
Extra height puts greater stress on the post. The same post that feels adequate on a lower fence can become marginal once the fence is taller, heavier, or more closed in.
A few patterns show up over and over on real jobs:
- Open decorative fencing usually tolerates wider spans because wind passes through it.
- Tall privacy fencing benefits from tighter post spacing because the load is constant across the panel face.
- Heavy boards, lattice toppers, and trim details add weight and increase movement at the top of the run.
A fence can stay standing for a while and still be overstressed. Longevity is the test.
Ground conditions decide how much support the post can really use
Good spacing will not save a post set in weak ground. Clay that swells, sandy soil that shifts, and wet areas that never drain well all change how a fence behaves through the seasons. Frost heave makes it worse. So does water sitting around the base of the post.
Under specific conditions, spacing alone stops being the full answer. On soft or unstable ground, it often makes more sense to combine slightly tighter spans with better support hardware. Larger post bases, stronger anchors, and better connectors can do more for long-term stability than just adding another post and hoping for the best.
Practical adjustments that hold up better
I treat spacing as one part of the support plan, not the whole plan. The right fix depends on what is creating the stress.
Use these rules on difficult sites:
- Shorten spans on tall, solid, or wind-exposed runs
- Keep standard spacing where the fence is lower, more open, and sheltered
- Upgrade anchors, bases, or brackets where the ground is soft or seasonal movement is likely
- Pay extra attention to corners, end posts, and isolated exposed sections because they take more force than the middle of a protected run
The strongest fence is rarely the one built to the average condition across the property. It is the one built for the worst section of the site.
Handling Fence Post Spacing Around Gates and Slopes
Gates and slopes are where standard spacing stops being standard. These areas need their own measurements, their own support plan, and sometimes their own hardware decisions.

Gate openings need custom thinking
A gate post isn't a line post. One side is carrying moving weight, hinge stress, latch impact, and repeated opening force. That's why gate openings should be laid out from the gate requirement first, then tied back into the fence spacing around them.
If you set the line posts first and try to “fit a gate in later,” you usually end up with one awkward section beside the opening or hardware that never hangs cleanly.
A better approach is this:
- Determine the exact gate opening first
- Set hinge and latch posts for that opening
- Lay out the adjacent fence sections from those fixed points
- Accept that the panel beside a gate may need custom width
Gate spacing should follow the gate. The gate should never be forced to follow leftover spacing.
Slopes should be measured along the ground
On uneven terrain, spacing should follow the actual slope, not a flat horizontal guess. That matters whether you're building a stepped fence or a racked one.
A stepped fence keeps panels level and drops them in stages. A racked fence follows the grade more closely. Either way, the terrain changes how you mark post centres and how each panel lands.
Common mistakes on slopes include:
- Measuring straight through the air instead of along the contour
- Using the same post spacing from flat ground on steep sections
- Ignoring dips and rises that need extra support
- Treating the bottom of the hill like an ordinary line-post section
This walkthrough shows some of the practical fitting issues that come up when layout meets terrain:
Where to tighten things up
A slope creates pressure points. The fence may look continuous, but stress collects at transitions, low spots, and points where the panel geometry changes.
That's where I tighten the plan. Not necessarily everywhere, but in the places where the ground tries to pull the fence out of alignment. The post spacing guide that works on level ground is only a reference once the land starts moving under the fence line.
Choosing the Right Post Size and Fence Hardware
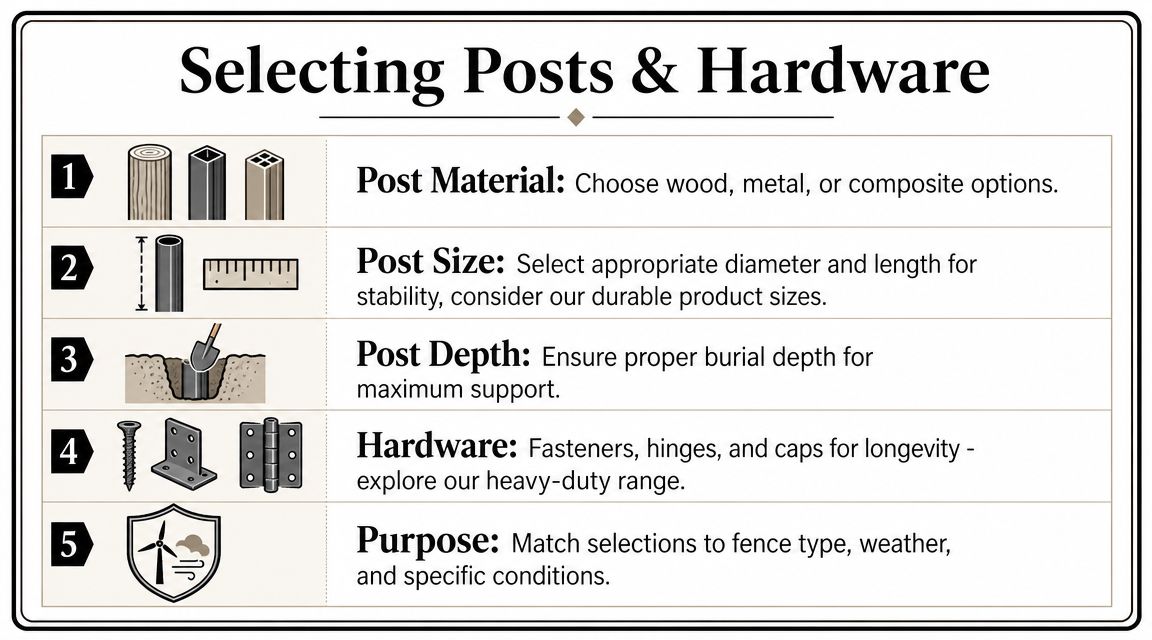
A fence can be laid out perfectly and still fail if the posts are undersized or the hardware is too light for the load. Spacing controls span. Post size and connectors control how that span behaves once wind, weight, and daily use start working on it.
Start with the stress points. Line posts on a calm, low fence do one job. Corner posts, end posts, and gate posts do far more. They resist pull from multiple directions, carry hinge weight, and take the twisting force that shows up year after year. That is why many standard residential runs can work with 4 x 4 fence posts, while corners and gates often justify stepping up to a heavier post.
Height changes the equation fast. So does a solid privacy design that catches wind instead of letting it pass through. In those builds, closer spacing helps, but it does not replace adequate post mass. A skinny post in a short span still flexes, loosens, and starts the kind of movement that shows up later as sagging rails, sticking gates, and fasteners working loose.
Choose hardware for the force, not just the layout
Hardware decides whether the load transfers into the post and footing the way you planned. Light hinges sag under a heavy gate. Thin brackets deform at corners. Cheap screws corrode, lose grip, or snap during seasonal movement.
This matters most on problem sites. Soft soil, freeze-thaw cycles, and exposed wind lines often call for stronger hardware before they call for another round of tighter spacing. Post bases, anchors, and structural connectors can keep a fence aligned where spacing changes alone will not solve the problem.
Upgrades that usually earn their cost
A few hardware choices consistently pay off on fences built for long service life:
- Post bases and anchors: Worth using where uplift, lateral movement, or tricky mounting conditions put extra stress on the connection to concrete or masonry.
- Heavy-duty gate hinges: A better match for wide or frequently used gates that would quickly expose weak hinge sets.
- Coated structural screws: Better suited to exterior framing and long-term holding power than generic fasteners.
- Protective post caps: A simple way to limit water entry into wood posts and slow down rot from the top.
A well-stocked supplier like XTREME EDEALS INC. is useful here because their catalog includes the post base brackets, anchors, and exterior fasteners that solve these higher-stress details without guesswork.
The common mistake is trying to save a weak build with tighter post spacing alone. On a fence that sees real force, stronger posts and better connection hardware usually buy more service life than shaving a few inches off every span.
Your Final Fence Spacing Checklist
Before you dig, run through the job once more with a builder's eye instead of a shopper's eye. A reliable fence post spacing guide only works when the layout, materials, and site conditions agree with each other.
Pre-build checks
- Confirm local requirements: Check what your municipality expects for setbacks, height, and any site-specific structural considerations.
- Match spacing to fence type: Wood privacy fencing, general residential runs, and agricultural wire systems don't share the same logic.
- Mark the line properly: Use string, measured centres, and fixed corner references.
- Review exposure: Wind, soft ground, slopes, and wet areas usually need adjustments.
- Plan gates separately: Don't treat a gate opening like a leftover panel space.
- Upgrade hardware where stress is highest: Corners, gates, and unstable soil are the places where stronger connectors matter most.
Build for the hardest part of the fence line, not the easiest stretch.
The fence that stays straight the longest usually isn't the one built fastest. It's the one laid out carefully, spaced intelligently, and supported properly where the site demands it.
If you're gathering posts, anchors, brackets, hinges, screws, and finishing details for your next fence build, XTREME EDEALS INC. offers a practical range of fencing and hardware products that fit both DIY and contractor jobs.