
You're probably here because your chain link gate keeps ending up open when it shouldn't. Maybe the dog noses through it, maybe delivery people leave it swinging, or maybe you're dealing with a pool area where “close enough” isn't safe enough. A gate that swings shut once in a while isn't the same as a gate that closes and latches properly every time.
That's the difference that matters with a self closing gate chain link fence. The actual work isn't just adding a spring and hoping for the best. The job is building a gate that closes from a small opening, stays aligned, doesn't drag, and keeps doing that after weather, use, and minor settling start working against it.
A lot of DIY failures come from treating the closer as the whole system. It isn't. The closer, latch, post stiffness, bottom clearance, hinge fit, and gate bracing all work together. If one part is off, the gate becomes noisy, inconsistent, or non-compliant. That's where careful installation pays off.
Why Your Chain Link Gate Needs to Close Itself
The most common problem is simple. Someone opens the gate with full hands, lets go, and walks away. The gate hangs half open. Later, you find a pet out front, a child in a restricted area, or a pool barrier left unsecured.
For ordinary yard access, that's frustrating. Around a pool, it becomes a serious safety issue. A gate that depends on people remembering to shut it is already the weak point in the fence line.
The problem isn't the swing, it's the follow-through
A chain link gate can look fine and still fail in daily use. It may swing freely when you test it by hand, but that doesn't mean it will return to the closed position with enough force to line up and latch after months of use. Wind, slight sag, loose hardware, and ground movement expose weak installations fast.
Practical rule: If the gate only closes when you give it a push, it isn't self-closing in any useful sense.
That's why I treat self-closing hardware as a functional upgrade, not a convenience add-on. It protects the opening when nobody is paying attention. It also reduces wear caused by gates being left open and blown back against posts, fence fabric, or nearby walls.
Where self-closing gates earn their keep
A properly built system makes sense in several situations:
- Pool enclosures: The gate needs to return and secure itself without relying on memory.
- Side yards: High-use access points get left open more than owners realise.
- Pet containment: Even a brief opening is enough for a dog to bolt.
- Rental properties: You can't assume every user will treat the gate carefully.
The right setup gives you peace of mind, but its true value is consistency. When the gate closes the same way every time, the fence starts doing the job it was built for.
Choosing Your Self-Closing Mechanism
The closer you choose decides how much adjustment you have later, how much abuse the system will tolerate, and how often you'll need to revisit it. Cheap spring add-ons can work on light gates, but they don't fix poor alignment and they don't stay forgiving for long.
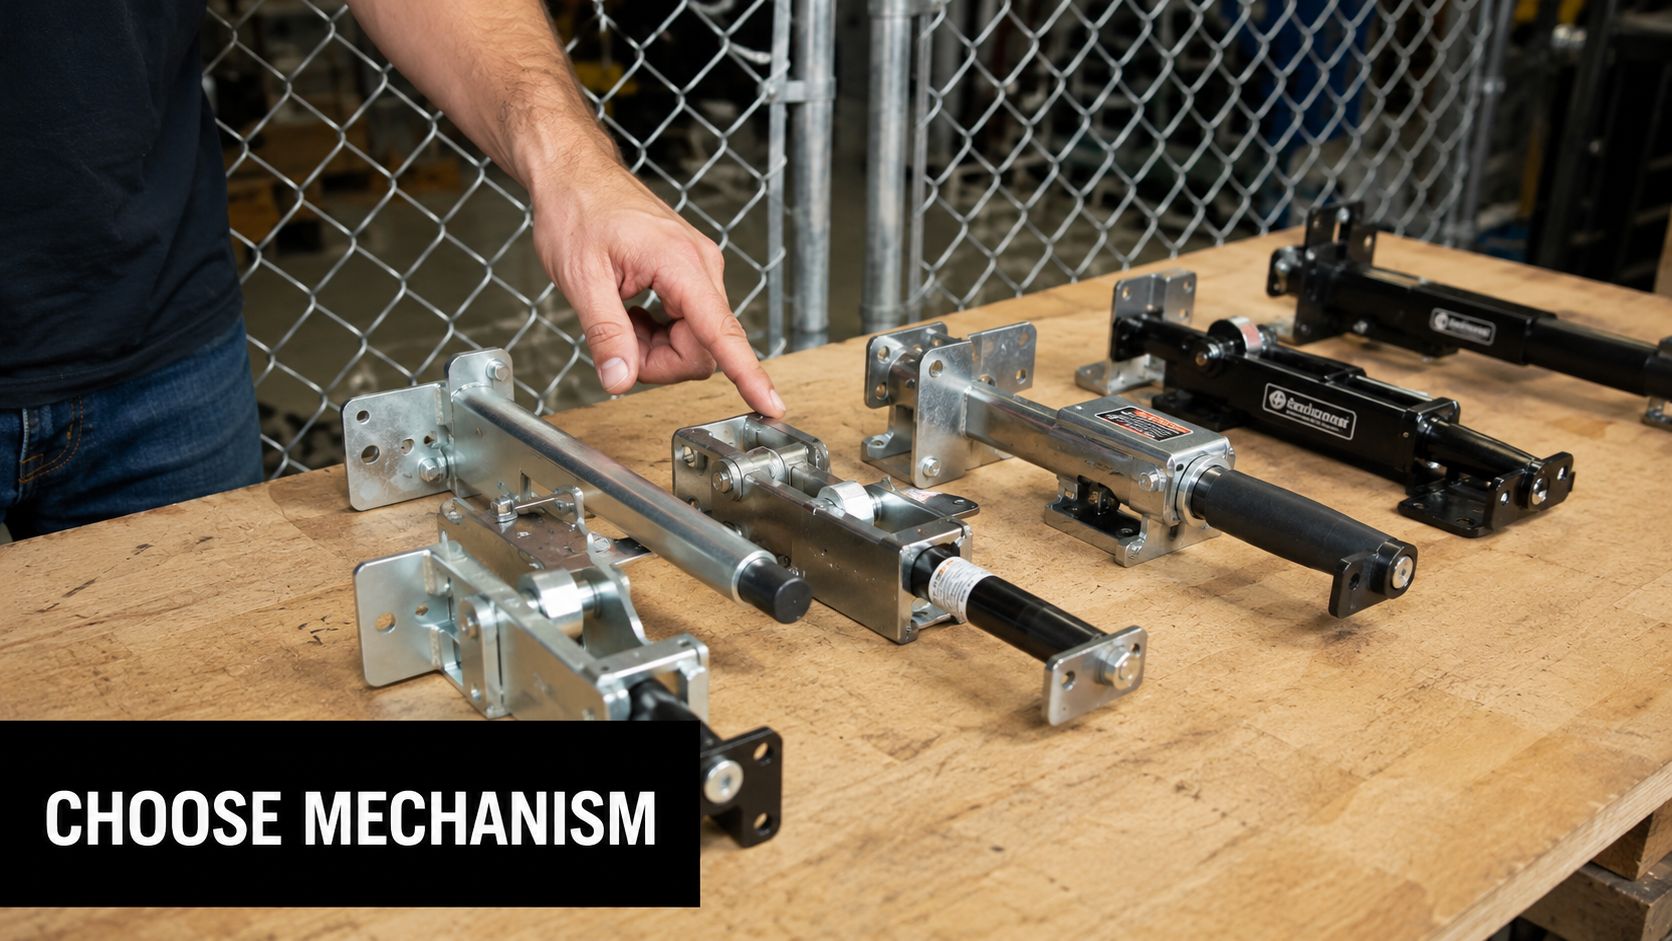
The main hardware options
| Mechanism Type | Best For | Adjustability | Durability |
|---|---|---|---|
| Basic tension spring | Light-use residential gates | Low | Fair if the gate is already well aligned |
| Spring hinge set | Most residential chain link gates | Moderate | Good when matched to gate size and installed correctly |
| Hydraulic closer | Heavier gates or higher-traffic openings | High | Strong long-term control when properly mounted |
Basic springs are the most common DIY starting point because they're simple. The trade-off is that they're less forgiving. If the gate drags or the latch side drops, a basic spring won't correct it. It will just expose the problem.
Spring hinge systems usually give a better balance for a chain link residential gate. They combine hinge support with closing force, which reduces the number of separate parts working against each other. For homeowners comparing options, self-closing gate hinges from XTREME EDEALS INC. are one route to look at alongside other properly sized hinge and closer assemblies.
Fit matters more than brand labels
One detail gets missed all the time. The hardware must match the gate frame and post size. The SwingSpring Chain Link Gate Closer is engineered for a 2-3/8-inch post diameter with a 1-3/8-inch frame size, and that sizing matters because mismatched hardware can prevent reliable auto-closure, as noted in the SwingSpring product specification.
If the collar is sloppy on the post or cramped on the frame, adjustment becomes guesswork. You can tighten everything and still get a gate that binds, twists, or loses tension.
Don't choose a closer by appearance. Choose it by post diameter, frame size, gate weight, and how often the gate gets used.
What holds up better over time
For ordinary side gates, a dedicated spring hinge or chain link spring closer is usually enough if the gate is straight and the post is solid. For heavier gates, frequent traffic, or pool access, more controlled hardware often makes more sense because it closes more predictably and puts less shock into the frame and latch.
Also pay attention to finish quality. Outdoor gate hardware lives with rain, grit, and repeated movement. Better coatings and better bearings don't make the gate look nicer for a week. They reduce corrosion, seized pivots, and premature play in the hinge points.
Gathering Tools and Preparing Your Gate
Most self-closing gate problems start before installation. The gate was already sagging, the post already had movement, or the frame was out of square. Adding a closer to that setup only makes the failure more obvious.
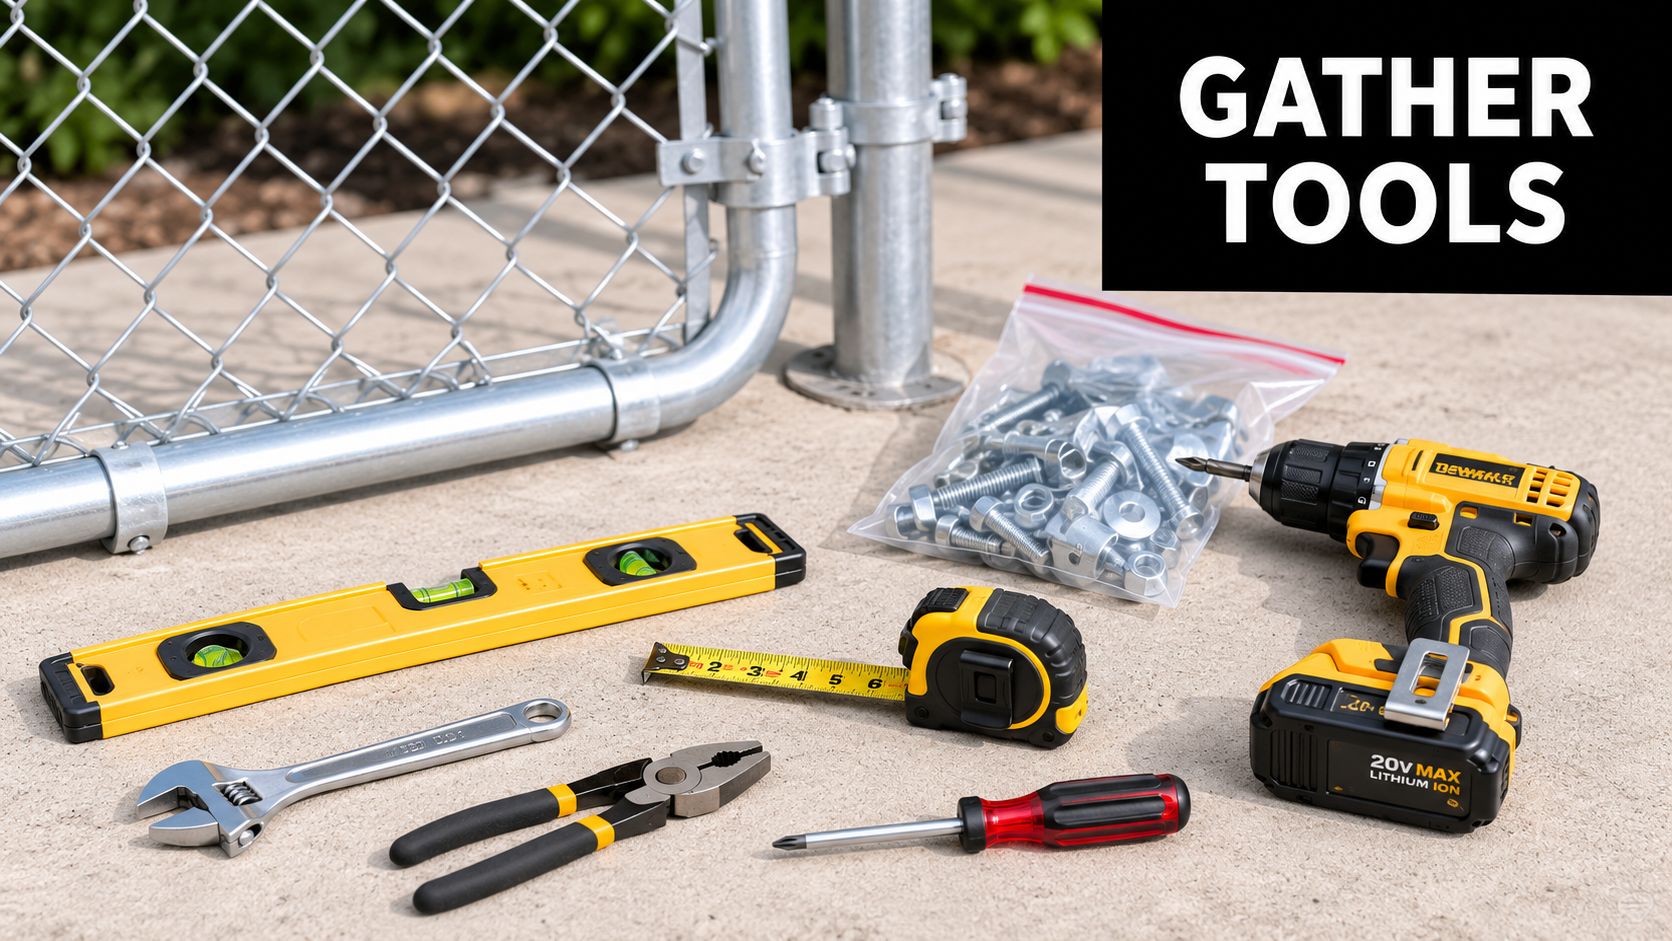
Tools that actually matter
Keep the tool kit straightforward:
- Tape measure: for post diameter, frame size, and bottom clearance.
- Level: to check the hinge post and latch post for plumb.
- Socket set or spanners: for hinge nuts, collars, and latch hardware.
- Drill and bits: if your latch or closer setup needs pilot holes or mounting screws.
- Adjustable wrench: useful during hinge and spring adjustment.
- Marker or chalk: to mark hinge positions before removal.
- Safety gear: gloves and eye protection. Springs and metal hardware can bite.
You'll also want replacement bolts, tension bands if mesh work is involved, and any specific collars or spring assemblies that match your gate dimensions. If you're still collecting parts, chain link fence hardware options are easier to sort when you already know your post and frame sizes.
Inspect before you bolt anything on
Start with the hinge post. If it leans, the gate won't close consistently. Next, check the gate frame. If the latch side has dropped, the closer will have to fight gravity and friction every cycle.
Then inspect the gap under the gate and along the latch side. Uneven gaps usually tell you where the sag or twist is happening. If the gate scrapes now, a stronger spring won't solve it. It will just slam the scrape point harder.
A closer can return a gate to position. It can't make a bent frame square again.
The bracing step most DIY installs skip
Where the post or gate line needs reinforcement, bracing is the fix, not extra spring tension. A key method is a 10 mm steel truss rod installed diagonally from the top of the gate post to the adjacent line post, which reduced gate sag by over 85% in tested installations, according to the chain link construction specification.
That matters because sag is the main reason self-closing gates stop latching cleanly. If the structure moves, the closer loses its mechanical advantage. Fix the support first, then install the closer.
The Core Installation Process
A self-closing gate chain link fence will either start out right or become a callback waiting to happen. Work in order, and don't tension the closing mechanism until the gate swings cleanly on its hardware.
The basic flow is easier to follow visually first.
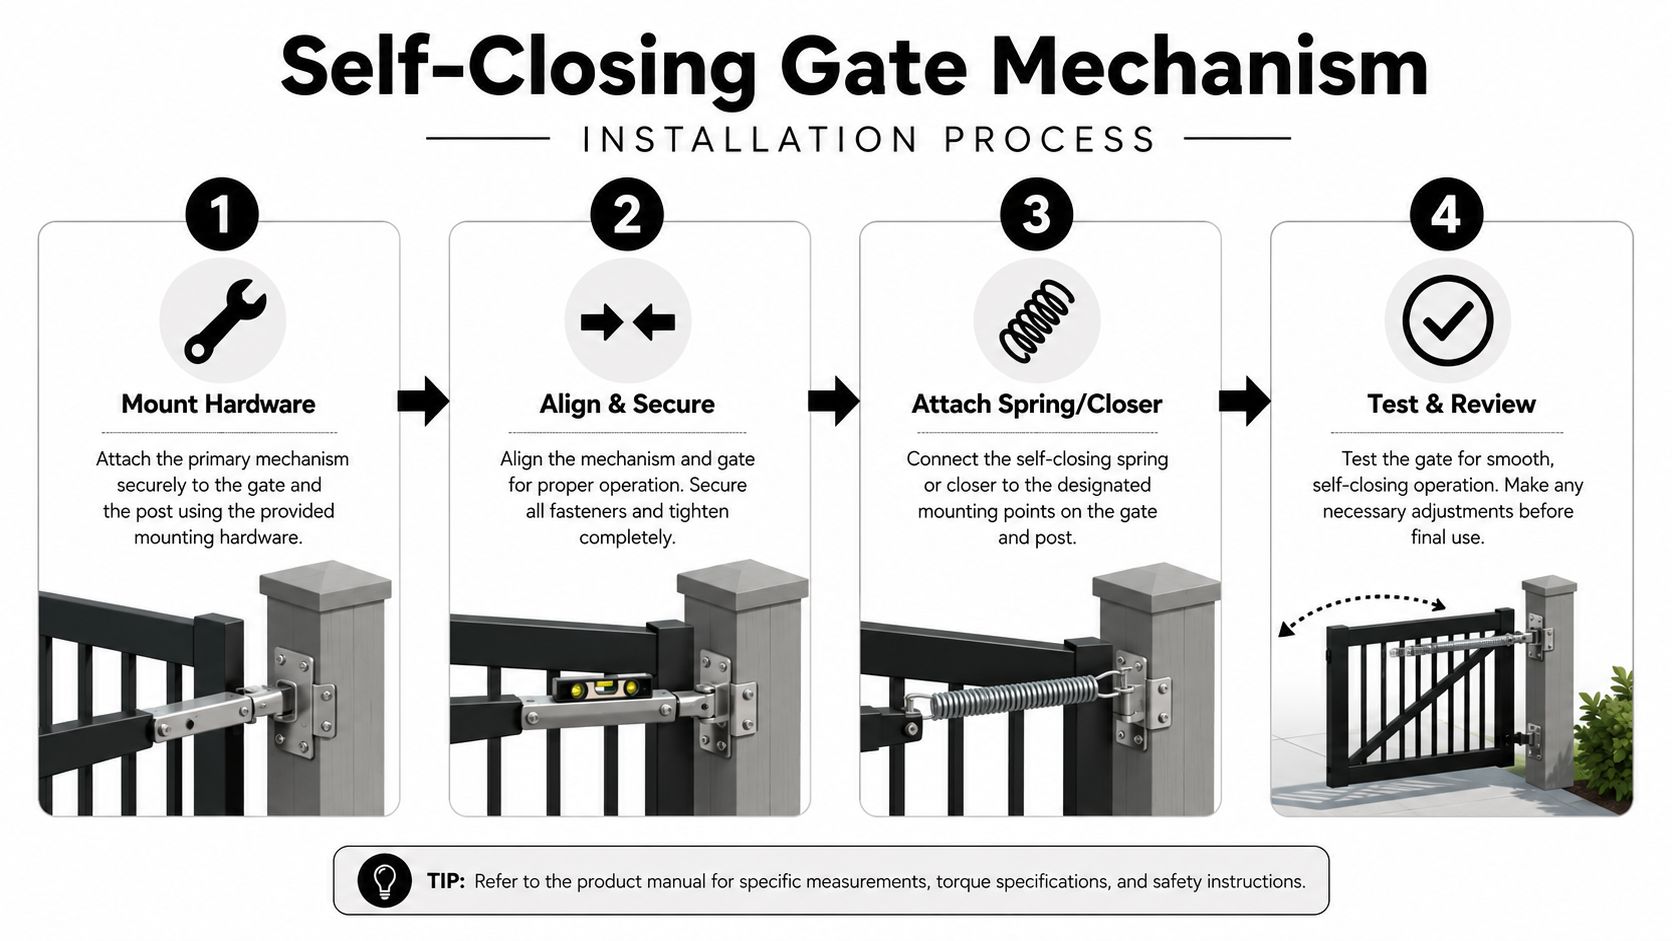
Start with hinge-side alignment
Remove the old hinge hardware carefully and support the gate so the frame doesn't twist while you work. Mount the replacement hinge components or the closer-compatible hinge set loosely at first. You need room for final alignment.
Check that the gate opens freely and that the frame sits naturally without being forced into place by tightened hardware. If you lock everything down while the gate is slightly racked, the closer will amplify that error on every cycle.
Maintain the right mesh and bottom clearances
If you're working on a new gate section or rebuilding the hinge area, keep the chain link fabric and frame properly secured. Commercial chain link guidance calls for three tension bands for a 4-foot fence, four for a 5-foot fence, and five for a 6-foot fence, and it also sets the bottom mesh clearance at exactly 2 inches, as shown in this chain link installation guide.
That 2-inch clearance matters more than people think. Too tight, and the gate catches on grade changes, debris, or frost heave. Too high, and you may create a security or code issue depending on the application.
For a broader walkthrough on gate assembly order, installing a chain link fence gate is a useful reference while you're matching parts and sequence.
Attach the closer only after the swing is clean
Once the gate opens and closes manually without drag, install the spring or closer assembly. Follow the hardware orientation exactly. On chain link spring assemblies, the relationship between the post collar, hinge body, and frame collar matters because the spring has to load in the intended direction.
Here's a visual walkthrough that helps if you want to compare your setup while working:
Tighten hardware in stages. Set the hinge-side pieces first, then confirm the latch side still lands where it should. After that, snug the closer hardware and cycle the gate by hand several times before adding or increasing spring tension.
Common installation mistakes
- Over-tightening early: This locks in poor alignment.
- Ignoring post movement: The gate may look fine until the closer starts pulling against a weak post.
- Skipping latch mock-up: If the latch is mounted before the gate settles into its true swing path, alignment drifts.
- Using tension to fix sag: Spring force should close the gate, not compensate for structural problems.
If the gate won't swing freely before tensioning, stop there. You're installing hardware onto a geometry problem.
Fine-Tuning and Tension Adjustment
This is the stage that separates a gate that technically works from one that works every day without irritating everyone who uses it. The target isn't maximum force. The target is enough force to close the gate from a modest opening and engage the latch without slamming.
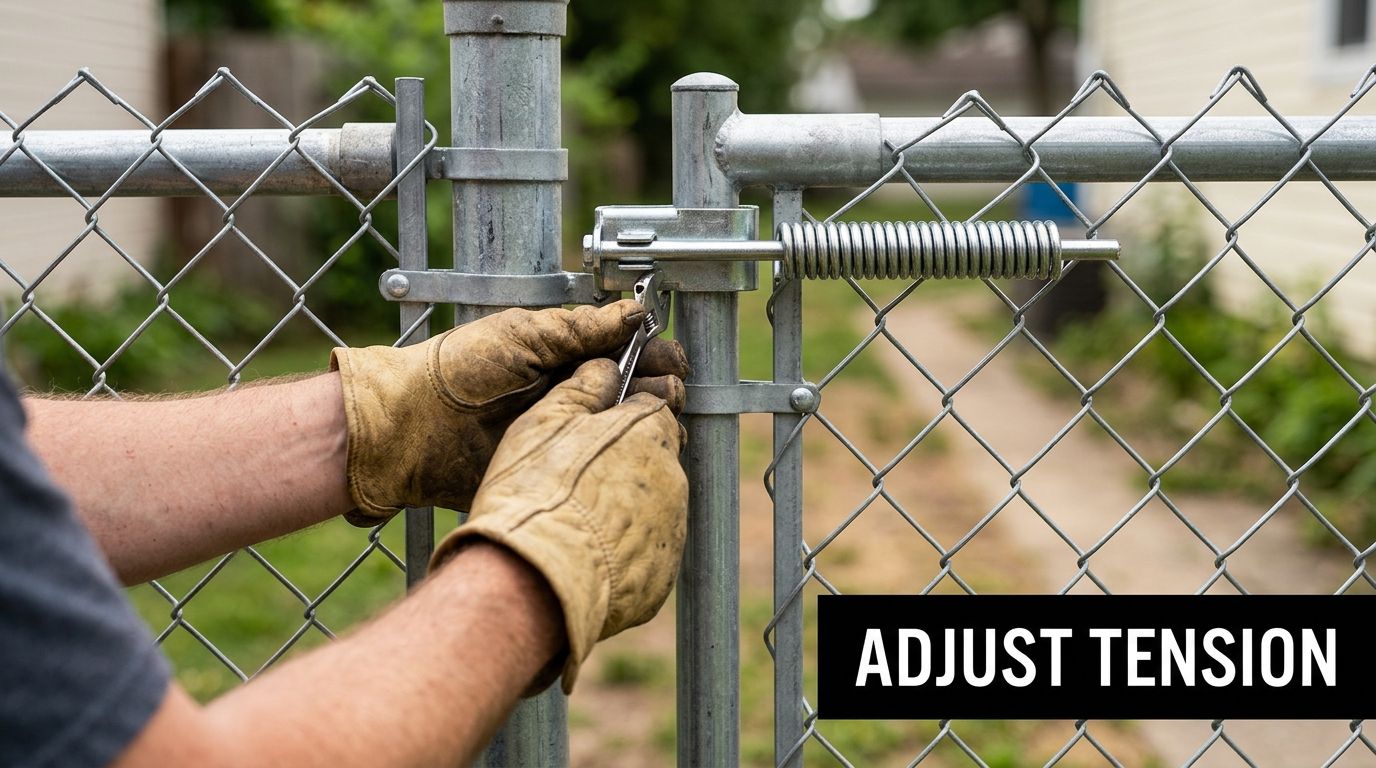
Set the spring correctly first
On chain link spring closer assemblies, orientation matters. The spring has to be installed in the intended direction so it generates tension as the gate opens. If it's flipped or mis-seated in the collars, the gate may hesitate, fail to return, or feel inconsistent through the swing.
Just as important, the frame collars need the right feel. The installation method calls for them to be tightened to a “snug” threshold that stops slipping while still allowing the spring to slide within the collars, according to this installation video reference. Too loose and the assembly shifts. Too tight and the mechanism binds.
Tune in small increments
Use a gradual approach:
- Open the gate slightly and let it return.
- Check the last part of travel near the latch post.
- Increase tension a little at a time if the gate stalls before closing.
- Back off if it slams, rebounds, or shakes the latch.
Most poor adjustments show up in the final few inches. That's where hinge friction, latch resistance, and gate sag all combine. A gate that moves well through mid-swing but dies at the end usually needs either minor tension adjustment or latch-side realignment, not a full hardware redo.
The best adjustment is quiet. The gate returns with purpose, but it doesn't announce itself across the yard.
Latch alignment and everyday reliability
The latch has to meet the gate where the gate naturally lands under spring force. Don't drag the gate into the latch position by hand and mount to that. Cycle the gate repeatedly and watch its repeatable closing path.
This same maintenance mindset shows up in lighter hardware too. If you also need to maintain your patio screen door closer, the principles are familiar: reduce friction, avoid over-tensioning, and correct alignment before blaming the spring.
For pool-related gates, pay attention to local rules on latch placement and swing direction while you fine-tune. A gate that closes nicely but misses those details can still fail inspection.
Safety Compliance and Long-Term Maintenance
A self-closing gate isn't finished when it swings shut. It has to keep working, and on some properties it also has to satisfy legal safety requirements. Pool barriers are the clearest example because the standard is stricter and the consequences of failure are more serious.
In California, pool barrier gates must comply with California Health and Safety Code §115922, which requires them to be self-closing and self-latching, and the gate must return to the closed position and latch without human intervention, as outlined in this summary of California self-closing pool gate requirements. That distinction matters. A gate that swings shut but doesn't latch isn't doing the full job.
What compliance looks like in practice
For pool applications, think beyond the closer itself:
- The gate must return on its own: Not just from a wide-open position, but from a partially opened one as well.
- The latch must catch automatically: If someone has to lift, push, or re-seat the gate, the setup needs correction.
- The swing path must stay clear: Ground contact, twisted mesh, or latch drag can defeat an otherwise good closer.
- The installation has to stay stable over time: Posts, hinges, and latch alignment all affect compliance.
Some municipalities also set specific latch-height and swing-direction rules for pool gates. Check the bylaw that applies to your property before finalising hardware placement.
A maintenance routine that prevents call-backs
Self-closing hardware doesn't need constant attention, but it does need inspection.
- Check fasteners seasonally: Nuts loosen gradually with vibration and repeated use.
- Watch for sag: If the latch side drops, correct the cause before increasing spring tension.
- Clear the swing path: Soil buildup, gravel, ice, and plant growth all interfere with reliable closure.
- Inspect latch engagement: It should catch cleanly without forcing the gate sideways.
- Lubricate where appropriate: Follow the hardware maker's guidance. Some components want lubrication, others collect grit if over-oiled.
For owners thinking about the bigger security picture around gates, doors, and entry points, practical guidance on expert locksmith home protection can help frame where a self-closing gate fits into the rest of the property.
A good installation should get quieter and more predictable after final tuning, not rougher. If it starts needing a shove, starts scraping, or stops latching cleanly, treat that as an early warning. Small corrections done early are easier than rebuilding a worn-out hinge side later.
If you're sourcing hardware for a self-closing gate chain link fence, XTREME EDEALS INC. carries fence and gate hardware, fasteners, and related accessories that fit both DIY upgrades and contractor supply needs. Start with your post diameter, frame size, latch requirements, and gate use level, then choose hardware that matches the job instead of forcing a universal fix onto the wrong gate.