

You've finished the deck boards, set the last fence panel, and the yard looks finished in daylight. Then the sun drops. The steps disappear, the gate latch is hard to find, and that row of bare posts turns into a line of dark silhouettes. That's the moment most homeowners start looking at LED post cap lights, not as decoration, but as the missing piece that makes the space usable after dark.
What LED Post Cap Lights Are and Why They Matter
A homeowner I worked with had a solid new deck, square posts, clean railings, and no plan for lighting. On the first evening out there, guests kept missing the top step and drifting toward the unlit corners. We capped the posts the following weekend, and the whole footprint became readable at a glance. Nobody needed a phone flashlight to find the stairs.
LED post cap lights are fixtures built to sit on top of wood or metal posts. The LED sits inside or under the cap, so the same piece that protects the exposed end grain of a post also throws light across a deck, fence line, or walkway. You're getting two jobs from one part. The cap sheds water away from the post top, and the light marks edges, gates, and changes in level.
Why They Earn Their Place Outdoors
Their appeal isn't complicated. LEDs draw far less power than older bulb types, they last a long time without bulb changes, and a row of lit caps defines an outdoor space the way a low wall or hedge does during the day. For a fence, they give you orientation along the boundary. For a deck, they give you enough ambient light to move around without flooding the yard.
- Safety at edges: Steps, gates, and corners stay visible without a harsh floodlight.
- Post protection: The cap covers the post top, which is where water does the most damage.
- Space definition: A consistent light line makes a deck or garden feel finished after dark.
A post cap light is a marker light, not a floodlight. Judge it on whether you can navigate comfortably, not on whether you can read under it.
Choosing well takes more than picking a pyramid over a ball shape. Power source, fit, brightness, and local rules all matter. In some jurisdictions the compliance picture is real, not theoretical. California's Title 24 residential energy requirements establish a foundational framework for these fixtures when they're permanently mounted to a dwelling or another building on the same lot, covering applications such as patios, entrances, balconies, and porches, as described in the California Energy Commission residential lighting guidance. Even outside California, that same principle applies. Where the light sits and how it's controlled can matter as much as how it looks.
Solar vs Low-Voltage vs Rechargeable Options
This is the decision that shapes everything else, so make it based on your site, not on which box is on sale. The three power types suit very different situations.
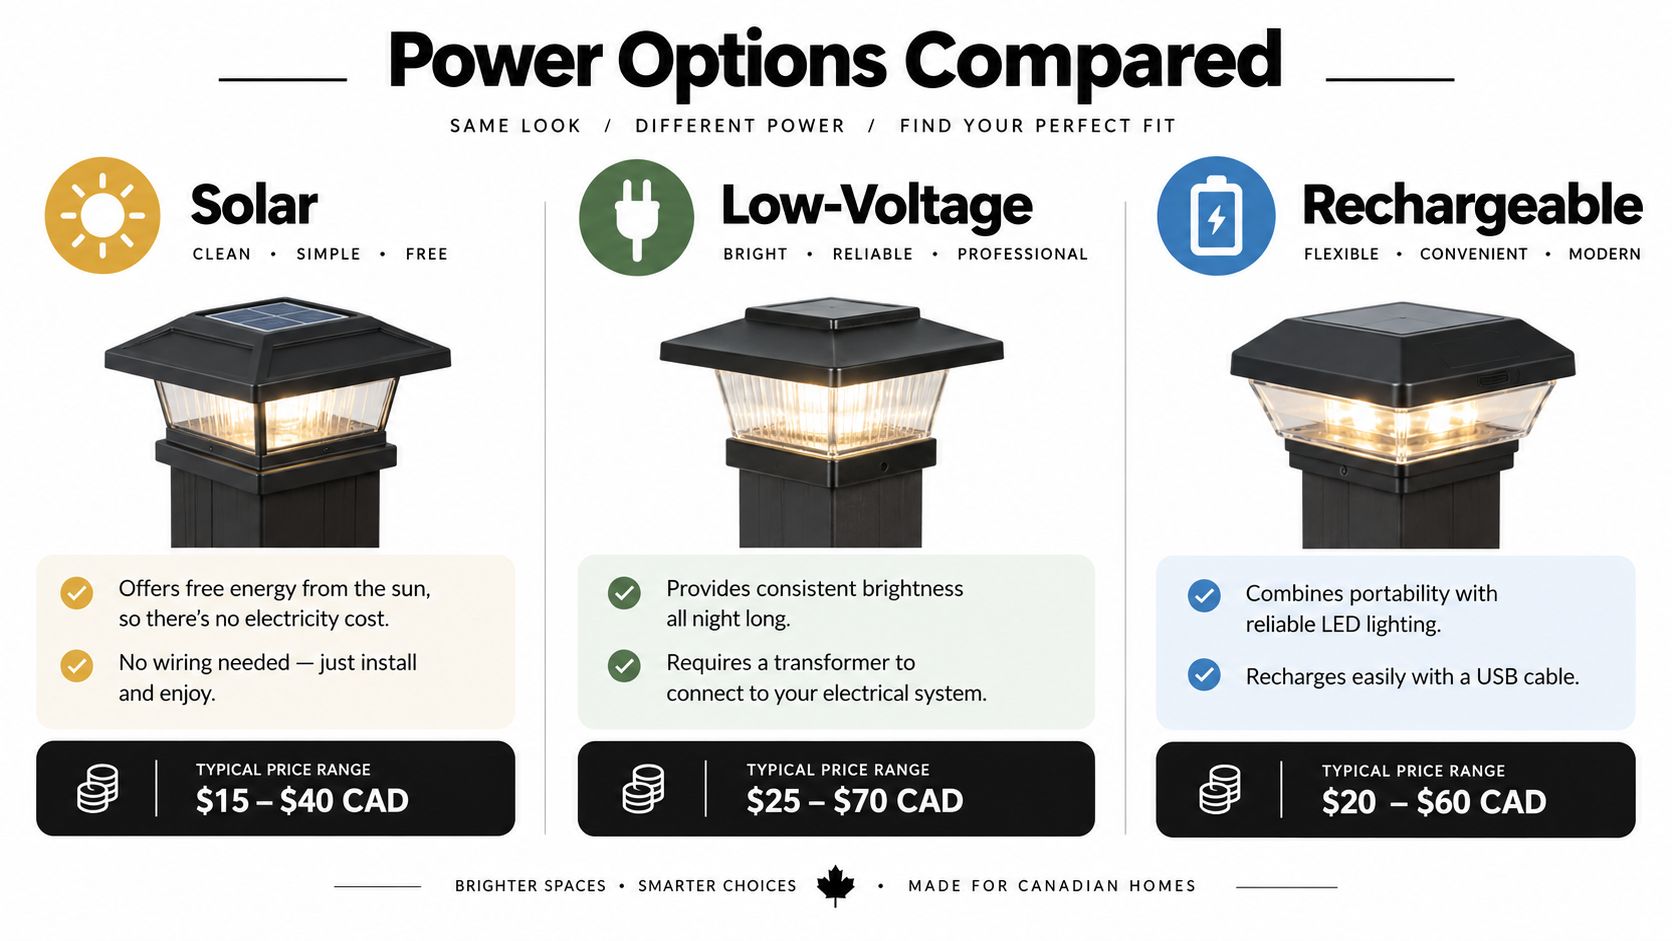
Solar
A solar cap carries its own panel, rechargeable battery, LED, and light sensor. There's no wiring at all. You screw it down, let it charge, and it switches on at dusk. That simplicity is genuine, and for a sunny fence line or a couple of gate posts it's hard to beat. The trade-off is dependence on exposure. A cap under an eave, a tree canopy, or the shadow of a taller fence panel will charge poorly and die early in the evening. Battery quality varies a lot between brands, and it's the battery, not the LED, that usually gives up first.
For any post cap product, the specification checks that matter most include rated input voltage, standby and operating wattage, photocell behaviour, and whether the control stays reliable under partial shade or reflected daylight, and solar models need extra attention to battery capacity and winter charging margin, since a cap that performs well on long summer days may run much shorter in winter or along shaded fence lines, according to California Energy Commission guidance on outdoor LED controls.
Low-Voltage
Low-voltage caps connect by cable to a transformer plugged into an outdoor outlet. You run the cable along the fence or under the deck boards and connect each cap in sequence. It's more work up front, there's no getting around that. What you get back is consistency. Brightness doesn't fade through the night, doesn't depend on the weather, and every cap on the run matches. If you're lighting a full deck perimeter or a long fence, this is the dependable choice, and one transformer with a timer or photocell controls the whole run at once.
Rechargeable
Rechargeable caps skip both the panel and the cable. You charge the battery, typically by USB, and drop the cap in place. They suit shaded posts where solar won't charge and where running cable isn't practical, or spots you only light occasionally. The catch is obvious. Someone has to remember to collect them, charge them, and put them back. On two entry posts that's a minor chore. On twenty fence posts it's a maintenance routine you'll abandon by midsummer.
| Option | Install effort | Best fit | Main weakness |
|---|---|---|---|
| Solar | Lowest, no wiring | Sunny, scattered posts | Shade and winter runtime |
| Low-voltage | Highest, cable and transformer | Long runs, full decks | Up-front labour |
| Rechargeable | Low, manual charging | Shaded or occasional posts | Charging discipline |
My practical rule is simple. Match the power to the worst post on the run, not the best one. If half your fence sits in shade, solar will disappoint you no matter how well the sunny half performs.
Sizing and Fit for Common Post Dimensions
More post caps get returned over fit than over any other reason. The usual mistake is trusting the lumber label. A nominal 4×4 post isn't four inches square, dressed lumber measures smaller than its nominal name, and metal posts follow yet another set of true dimensions. If you order by the label instead of the tape, you'll end up with caps that rock, gap, or won't seat at all.
Measure the Post, Not the Label
Measure across the top of the actual post in both directions, right where the cap will sit. Do it on more than one post, because wood posts can vary slightly along a run, and an older post may have swollen, checked, or been cut out of square. Note whether there's a post sleeve or wrap in place, since the cap has to fit over the finished outside dimension, not the bare timber underneath.
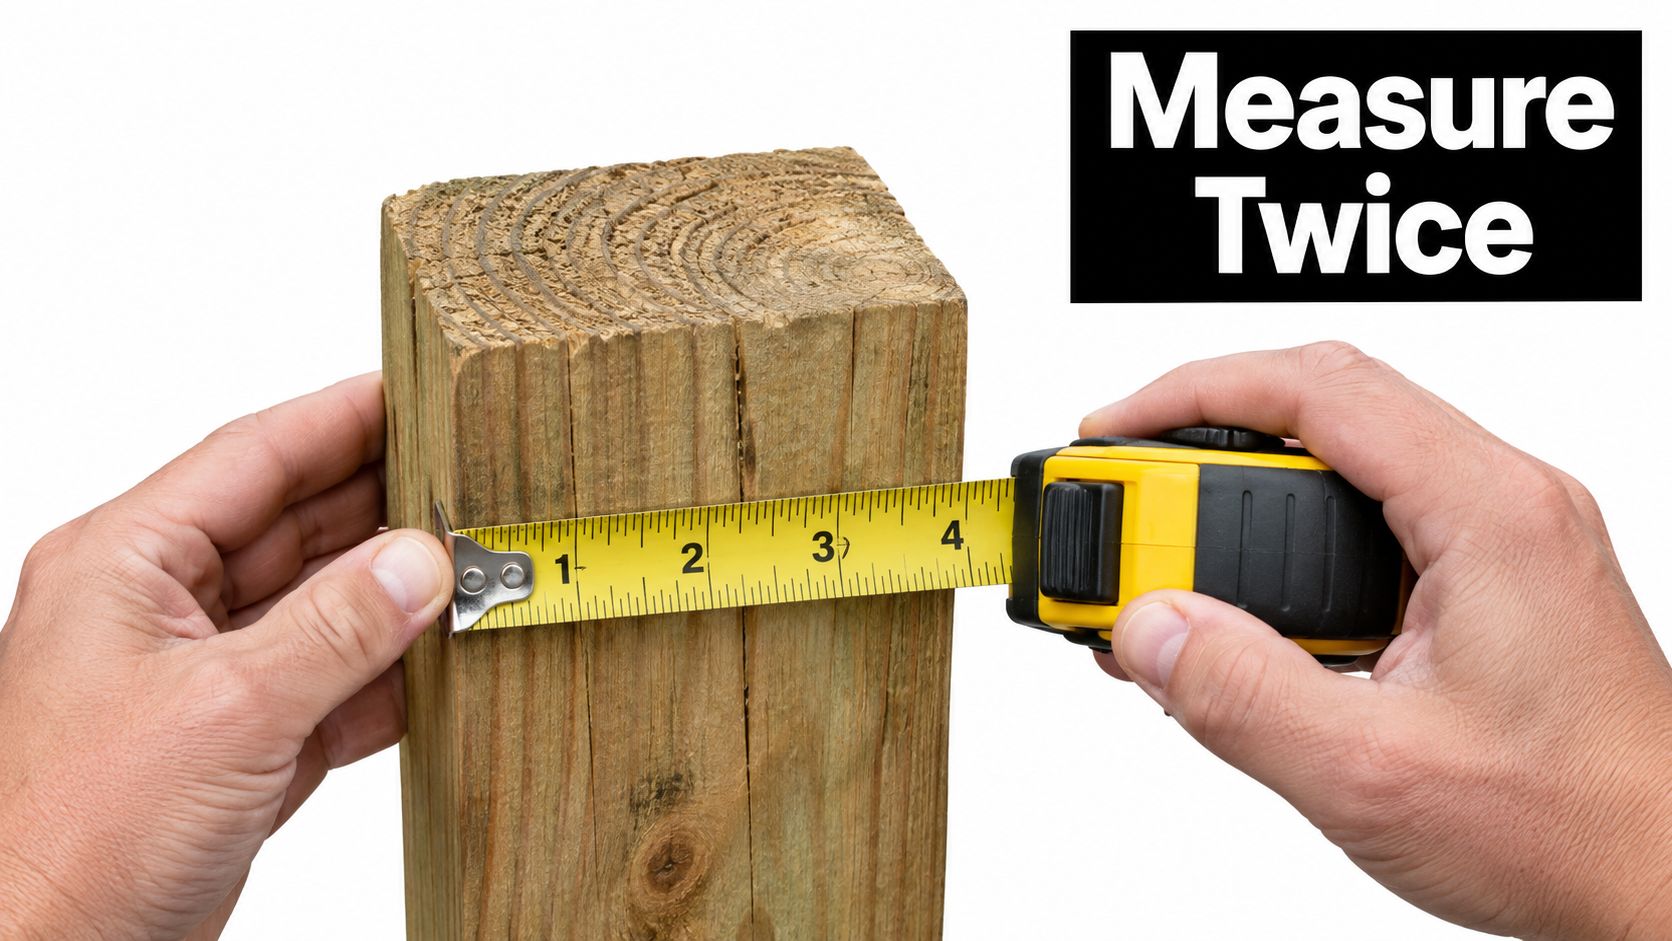
- Measure width and depth: Record both dimensions at the post top, in inches, to the nearest small fraction you can read confidently.
- Check several posts: Use the largest measurement from the run so every cap fits without forcing.
- Match the inside dimension: Compare your numbers against the cap's inside opening, not its outside width, which is the figure listings often headline.
- Confirm the material: Wood and metal posts of the same nominal size often need different cap bases or adaptors.
XTREME EDEALS INC. stocks solar post cap lights and unlit caps in pyramid, ball, and decorative styles for wood and metal posts, covering common sizes from 2×2 up to true 6×6 and beyond, which makes it a reasonable place to compare inside dimensions across styles before you commit. Our detailed breakdown of what size fence post caps you need for common post dimensions walks through the nominal versus actual problem post by post.
Cap Styles and How They Seat
Some caps sit flat on top of the post and fasten through the top. Others have a skirt that wraps down over the sides and screws into the post face. The wrap style hides a slightly rough post top and resists being knocked askew, while the flat style gives a cleaner line on squared, finished posts. Either way, a small amount of clearance is normal and desirable. A cap that's forced on will stress its housing every time the wood swells, and that's how bases crack in their second winter.
Fit check: If you have to persuade a cap onto the post with a mallet, it's the wrong size. Send it back before you install the rest.
Brightness and LED Specifications Explained
Product listings throw numbers at you because numbers look objective. Two of them matter for a post cap, lumens and colour temperature, and both are easy to misread.
The overview below sums up how those two specifications translate into what you'll see on your deck.
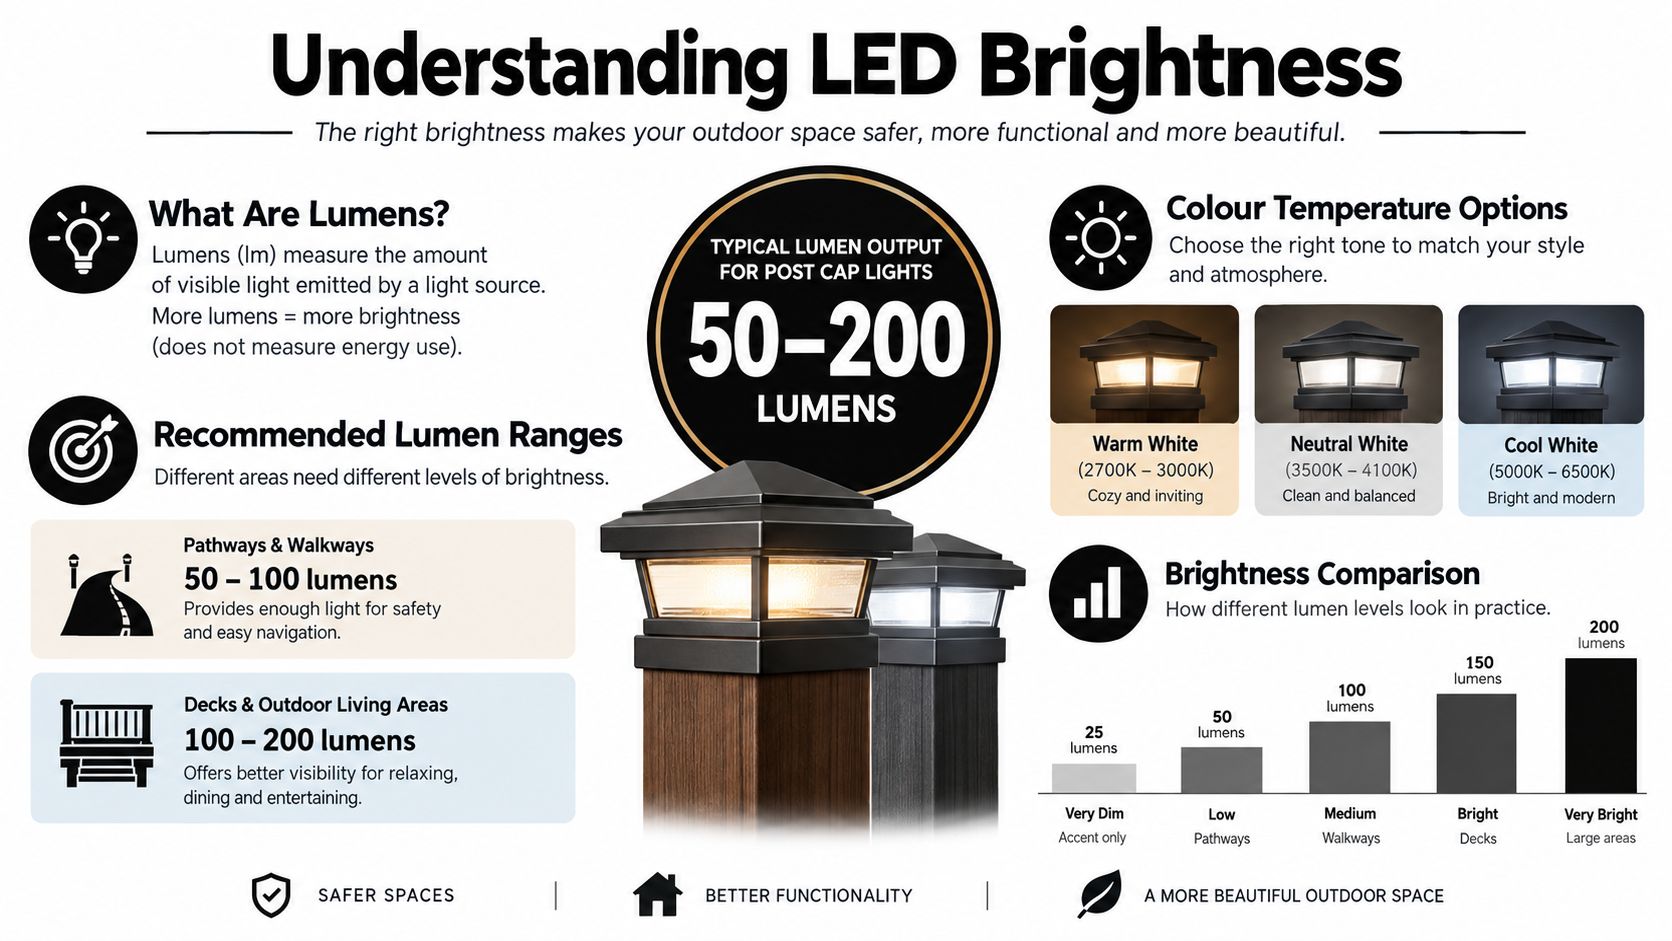
Lumens Measure Light, Not Quality
Lumens measure the total visible light a fixture produces. For a post cap, you're buying orientation light, a visible marker and a soft pool at the post base, not task lighting. That means modest output is a feature, not a shortcoming. A cap that's too bright for its position creates glare at eye level, flattens the look of the whole yard, and can annoy the neighbours whose bedroom window faces your fence.
Watch for one common trick. Some listings quote the output of the bare LED chip rather than the light that leaves the finished fixture after passing through a lens or diffuser. Those numbers aren't comparable. In practice, you should confirm the advertised lumen output is measured at the fixture rather than the bare LED, a point made in the California State University outdoor lighting design guide. If a listing won't say which figure it's quoting, treat the output as lower than claimed.
Colour Temperature Sets the Mood
Colour temperature, measured in kelvin, describes whether the light reads warm or cool. That same design guidance supports specifying warm white light around 2700–3000 K where visual comfort matters, and that range suits most decks and fences. Warm white flatters wood tones and doesn't make a backyard feel like a parking lot. Cooler, bluer light can look sharper on modern metal fencing, but it reads harsh at close range and shows every insect in the air. Whatever you choose, buy every cap for a run at the same colour temperature from the same product line. Mixed temperatures along one fence look like a mistake, because they are one.
If you want to see how these differences look in a real installation before you buy, the walkthrough below is worth a few minutes.
Distribution matters as much as the headline numbers. A cap with an opaque top and downward facing emitters puts light where your feet are. A translucent cap glows in every direction, including horizontally into the house next door. Same lumen rating, completely different result.
Materials and Finish Durability for Outdoor Use
A post cap lives in the worst spot on the fence. It takes full sun, standing rain, freeze and thaw cycles, sprinkler spray, and in coastal areas, salt air. Material choice decides whether it still works and looks decent in five years.
Cast aluminum is the workhorse. It's rigid, it doesn't rust, and a powder coated finish holds its colour well. Most quality low-voltage caps use it. Plastic housings keep solar caps affordable and light, but cheap plastic chalks, yellows, and turns brittle under ultraviolet exposure, and the clear lens over the solar panel usually degrades first. Stainless steel looks sharp and resists corrosion, though lower grades can tea stain near the coast. Composite caps sit between plastic and metal, decent durability with a moulded look that suits vinyl fencing.
Wet-Location Rating Is the Specification to Verify
Material is only half the story. What kills outdoor fixtures is water getting into the electrical compartment through seams and cable entries. Look for an explicit wet-location listing, sealed electrical compartments, and corrosion resistant hardware. A fixture that's only rated for damp or indoor use will corrode, flicker, and fail early outdoors no matter how solid the shell feels. Check the listing on the product itself or its specification sheet, not just marketing words like weatherproof, which don't correspond to any tested standard.
Finish matters for the same reason. Powder coating bonds to metal and resists chipping far better than a simple painted surface, and once paint chips, corrosion starts at the chip. If you're comparing finishes, our overview of protective coatings for outdoor hardware and metal finishes explains how the common options hold up. For sprinkler exposed or coastal sites, choose corrosion resistant finishes and stainless fasteners from the start. Replacing rusted screws later, usually by drilling them out, costs more time than the upgrade ever would have.
- Aluminum with powder coat: Best all-around balance of weight, strength, and finish life.
- UV stable plastic: Acceptable for solar caps if the resin is UV rated, questionable otherwise.
- Stainless and composite: Good corrosion behaviour, match the grade and style to your fence material.
Spend on the housing and the seal. The LED inside almost any cap will outlast a cheap enclosure by years.
Installation Options for Every Skill Level
There are three realistic ways to get these lights onto your posts, and they're separated mostly by how much wiring you're willing to do.
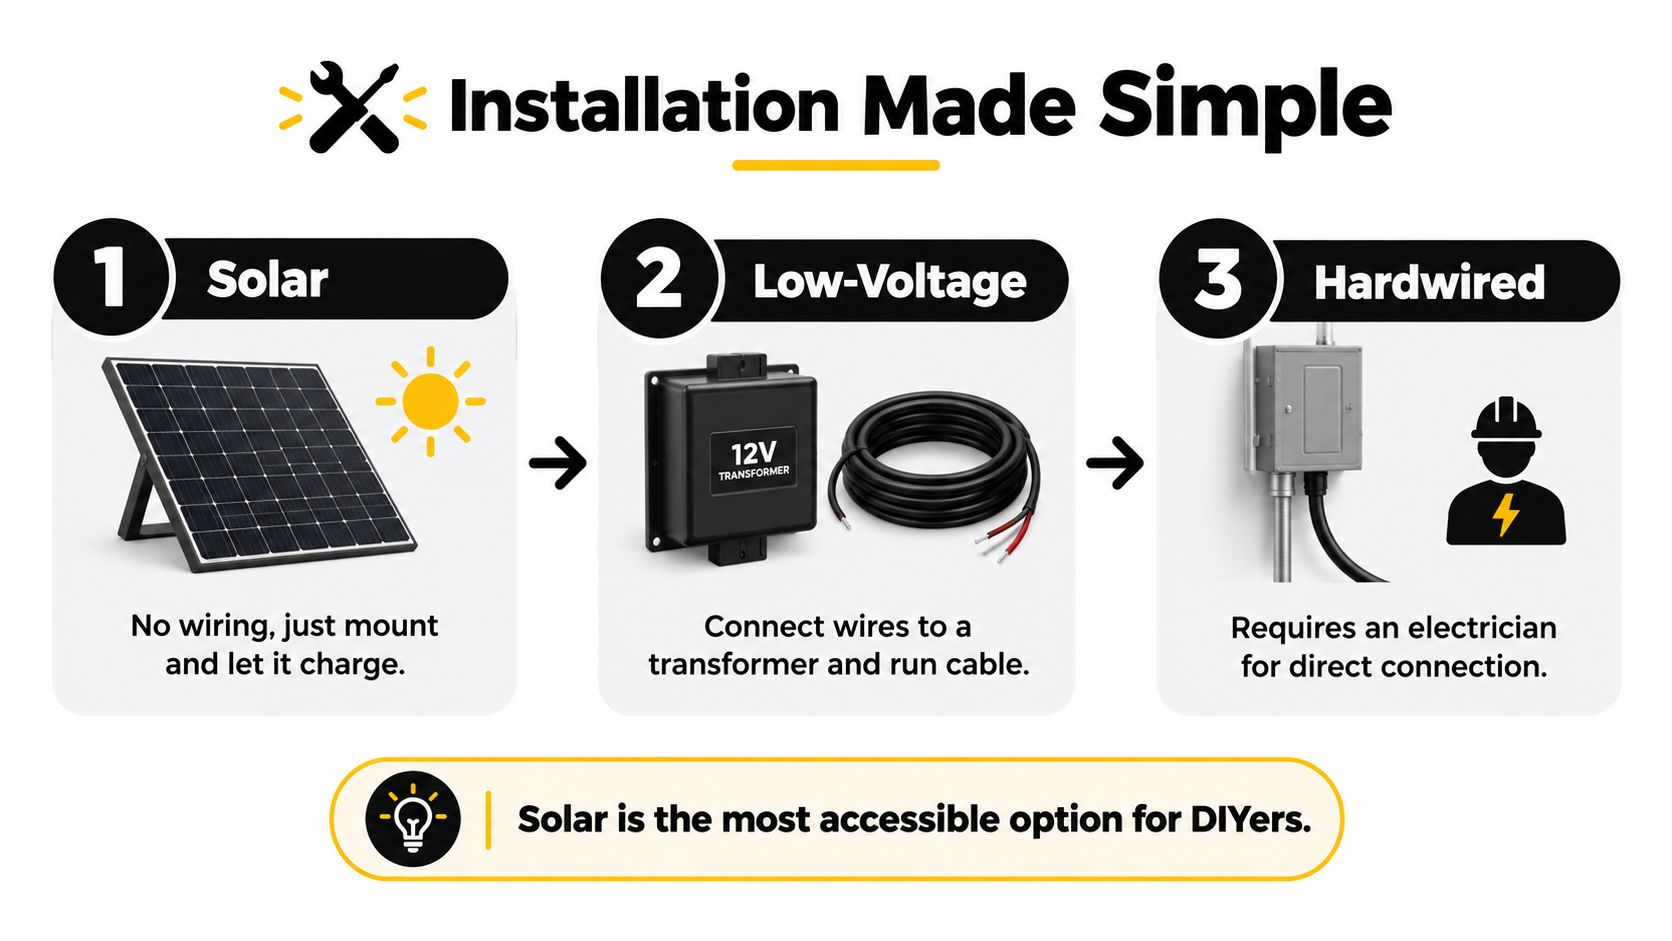
No-Wiring Solar Installation
Solar is the entry point. Set the cap on the post, drive the supplied screws, remove the battery tab if there is one, and let it charge for a full day before judging it. A screwdriver and a level are all you need. The only real skill involved is placement. Walk the fence line at midday and note which posts sit in shadow. Those posts are candidates for a different power type, no matter how convenient solar is everywhere else.
Low-Voltage Retrofit
A low-voltage retrofit sits in the middle. You mount a transformer near an outdoor receptacle, run low-voltage cable along the inside of the fence rail or beneath the deck, and connect each cap as you go. The wiring is low voltage, so it's forgiving work, but neat cable routing takes patience. Keep connections inside the post or under the cap where they're sheltered, leave a little slack at each cap for future service, and test the full run before you fix the cable permanently. Our guide to outdoor lighting installation methods for decks and fences covers transformer placement and cable routing in more detail.
Hardwired Installation
Hardwired caps connect to household voltage and give the most permanent result, usually as part of a new build or a major renovation where walls and posts are already open. This is the one path where I'd tell a homeowner to hire an electrician. Permits, proper junction boxes, and ground fault protection aren't optional details, and retrofitting household voltage into a finished fence rarely justifies the cost when low-voltage does the same lighting job.
Whichever path you take, two habits pay off. Pre-drill hardwood posts so the small supplied screws don't snap, and seat every cap before tightening anything, then step back and check the line. A row of caps that's visibly uneven will bother you every evening, and it takes two minutes to prevent.
Maintenance and Troubleshooting Common Issues
Post cap lights are low maintenance, not no maintenance. A few minutes twice a year prevents most of the failures people blame on the product.
Routine Care That Actually Matters
Wipe solar panels with a damp cloth when you notice a film of pollen or dust. A dirty panel charges slowly, and the symptom looks exactly like a dying battery. Check the seal where the cap meets the post and clear out the debris and insect nests that collect under the skirt. On low-voltage runs, look over the cable for nicks from trimmers and garden tools, and confirm each connection is still snug. Rechargeable caps need their charge cycle kept up even in the off season, since a battery left flat in a cold garage all winter often won't recover.
Working Through the Common Failures
The light stopped working entirely. Start with power, not parts. On solar caps, confirm the switch is on, then cover the panel completely in daylight. If the light comes on, the photocell and LED work and your problem is charging, usually shade or a dirty panel. If it stays dark after a full sunny day of charging, the battery is the likely culprit, and on better caps it's replaceable. On a low-voltage run, check whether one cap or the whole run is out. One cap points to its connection. The whole run points to the transformer, its timer settings, or the outlet's ground fault protection, which trips more often than people expect.
The light runs but dies partway through the night. This is the classic solar complaint, and it's usually an exposure problem rather than a defect. A tree has leafed out, a new structure casts a shadow, or the season changed and the charging window shrank. Clean the panel, then check what shade falls on that post across a full day. If the post doesn't get enough sun, no replacement battery will fix it. That post wants a low-voltage or rechargeable cap.
Flickering or uneven brightness. Flicker on a wired cap usually means a loose or corroded connection, especially where dissimilar metals meet outdoors. Clean the contact, remake the connection, and protect it from direct water. On solar caps, intermittent flicker near dawn typically means the battery is nearly spent and the voltage is sagging. Uneven brightness across a solar run, where some caps glow strongly and others barely register, tells you the posts aren't getting equal sun. That's a layout observation, not a warranty claim.
The light comes on during the day or won't come on at dusk. The photocell is confused. A sensor shaded by an overhanging branch, a nearby cap, or the fence itself can trigger in daylight, and a sensor facing a porch light or street light may never register darkness. Reposition, trim, or shield as needed before you assume the unit is faulty.
Know the Rules Before You Replace or Add Lights
Troubleshooting is also the right moment to check something most guides skip. When you're adding caps, replacing a whole run, or switching from solar to wired, local rules can shape what you should install. Ventura County's outdoor lighting guidance points to California Energy Code requirements for new single-family outdoor lighting, including high-efficacy equipment, a manual on and off switch, and either photocell plus motion sensing, photocell plus automatic timing, or an astronomical time clock, with override controls returning to normal operation within six hours, and it notes that local ordinances can be stricter, as set out in Ventura County's outdoor lighting restrictions guidance.
That pattern shows up well beyond California. Municipal rules increasingly care about brightness, direction, and operating hours, and a solar label doesn't automatically exempt a fixture. The practical takeaway travels anywhere. A lower output, warm, downward directed cap on a sensible schedule is easier to live with, easier on your neighbours, and far less likely to draw a complaint than the brightest cap in the catalogue. Verify your local ordinance before a big purchase rather than assuming any single product is compliant everywhere.
Diagnose in order. Power first, then exposure, then connections, then parts. Most dead caps are failed by shade and dirt, not by their LEDs.
When a cap has a cracked housing, water inside the lens, or a swollen battery compartment, stop troubleshooting and replace it. Those are enclosure failures, and no cleaning routine reverses them.
Final Thoughts and Pre-Purchase Checklist
Every good post cap purchase I've seen came down to five answers. What's the true post size. Which power source suits the shadiest post on the run. How much light the space needs, which is usually less than people first assume. Whether the housing is rated and finished for the exposure it'll face. And whether you've checked local rules on brightness, direction, and hours before the boxes arrive.
Get those five right and the style choice, pyramid, ball, or decorative, becomes the easy part it should be. Get the power or the fit wrong and no style will save the project. You'll have beautiful caps that die by nine in the evening or wobble every time the gate closes.
Your Pre-Purchase Checklist
- Post dimensions measured: Actual width and depth recorded at the post top, checked on several posts, with any sleeve or wrap included.
- Inside opening confirmed: Cap's inside dimension matched to your largest measurement, with a little clearance rather than a forced fit.
- Power source matched to exposure: Solar only where panels get real sun, low-voltage for long or shaded runs, rechargeable for a few awkward posts.
- Output verified at the fixture: Lumen figure quoted for the finished fixture, warm colour temperature chosen consistently for the whole run.
- Light directed downward: Opaque top or shielded design preferred where neighbours, windows, or the street sit close to the fence line.
- Wet-location listing checked: Sealed compartments and corrosion resistant hardware confirmed, not just weatherproof marketing language.
- Local rules reviewed: Municipal limits on output, shielding, and operating hours checked before ordering, especially for wired installations.
- Spares considered: One extra cap and a set of replacement batteries or fasteners bought with the original order, while the exact model is still available.
A well chosen set of LED post cap lights is a small project with an outsized effect. The deck stays usable after dinner, the fence line reads clearly from the house, and the posts shed water instead of soaking it up. Measure carefully, power it thoroughly, and you'll install them once and enjoy them for years.
When you're ready to compare sizes and styles, XTREME EDEALS INC. carries solar post cap lights, unlit pyramid, ball, and decorative caps for wood and metal posts from 2×2 to true 6×6 and beyond, plus the fasteners, hinges, and deck hardware to finish the job in one order. Browse the range with your post measurements in hand, check the inside dimensions on each listing, and pick the cap that fits your fence, your sun exposure, and your local rules.