
You're standing in the driveway with a ledger board, a box of hardware, and a plan that looked simple on paper. Maybe it's a new deck off the back door. Maybe it's a fence post base on an old concrete pad. Maybe it's a railing that needs to feel solid the first time someone leans on it.
The part that decides whether the whole job feels professional or sketchy is usually hidden in the concrete.
A lot of people spend hours choosing boards, stain, post caps, and brackets, then treat the anchor as an afterthought. That's backwards. The connection to the slab, footing, or wall is the part that carries load, resists movement, and keeps small mistakes from turning into cracked concrete, loose hardware, or a callback later.
Generic DIY advice tends to make expansion anchors for concrete sound interchangeable. Drill a hole, tap it in, tighten the nut, done. In practice, that approach causes most of the trouble I see. The questions are more specific. Is the concrete old and likely cracked? Is the load mostly pull-out or mostly sideways shear? Is the area exposed to weather and corrosion? Did you drill the right diameter and clean the hole?
Those details matter whether you're a homeowner building one deck or a contractor knocking out multiple fence and railing installs in a week. A connection can look tight on day one and still be the wrong anchor, the wrong finish, or the wrong install method.
Your Project Starts with a Solid Connection
A common job starts like this. Someone has a decent concrete base already in place, and they want to build on it instead of starting from scratch. That's smart. Existing concrete can save time and money, but only if the attachment is done properly.
Take a deck upgrade. The framing may be straightforward, but the moment you fasten a post base or ledger-related hardware into cured concrete, the project stops being basic carpentry and becomes anchorage work. That's where many capable DIYers get tripped up. They know how to frame square and level. They don't always know how concrete behaves when you expand steel inside a drilled hole.
The same thing happens with fence retrofits. A post base gets added to an older pad, the anchor hole goes too close to the edge, the hole isn't cleaned, and the installer keeps tightening because the anchor “doesn't feel set yet”. Then the concrete chips, the anchor spins, or the base plate never sits flat.
Practical rule: If the concrete connection fails, the rest of the build doesn't matter much.
A good anchor installation does more than hold a bracket down. It transfers load into the concrete without overstressing the surrounding material. It also gives you predictable performance. That predictability is what separates a clean, durable build from one that keeps loosening up with freeze-thaw cycles, vibration, and seasonal movement.
Where people usually underestimate the risk
Most mistakes start with one of these assumptions:
- “Concrete is hard, so any anchor will bite.” Hardness alone doesn't make an anchor suitable.
- “If it tightens, it's good.” A tight nut can still be hiding a bad hole, shallow embedment, or blown-out concrete.
- “Outdoor hardware is outdoor hardware.” Finish and corrosion resistance matter a lot when the connection is exposed.
- “Old concrete is the same as new concrete.” It often isn't. Age, cracking, moisture, and reinforcement all change the job.
If you get the anchor choice and installation right, the project feels boring in the best way. It goes together cleanly, passes inspection where needed, and stays put.
How Expansion Anchors Grip Concrete
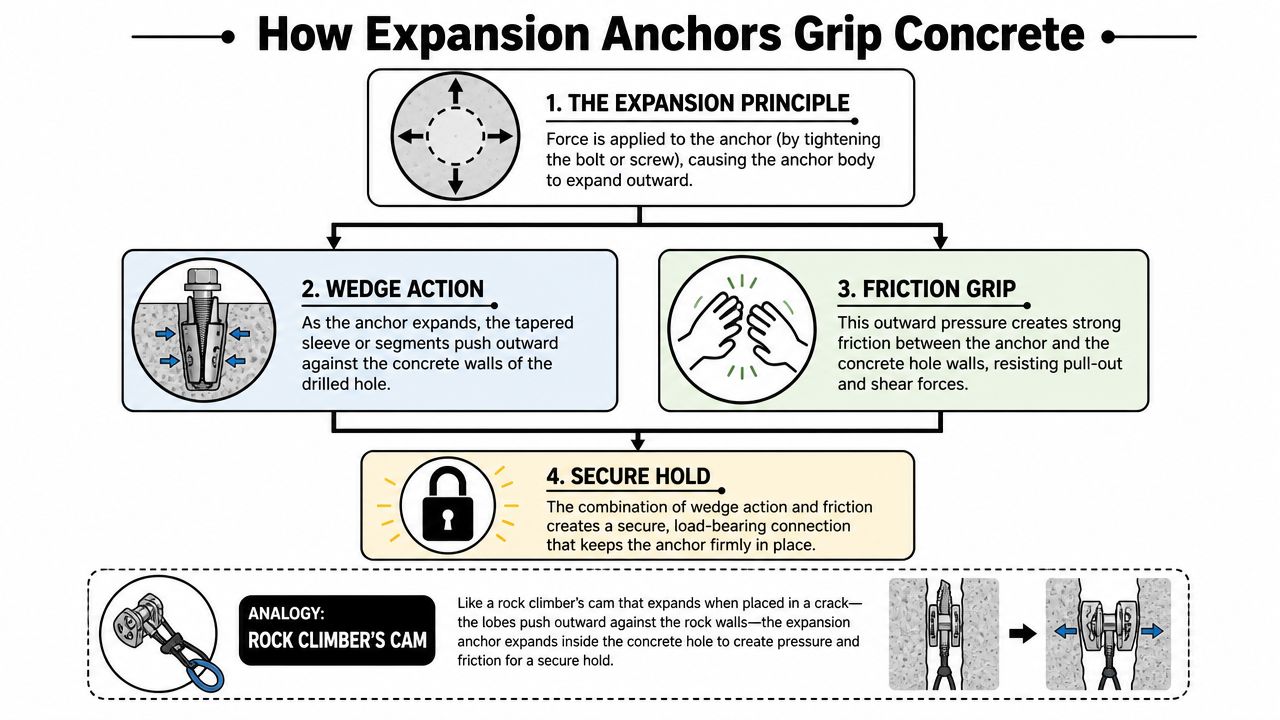
Expansion anchors grip concrete by creating outward pressure against the wall of a drilled hole. Once the anchor is tightened or set, that pressure turns into holding power through mechanical interlock and friction.
The basic mechanics
The process sounds simple, but the details matter. One part of the anchor is drawn into another part, and that movement forces a clip, sleeve, or shell outward. The concrete pushes back. That reaction is what locks the anchor in place.
Good grip depends on more than torque alone. Hole diameter, drilling accuracy, embedment depth, and hole cleaning all affect how evenly the anchor bears against the concrete. In Canadian exterior work, that matters even more because moisture, freeze-thaw cycling, and older cracked slabs expose weak installation habits fast.
For a broader overview of anchor types and project planning, this guide to concrete anchor bolts for 2026 projects helps frame the options before you choose hardware.
Wedge anchors
A wedge anchor develops its holding power near the embedded end. As the nut is tightened, the tapered section pulls into the expansion clip, and the clip presses hard against the hole wall.
That makes wedge anchors a strong choice for base plates, structural brackets, and other higher-load connections in sound concrete. It also makes them less forgiving. If the hole is oversized, dusty, or drilled too shallow, the anchor may torque up without developing the holding values you expect. In cracked concrete, that distinction matters because some anchors are rated for it and some are not.
Sleeve anchors
A sleeve anchor expands over a longer portion of the body. Tightening the fastener draws a cone into the sleeve, and the sleeve spreads pressure over more surface area inside the hole.
That broader contact can help in medium-duty applications where fixture fit-up is less exact or the loading is lighter. Sleeve anchors are often used for lighter brackets, electrical supports, and general attachment work. They are useful, but they are not a substitute for a properly specified wedge anchor where higher tension or shear loads are involved.
A sleeve anchor spreads load along more of the hole wall. A wedge anchor concentrates expansion near the working end.
Drop-in or shell anchors
A drop-in anchor sits flush or slightly below the surface and uses a setting tool to expand the internal shell. This style is useful when the job calls for a female thread in concrete and the bolt may need to be removed later.
These anchors are installation-sensitive. If the hole is too shallow, the shell cannot expand correctly. If the anchor sits too high, the bolt engagement and fixture fit can both suffer. Shell-style anchors have similar limits. They rely on correct hole prep and full setting force to develop reliable grip.
This is one area where generic DIY advice often falls short. Professional installation practice pays close attention to whether the concrete is cracked, how close the anchor is to an edge, and whether the hole was properly cleaned before setting. Those factors directly affect how the expansion force transfers into the slab, and they often decide whether the connection stays sound over time or loosens, spins, or damages the surrounding concrete.
Choosing the Right Anchor for Your Job
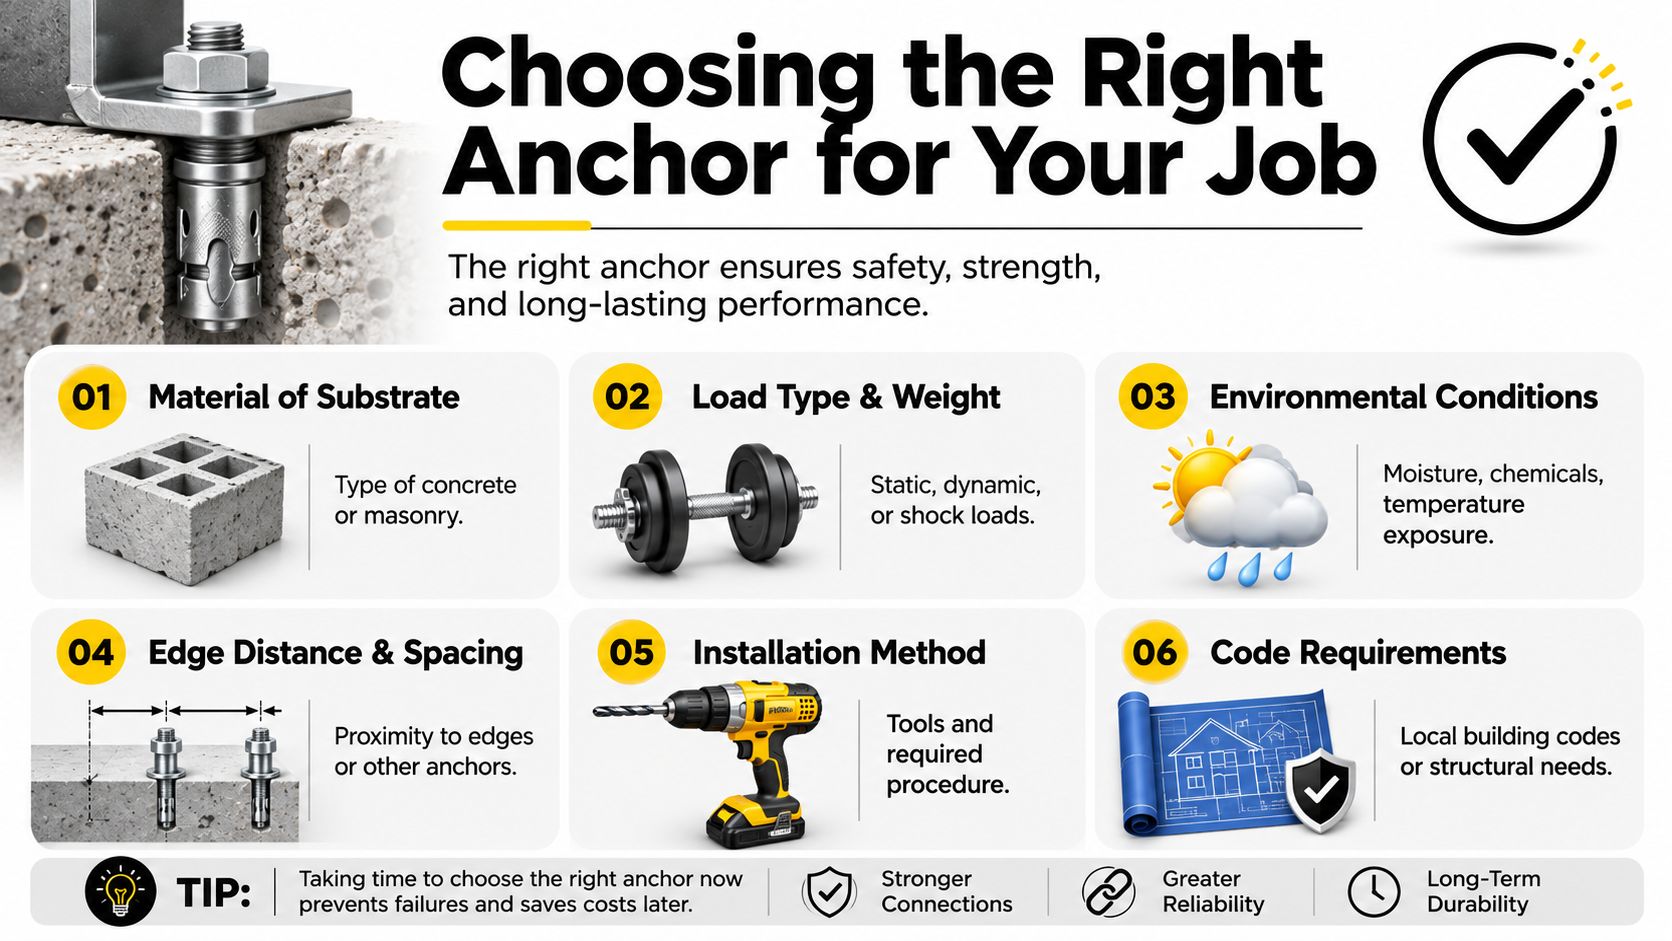
Picking between expansion anchors for concrete isn't about brand loyalty or habit. It's about matching the anchor to the load, the concrete, and the environment. If any one of those is ignored, you can end up with a connection that looks fine but isn't carrying load the way you think it is.
Start with the load
Ask what the anchor is really resisting.
A post base for a fence may see uplift, side load, and repeated movement from wind. A bracket on a slab may mostly see downward compression with some shear. A railing base can get shock loading from people grabbing it abruptly. Those aren't the same job, even if the drilled holes look identical.
To illustrate this practically:
| Job condition | What matters most | Typical anchor direction concern |
|---|---|---|
| Deck or railing base | stiffness and reliable expansion | tension and shear |
| Light fence hardware | versatility and fit-up | mixed loading |
| Removable threaded connection | flush female thread | pull-out and serviceability |
The anchor should match the force path, not just the hole size in the bracket.
Concrete condition changes the answer
This is the part generic tutorials often skip. Cracked concrete is not a niche engineering detail. It's common in older slabs, deck support areas, and retrofit work. Hairline cracks, shrinkage, and stress zones can all change how an anchor behaves.
The biggest gap in DIY advice is seismic and cracked-concrete qualification. General guides often say wedge anchors suit high seismic loads, but they rarely explain that in California, anchors installed in cracked concrete for fence and deck retrofit work must be explicitly qualified for cracked concrete under ICC-ES AC398 to meet Title 24 and DOT seismic requirements. California DOT also requires verification that anchorage devices are on the Authorized Materials List, and ordinary wedge anchors may not satisfy that requirement unless they're specifically certified, as outlined in this expansion anchor overview discussing cracked concrete qualification.
That's California-specific, but the lesson carries over well in Canada. If the concrete is aged, weathered, visibly cracked, or carrying cyclical loads, don't assume a standard anchor is automatically suitable just because it fits the hole.
Edge distance and spacing are not optional
Concrete needs room around an anchor to develop strength. Put an anchor too close to an edge, and the concrete can break out or spall before the anchor reaches its intended hold. Put anchors too close together, and they start affecting each other.
Before drilling, professionals slow down and check layout. One misplaced hole can force you to abandon a base plate location or redesign the attachment.
For a practical comparison of common anchor choices, this breakdown of sleeve anchor vs wedge anchor helps clarify where each type fits.
Think about environment before you buy
Outdoor anchorage in Canada deals with moisture, temperature swings, and corrosion. Basements, garages, exposed decks, and fence lines all create different risk levels. If the hardware finish is wrong, the anchor can degrade long before the wood or bracket does.
Use this quick filter before purchasing:
- Exposed exterior work: Choose finishes suited to wet conditions and seasonal exposure.
- Pressure-treated lumber nearby: Check compatibility with adjacent hardware and framing conditions.
- Older concrete retrofit: Expect variation in density, cracking, and drill feel.
- Structural attachment: Confirm the anchor is appropriate for the actual application, not just convenient to install.
If you're not sure whether the slab is cracked concrete, treat uncertainty as a warning, not a green light.
Featured Concrete Anchors from Xtreme eDeals
A lot of anchor failures start at the buying stage. The installer grabs whatever is on the shelf, the hole gets drilled, the bracket feels tight, and the connection still ends up weaker than expected because the anchor type never matched the concrete, the load, or the environment.
For typical residential and light commercial work in Canada, two categories cover a lot of ground: wedge anchors and sleeve anchors. Both are mechanical expansion anchors, but they do not behave the same in the field.
Where wedge anchors make sense
Wedge anchors are usually the better fit for heavier steel-to-concrete connections in sound concrete. Post bases, equipment brackets, and fixed hardware that need a firm mechanical hold are the usual examples. Once set properly, they give a direct, predictable connection, which is why they show up so often on professional jobs.
They also ask more from the installer.
If the hole is oversized, shallow, dusty, or drilled out of square, a wedge anchor will show it fast. That makes them a good choice for crews with the right tools and a disciplined install routine, not for casual guesswork. If you are still sorting out tooling, this comparison of hammer drill vs rotary hammer helps clarify what is appropriate for real concrete rather than masonry block or soft material.
Where sleeve anchors earn their keep
Sleeve anchors are more forgiving across a wider range of fixtures. They work well for lighter and medium-duty attachments, especially where the fixture shape, base thickness, or fastening layout does not suit a wedge anchor.
In practice, I reach for sleeve anchors on many general fastening jobs, light framing attachments, and some fence or gate hardware where the loads are lower and the connection details are less demanding. They can also be useful where the substrate is less uniform, which matters on older slabs and retrofit work.
If you are comparing lengths, diameters, and head styles for a specific bracket, the sleeve anchors collection for concrete fastening is a practical place to sort options by application.
What separates a proper selection from a random purchase
The anchor itself is only part of the decision. The better question is whether the anchor has published use conditions that match the job you are building.
That matters most on work that sits in a grey area between basic DIY and code-aware installation. In Canada, that often means asking a few questions earlier than many homeowners expect. Is the slab likely to crack under service loads? Is this a dry basement install or an exposed exterior connection dealing with freeze-thaw cycles and corrosion? Is the hardware supporting a guard, a post base, or something that could injure someone if it loosens?
Those trade-offs should shape the purchase. A sleeve anchor that works fine for a light ledger-mounted accessory is not automatically the right call for a heavily loaded base plate. A wedge anchor that looks stronger on paper is not automatically acceptable if the concrete condition, edge layout, or installation quality are uncertain.
Good hardware selection is less about buying the strongest anchor in the category and more about choosing one the concrete, fixture, and installer can support properly.
Step by Step Installation Best Practices
Even the right anchor fails when the hole is wrong. Installation is where expansion anchors for concrete either deliver their rated behaviour or turn into a liability.
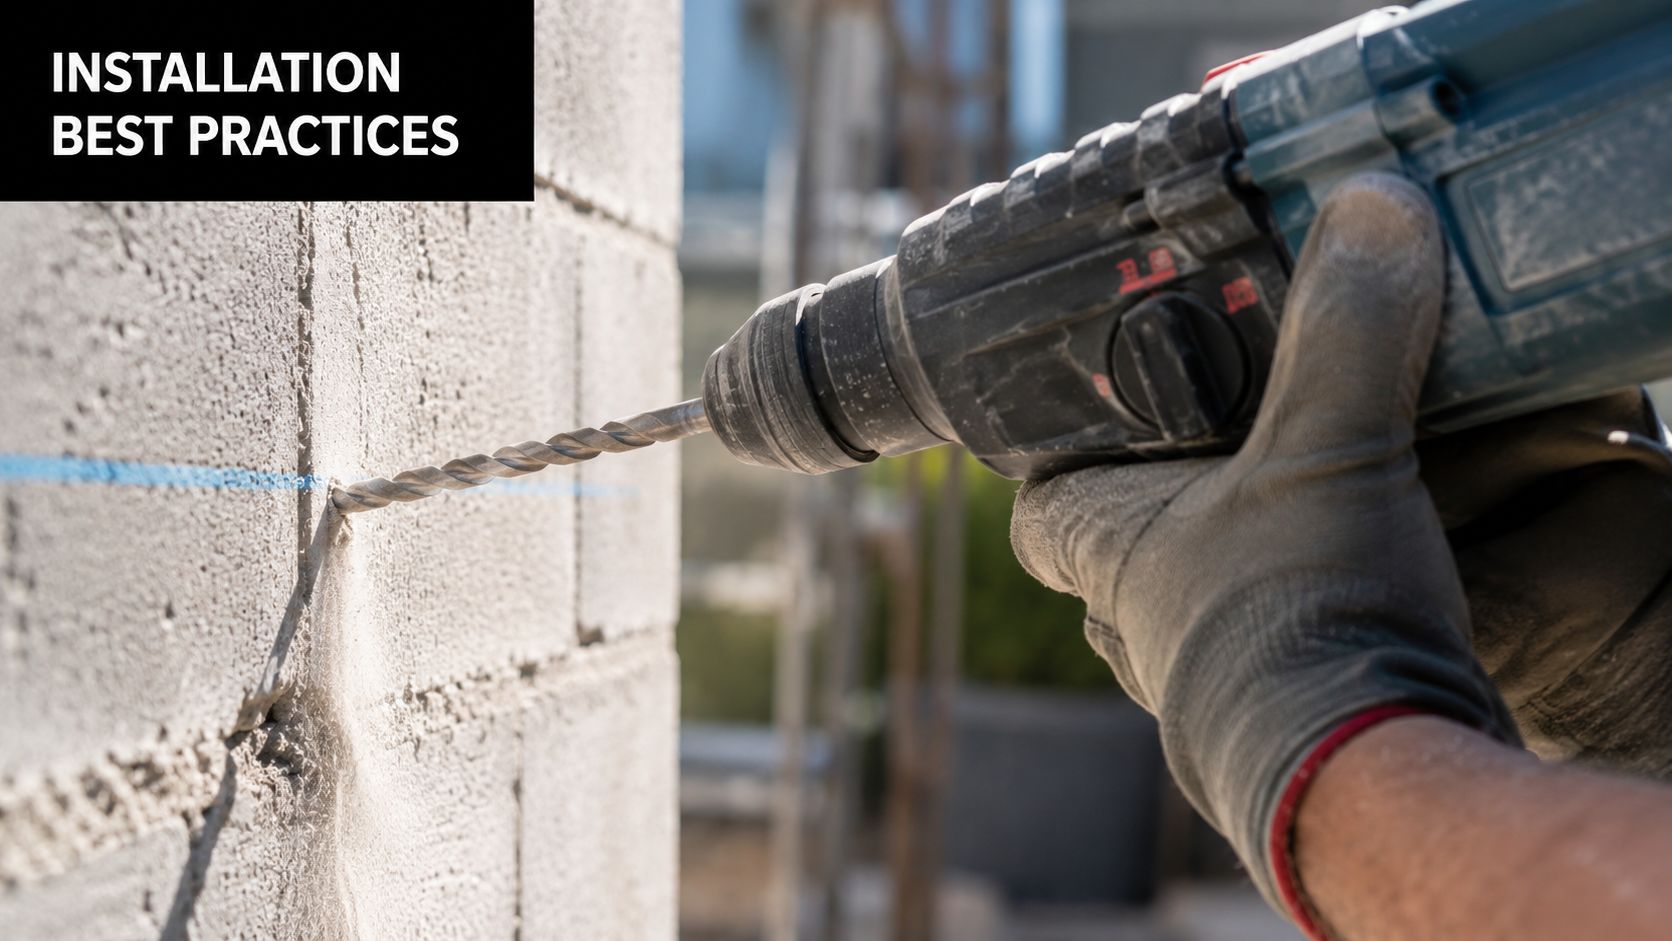
Step 1 Drill the correct hole
Use the correct bit diameter for the anchor and keep the drill square to the surface. If the bit wanders, the hole enlarges, or the angle is off, the anchor won't expand as designed.
For anyone choosing tools, this comparison of hammer drill vs rotary hammer is worth reading before you start. On real concrete, especially older or denser pads, the wrong drill can make it harder to hold alignment and depth consistently.
Drill to the required depth for the specific anchor and fixture. Don't guess. Don't “eyeball close enough”.
Step 2 Clean the hole properly
This is the step amateurs skip most often, and it's the reason many installs feel wrong during tightening.
Concrete dust left in the hole interferes with expansion. The anchor may bottom out on debris, spin, bind, or produce a false sense of tightness. In practical terms, dust acts like a weak layer between the anchor and the concrete.
Use a simple professional routine:
- Blow out loose dust with air or a proper hole-cleaning method.
- Brush the hole with a brush sized for the diameter.
- Blow it out again until the debris is cleared.
A clean hole gives the anchor something solid to bear against. A dirty hole gives you bad feedback and unreliable holding power.
California Department of Transportation Bridge Construction Memo 75 requires inspectors to verify that the hole is properly cleaned and drilled to the exact size shown on project plans, and it also requires galvanized threaded studs rather than black steel or headed bolts for expansion anchorage installations on those projects. The same memo prohibits accepting a stud diameter smaller than the anchorage device size listed on the plans and requires the device to appear on the Approved Materials List, according to Bridge Construction Memo 75.
That's project-specific regulation, but the lesson is universal. Hole preparation is not optional.
Step 3 Seat the anchor correctly
Insert the anchor without damaging threads or deforming the expansion component. If you're setting a wedge anchor through a fixture, make sure the fixture sits flat before final tightening. If it rocks, something is off. Usually the hole depth, debris, or bracket alignment.
For drop-in or shell-style anchors, follow the required setting method exactly. These anchors depend on proper expansion at the right depth, not just being dropped into the hole.
A short demonstration helps if you haven't installed them recently:
Step 4 Tighten with control
Tightening is where the anchor develops its hold, but more force isn't automatically better. Overtightening can damage threads, crush weaker fixtures, or overstress the surrounding concrete. Undertightening can leave the expansion mechanism only partially engaged.
Use the proper wrench, hold the fixture in position, and tighten evenly and deliberately. If the anchor starts spinning, don't keep going and hope it fixes itself. Stop and diagnose the cause before the concrete gets damaged.
A clean, accurate install follows the same sequence every time: drill, clean, seat, tighten. Changing the order or rushing one step usually creates problems later.
Common Mistakes and How to Troubleshoot Them
Troubleshooting anchor problems works best when you start with the symptom and work backward. Most failures don't happen because expansion anchors are unreliable. They happen because the anchor, the hole, or the concrete condition didn't match the job.
If the anchor spins in the hole
A spinning anchor usually points to one of three issues: the hole is oversized, the hole wasn't cleaned properly, or the concrete is weaker than expected at that location.
Try this checklist:
- Check the hole diameter: If the bit size was wrong or the hole wall got chewed up, the anchor may never develop proper expansion.
- Look for dust packing: If debris stayed in the bottom or along the wall, the anchor may have seated badly.
- Inspect the concrete surface: Crumbling or soft concrete around the opening can signal poor local substrate quality.
If the anchor has already spun during tightening, replacement in the same compromised hole usually isn't the right fix without re-evaluating the location and anchor choice.
If the concrete chips or spalls
This often means the anchor is too close to an edge, the spacing is too tight, or the installer forced the anchor during setting and tightening.
When concrete breaks at the edge, the anchor isn't the only thing in trouble. The surrounding concrete cone may already be compromised.
The solution is usually layout-related, not torque-related. Move the hole location if possible, respect edge distance, and avoid treating concrete like steel plate. It needs room to distribute stress.
If drilling feels inconsistent
Concrete isn't always uniform. One hole drills cleanly, the next one catches fibres, reinforcement, or a denser patch. That difference affects both installation feel and anchor behaviour.
Research on fibre-reinforced concrete found that increasing dispersed steel and polypropylene fibre reinforcement from 10 kg/m³ to 30 kg/m³ increased the pull-out resistance of segment expansion anchors by 20%, while reinforcement levels up to 10 kg/m³ produced only a 3 to 6% increase, according to this study on pull-out resistance in fibre-reinforced concrete.
That doesn't mean a DIY installer should chase a specific reinforcement formula on a home project. It does mean the substrate can change anchor performance in ways a generic tutorial won't mention. If one area drills differently or tightens differently, pay attention. The concrete may not be uniform.
If the bracket still feels loose
When hardware moves after tightening, don't assume the anchor failed first. Check whether the fixture hole is oversized, the base plate is warped, washers are missing, or the surface under the bracket isn't flat.
A solid anchor can't fix a sloppy fixture stack-up. The whole assembly has to bear properly.
Secure Your Project with Confidence
Good anchorage isn't flashy, but it's what makes a deck feel solid, a railing feel trustworthy, and a fence base stay put through weather and use. The right approach is simple to describe and disciplined to execute. Match the anchor to the job, respect the concrete you're drilling into, and don't cut corners on hole cleaning or installation.
That's the difference between fastening something down and building a connection that performs.
For capable DIYers and working contractors alike, expansion anchors for concrete deserve the same attention you give framing, layout, and finish hardware. Cracked concrete, edge distance, corrosion exposure, and proper drilling all affect the outcome. Ignore those details and you're guessing. Handle them properly and the connection becomes predictable.
Reliable hardware is part of that equation. So is buying from a supplier that carries the anchor styles, deck hardware, and fence components you need for the whole job, not just one isolated fastener.
If you're sourcing anchors, brackets, post caps, deck and fence hardware in one place, XTREME EDEALS INC. offers wedge anchors, sleeve anchors, and related fastening products suited to practical concrete attachment work.