
Ask ten carpenters what size pilot hole a 1/2 inch lag bolt needs and most will hand you a single number. That single-number habit is the most repeated piece of advice on the subject, and it breaks in two places. A lag bolt doesn't pass through one hole, it passes through two, and only the lower one is a pilot. And pilot size isn't fixed by bolt diameter alone. The same 1/2 inch bolt wants a wider hole in white oak than in western red cedar, because density decides how much wood the threads need around them.
Get either half wrong and the symptom shows up fast. The bolt seizes halfway in, the board splits along the grain, or the joint never pulls tight however hard you lean on the wrench. None of that is bad luck. It's a chart answering a narrower question than the job asked.
So take the numbers first, then the reasoning, then a routine you can repeat on joints no chart has ever seen.
Lag Bolt Pilot Hole Size Chart by Diameter and Wood
Read the table in two moves. Find your bolt diameter in the first column. Then choose the pilot column for the wood that will hold the threads. The clearance hole is separate: it belongs to the top member, the board, cap or bracket the head pulls against, and it stays the same across species.
| Bolt diameter | Clearance hole (top member) | Softwood pilot | Medium-density pilot (Douglas-fir) | Dense hardwood pilot |
|---|---|---|---|---|
| 1/4 in (6.4 mm) | 1/4 in (6.4 mm) | 2.5 to 4.4 mm | 3.8 to 4.8 mm | 4.1 to 5.4 mm |
| 5/16 in (7.9 mm) | 5/16 in (7.9 mm) | 3.2 to 5.6 mm | 4.8 to 5.9 mm | 5.2 to 6.7 mm |
| 3/8 in (9.5 mm) | 3/8 in (9.5 mm) | 3.8 to 6.7 mm | 5.7 to 7.1 mm | 6.2 to 8.1 mm |
| 1/2 in (12.7 mm) | 1/2 in (12.7 mm) | 5.1 to 8.9 mm | 7.6 to 9.5 mm | 8.3 to 10.8 mm |
Those millimetre ranges are percentages of the nominal shank diameter: 65 to 85% for dense hardwoods, 60 to 75% for Douglas-fir and comparable medium-density species, and 40 to 70% for low-density softwoods, following Canadian CSA O86-19-based guidance recorded in the lag screw dimension reference at Engineers Edge. The pattern is practical, not arbitrary. Softwood fibres compress, so a snug hole keeps more material in contact with the threads. Dense hardwood has less give, so a roomier lead hole relieves the pressure that would otherwise split the board.
Two worked examples show how the bands shift. A 3/8 inch lag screw takes about a 1/4 inch lead hole in dense hardwood, 15/64 inch in medium wood, and 11/64 inch in softwood. A 1/2 inch lag bolt takes about 11/32 inch, 5/16 inch, and 15/64 inch in the same three woods. In each row, the hardwood figure sits near the top of its band and the softwood figure near the bottom. That is the species decision doing its work.
Every pilot figure in the three right-hand columns is for the threaded portion only. It is not the hole through the board you are clamping. Drill it at least the full threaded length, and go deeper on long screws in dense wood so the unthreaded shank does not bottom out before the head seats. The clearance hole in the second column is what lets the top member pull tight; skip it and the threads bite the board instead of clamping it.
Find your row and column, then check the fastener maker's published chart before drilling anything structural. The manufacturer's chart outranks this table, and your locally adopted code outranks both.
Matching the Pilot Hole to Wood Density
Bolt diameter picks the row. Species picks the spot inside the row, and that second decision carries more weight than most installers give it.
Timber-engineering guidance puts the lead hole at roughly 40% to 85% of the lag screw's root diameter, with the correct point in that range set mainly by wood density, as the USDA Forest Service timber engineering reference explains. The root diameter is the solid core between the threads, not the outside of the thread crest, so measure the right part of the fastener before you convert a percentage into a bit. The same guidance gives species benchmarks: 40% to 80% of the shank diameter for California redwood, and a broader 60% to 85% for Douglas Fir-Larch. It also calls for a separate short clearance hole sized at the unthreaded shank plus 1/16 inch, rather than one uniform hole for the whole fastener.
What each density band does to the bolt
Dense hardwoods such as oak, maple, birch and ash sit at the top of the range. A pilot that's too tight in these species forces the threads to tear fibre instead of cutting it, which raises torque and puts a splitting wedge into the board. Medium-density stock such as Douglas-fir and larch lands in the middle band, where the hole balances grip against split risk. Low-density softwoods such as spruce, pine and cedar take the smallest pilot, because those fibres compress easily and the threads need all the surrounding wood they can get.
Both directions of error bite. A softwood-sized pilot in hardwood turns a wrench into a fight and can crack the piece. A hardwood-sized pilot in softwood leaves the threads loose, and a loose thread gives up under load.
Field rule: if driving the bolt takes your body weight on the wrench, your pilot is one size small for the wood in front of you.
Identify the species from the lumber stamp, the grade mark or the supplier's label. When that isn't possible, drill a test hole in an offcut of the same board and judge how the bolt turns. Published ranges also differ between sources, and mixing one chart's percentage with another's species assumption is how good joints go wrong, so settle on one reference per joint and note the species and bolt diameter before the drill comes out.
Why a Lag Bolt Needs Two Holes
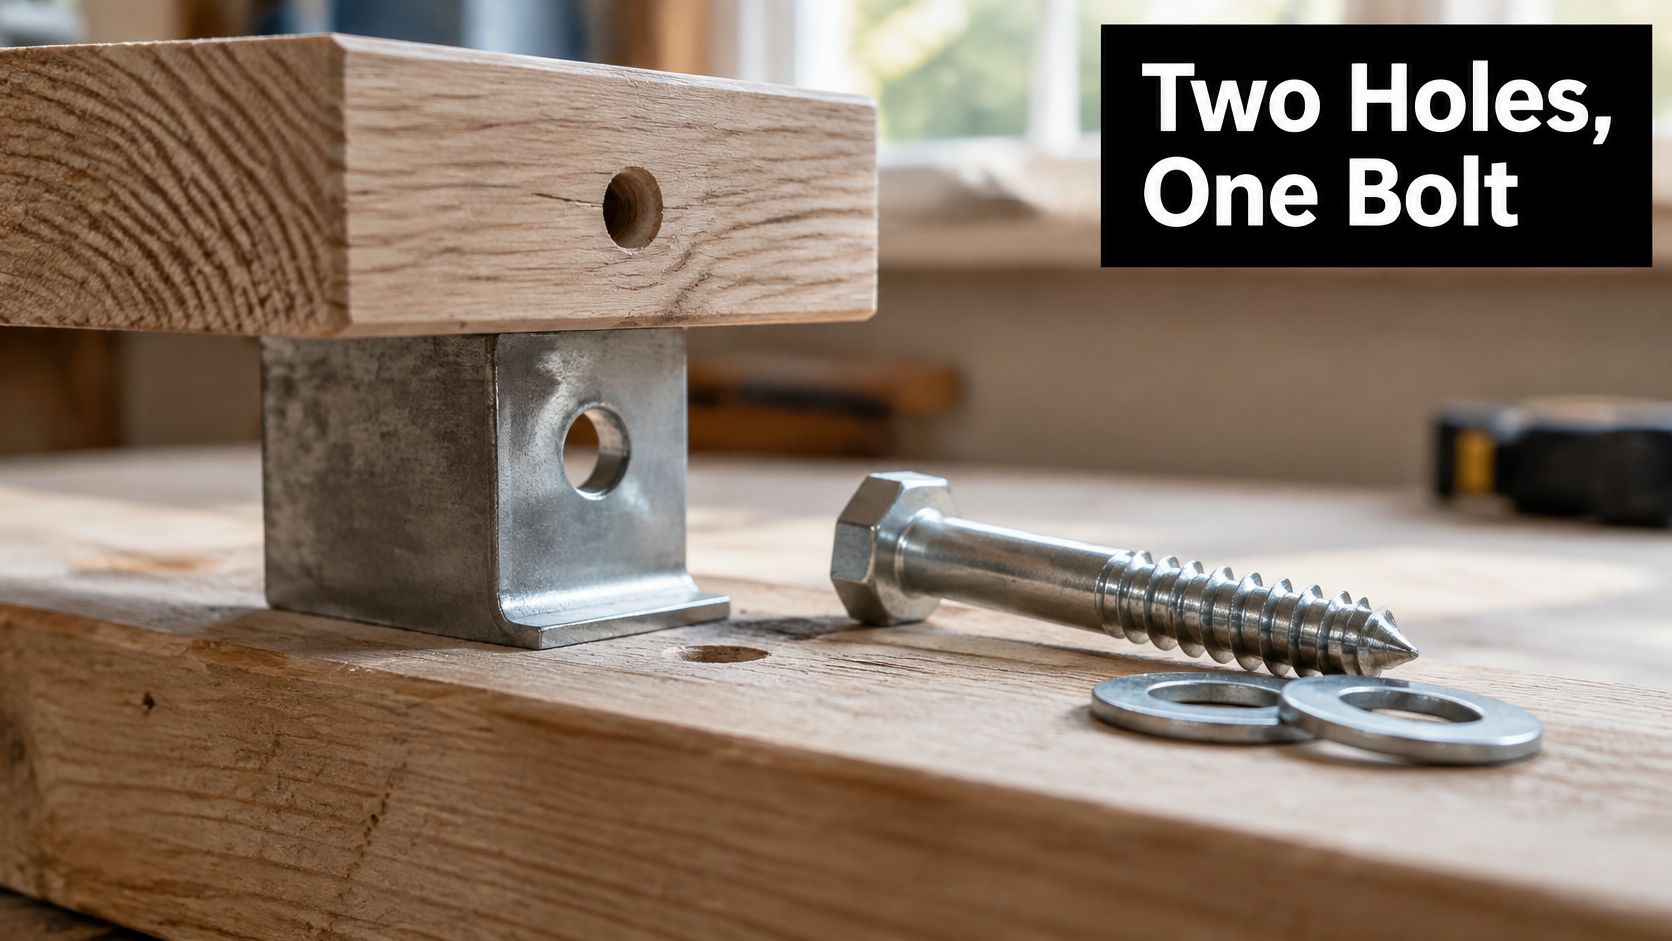
Here's the idea that most diameter tables leave out. The pilot hole is not one hole, it's a two-part drilling operation with a different job at each end. The upper, unthreaded portion of the bolt needs a clearance hole roughly equal to its nominal diameter, so the shank passes freely and the threads never bite the top piece. The lower member receives the wood-specific pilot, and that's where the threaded portion develops its grip, as the lag screw pilot hole chart guide at WhatDrillBit sets out.
The joint from the top down
Picture the section through a finished connection. Washer and hex head sit on the face of the top member. Behind the head runs a clearance hole the full thickness of that board. The unthreaded shank rides inside it without touching wood. Then the threads cross into the bottom member and turn into a pilot hole sized from the chart, drilled to the full threaded length.
Scale that down and up: a 1/4 inch bolt through a 1x board into a 4×4 post gets a 1/4 inch clearance hole and a softwood or hardwood pilot from the table. A 5/16 inch bolt through a bracket ear gets the same treatment, because the bracket has its own hole and the timber still needs the pilot. A 3/8 inch bolt through a 2×6 into a beam, and a 1/2 inch bolt through a post cap, follow the identical logic with larger bits.
Skip the clearance section and the threads grip both pieces at once. The members can't slide together, so the joint sits proud with a visible gap, crushes fibres around the head, and transfers load through the threads rather than through clamped faces. Washers belong on the clearance side, spreading the clamping force over the top member instead of pressing a hex head into the grain.
Deck ledgers show it in code language. California residential-deck guidance drills a 1/2 inch clearance hole through the ledger and a 5/16 inch lead hole in the existing house band board, requires washers under the heads, and instructs installers to turn the threaded portion in with a wrench rather than drive it with a hammer, in the deck submittal checklist used by the City of El Cerrito. That 5/16 inch figure is the medium-wood value from the chart, applied to a real permit drawing.
Any joint splits into a top member and a bottom member. Give each one its own hole and the rest follows.
Edge Distance, Spacing and Washer Placement
A correctly sized hole still fails if it's in the wrong place. Holes need room around them, because a bore close to an edge concentrates stress exactly where wood is weakest.
Santa Cruz County's deck publication puts numbers on that for ledger connections: lag screws at least 2 inches from the top and bottom edges, 2 to 5 inches from the ledger ends, staggered, with the screw tip extending fully beyond the inside face of the band joist, as the Santa Cruz County deck construction guide states. Read those as placement rules that shape where your drill goes, not as rough preferences.
Spacing moves with framing, which is why you can't lift a number from a chart and call it done. One municipal schedule lists 1/2 inch lag screws at 30 inches on centre for joist spans of 6 feet or less, tightening to 10 inches for spans from 16 feet 1 inch to 18 feet, with lag bolts running 36 inches to 19 inches across the same span categories, per the Oceanside residential deck schedule. Treat those figures as evidence that spacing is engineered, then use the schedule or drawing that governs your own job.
Practical rule: the drawing, the manufacturer's instructions or the local code set spacing. The pilot chart only sets hole diameter.
Staggering matters as much as the distance between bolts. Two rows offset from each other leave more sound wood between fasteners than one straight line does, and they share load across more of the ledger.
Washers finish the job. Put one under every head so the clamping force spreads across the top member instead of biting a ring into the surface, and match the washer to the bolt diameter and the exposure. If you're unsure which style suits a bolted joint, this comparison of lock washer vs flat washer covers where each belongs. Mark every bolt position on the drawing before drilling, and recheck the layout if the lumber size or the bolt length changes.
How to Drill the Clearance and Pilot Holes
A lag bolt joint gets two holes for a reason: the top member needs clearance, the bottom member needs bite. Drill them in this order, and slow down where the work feels routine. Each step carries a reason, and each has a slip that undoes the work.
The illustration below shows the drilling core. The six steps wrap it in layout and final check.
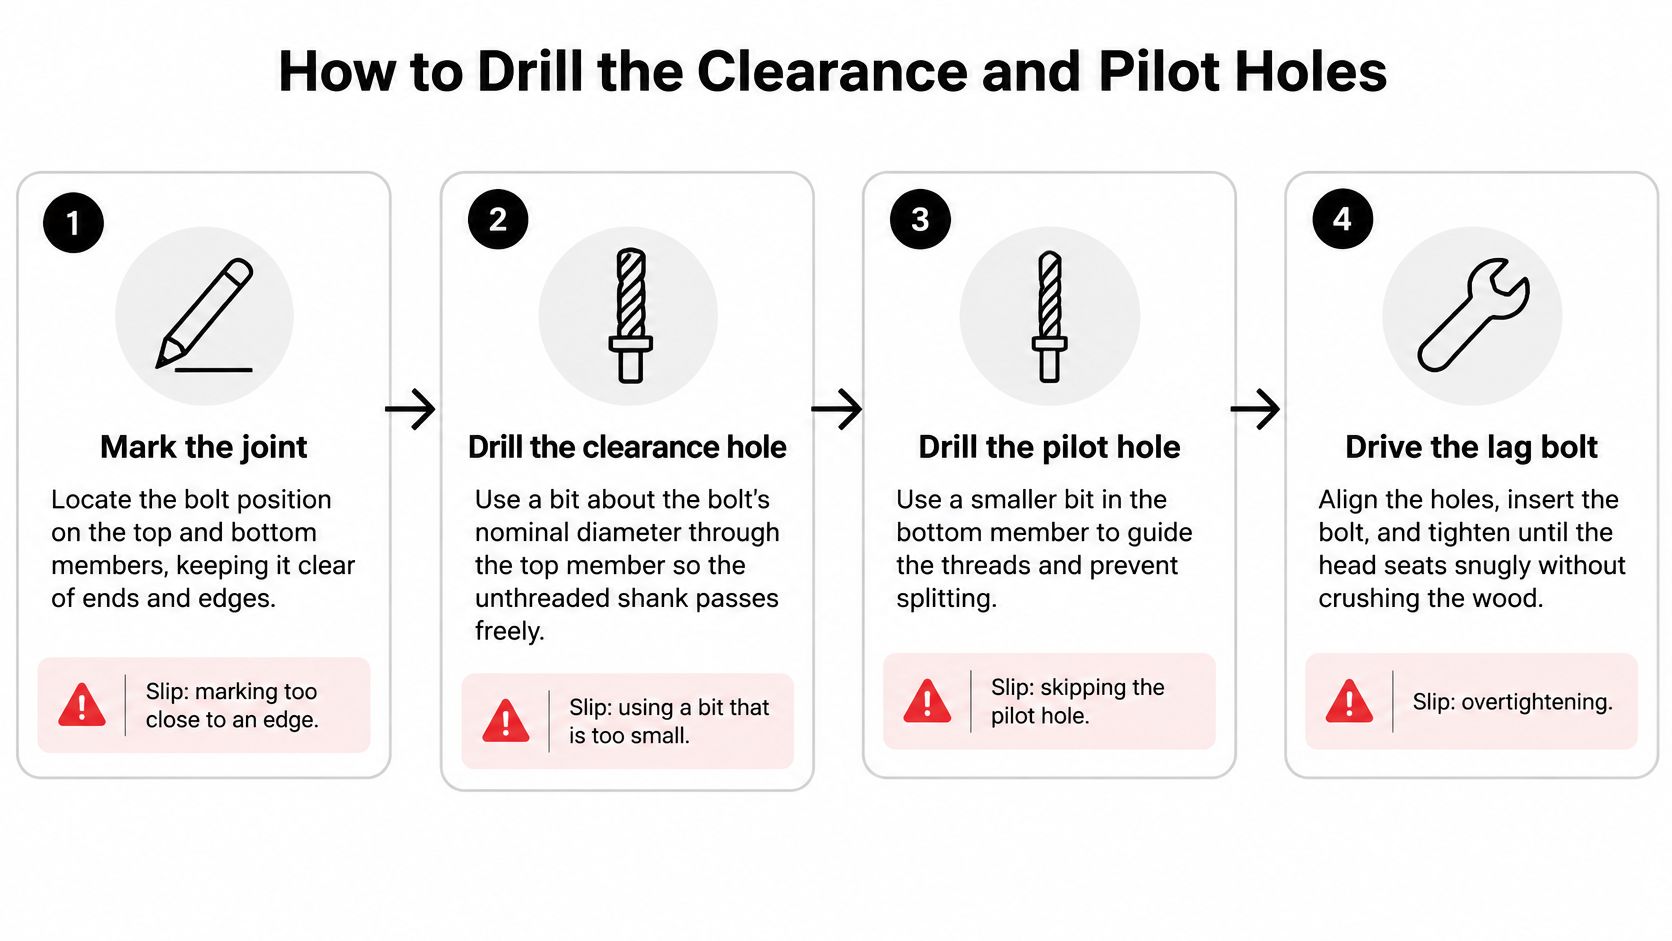
Mark the joint. Locate the bolt position on both the top member and the bottom member, clear of ends and edges by the margins your drawing requires. The slip is marking a board that still has to be cut to length, then losing the mark.
Drill the clearance hole through the top member at the nominal bolt diameter, to the depth of the unthreaded shank or right through the board. The slip is using the pilot size up top, which leaves threads biting the piece you are trying to clamp.
Drill the pilot hole in the bottom member at the size from the chart, deep enough for the full threaded length. The slip is drilling too shallow, so the tip stops short of the member's inner face.
Clear the dust from both holes with a rod or compressed air. The slip is leaving debris in the bottom of the hole, which stops the bolt seating and fakes a tight joint.
Place a washer under the head and drive the bolt by turning it with a socket or wrench. The slip is hammering it in, which crushes and strips the threads you just paid for. The Berkeley deck, porch and stair checklist specifies minimum 1/2 inch lag screws or bolts with washers, hot-dip galvanized or stainless steel, a hardware standard that exists because an exterior joint has to survive moisture.
Tighten until the head seats firmly and the top member is clamped, then stop. The slip is leaning on the wrench past that point, which crushes the fibres around the hole and gives the bolt nothing to hold.
If you would rather watch the two-hole sequence run at the bench than read it, this walk-through covers the drilling order and the feel of a properly seated bolt:
Then check your own work. The head sits flush on the washer, no gap shows between the members, and the bolt does not spin freely when you try it.
Problems and Fixes for Split, Stripped or Loose Joints
The most common failure arrives with a sound, not a movement. A board splits near the hole, usually because the pilot was too small for dense wood or the hole sat too close to an edge. Step up one size band and move the hole inward on the replacement piece.
Everything else the reader meets tends to fall into four patterns, and each has a cause you can identify from the symptom alone. Once you know which one you're looking at, the fix is usually a bit change rather than a new board.
| Symptom | Likely cause | Fix |
|---|---|---|
| Wood splits near the hole | Pilot too small for dense wood, or hole too close to an edge | Step up one size band and move the hole inward |
| Bolt is hard to turn or snaps | Pilot too small or wood very dry | Enlarge the pilot and lubricate the threads with wax or soap |
| Bolt spins without tightening | Pilot too large, no thread bite | Fill the hole with a dowel or glue, let it set, then redrill |
| Head sinks in or joint gaps | No clearance hole in the top member | Redrill the top member at the nominal bolt diameter |
| Pilot hole wanders | Freehand drilling | Use a guide block or start with a small bit |
Sort the fixes by how long they take. Enlarging a pilot, rubbing wax or soap on threads, redrilling a clearance hole and adding a guide block are ten-minute corrections on the same piece of wood. A split board and a hole with no thread bite both cost you the part, because a dowel repair works for a non-structural pull-out and not for a connection carrying load.
A bolt that spins freely is telling you the hole is too big. A bolt that won't turn is telling you it's too small. Neither one is a mystery once you stop forcing it.
Dry framing lumber is the quiet culprit behind a bolt that binds halfway. Old stock can be far drier than the moisture content the chart assumes, so a pilot that suits fresh lumber can run tight in material that's sat in a garage for a season. Test on an offcut and adjust one bit size rather than forcing the fastener and stripping the hex head.
Lag Bolts Compared With Other Fasteners
Lag bolts have relatives, and the hole rules change with each one. Before you reach for the chart, confirm which fastener the joint calls for.
Lag screws are the same family as lag bolts, hex-headed and turned with a wrench, so every value in the table above applies directly. Carriage bolts need a full through-hole at the nominal diameter with no pilot at all, plus a nut and washer on the far side, which suits joints you can reach from both faces and want to clamp hard. Deck screws are smaller and often self-tapping, so they take a much smaller pilot, and dense hardwood still benefits from pre-drilling even then.
The selection rule is short. If both faces are accessible and the joint has to clamp through, use a carriage bolt. If only one side is reachable and the connection carries structural load, use a lag bolt with the two-hole method. If the piece is thin, decorative or just holding trim, use a deck screw with its own smaller pilot.
Never reuse the lag bolt chart for another fastener. A carriage bolt doesn't want a pilot, a deck screw doesn't want a 1/2 inch bore, and a structural screw is engineered to its own manufacturer's specification, which is why the two are rarely interchangeable in a load path, as this comparison of lag bolt vs structural screw sets out. When a project moves past bolted joints into fitted work such as railings, gates or built-in seating, it's worth knowing how fabricators compare made-to-measure carpentry options, because joinery tolerances and fastener tolerances are planned differently.
Match the fastener to the joint first. The drill bit is the last decision, not the first.
Confirm Your Bolt Size Before You Buy
Four checks close the loop before you spend anything. Confirm the bolt diameter and length, identify the wood band, read the clearance and pilot sizes from the chart, then check spacing against the drawing or code.
Length deserves a moment of its own. The bolt should equal the top member's thickness plus at least the full threaded length in the bottom member, with the tip clear of the inside face of a band joist on a ledger connection. A 1/2 inch bolt that's right for a 2x ledger plus a rim board is too short for the same detail through thicker siding.
Once the size is settled, our lag bolts for deck posts range covers the diameters in this chart. Our 1/2 inch x 8 inch hex-head lag bolts are hot dip galvanized, meet ASTM A307, and come in 10-piece boxes at $25.19, which suits outdoor deck and fence work where corrosion matters and pairs with the medium and hardwood pilot values above. For longer joints, the 1/2 inch x 12 inch option at $42.99 covers greater thickness. Add washers of the same diameter, and check the product page for the current coating and standard before ordering.
Choose the row, drill the clearance hole first, then the pilot, and confirm the head seats flush before you call the joint finished.
You can find the fasteners this article keeps referring to, including hot dip galvanized lag bolts, carriage bolts, flat washers and the deck screws that pair with them, at XTREME EDEALS INC.. Sizing a joint starts with the correct bore and ends with hardware that survives the weather, and our deck and fencing range covers both ends of that job. Browse the fasteners category, match your bolt diameter to the chart above, and order the washers in the same trip so nothing stalls halfway through the build.