
Search for advice on deck screws for framing and you'll get the same answer almost every time: buy a box of coated deck screws, drive two per board, and pick a length that bites without poking through. That advice works fine for the walking surface. It's wrong for everything underneath it. A deck frame is a chain of load paths running from the ledger bolted to the house down to the post bases buried in the ground, and each one of those paths has a fastener the code recognises and several it doesn't.
A deck screw for framing isn't a product category you buy by length off a shelf. It's a decision made at each connection, in a fixed order: identify what the connection has to carry, read the table or connector approval that governs it, then choose the diameter, length and coating that satisfy both. Skip that order and you end up with a box of screws that look right and a ledger that fails inspection.
The county handouts and the state residential code have already made most of these decisions. What's left is reading them correctly, which is where most of the trouble on a real job starts.
Which Screw Goes Where on a Deck Frame
A deck frame needs a connection-specific fastener schedule. The decking boards, ledger, hangers and post bases each have different requirements, so choose the fastener for the connection rather than by appearance.
| Connection | Fastener and count | Size | Coating or material |
|---|---|---|---|
| Decking boards to joists | Two No. 8 deck screws per support (2-inch boards, 1/8-inch gaps) | No. 8, length to suit board thickness | Hot-dip galvanized or stainless steel |
| Rim joist to end of each joist | Three No. 10 wood screws per joist end | No. 10 by 3 in. | Hot-dip galvanized or stainless steel |
| Ledger to house | Lag screws or bolts with washers, staggered in two rows | 1/2 in. diameter, spacing per ledger table | Hot-dip galvanized or stainless steel |
| Joist hanger to beam or joist | Screw type named by the connector manufacturer | Length named by the connector manufacturer | As specified by the connector manufacturer |
| Post base to beam or post | Lag screws or bolts per the approved connector detail | Set by the connector manufacturer's detail, not by the screw bin | Hot-dip galvanized or stainless steel |
| Stair stringer to joist | Structural screws or lag screws per the stair detail | Set by the stair detail, verified with the building department | Hot-dip galvanized or stainless steel |
Reading the Frame From the House Out
Ledger to house. The ledger carries deck load and resists separation from the building. Use lag screws or bolts with washers, staggered in two rows. Diameter and spacing depend on the ledger table for the specific band joist and ledger sizes. For the difference in installation and withdrawal capacity, see this comparison of lag bolts and structural screws.
Rim joist to joist ends. Use three fasteners at each joist end. Eureka's deck permitting guide specifies at least three 10d nails measuring 3 inches by 0.128 inches, or three No. 10 wood screws that are 3 inches long, when the rim joist provides lateral restraint. The screw option is specific: three No. 10 by 3-inch wood screws per joist end. A deck screw of the same length does not meet that specification just because it looks similar.
Hangers, post bases and stringers. Follow the approved connector assembly or stair detail. It sets the screw type, diameter and length. A fastener that fits the hole may still be the wrong fastener for the connection.
Decking boards on top. San Diego's residential deck bulletin allows two No. 8 screws or two 8d threaded nails per support for nominal 2-inch decking laid with roughly 1/8-inch gaps. It also requires hot-dip galvanized or stainless-steel fasteners and connectors. For a joist-to-girder connection, the same bulletin specifies three 8d common nails, showing why each connection needs its own schedule.
Where This Table Runs Out
The post-base and stair-stringer rows do not have a universal size. Use the connector manufacturer's sheet for the post base and the stair detail for the stringer, then confirm the choices with the building department. Keep those sizes marked as unconfirmed on the plan until the relevant details are settled. Local code and the connector approval govern wherever they differ from this starting schedule.
Why Framing Connections Need More Than Deck Screws
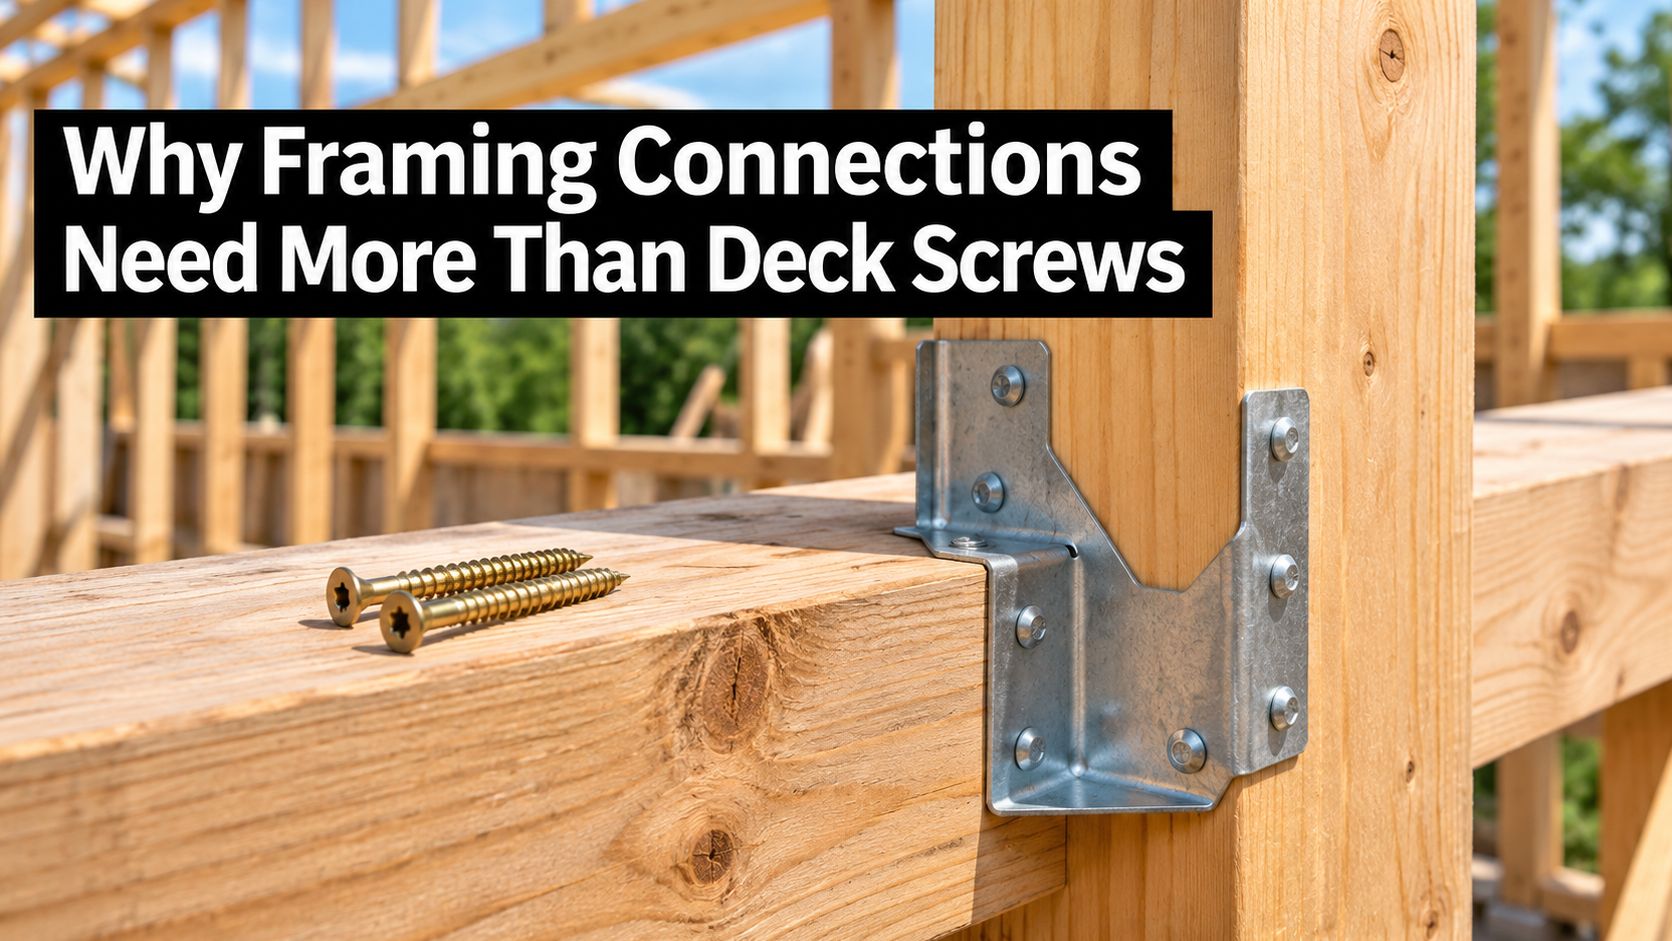
A deck screw holds decking tight to a joist. A framing fastener transfers forces through the frame. The difference matters because a deck connection is a load path, and its fasteners also have to suit the wood's exposure conditions.
Gravity pushes joists down, loading connections in shear at hangers, beams and ledgers. Lateral forces try to rack the deck, transferring load through the rim joist, ledger and post-to-beam connections. Withdrawal force pulls a fastener straight out of the wood, a demand a general-purpose decking screw may not be rated to resist.
The ledger shows why fastener selection cannot come down to appearance or length. The California residential code provisions for exterior deck attachments require a positive connection to the primary structure and prohibit toenails or nails subject to withdrawal for that connection. Ledger tables specify fastener type, spacing, edge distances and arrangement. Some table notes allow lag-screw spacing as close as 4.5 inches on centre for specific 2×8-to-2×8 conditions. That spacing applies only to the stated condition, not as a general ledger rule.
Choose the fastener for the force it must transfer. The connection determines the fastener type and quantity, while the detail sets the dimensions and layout.
For a manufactured hanger, follow its fastening schedule. Use only the approved screw type, diameter and length listed in the connector manufacturer's instructions. A screw that fits the hole is not necessarily an acceptable substitute. The deck screw guidance for joist hangers can help clarify the distinction between a decking fastener and a connector fastener.
Coatings, Coastal Exposure and Wildfire Zones
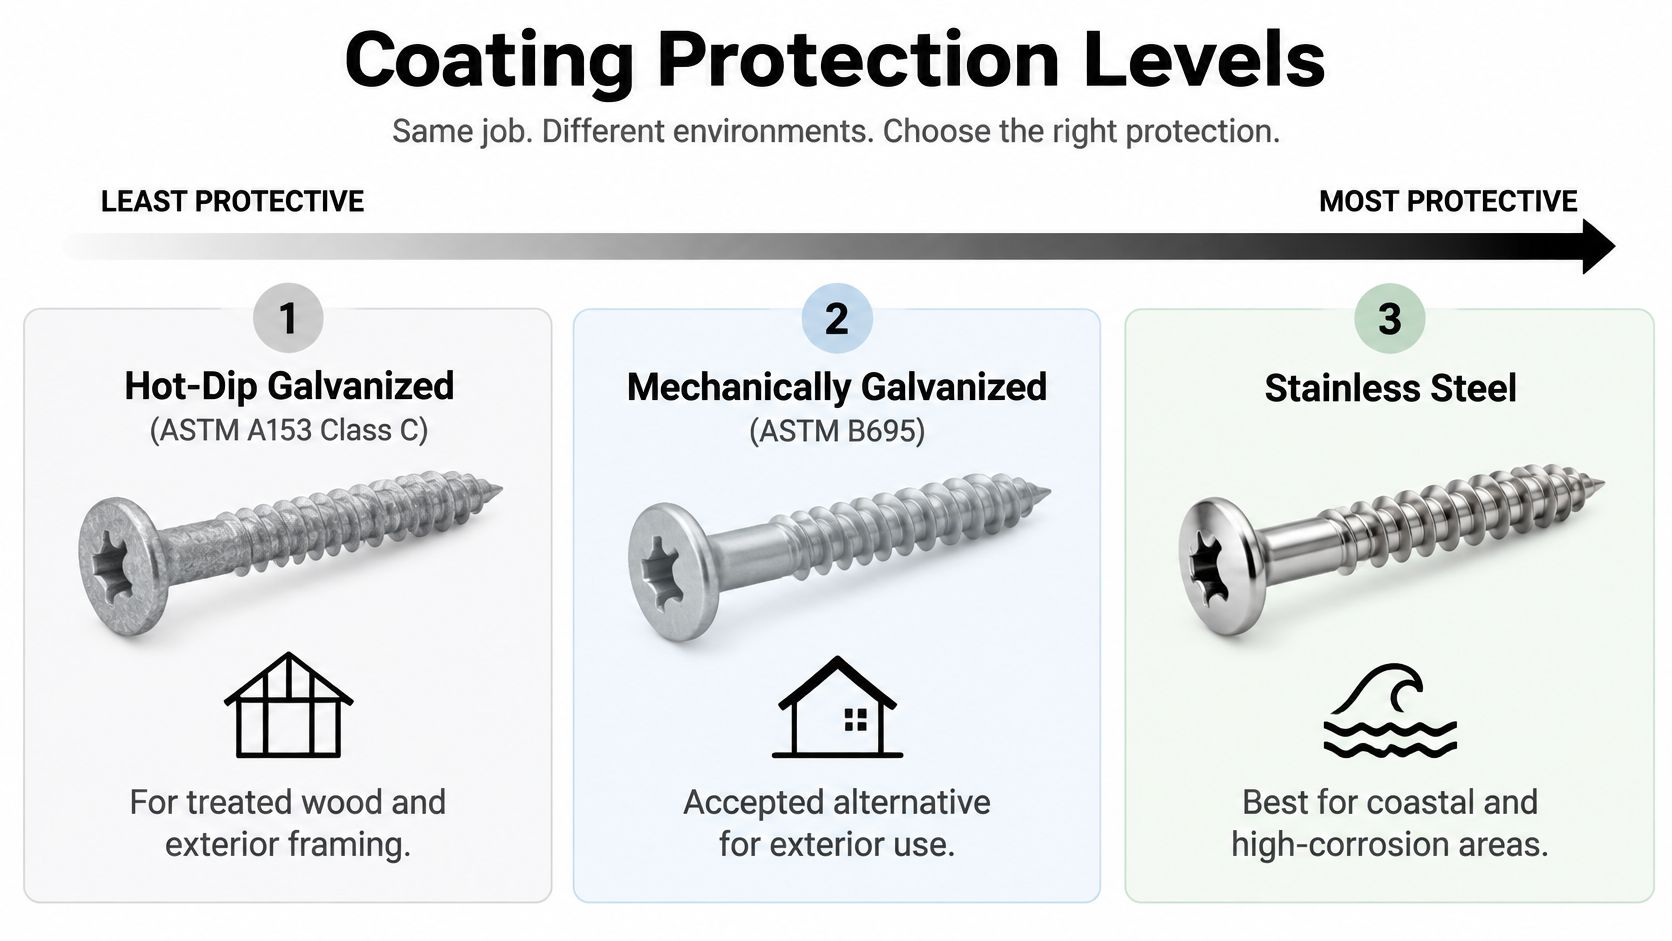
A framing screw can meet its connection requirements and still fail early if its coating is wrong for the site. Choose the corrosion protection for the wood treatment, surrounding metals and exposure, then keep that protection intact during installation.
| Coating | Standard or material | Use | Exposure |
|---|---|---|---|
| Hot-dip galvanized | ASTM A153 Class C | Pressure-treated wood and exterior framing | Inland wet conditions and treated wood |
| Mechanically galvanized | ASTM B695 | Lag screws in permitted details | Inland conditions, where the detail permits |
| 410 stainless steel | Stainless steel | Lag screws in permitted details | Inland conditions |
| 304 or 316 stainless steel | Stainless steel | Fasteners and connectors in salt-exposed work | Coastal or salt-exposed sites |
| Silicon bronze or copper | Where the detail permits | Specific details only | As specified by the detail |
What Treated Lumber Does to Steel
Pressure-treatment chemicals can corrode unprotected steel. For fasteners and connectors that contact treated wood or sit in wet framing, use a corrosion-resistant material suited to the treatment and the connection. The San Pablo deck and railing details list hot-dip galvanized steel, stainless steel, silicon bronze or copper for these applications and require corrosion-resistant protection for fasteners, hangers, plates and nails.
Corrosion reduces the steel section that carries tension and shear. Rust can also expand in the hole, loosen the connection and stain the lumber. Keep metals compatible across the assembly, including screws, hangers and washers. An overdriven screw can damage its coating and expose the steel beneath.
Coastal Exposure and Salt
On coastal or salt-exposed sites, use stainless steel fasteners and connectors, with grade 304 or 316 selected to suit the exposure and applicable requirements. Salt can reach framing beyond the immediate shoreline, so assess the site conditions rather than relying on a fixed distance.
Pressure-treated lumber also needs compatible hardware. Millbrae's residential deck submittal requirements warn that treatment chemicals can prematurely corrode standard fasteners. They require hot-dip galvanized or stainless steel anchors and fasteners, and specify galvanized hardware with a 1.85-ounce zinc coating.
Wildfire Zones Change the Gap, Not Just the Coating
Deck-board spacing affects both ember exposure and drainage. Embers can collect in gaps and where boards meet joists; tighter gaps can restrict water flow and leave moisture against the framing. In a wildland-urban interface zone, coordinate board spacing, drainage and corrosion protection, and check local requirements before ordering materials.
Use the site conditions to guide the choice:
- Dry interior: Hot-dip galvanized steel to ASTM A153 Class C is suitable for treated wood where the connection detail allows it.
- Inland treated wood: Use compatible corrosion-resistant protection on fasteners, hangers and washers.
- Coastal or salt-exposed site: Use stainless steel, grade 304 or 316 as appropriate.
- Wildland-urban interface: Choose a coating suitable for the exposure, and detail board gaps and drainage to limit ember traps without holding water against the frame.
Before ordering, check the lumber treatment, connector metal and site exposure. Choose protection that addresses the most demanding condition in the assembly. This comparison of galvanized and stainless steel fasteners explains the trade-offs between those materials.
How to Install Framing Screws Correctly
Under the 2022 California Residential Code floor provisions, the connection is judged as a whole: diameter, length, washer use, edge distance and installation pattern together, installed to the connector manufacturer's approved instructions. That's why the order below matters more than any single choice in it.
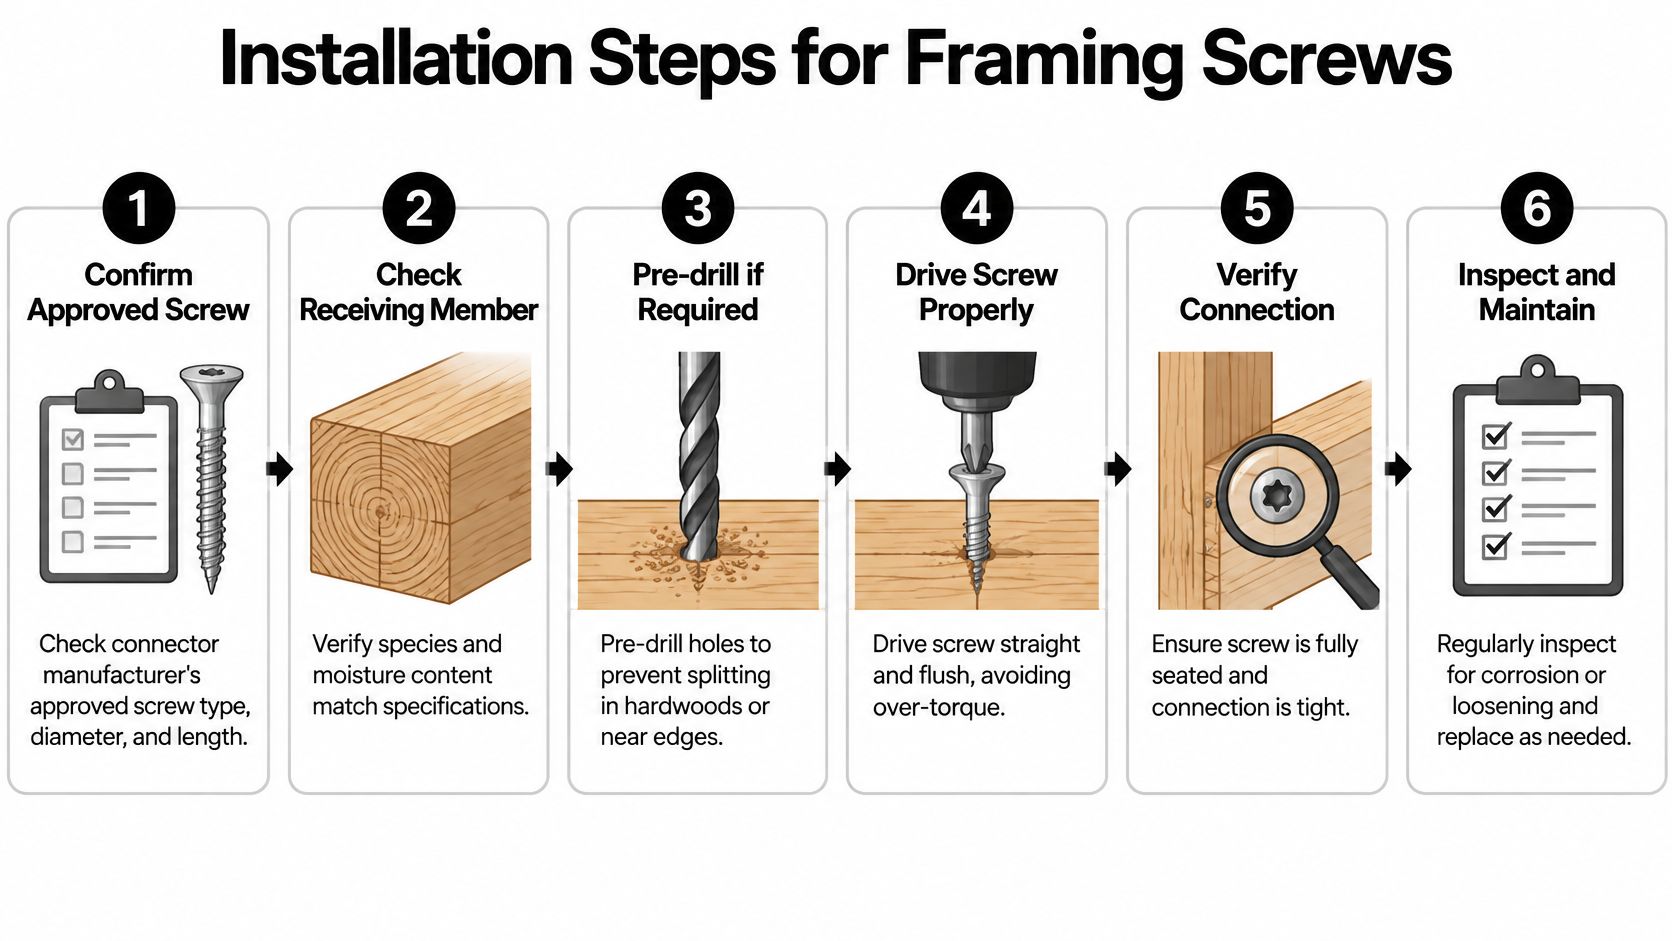
- Confirm the approved screw for that connector. The manufacturer publishes a fastening schedule naming the type, diameter and length, and the code expects you to follow it. Read that schedule before you open a box, because a #9 structural screw is not a swap for the #10 the schedule names.
- Check the receiving member. Verify the species and grade match the assumption behind your table and that the screw reaches full penetration through the member. A short screw in a deep member produces a connection that looks finished and holds a fraction of the rated load.
- Set edge distance and spacing from the table. Screws clustered near an end grain split the joist and give back the capacity you paid for. The spacing figure exists to keep the wood intact between fasteners, not to slow you down.
- Fit the washer where the detail calls for one, then hold the driver square to the face. The washer spreads load and stops the head sinking into the timber. A driver held off-angle walks the head across the surface and gouges the coating on the way in.
- Drive until the head seats, then stop. Overdriving strips threads, crushes the head and cracks the coating. A stripped screw has lost its withdrawal resistance and a damaged coating will start rusting in the first wet season.
- Inspect against the table before the next member goes on. A missing or mismatched fastener takes ten seconds to find while the bay is open and an hour to find at final inspection.
The sequence matters because each step constrains the next. Wrong diameter means the hanger's rated capacity doesn't apply. Wrong edge distance means the joist splits before the screw reaches torque. Correct screw in a broken board is still a failed connection.
Run one test on site before you close anything up. Walk the frame and ask, at every connection, whether a fastener is missing, mismatched or overdriven. If the answer is yes anywhere, that connection isn't ready, whatever the rest of the deck looks like. And confirm the coating against the exposure of the site before the first screw goes in, not after.
Common Framing Screw Mistakes and Fixes
Assuming a coated decking screw is a structural fastener. They look similar in the hand and behave nothing alike. The fix is to match the connection to the row in the schedule, not to the screw that fits the hole.
Buying thicker or longer and calling it compliant. This is the most expensive version of the mistake, because the screw costs more and still fails. Santa Cruz County's deck construction bulletin requires ledger connections to use minimum 1/2-inch lag screws or bolts with washers, hot-dip galvanized or stainless steel, and it prohibits relying on toenails or withdrawal-prone nails for primary attachment. Carmel-by-the-Sea's requirements ask for positive vertical and lateral anchorage with staggered 1/2-inch lag screws or bolts. A bigger general-purpose screw meets none of that.
Using nails where withdrawal governs. The ledger rules rule them out for primary attachment, and a smooth shank in uplift is the wrong tool.
Mixing metals across one connection. A stainless screw in a galvanized hanger is a corrosion weak point that no coating chart will fix.
Driving two screws where the drawing shows three. The rim joist requirement is three per joist end. Counting is free.
Substitution warning: swapping a screw without checking the connector approval breaks the tested assembly, and the warranty along with it.
Before you drive the last screw, do three things: read the packaging for coating and length, read the connector detail for the screw type, and count the fasteners against the table. The first two catch the wrong product. The third catches the missing one.
Confirm the Screw Spec Before You Order
Turn the whole guide into a purchase check with three questions. What connection is this screw for? What exposure does it see? What does the connector maker or the local code approve for that connection? Answer all three and the order writes itself. Skip one and you're guessing with someone else's inspection.
The product side is simpler than it looks once you've answered them. The #10 by 3-inch deck screws match the rim-joist row exactly: square drive, bugle head, brown ruspert finish, and they come in a 2,000-piece box for $125.99. That's the size the requirement names, so confirm the coating on the product sheet before you treat a box as compliant, because the listing alone won't establish it.
For ledger and post work, the 1/2-inch by 8-inch hex-head lag bolts are hot dip galvanized and meet ASTM A307, sold in 10-piece boxes. They suit a staggered two-row ledger once the spacing rule is confirmed, and their approval still has to be checked against the connector sheet and the ledger table for your band joist size.
The #9 by 3-inch multi-purpose framing screws at $93.59 for 2,000 pieces are a good screw for blocking and general framing. They are not a substitute where the rule calls for a No. 10.
One action finishes this properly: pull the connector approval or the local code table, confirm coating, diameter and length against it, then order the matching box.
XTREME EDEALS INC. supplies the fasteners these connections call for, from #10 by 3-inch deck screws in 2,000-piece boxes to 1/2-inch hot dip galvanized hex-head lag bolts, along with the joist hangers, post base brackets and washers that set the screw size in the first place. Bring the connection and the exposure, and you can match the coating, diameter and count before the first screw goes in. Visit XTREME EDEALS INC. to see the full deck and framing fastener range.