
Ordinary deck screws are not acceptable in joist hangers unless the hanger's listing or manufacturer instructions specifically name that screw. Use the listed fastener, not whichever exterior-rated screw looks strongest or happens to be in your toolbox.
The familiar advice to use galvanised screws outdoors misses the important distinction. Corrosion protection keeps metal from deteriorating; it doesn't establish that a screw can carry the load through a particular hanger. Getting that match wrong can mean reopening finished decking, supporting the framing and replacing connections that should have been settled before the boards went down.
Whether Deck Screws Are Acceptable in Joist Hangers
In most cases, deck-board screws don't belong in joist hangers. Their job is to secure decking to framing, not automatically to connect structural steel hardware to wood.
A structural connector screw is a different product. Its head, shank, threads and material properties are selected for connector work, but even that description isn't blanket approval for every hanger. Hanger nails remain the correct choice wherever the installation schedule specifies them without an approved screw alternative.
Fastener verdict by hanger situation
| Situation | Acceptable fastener | Why |
|---|---|---|
| Hanger listing specifies its own nails | Those listed nails only | Nails are part of the tested assembly |
| Hanger listing names structural connector screws | Those listed screws, same count and length | The listed screws are part of the rated connection |
| Hanger lists nails only and no screw is named | Listed nails, not screws | Screws are not an approved substitute |
| Exterior-rated deck screw with no listing | Not acceptable in the hanger | Head, diameter and steel strength can differ from tested fasteners |
| Hanger with no model number or documentation | None until the model is identified | The required fastener cannot be confirmed |
Running out of hanger nails isn't a reason to switch to screws. Stop and buy the specified fasteners rather than creating a connection nobody can verify.
An unidentified hanger needs the same pause. Clean the stamping, photograph its shape and hole pattern, and identify the model before choosing hardware. Don't infer its requirements from a similar-looking bracket.
Practical rule: Match the fastener to the hanger model, not just to the hole it fits through.
The broader deck screws or nails comparison helps distinguish fastening jobs, but a hanger's installation schedule settles this particular choice.
If deck screws are already installed, record the hanger model and compare the screws against its documentation. Plan any replacement before decking conceals the connection, and don't remove load-carrying fasteners without arranging suitable support.
Hanger Screw Types, Sizes and Corrosion Ratings
Choose in this order: hanger listing, wood treatment, exposure. Starting with the coating or the cheapest box can leave you with a corrosion-resistant fastener that isn't approved for the connection.
There's no universal hanger screw size. Face holes and angled joist holes may require different fasteners, and the same hanger can have different installation schedules for different applications.
Hanger fasteners, finishes and where each fits
| Fastener | Corrosion finish | Where it fits | What to check |
|---|---|---|---|
| Manufacturer structural connector screw | Hot-dip galvanised or manufacturer-approved ZMAX-compatible coating | Hangers whose listing names screws | Diameter, length and count on the listing |
| Hanger nail, including common hanger nails | Hot-dip galvanised or stainless steel | Hangers whose listing names nails | Exact size named by the hanger, not the nearest box |
| Stainless steel structural screw | Type 304 or 316 stainless | Coastal, pool or chemical-exposed sites, if listed | That the listing covers stainless and the grade |
| Exterior deck screw with ceramic or polymer coating | Coated, not necessarily hot-dip galvanised | Decking boards, not an unlisted hanger connection | Not a hanger fastener unless the listing names it |
| 1/2-inch lag screw | Hot-dip galvanised or stainless steel | Specified ledger and rim connections, not hanger seats | Washers and edge distances under the approved detail |
What the finish actually tells you
Hot-dip galvanising, commonly specified through ASTM A153 for hardware, provides a substantial zinc coating. That isn't the same as a thin electroplated finish or a brown coating chosen to blend with decking.
ZMAX is a proprietary higher-zinc connector finish, not a universal screw specification. When pairing screws with a ZMAX hanger, use the connector maker's approved fastener coating rather than assuming similarly coloured products are compatible.
Stainless steel can be the better choice around salt or pool chemicals, but the grade matters. Type 316 generally offers better resistance to chloride exposure than Type 304; neither grade makes an unlisted screw acceptable, and severe chemical exposure still needs manufacturer guidance.
Preservative-treated lumber adds another compatibility check. Copper-based treatments can accelerate corrosion of unsuitable metals, so assess the hanger, fasteners, flashing and wood treatment together.
Read the box before opening it
Look for structural or connector identification, then check the diameter and length in inches. Find the coating description and the manufacturer's reference to approved connectors or an evaluation report.
- Match the complete designation: A screw's trade size alone doesn't establish its head geometry or approved use.
- Separate installation positions: Keep different fasteners labelled if the hanger schedule assigns them to different holes.
- Reject near matches: The nearest available length can give inadequate penetration or project through the wood.
A deck screw label describes a product category. It isn't a hanger approval.
Why Hanger Makers Specify Their Own Fasteners
A joist hanger is a tested assembly, not a bracket with convenient holes. Think of a recipe: flour and oven temperature both affect the result, so changing either means you're no longer making the tested recipe.
The hanger and its fasteners need to be assessed together.
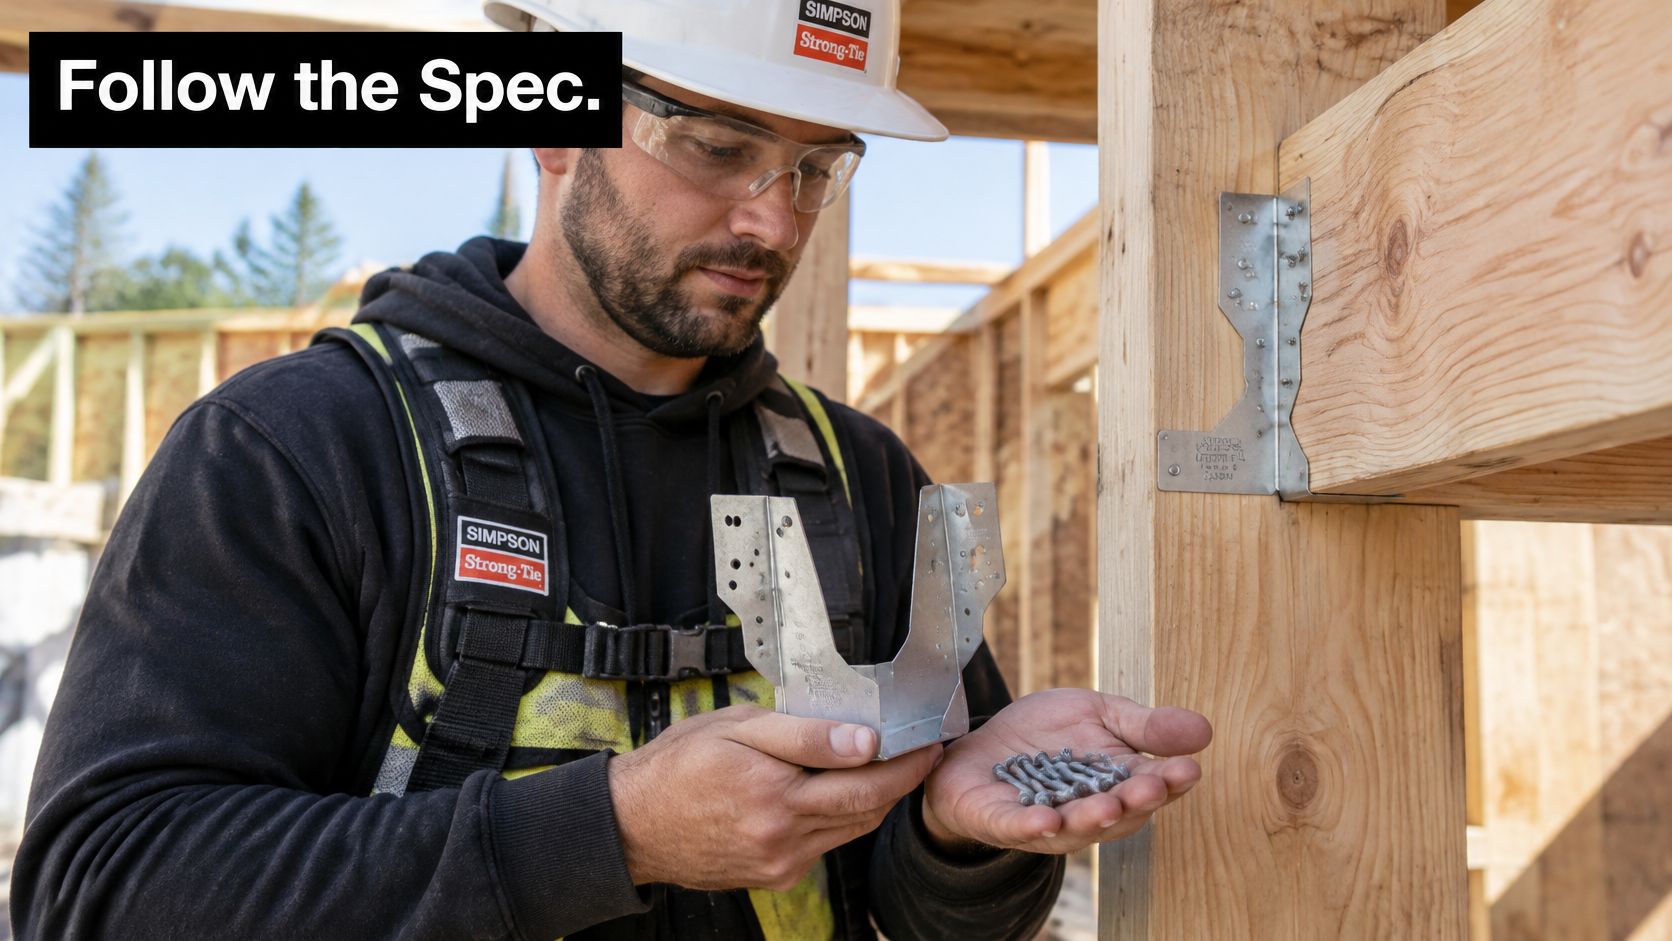
Follow the load through the connection
The joist transfers load into the hanger seat. The hanger then transfers that load through its fasteners into the beam or ledger, while its side connections help restrain the joist.
The rating assumes particular fastener diameters, lengths, head geometry and installation positions. Substitute a deck screw and you can change head bearing against the steel, shear resistance across the shank, withdrawal resistance in the wood and the way the fastener bends or breaks.
For a hypothetical example, consider a 2×10 joist in a hanger whose schedule calls for specified 16d nails, but which someone fills with 2-1/2-inch deck screws. It may feel rigid under a hand push, yet its capacity remains unverified. A snug fit isn't a load test, and the nail designation itself must be read with the specified diameter and length.
A higher advertised tensile strength doesn't establish a higher hanger capacity.
What testing and approval establish
California's wood provisions require hanger performance to be determined under ASTM D7147, including vertical load capacity, torsional-moment capacity and deflection characteristics, as described in the Eureka deck-permitting handout. In plain language, that addresses downward loading, resistance to twisting and how much the assembly moves under load.
For a visual look at the hardware and fastening process, use the demonstration alongside the installation sheet for your actual hanger.
The 2022 California Residential Code requires joists framed into the side of a beam or ledger to be supported by an approved joist hanger. California construction-connector guidance also requires fastener type, gauge, length, corrosion resistance and installation method to match the manufacturer's evaluation requirements.
For projects outside California, confirm the applicable local requirements rather than treating a California detail as universal approval. The practical trap remains the same: a strength claim on a screw box doesn't validate the complete connection.
How Coastal, Wet and Fire-Prone Sites Change the Choice
The connection that fails at the coast is rarely the one with the obviously cheap screw. It is the one where every part sounded exterior-rated on its own and still did not work as a tested load path.
As a concrete benchmark, Santa Cruz County's deck-construction guidance specifies minimum 1/2-inch ledger lag screws or bolts with washers, hot-dip galvanised or stainless steel, at least 2 inches from the ledger's top and bottom edges, 2 to 5 inches from its ends, and staggered. The same guidance requires lag tips to extend completely beyond the inside face of the band joist and separately calls for hot-dip galvanised or ZMAX joist hangers. Treat that as a benchmark for how specific exposure details can get, not as approval for a different hanger, screw or site.
Match the response to the exposure
- Coastal salt air: Assess the stainless grade and compatibility of the whole connection, including flashing, hanger, fastener and treated wood. Inspect exposed connections more often where salt deposits stay damp and keep attacking the coating.
- Wet inland and northern sites: Clear debris from framing pockets and look for trapped water, cracking and seasonal movement. A better coating will not correct a detail that keeps the joist end wet.
- Wildfire-prone sites: Check whether ember-resistant or protective modifications restrict ventilation or retain moisture. Fire-oriented detailing still needs drainage and a drying path.
Wildfire defensible-space guidance such as the Northstar wildfire guidance document is a separate concern from the drainage, ventilation and corrosion checks here. Do not close off an assembly without deciding where rainwater and condensation will go.
Inspect the assembly, not just the finish
I'd check a new deck after its first wet season, then set the inspection rhythm from exposure, access and whatever deterioration shows up. Arrange required framing inspections while the connectors remain visible, before decking and trim hide the evidence.
For material selection, the guide to galvanised versus stainless steel fasteners frames the trade-off between upfront cost and exposure resistance. For a wider coating comparison in salt-air conditions, compare corrosion-resistant fastener coatings; the hanger manufacturer still has to approve the actual combination.
Corrosion resistance cannot compensate for trapped water, incompatible metals or the wrong fastening schedule.
How to Install Hanger Fasteners Correctly
Lay out the installation sheet, labelled fasteners, correct driver bit, drill-driver, tape measure and a light before starting. Separate hanger fasteners from decking screws so nobody grabs the wrong box halfway through the framing.
The process starts with identification and ends with a documented inspection.
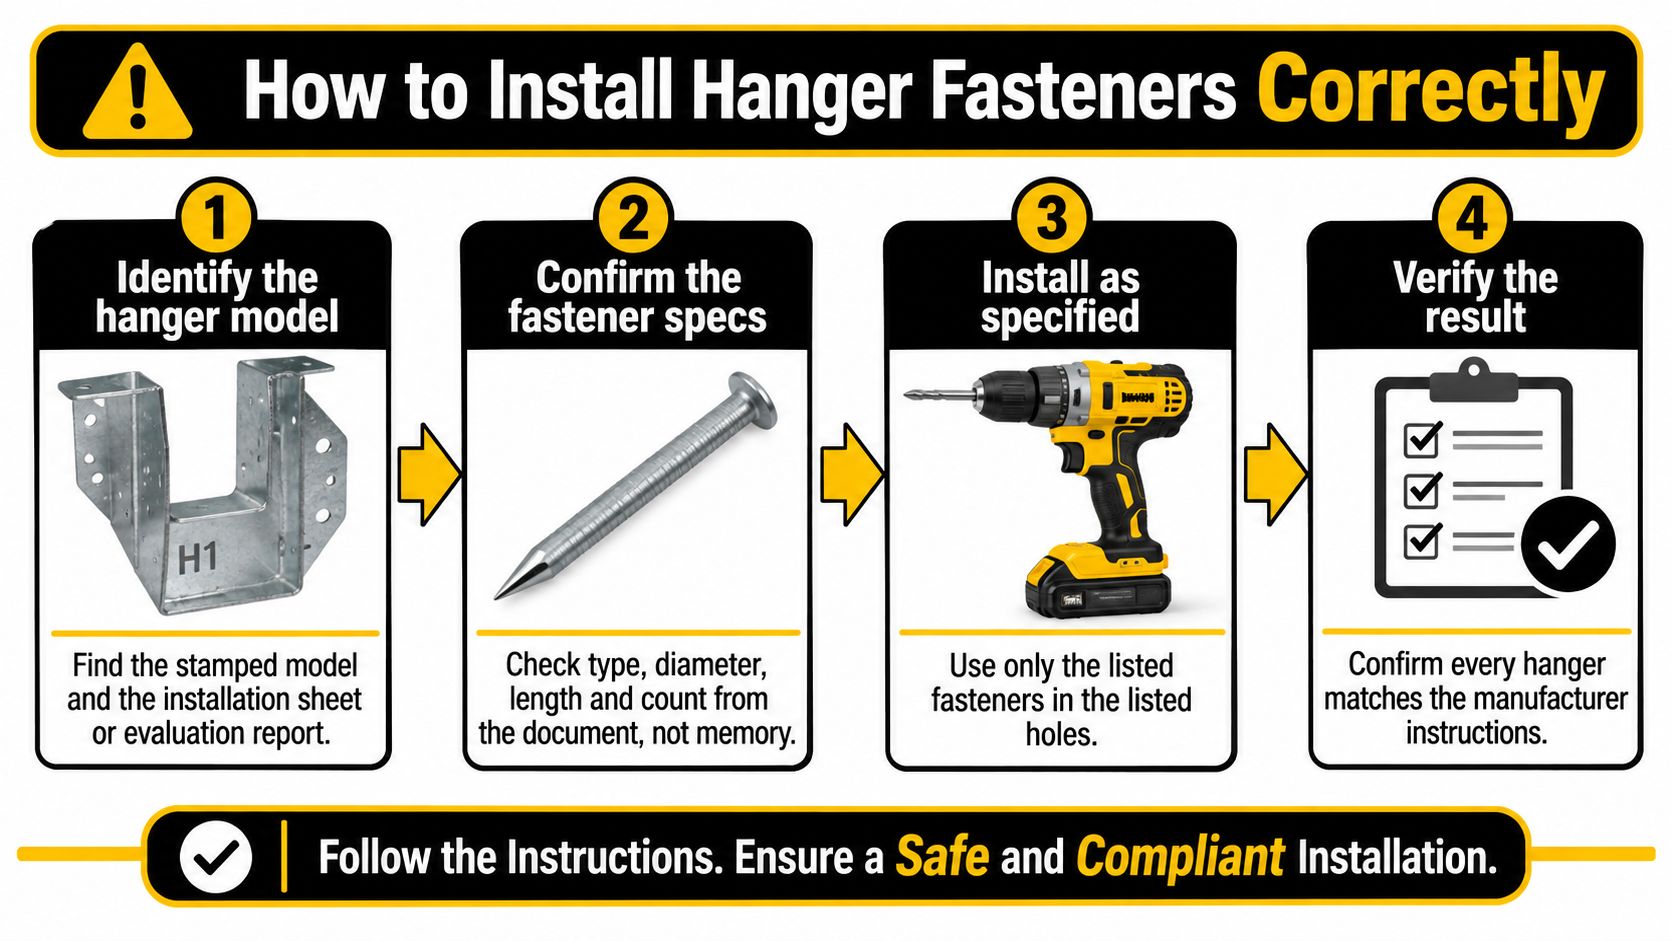
Work from identification to fastening
Identify the hanger model. Find the stamped model and obtain its installation sheet or evaluation report, including the detail for your connection. A similar shape or matching joist width doesn't establish that you have the right instructions.
Confirm the fastener specifications. Write down type, diameter, length and count separately for the supporting-member holes and joist holes. The common slip is carrying a familiar schedule from another hanger into a connection that requires something different.
Check material compatibility. Compare hanger and fastener finishes against the wood treatment and site exposure. Don't mix stainless screws into a galvanised assembly unless the manufacturer permits that combination.
Seat and align the joist. Check that the joist end is square, the bottom bears properly in the seat and the hanger fits without being bent open. Where the design uses a top flange, check its bearing too; don't pull a badly fitted assembly into shape with screws.
Finish without damaging the connection
Fill every designated hole. Follow the schedule's required holes, including any specified angled fastening through the joist into the supporting member. Don't assume every visible opening has the same purpose or that filling extra holes compensates for a missed required fastener.
Drive to the specified seating condition. For screws, use the specified bit and a drill-driver at moderate speed where the manufacturer permits it, stopping when the head seats against the connector without crushing or distorting it. Avoid uncontrolled impact driving, and install nails with an appropriate hammer or connector nailer rather than treating screw-driving advice as nail instructions.
Check penetration and hidden services. Confirm that fastener points won't enter plumbing or electrical zones, including behind the supporting member. A screw that unexpectedly breaks through the joist may indicate the wrong length, angle or hole choice; stop and verify the detail.
Photograph and verify the finished work. Capture the hanger model, fastener heads, joist seat and overall connection before installing decking. Keep the installation sheet and box label with those photos so the record identifies more than a tidy-looking bracket.
The San Bruno residential deck requirements identify connection hardware and fastener schedules as inspection items. Leave the work accessible until the required framing inspection is complete.
For fitting and positioning details, consult the joist hanger installation guide alongside the model-specific instructions. A complete connection has every designated hole correctly fastened, the joist seated without unintended gaps, undamaged hardware and a photo on file.
Common Hanger Problems and How to Fix Them
Rust streaks and white deposits are reasons to investigate, not repaint. Red rust can indicate exposed steel; white deposits can be zinc corrosion products, so colour alone doesn't establish the cause or remaining capacity.
Check the wood and the supporting member as carefully as the hanger. A new screw won't repair rotten wood or restore an enlarged connector hole.
Hanger symptoms, causes and fixes
| Symptom | Likely cause | Fix |
|---|---|---|
| Rust streaks or white corrosion on hanger | Unsuitable fastener coating, persistent moisture or metal mismatch with treated lumber | Identify the cause and install rated compatible fasteners; replace pitted hangers |
| Hanger rotating or joist sloping | Missing or short fasteners, unfilled designated holes, or damaged bearing | Support the framing and restore the listed fastening only if wood and hardware remain sound; replace damaged hangers |
| Split joist end | Over-driven or wrong-length screws, poor positioning or inappropriate end-grain fastening | Have an engineer review it; sister or replace the joist as directed |
| Screw heads snapping | Excessive driving force, wrong bit or unsuitable fasteners | Use the correct bit and controlled driving; resolve broken fasteners before completing the connection |
| Nails or screws backing out | An unapproved substitution, wood shrinkage or repeated movement | Check the schedule and wood condition; use listed structural screws only where approved |
| Wet staining at joist ends | Water trapped at the hanger or leaking from above | Correct drainage and flashing, then assess wood and fasteners for deterioration |
Decide whether it's a fastening repair or a structural repair
A fastening correction may be manageable in a day when the framing can be safely supported and the wood, hanger and holes remain undamaged. Follow the manufacturer's repair direction rather than assuming a removed deck screw leaves a suitable hole for a replacement nail.
Pitted metal, cracked welds where present, distorted seats and torn holes call for hanger replacement or professional assessment. A split joist needs a repair design, not a cluster of extra screws driven around the split.
- Restrict access: Keep people off a deck with visible sagging, separation or a rotating connection until it's assessed.
- Plan support first: Don't remove the fasteners that are currently carrying the joist without a safe support arrangement.
- Correct the cause: Resolve leakage, unsuitable coatings or incorrect installation before fitting replacement hardware.
Don't paint over corrosion to make an inspection look better. Paint doesn't replace lost steel, restore damaged wood or recover the capacity of a stripped connection.
Buying the Right Hanger Fasteners and Answering Common Questions
Make the purchase list from the hanger document before browsing fastener categories. Record the hanger model, application, fastener type, diameter, length, count and coating, with separate entries wherever the schedule uses different fasteners.
Calculate quantities from the actual hanger count and installation schedule. Keep different sizes in labelled containers, and retain the packaging so loose screws don't become unidentified hardware.
Build a purchase list that can be checked
- Document the application: Include the supporting member and wood treatment, not just the joist width.
- Specify the complete fastener: Record the manufacturer and product designation where the listing names them.
- Resolve uncertainty before installation: Ask the hanger manufacturer to clarify an unclear schedule; a sample purchase can confirm fit and identification but cannot establish approval.
- Keep the record: Save the listing, box label and installation photos with the project documents.
Our Deck Hardware category includes joist hangers, brackets and covers, while our Fasteners category includes deck screws, construction screws, lag bolts and anchors. For example, our #8 x 2.5 Deck Screws have a Torx drive and ceramic-coated brown finish, but those product features don't establish hanger approval. Keep decking purchases separate from the model-specific connector fasteners on your list.
Can I use deck screws if the listing names nails?
No. Buy the listed nails unless the manufacturer publishes an approved screw alternative for that hanger and application.
The inconvenience of another supply run is smaller than the work of opening finished decking to correct hidden connections.
Do I need an engineer?
Call one when a joist is split, structural deterioration is present or you want to depart from the listed installation. A pitted hanger also warrants assessment of the surrounding connection rather than an automatic fastener-only repair.
Routine installation of an approved detail doesn't automatically require a custom design. Your permit authority can confirm the project's review requirements.
Can stainless screws replace galvanised nails?
Only when the hanger's documentation approves those stainless screws for that application. Better corrosion resistance doesn't make screws and nails interchangeable.
Does a ZMAX hanger make any fastener acceptable?
No. The hanger finish doesn't approve an unrelated screw, its coating or its dimensions.
Buy a compatible combination documented by the connector manufacturer, not a collection of individually impressive labels.
What should I confirm before decking goes down?
Confirm the model, buy the listed fastener, install the specified schedule and photograph the connection. Check that the required inspection has happened and that no later framing adjustment has bent a hanger or left a required hole empty.
That final check is inexpensive while the framing is open. Once the decking hides it, even a straightforward correction can require substantial dismantling.
XTREME EDEALS INC. offers joist hangers, deck hardware and fasteners for framing and decking purchases. Visit XTREME EDEALS INC. with your hanger model and fastening schedule ready, and compare product specifications before ordering.