
Standing on a newly finished deck, many homeowners can see the posts, the boards, and the view beyond the edge. What they can't see yet is how the finished railing will hold together. Will the glass feel secure? Will the posts sit properly on the framing? Which parts carry the load?
An aluminum glass railing is easier to choose when you stop treating it as one product. It's a coordinated system of posts, base plates, channels, clamps, fasteners, caps, and glass. Each part has a job, and the quality of the finished guard depends on how well those parts work together.
Why Aluminum Glass Railing Is Really a System of Parts
Start with the invisible version of your railing. Draw a line around the deck edge, then mark every corner, stair transition, gate opening, and change in mounting surface. Before choosing a colour or glass style, you need to understand where the force travels.
The posts stand vertically and support the railing assembly. The base plates connect those posts to the deck structure, concrete, fascia, or another approved substrate. Clamps and channels hold the glass in the intended position, while the glass forms the transparent barrier that keeps people safely inside the deck area.
That means the glass isn't just decorative infill. It's part of the guard system, and its attachment points matter just as much as the panel itself. A beautiful panel installed with unsuitable anchors or poorly supported posts can create a weak assembly even when the glass appears substantial.
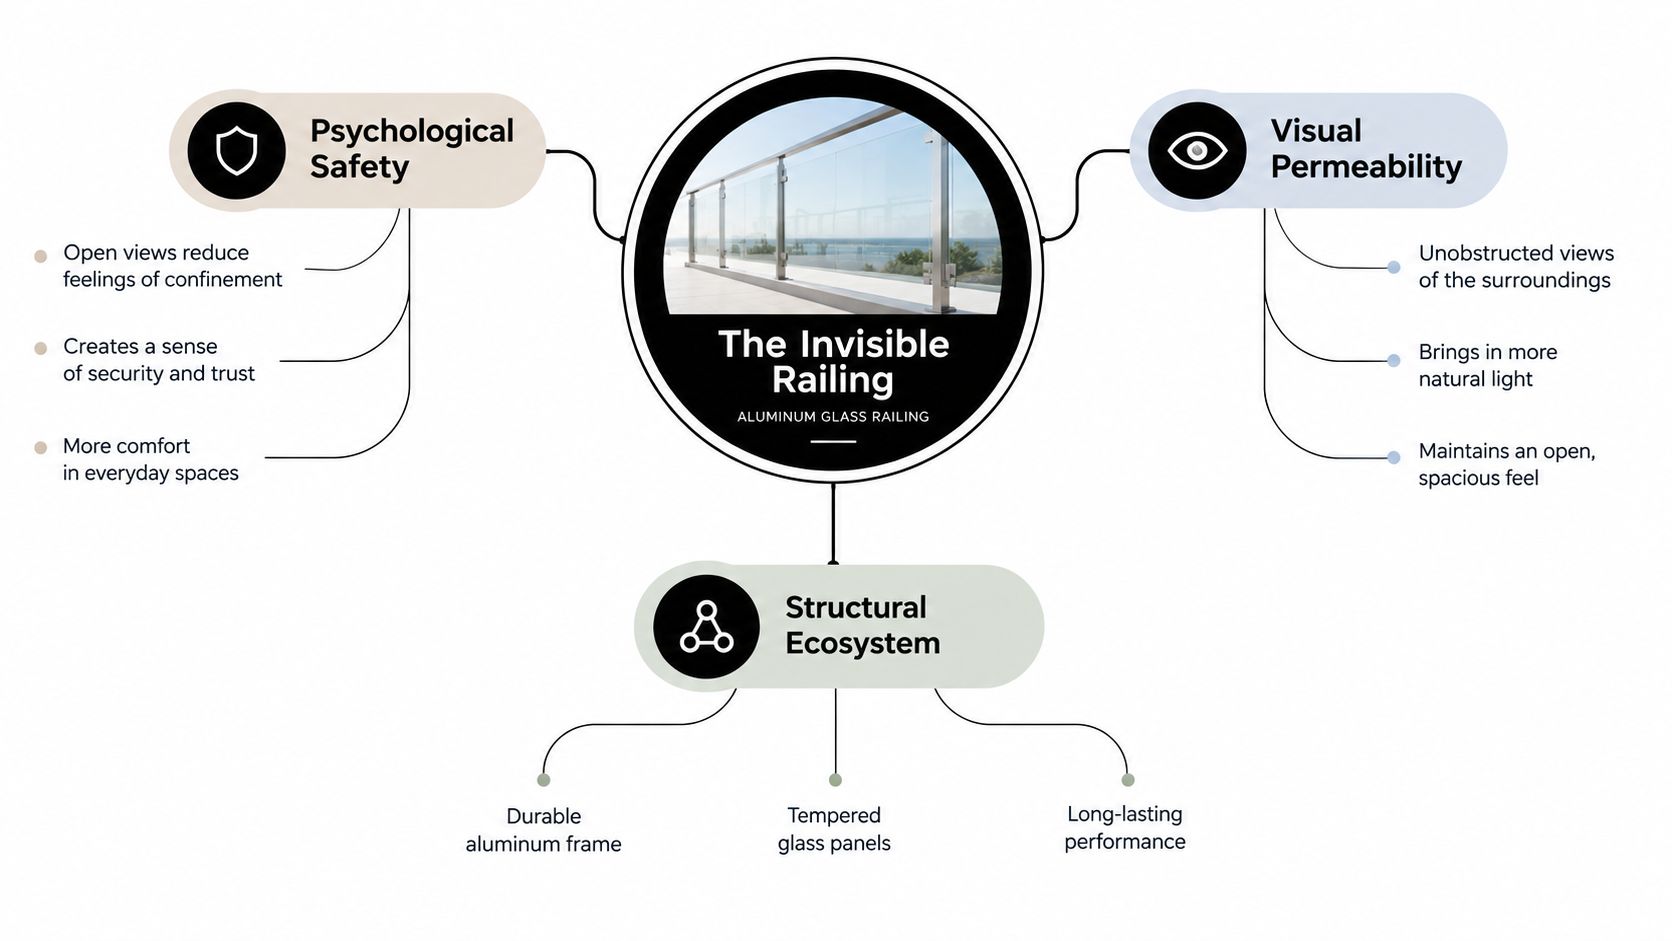
Follow the load path
Think of the system like a small piece of house framing:
- Glass panels close the opening and help form the guard.
- Clamps or channels grip the glass and transfer movement into the posts or rails.
- Posts and rails distribute force along the run.
- Base plates and anchors transfer that force into the deck or supporting structure.
This component view helps with more than installation. It makes product sheets easier to read, exposes missing hardware before ordering, and gives you better questions to ask a supplier. A useful place to begin is a selection of fasteners and fittings that match the substrate and railing style.
Practical rule: Don't approve a railing by looking at the glass alone. Ask how every load moves from the glass to the attachment hardware, then into the structure.
The system also affects the experience of the deck. Clear panels preserve sightlines, while the aluminium framework creates a defined edge without making the space feel closed in. That visual openness is valuable, but it shouldn't distract from the less visible decisions involving anchorage, drainage, panel retention, and maintenance access.
Once you use this mental model, every later choice becomes simpler. Finish is a surface decision. Glass type is a performance decision. Post spacing and base plates are structural decisions. Treating them separately, while ensuring they remain compatible, is the calmest way to buy.
The Core Components of an Aluminum Glass Railing
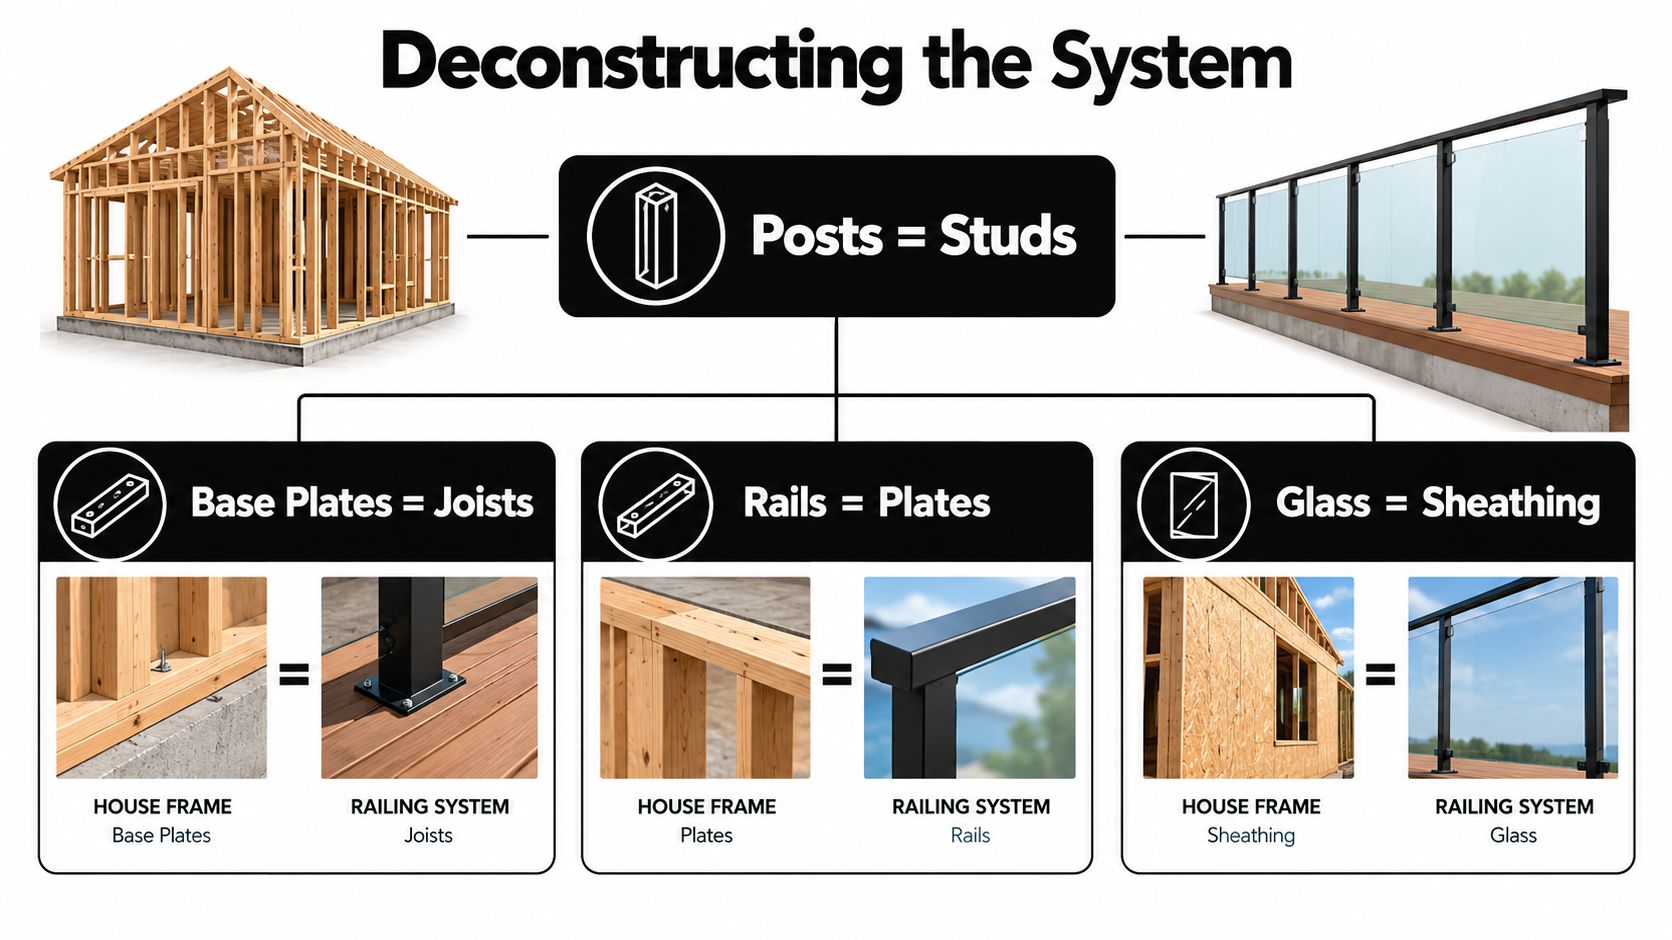
A house frame gives us a useful analogy. Posts are similar to studs, base plates perform the anchoring role, rails act like horizontal plates, and the glass fills the opening much like sheathing. The comparison isn't exact engineering, but it helps a first-time buyer understand why a railing needs more than panels and posts.
Start with the vertical supports
Posts commonly appear in square profiles such as 2×2, 2.5×2.5, and 3×3, as well as round profiles. A larger profile may provide a different visual weight and greater room for hardware, but it isn't automatically suitable for every project. The post must match the base plate, glass attachment method, top rail, and structural design.
Base plates determine how the post meets the supporting surface. Surface-mount plates sit on top of a deck or concrete surface. Fascia mounts attach to the side of a rim joist or structural edge. Core-drilled mounts use a drilled opening and engineered anchoring method. The right choice depends on the substrate, available edge distance, drainage, and the loads the assembly must resist.
Choose the glass support method
Clamps hold panels at selected points. A round glass claw creates a distinct hardware look, while a square standoff clamp gives the system a more architectural appearance. Channels can run along the bottom or another edge of the panel, with either a side-mount or surface-mount arrangement depending on the design.
Some channels use setting blocks, gaskets, or compatible silicone systems to cushion the glass and keep it positioned. Those small pieces aren't optional decoration. They help prevent direct contact between hard materials and protect the panel edge during movement.
Don't overlook the finishing pieces
Fasteners need to suit the substrate and the surrounding materials. Treated wood, concrete, stone, and aluminium each create different anchoring conditions, so a fastener that works in one deck assembly may be wrong for another. Uneven surfaces may also require shims beneath a base plate so the post sits plumb instead of being pulled into alignment by excessive tightening.
Top caps, end caps, post caps, and rail returns complete the run and protect exposed edges. When comparing deck railing systems, look beyond the product photograph and check whether the listed package includes the parts needed for corners, terminations, transitions, and glass retention.
Ask before ordering: Does the quote include posts, base plates, clamps or channels, gaskets, fasteners, caps, shims, and all corner hardware?
A complete parts list reduces surprises. It also makes it easier to compare two systems fairly, because a lower-looking price may exclude the hardware that turns loose components into a functioning guard.
Aluminum Finishes and Glass Types Compared
Finish and glass should be selected as a pair. A dark textured frame may suit a contemporary deck, but the glass still needs to match the view, privacy requirements, cleaning conditions, and applicable safety rules.
| Finish / Glass | Best For | Watch Out For |
|---|---|---|
| Mill aluminium | Utilitarian installations where the raw-metal appearance is acceptable | Surface marks, salt, and pollution can be more visible |
| Clear anodized aluminium | A restrained metallic appearance and a lighter visual presence | Coastal exposure and grime still require regular attention |
| Black powder coat | Strong contrast with clear glass and modern exteriors | Scratches and accumulated dirt can stand out |
| Bronze powder coat | Warm palettes, wood decks, and darker architectural schemes | Confirm colour consistency with nearby materials |
| Textured powder coat | A less uniform surface appearance that can disguise minor marks | Texture can make cleaning more involved |
| Tempered glass | Many residential guard applications where the specified safety glass is accepted | It still requires correct thickness, attachment, and edge protection |
| Laminated glass | Applications where retained fragments and additional acoustic separation are important | It can require a different support and glazing detail |
| Low-iron glass | Clearer views where a neutral appearance matters | It may make smudges and edge details easier to notice |
| Tinted, frosted, or reflective glass | Privacy screens and locations where glare or direct visibility is a concern | These options reduce visual openness and may change the appearance of the deck |
Near a coast or in a de-icing environment, the finish is only one part of the maintenance decision. Salt can affect fasteners, gaskets, bases, and other materials even when the aluminium itself appears sound. Canadian product guidance recommends rinsing salt buildup, using pH-neutral cleaners, and checking hardware rather than relying on the phrase “low maintenance” alone. Canadian railing product guidance is useful for seeing how environmental exposure changes the care routine.
California has a specific requirement for glazing used in handrails and guards. The glass must be laminated glass made from fully tempered or heat-strengthened glass, comply with CPSC 16 CFR Part 1201 Category II or ANSI Z97.1 Class A, and have a minimum nominal thickness of 1/4 inch, or 6.4 mm. These requirements are set out in the California glass and glazing provisions.
A supplier should be able to identify the glass construction, not just call it “safety glass.” Ask for the product specification, the edge treatment, the supported span, and the approved clamp or channel detail. Clear glass may be your visual priority, but the selected panel still has to belong to the complete engineered system.
Code and Load Basics You Cannot Skip
Code questions should come before the shopping list. The exact rules depend on the jurisdiction, building type, location, and project conditions, so a generic catalogue statement isn't enough for a deck, balcony, or raised walkway.
California provides a clear example of how these requirements affect an aluminum glass railing. Guardrails are required on open sides of unenclosed high work locations more than 30 inches above the floor, ground, or other working area. California's standard guardrail height is between 42 and 45 inches, and its workplace rule specifies a live load of 20 pounds per linear foot applied horizontally or vertically downward at the top rail. The California guardrail requirements also place responsibility on the guardrail assembly, not only on the visible infill.
| Requirement | Residential | Commercial |
|---|---|---|
| Guard height | Confirm the adopted local building code and project conditions | Confirm the adopted local building code and project conditions |
| Opening limitations | Confirm the applicable opening-size rule with the building department | Confirm the applicable opening-size rule with the building department |
| Distributed load | Use the governing local code and the engineered system data | Use the governing local code and the engineered system data |
| Concentrated top-rail load | Confirm the required test or design load | Confirm the required test or design load |
| Glass classification | Verify the permitted safety-glazing construction | Verify the permitted safety-glazing construction |
| Anchorage | Match the base plate and anchors to the supporting structure | Provide the required design documentation and anchorage information |
California rules also require railings, including their connections and anchorage, to withstand 200 pounds applied to the top rail within 2 inches of its top edge in an outward or downward direction. That requirement is described in the California railing force regulation. It explains why a strong-looking post can still be unsuitable if its anchors or supporting framing are inadequate.
For glass panel railings, California guidance requires the system to resist a 50-pound-per-linear-foot horizontal load without the rail contacting the glass, and it specifies a factor of safety of 4. The same guidance limits calculated stresses for stressed glass to 3,000 psi for heat-strengthened glass and 6,000 psi for fully tempered glass. The California glass railing design guidance shows why rail stiffness, panel support, and glass selection must be considered together.
For exterior installations, combined loads can include wind and snow. The California DSA guidance on glass panel railing design places emphasis on the complete load path, including the aluminium frame, post-to-base connections, and glass attachment points.
Before ordering, ask your supplier for shop drawings, anchor details, glass specifications, and any required engineering documentation. If your project is in another province, state, or municipality, ask the building department which rules apply rather than copying California figures into a different jurisdiction. A deck railing height and code reference can help you organise the questions you need to bring to that conversation.
Measuring, Designing, and Estimating Your Project
Begin with a tape measure, a level, a pencil, and a notepad. Don't start by counting attractive glass panels in an online catalogue, because the deck may not be square and the available mounting surface may change along the run.
Record each straight section separately. Mark inside and outside corners, stair transitions, gate locations, post returns, and places where the railing changes from surface mounting to fascia mounting. Measure every opening at three points, such as both ends and the centre. A difference between those measurements tells you whether the framing is out of square or the surface needs preparation.
Build the layout before the order
A long straight run can often be divided into bays that suit the supplier's available panel widths. Keep the bays consistent where possible, but don't force a standard panel into a corner or stair opening that needs a different treatment. Stairs may require angled glass, custom channels, or a separate handrail arrangement.
Your material list should identify more than the total length:
- Straight runs: Record each run independently.
- Posts: Count line posts, corner posts, end posts, gate posts, and any special transition posts.
- Glass: List panel locations, approximate widths, heights, edge treatments, and any angled pieces.
- Attachment hardware: Note base plates, anchors, clamps, channels, gaskets, shims, and fasteners.
- Finishing hardware: Include top rails, caps, returns, end caps, and post covers.
- Site conditions: Describe timber, concrete, stone, steel, stairs, uneven surfaces, and drainage concerns.
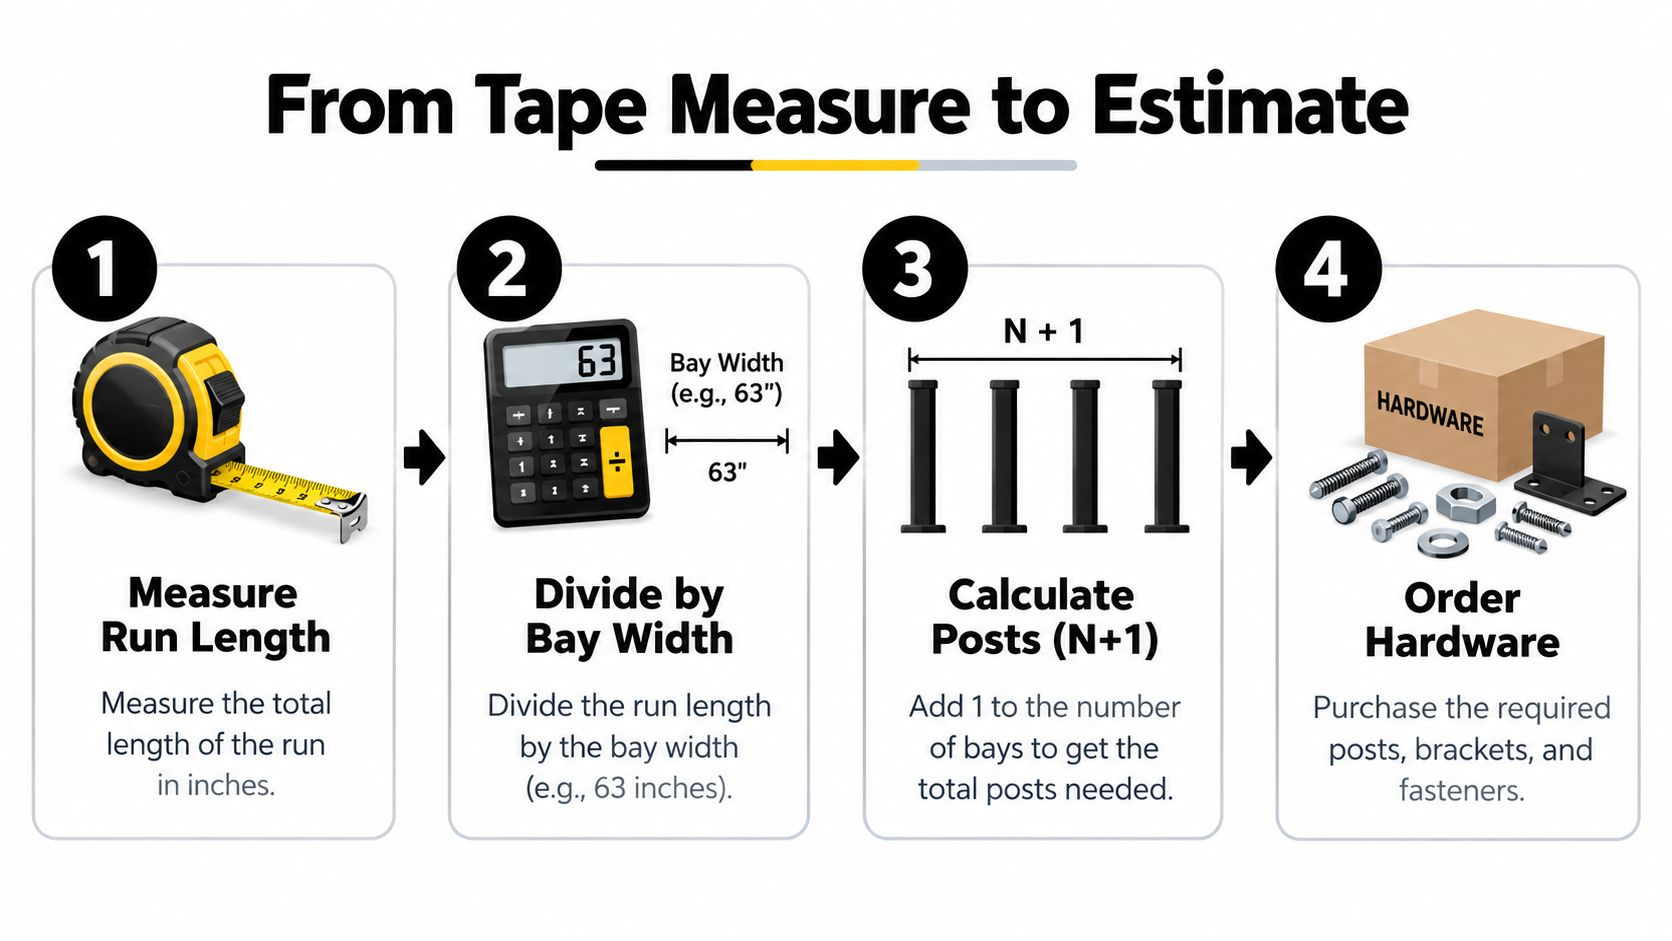
A rough estimate becomes more useful when you separate the major cost drivers instead of multiplying one price by the total run. Glass, posts, and the top cap commonly make up the most visible parts of the material budget, while anchors, clamps, channels, gaskets, corner pieces, and shipping can change the final total.
Don't add an unsupported waste allowance automatically. Ask the supplier how replacement panels, cut lengths, damaged parts, and custom sizes are handled. Glass is ordered to a specification, so a measuring mistake can be more expensive than a small hardware shortage.
Use the following handoff list when requesting a quote:
- A sketch with every run and corner labelled.
- Measurements taken at multiple points.
- Photos showing the deck edge and supporting framing.
- The substrate type at every post location.
- The preferred finish and glass appearance.
- The intended mount, surface or fascia.
- Stair and gate details.
- The local code or permit information already received.
- The desired delivery timing.
- A request for a complete parts schedule.
For a practical visual guide to the installation sequence, review the video below.
Maintenance and Common Failure Points
A coastal installation can look perfect at handover and still develop trouble around the bases. White powder beneath a post plate, a gasket that has hardened, or a fastener showing surface corrosion may indicate that salt, moisture, incompatible materials, or trapped water is affecting the assembly.
The common mistake is to inspect only the visible aluminium and glass. The parts most likely to need attention are often the ones underneath or between those surfaces.
Look beyond the frame
Anodized coatings can wear where hardware rubs or where grit remains trapped. Fasteners may react with treated lumber or nearby metals. Base shoes can collect water if drainage paths become blocked. A chipped glass edge can concentrate stress and develop into a running crack, even when the face of the panel still looks clean.
Inspect the system as a group:
- Posts: Check for movement, distortion, coating damage, and loose set screws.
- Base plates: Look for white powder, standing water, cracked sealant, and gaps beneath the plate.
- Fasteners: Check for corrosion, stripped heads, movement, and signs that the anchor is no longer gripping.
- Gaskets and channels: Confirm that cushions remain seated and that the channel is free of grit.
- Glass edges: Look for chips, cracks, cloudy areas, and contact with metal.
- Drainage: Make sure water can leave the base and channel instead of remaining trapped.
Use clean water to remove salt and loose dirt, then choose a pH-neutral soap. Harsh abrasives can scratch glass and finishes, while aggressive deck cleaners can damage adjacent materials. Canadian guidance on aluminium railing maintenance also warns against direct unprotected contact with concrete and harsh cleaning products, particularly in wet or coastal settings.
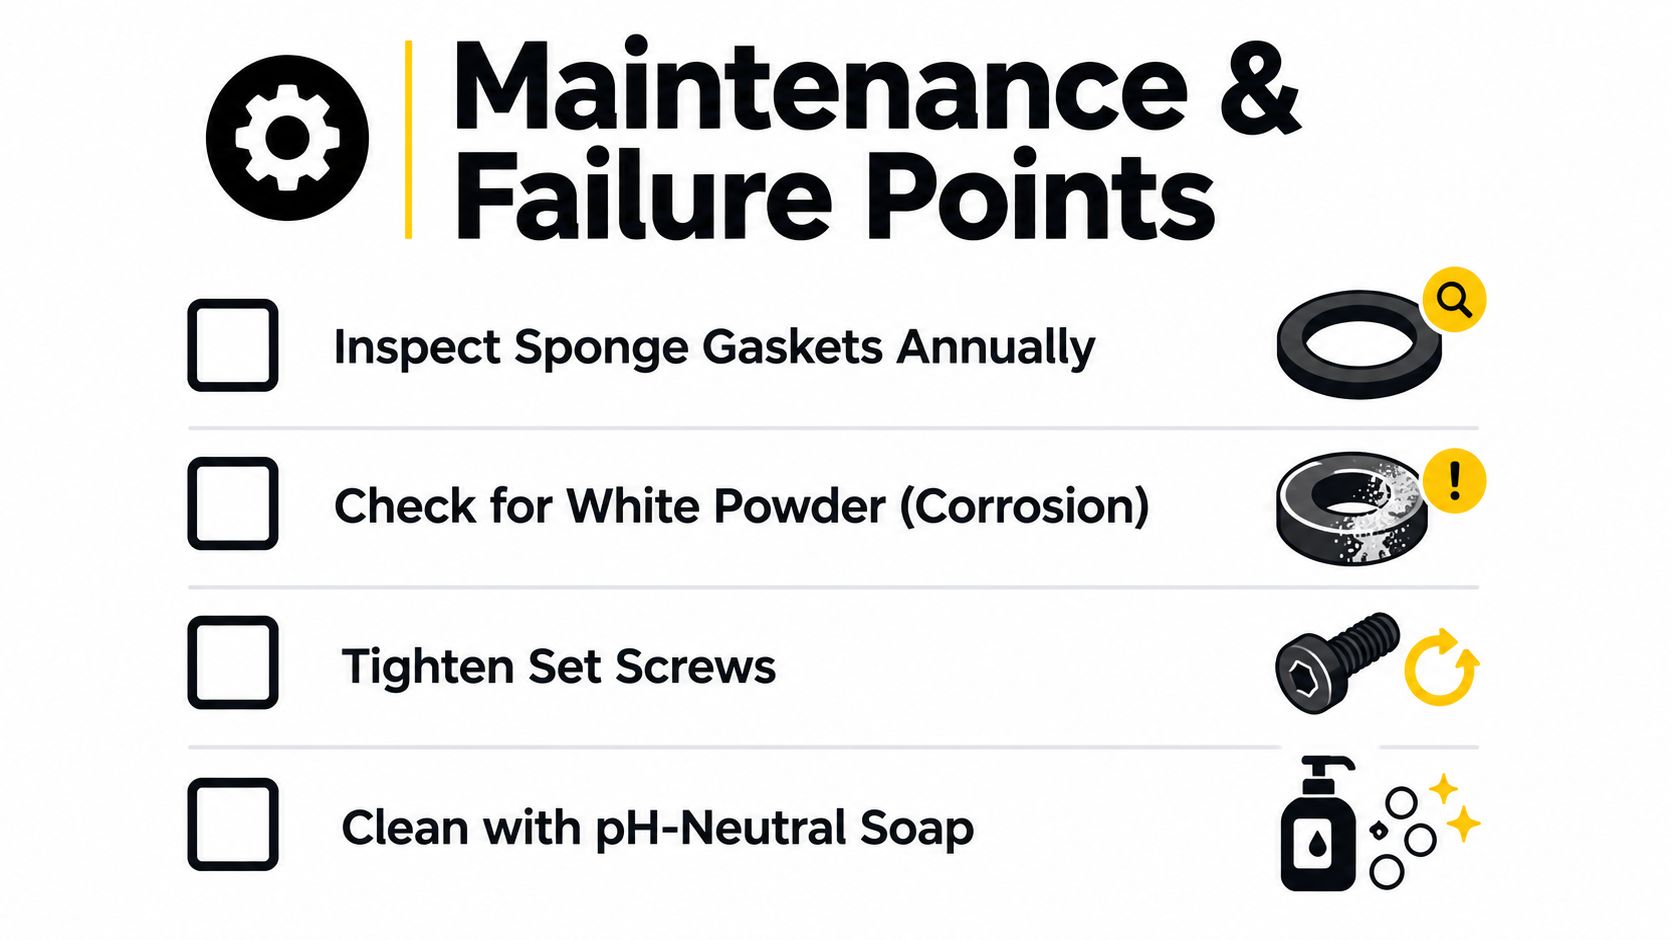
A good routine follows the seasons without pretending that every property needs the same schedule. Rinse after periods of salt exposure or heavy grime, inspect sealant and gaskets before the wet season, and check anchors after severe weather or unusual movement. In a city environment, pollution may require more cleaning than a sheltered rural deck.
Replace, don't disguise: A wobbly post, cracked glass, damaged anchor, or badly chipped edge needs a qualified assessment. Cleaning the surface won't restore the assembly's safety.
Keep a record of replaced gaskets, fasteners, panels, and adjustments. That small habit helps you identify whether a problem is isolated or recurring at every base, corner, or hardware connection.
When to DIY and When to Hire a Professional
A straight, level deck run with a sound substrate can be a reasonable project for a careful homeowner. You'll need a drill, suitable bits, a level, measuring tools, clamps, protective equipment, and enough patience to follow the manufacturer's templates without improvising the attachment details.
The decision changes when the structure or glass becomes less predictable. Uneven surfaces may require shims and a revised anchoring detail. Concrete or stone may require core drilling and engineered epoxy anchors. Stairs can involve angled glass, changing heights, and difficult handling. A permit, engineering review, or inspection requirement can also make professional involvement the sensible choice.
| Project Condition | DIY Friendly | Hire a Pro |
|---|---|---|
| Straight run on sound, level framing | Suitable for an experienced homeowner following the system instructions | Useful if you want the installation documented |
| Uneven deck or irregular edge | Only with a clear approved shimming detail | Better when the substrate needs correction |
| Concrete, stone, or masonry attachment | Possible with the right tools and design | Preferable when drilling and anchorage are critical |
| Stairs or angled panels | Demanding and difficult to verify alone | Strongly recommended |
| Custom glass or unusual corners | Risky if measurements are uncertain | Better for field verification and ordering |
| Permit or engineering documentation | Depends on local rules and the homeowner's ability to provide it | Often the safer route |
| Uncertainty about lifting or protecting glass | Not a suitable DIY condition | Use trained installers |
A homeowner can follow general Pine Country diy vs pro advice while still applying project-specific judgement. Glass installation adds a further concern because incorrect handling, field cutting, or unapproved hardware can affect supplier support and warranty terms.
Before cutting or drilling aluminium, read a practical guide on how to cut aluminum deck railing, then confirm that the system manufacturer permits the proposed cut. A neat cut doesn't make an unapproved modification acceptable.
Ask yourself three questions:
- Can you verify the anchor type and embedment for your substrate?
- Can you handle the glass without striking an edge or twisting a panel?
- Can you identify the code and permit requirements before installation?
If you hesitate on any answer, the money saved by doing the work yourself may disappear through a replacement panel, failed inspection, or damaged structure. Hiring a professional isn't a sign that the system is too complicated. It's a way to put the highest-risk decisions in experienced hands.
A Simple Pre-Purchase Checklist
Take this list to a supplier, contractor, or building department. It turns a collection of attractive product photos into a clear system specification.
- Confirm local code: Identify the required height, loads, glass classification, openings, permits, and documentation for the project.
- Choose the mounting method: Decide whether each section uses surface mounting, fascia mounting, or another approved arrangement.
- Select the post profile: Choose the square or round style and confirm that it matches the base plates and attachment hardware.
- Select the finish: Compare mill, anodized, powder-coated, and textured options against salt, pollution, moisture, and cleaning conditions.
- Specify the glass: Confirm the glass construction, thickness, edge treatment, tint, privacy level, and approved support method.
- Count posts and panels: Use the measured runs, corners, stairs, gates, and returns rather than estimating from total length alone.
- Match anchors to the substrate: Verify that the base plate and fasteners are designed for wood, concrete, stone, steel, or the actual supporting material.
- Choose the top finish: Confirm whether the system uses a top rail, cap rail, post cap, end cap, or another finishing detail.
- Request the parts schedule: Ask for shop drawings or a written list showing quantities for posts, plates, clamps, channels, gaskets, fasteners, caps, and glass.
- Ask about glass lead time: Confirm ordering, delivery, damage inspection, replacement procedures, and the point at which measurements become final.
The most important question is whether the parts were designed to work together. A post from one system, a channel from another, and an anchor chosen from a general hardware bin may look compatible while lacking an approved load path. Match components by manufacturer documentation, substrate, glass specification, and local code requirements.
XTREME EDEALS INC. offers deck and fencing accessories, fasteners, brackets, post-related hardware, and railing-related products that can help organise the hardware side of a deck project. Visit XTREME EDEALS INC. to review products for your component list, then confirm compatibility with your chosen aluminum glass railing system before ordering.