
You're standing in the hardware aisle with a stair stringer already cut, two boxes of metal connectors in your cart, and one uncomfortable question: will the hanger you're holding actually carry the connection, or will it fail when the inspector sees the installation? A standard deck hanger can look substantial and still be the wrong choice for an angled stair connection.
Joist hangers for stairs are structural components in the load path. The right selection depends on the carried member, stringer geometry, bearing, fasteners, corrosion exposure, and the rules enforced in your jurisdiction. California guidance ties wood I-joist hangers to ASTM D7147 and evaluation under ICC-ES AC13, while Canadian guidance requires mechanical support for joists framed into the side of a beam unless an approved ledger-strip alternative is used (California DSA CBC interpretation, Ontario building code guidance).
Why Stair Framing Demands a Different Hanger Mindset
You can install a heavy-looking hanger and still build a connection that fails inspection. Stairs concentrate force through individual treads, angled stringers, landings, and framed transitions. Climbers also push forward, so the connection handles movement and lateral force as well as gravity.
The selection starts with the load path, not the brand or the thickest steel on the shelf. Identify the member carrying the stair load first. It may be a cut stringer bearing on a landing beam, a stringer tail attached to a rim joist, or a landing joist framed into a beam. Then verify how the connector transfers that force into the supporting member.
Practical rule: A hanger cannot correct weak framing. The supporting member, carried member, bearing, fasteners, and connector must match the approved installation.
The slope changes the connection
A square face-mount hanger can fit a horizontal deck joist neatly. An angled stringer may twist its seat or leave the flanges bearing unevenly. Forcing the fit by bending the flanges in the field can create a connection outside the product's evaluated use. Choose an adjustable or skewable stair connector when the stringer angle requires one.
Stair geometry also leaves little room for framing hardware, skirt boards, finishes, and handrails. California rules limit how far handrails and stair stringers may project into the required stair width, with handrails allowed 3 1/2 inches and stringers 1 1/2 inches (California DIR stair regulation). Those dimensions can determine whether a selected hanger physically fits without interfering with the finished stair.
Canadian inspection practice raises the same broader issue: a connector must suit the measured geometry and provide the intended structural engagement. A convenient-looking hanger may have the wrong angle, seat, or nailing surface once the stair pitch is laid out.
Depth and flange integrity are checked against code in the section below. The practical takeaway is simple: treat stair hangers as code-sensitive structural components, not generic hardware. Choose for the stringer geometry, account for corrosion exposure, and confirm that the installation can be inspected and accepted in the jurisdiction where the stairs are built.
How a Stair Frame Actually Carries Load
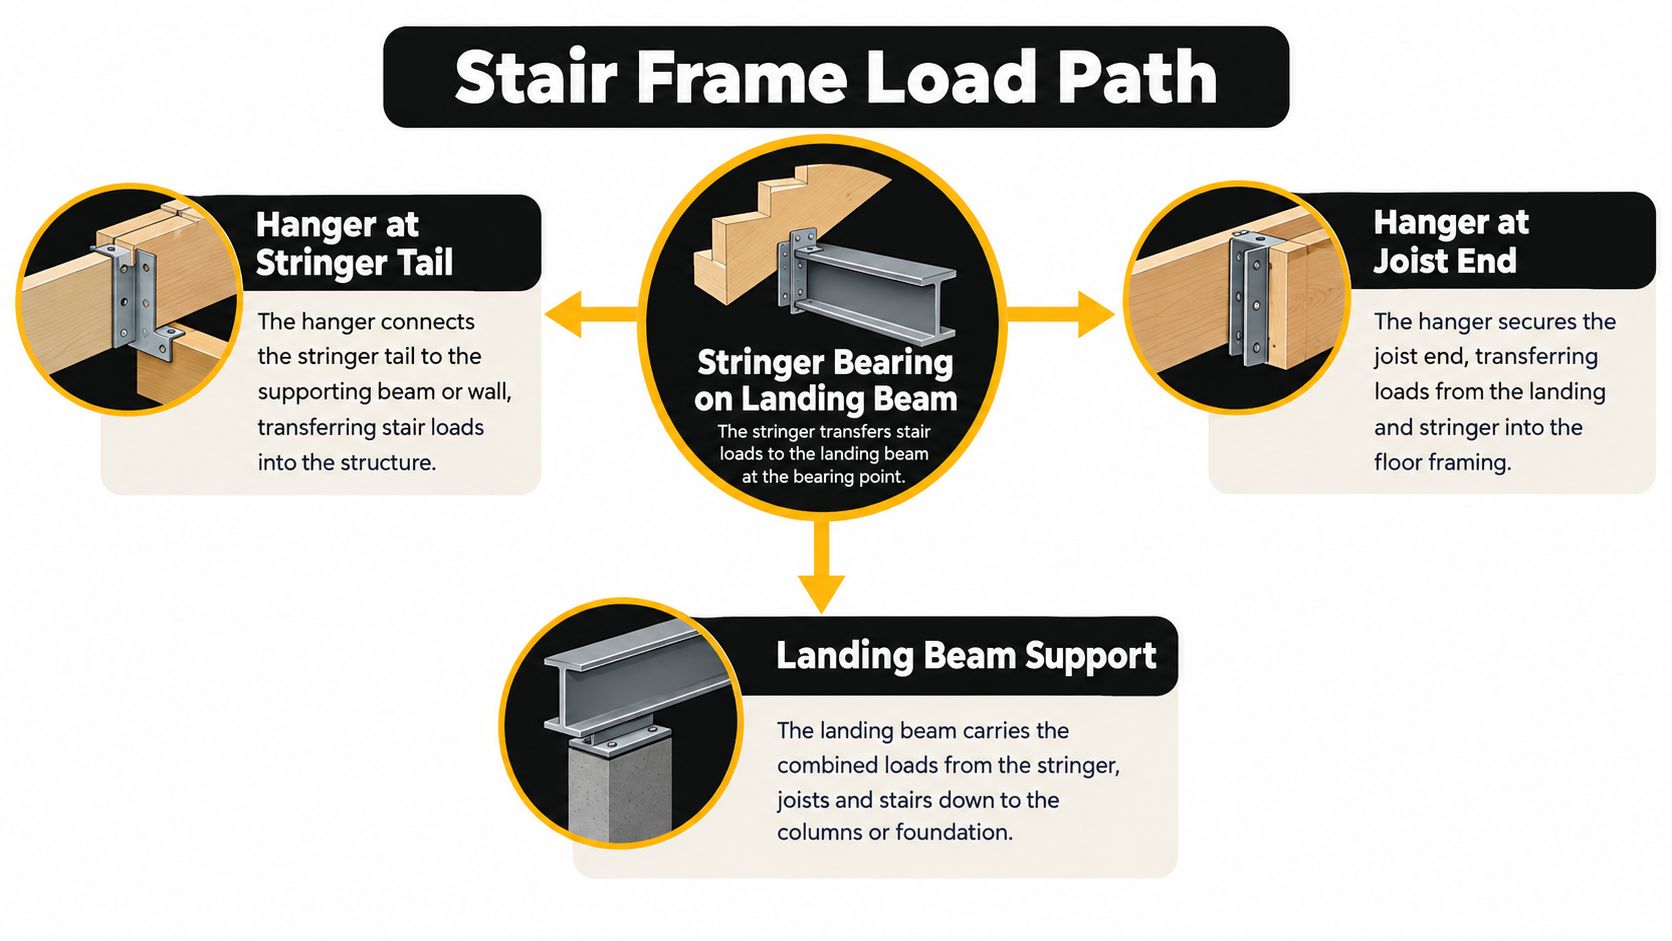
Start at the top of a cut stringer. The stringer tail bears on, or connects to, the upper landing structure. Each tread transfers foot traffic into the stringer, and the stringer sends that force down to the lower landing or supporting beam. At the landing, joists carry the load sideways to the beam, ledger, rim, or wall that forms the main structural support.
That path has several distinct connection points:
- Stringer tail connection: Supports the upper or lower end of the stringer and controls movement at the landing.
- Landing joist end: Transfers the landing platform load into a beam, ledger, or rim member.
- Landing beam support: Carries the concentrated reactions back to posts, walls, or the primary deck frame.
Bearing comes before hardware
A hanger loaded at the end of a stringer or joist must have a proper seat and full contact. If the cut is sloped, notched, or short, the load can concentrate at one edge instead of distributing through the connector. The same problem appears at a mid-span landing splice. A hanger that doesn't engage the full supported depth may leave the connection relying on a small strip of wood.
The upper connection often needs to deal with limited bearing, lateral movement, or an angled stringer. The lower landing connection may also experience a forward kick as people step off the stairs. Positive bearing, adequate nailing, and lateral restraint work together. One cannot compensate for a missing part of the others.
Geometry determines the hanger family
Use a concealed-flange hanger where the connector must disappear behind drywall, trim, or a tight stair finish. Use a face-mount hanger where the carrying member is exposed and you need a broad nailing surface. Use a skewable or adjustable hanger when the stringer meets the supporting member at an angle.
Mid-span stringer splices deserve particular caution. The connector must be rated for the full stringer depth and the expected load path, not merely chosen because its opening appears wide enough. If the framing layout can't provide the required seat and fasteners, change the framing detail or obtain a design rather than forcing the hardware into place.
Joist Hanger Types That Fit Stair Geometry
Three hanger families cover most practical stair connections. They solve different problems, and none is automatically superior.
Face-mount hangers
Face-mount hangers are the dependable choice for many landing joists and rim connections. Their flanges sit on the face of the carrying member, which generally gives the installer a clear nailing pattern and a direct load transfer. They also work well where the hanger will remain visible or will be covered by a planned trim detail.
The trade-off is finish clearance. A face flange can interfere with a skirt board, drywall return, or tread detail. It also won't sit correctly on a skewed stringer unless the product is designed for that angle.
Concealed-flange hangers
Concealed-flange models keep the connection visually cleaner at upper-floor landings and other finished areas. They're useful when a stair finish wraps tightly around the framing and an exposed flange would create a bump or force extra trimming.
The reduced visible hardware comes with less tolerance for sloppy layout. You need the correct header thickness, the specified fasteners, and enough room to drive them. A concealed connector isn't permission to omit holes that are difficult to reach.
Adjustable and skewable hangers
Adjustable and skewable models earn their place on angled stringers. They can be set to match the stair pitch or plan angle, allowing the connector to sit flush without bending the flanges. This is important because a square hanger on an angled member can create gaps, uneven bearing, and a compromised nailing pattern.
Canadian compliance material identifies the LSCZ stair-stringer connector as field-adjustable, suitable for common stair pitches, and intended to replace added framing or toe-nailing in the stair-stringer-to-deck connection (Canadian deck compliance presentation). For angled connections, joist hangers for angled framing can help you compare the relevant connector category before you cut the supporting member.
| Hanger Type | Best Stair Use | Key Trade-Off |
|---|---|---|
| Face-mount | Landing joists, rim connections, exposed framing | Strong nailing access, but visible flanges can interfere with finish work |
| Concealed-flange | Finished upper landings and tight trim details | Cleaner appearance, with stricter layout and fastening access |
| Adjustable or skewable | Angled stringers and non-square stair connections | Better geometry control, but requires careful adjustment and product-specific installation |
| Tread or specialty hanger | Special stair-tread or proprietary framing details | Useful only when the complete system is approved for that application |
| Saddle hanger | Beam-top or unusual support details | Can solve a narrow framing condition, but isn't a general replacement for a rated face-mount hanger |
Specialty tread hangers and saddle hangers have legitimate uses, but they shouldn't be selected by appearance alone. A standard face-mount hanger rated for the member and load is often the simpler, more inspectable option when the geometry allows it.
Code Rules and Spacing You Cannot Skip
A stair hanger can look substantial and still fail inspection if the supported member lacks bearing, the connector does not match the geometry, or the fasteners do not follow the listed schedule. Check the framing condition before choosing hardware.
California residential deck framing rules require approved joist hangers where joists frame into the side of a beam or ledger. Apply the bearing and depth checks first: the minimum hanger depth is 60% of joist depth, with minimum bearing of 1 1/2 inches on wood or metal and 3 inches on concrete or masonry (California residential deck framing rules).
Confirm bearing and hanger depth
A hanger does not create bearing where the framing has none. Measure the supporting surface, confirm that the stringer or landing joist sits fully in the seat, and verify that the connector engages the required portion of the member. A deeper engineered member may need a different hanger, web stiffeners, or a listed connector evaluated for that specific product.
For wood I-joists, a hanger designed for solid-sawn lumber is not automatically acceptable. California building guidance connects I-joist hanger use with ASTM D7147 and requires the evaluation report to demonstrate compliance with ICC-ES AC13 (California DSA CBC interpretation). The evaluation report carries more weight than a generic “heavy duty” label.
Check span and support conditions
A stronger hanger cannot correct an undersized or over-spanned member. One California county guide requires approved hangers for header-joist-to-trimmer-joist connections when the header-joist span exceeds 6 feet. It also requires support at the header for tail joists longer than 12 feet, using framing anchors or 2-inch-by-2-inch ledger strips (California deck and stair guide).
Ontario guidance requires joists framed into the side of a wood beam to use joist hangers or another acceptable mechanical connector unless ledger strips are used. With 38 mm by 38 mm ledger strips, each joist must be nailed to the beam with at least four 89 mm nails (Ontario building code guidance).
| Requirement | IRC Baseline | Stair-Specific Rule | Common Field Error |
|---|---|---|---|
| Bearing | Follow the approved framing detail and span design | Keep the stringer or landing joist fully seated | Treating the hanger as a substitute for bearing |
| Hanger depth | Match the connector to the carried member | Engage at least 60% of joist depth where required | Using a shallow hanger on a deep stringer |
| Fasteners | Use the listed nailing or screw schedule | Fill the required holes in both carrying and carried members | Leaving hard-to-reach holes empty |
| Lateral restraint | Provide the restraint shown by the approved detail | Check for tension devices, blocking, or I-joist web stiffeners | Assuming vertical nails stop all stair movement |
| Span | Stay within the applicable prescriptive table or design | Provide additional support when the member exceeds the permitted condition | Buying a stronger hanger instead of correcting the frame |
Local seismic rules, treated-wood requirements, and provincial interpretations can override generic tables. Keep the connector evaluation report with the framing paperwork, and confirm the local authority's deck and stair guidance before the framing is closed.
Matching Corrosion Protection to Your Climate
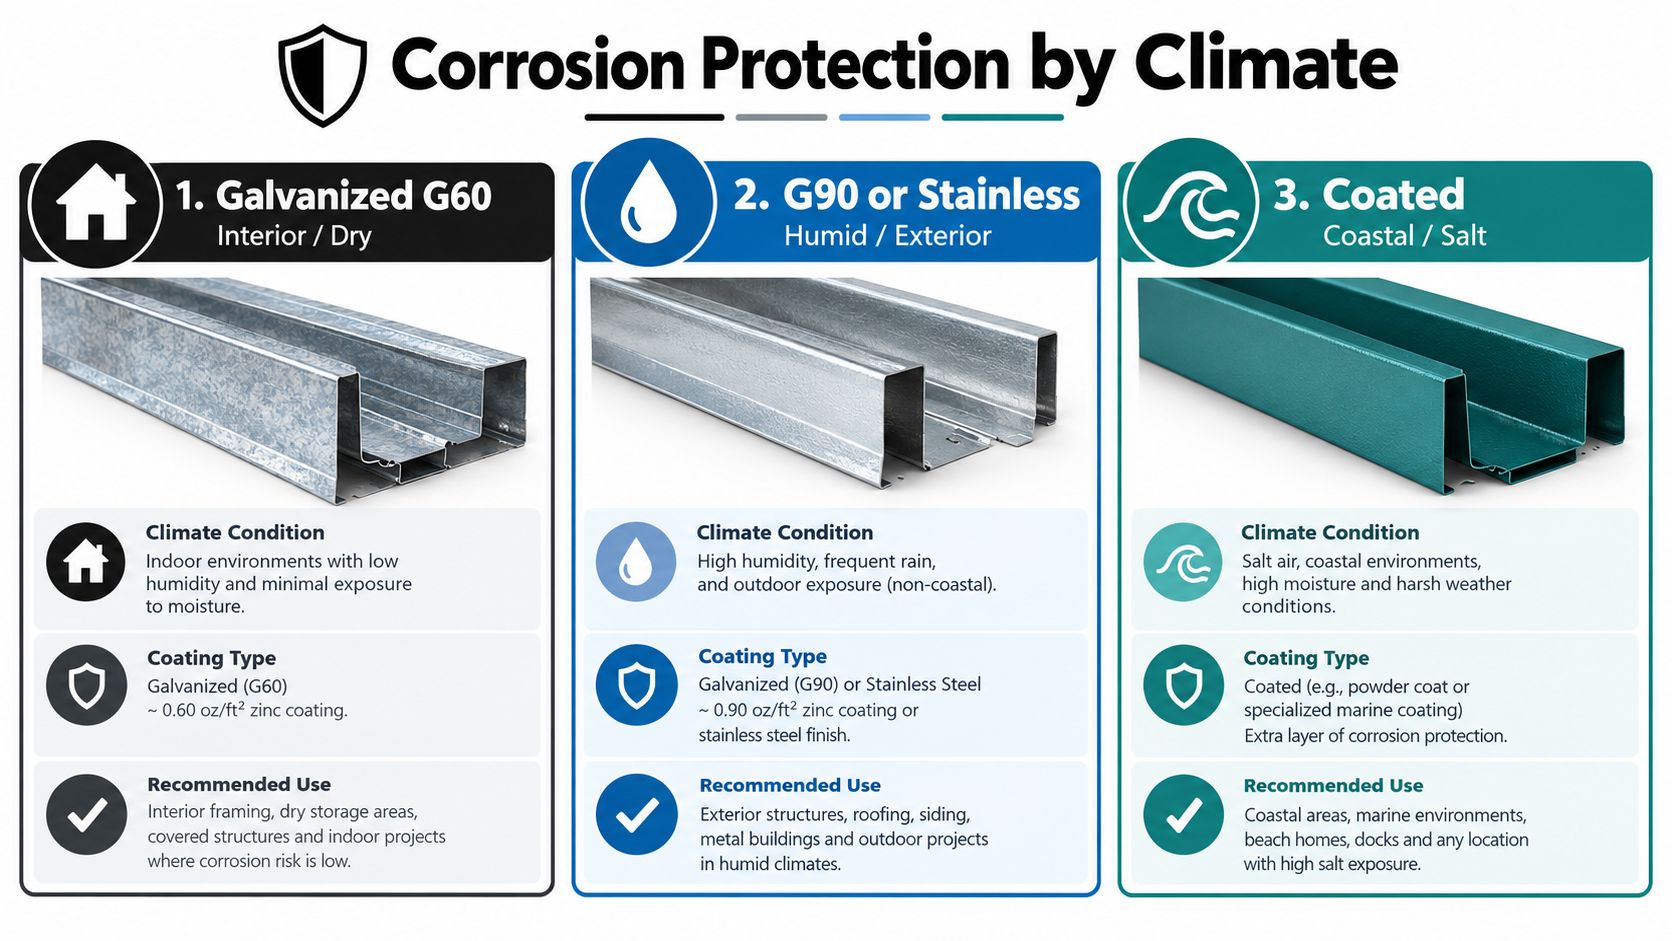
Choose corrosion protection for the stair's worst exposure, not for the store aisle where you bought the hardware. An interior basement stair has a different risk profile from an exterior landing exposed to irrigation, snow storage, pool chemicals, or salt-laden air.
Galvanized steel can suit a dry interior application when the connector and fasteners are listed for that service. Exterior stairs require closer review, especially where treated lumber stays damp or freeze-thaw cycles repeatedly wet the connection. A coating label alone does not establish that the complete assembly will pass inspection.
Compare exposure, not just finish colour
A more protective coating can provide greater margin in damp conditions, but the hanger, fasteners, and treated wood must be compatible. An approved hanger paired with an unsuitable fastener can still produce a corroding or underperforming connection. Treatment chemistry and moisture exposure both affect the hardware selection.
For a practical reference on coating systems evaluated for corrosion resistance, check whether the information identifies the coating system, substrate, and exposure conditions considered. Marketing language is not a substitute for a product rating, evaluation, or approval.
- Interior and dry: Use a connector listed for dry service with compatible fasteners.
- Humid or exterior: Choose a corrosion-resistant connector approved for outdoor and treated-wood exposure.
- Coastal or salt exposure: Consider stainless steel or another product specifically evaluated for chloride exposure.
- Freeze-thaw conditions: Inspect the coating, cut edges, fasteners, and drainage. Colour is not a reliable measure of performance.
Canadian exterior stairs may see wetting, drying, snow, and treated lumber within the same season. Material and span also affect whether a proposed hanger is acceptable. OSB or plywood connectors, for example, may be restricted by the applicable guidance and are not a general replacement for listed metal hardware.
California projects add another inspection concern: exterior exposure, treated lumber, and local amendments can affect the approved connector and fastener combination. Confirm the local requirements before framing is enclosed, particularly where coastal air or persistent moisture is present.
For Canadian exterior work, galvanized joist hangers are one category to evaluate. Check the complete assembly, including fasteners, treatment compatibility, exposure rating, and the documentation an inspector may request.
Installing Joist Hangers the Right Way
A stair connection can look secure and still fail inspection if the hanger does not match the stringer angle, the bearing is incomplete, or the fastener schedule is wrong. Set out the hanger before lifting the stringer or joist into position. Mark the top and seat elevations, inspect the carrying member for sound wood, and confirm that the supported member will sit squarely and fully in the saddle.
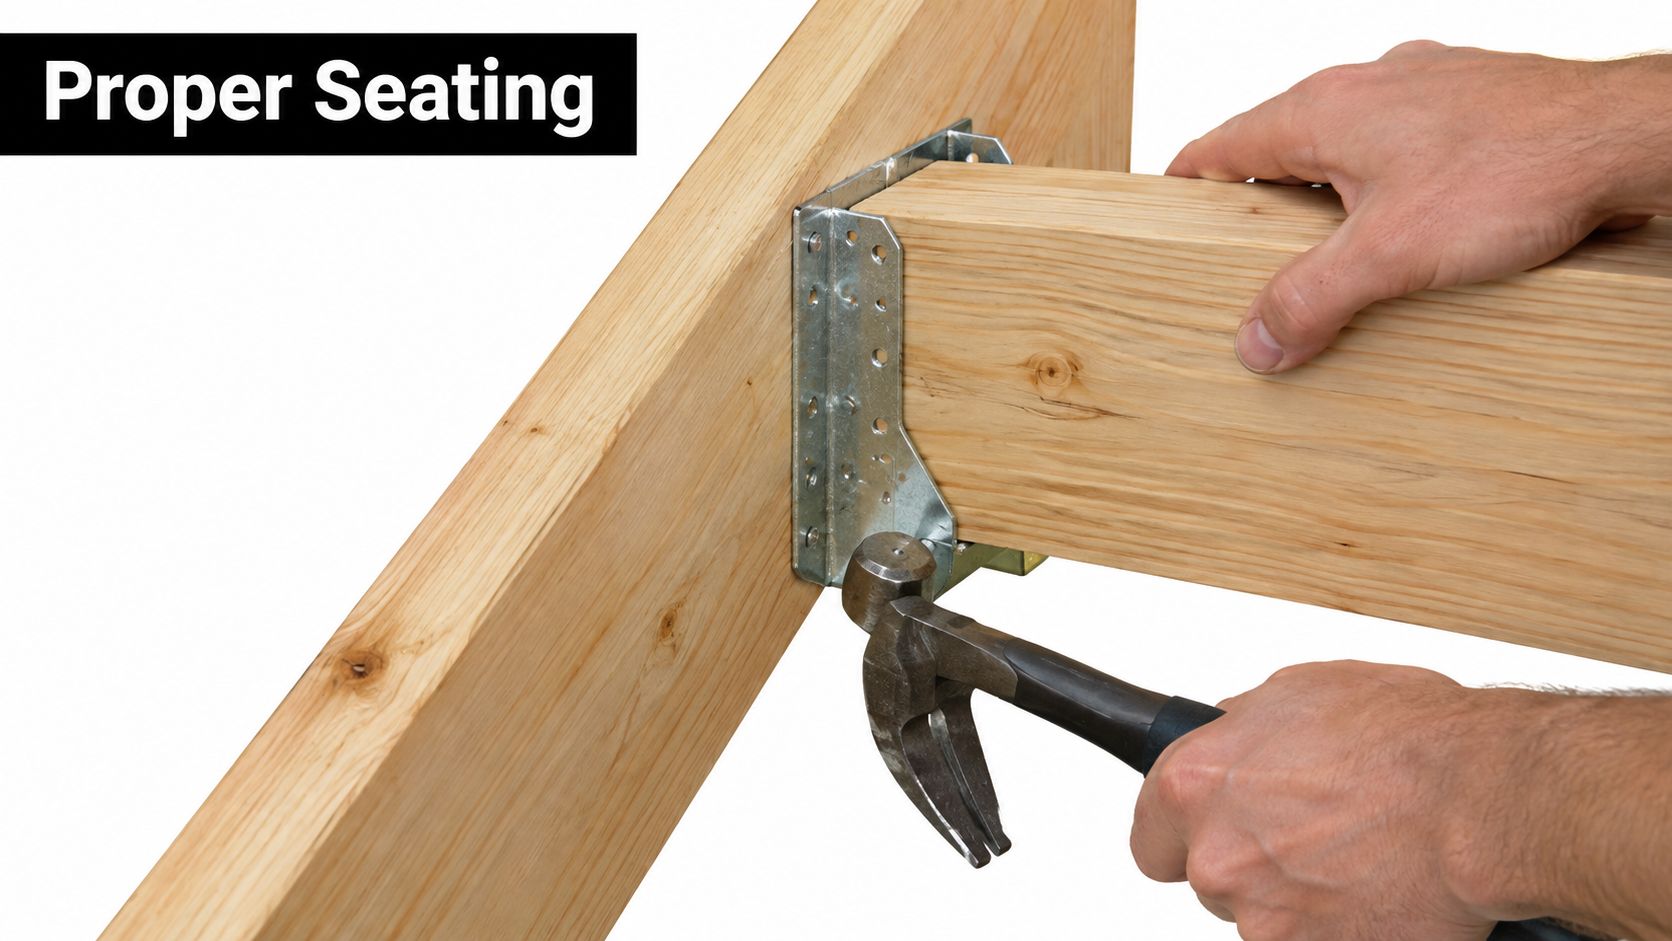
Cut the stringer tail or joist end cleanly. A sloped, crushed, or notched end creates uneven bearing and can twist the connector under load. Seat the member completely before fastening. Check for daylight between the hanger, carrying member, and supported member.
Fasteners are part of the design
Install the connector nails or structural screws specified for the hanger, using every required hole. Drywall screws, generic deck screws, or mixed fasteners are unacceptable unless the product instructions specifically allow them. A screw that fits the hole does not automatically provide the tested structural capacity.
If the manufacturer specifies double-shear nailing, drive the listed nails through the carrying member and into the supported member. Pre-drilling can help in tight framing, but it does not replace the holes that transfer load through the hanger.
Joist hanger screws must match the connector approval and fastener schedule. Head shape and convenience are poor selection criteria. Structural screws can help where access is restricted, provided the listed screw type is used.
Never bend a flange sideways to force a square hanger onto an angled stringer. Replace it with a skewable or adjustable product. Follow the manufacturer's instructions, which prohibit field-bending flanges.
Inspect the connection before loading it:
- Confirm full seating: The stringer or joist is tight against the hanger seat.
- Check the flanges: They remain flat, aligned, and undamaged.
- Count the fasteners: Every required hole contains the approved fastener.
- Inspect the bearing: No split, crushed edge, or unsupported notch carries the load.
- Verify the angle: The connector follows the stringer geometry without forced distortion.
A short installation demonstration can clarify an unfamiliar connection. Compare the actual hanger instructions with the framing detail, then complete the physical inspection before covering the work.
Where the Cheapest Hanger Quietly Costs the Most
A low-cost hanger can become expensive when the stair is exposed to Canadian rain, snow, treated lumber, or salt air. A thin coating may look acceptable on installation day, then leave rust staining around the stair finish and corroded fasteners after repeated wetting and drying.
The bigger cost often arrives at inspection. A hanger with the wrong depth, missing nails in the carrying member, or no provision for lateral restraint can require removal of finished work and a return visit. Replacing the visible connector may also mean disturbing the skirt board, treads, flashing, or stringer.
| Cost Factor | Standard G60 Galvanized | ZMAX or Stainless Upgrade |
|---|---|---|
| Initial purchase | Lower upfront cost | Higher upfront cost |
| Exterior exposure | May be unsuitable for the project conditions | Better choice when the product is approved for the exposure |
| Rust staining | Can create visible maintenance work | Reduced risk when correctly matched to the environment |
| Fastener compatibility | Must be checked carefully | Still requires compatible fasteners |
| Inspection risk | Increases when the rating doesn't match the detail | Reduced when the connector has the required approval |
| Replacement work | May involve opening finished stair components | Avoided when the original selection is correct |
Don't compare only the price printed on the box. Compare the connector rating, fastener system, installation labour, finish repair, and the possibility of replacing a damaged stair component. The right question is whether the hardware remains suitable for the most aggressive condition on the project.
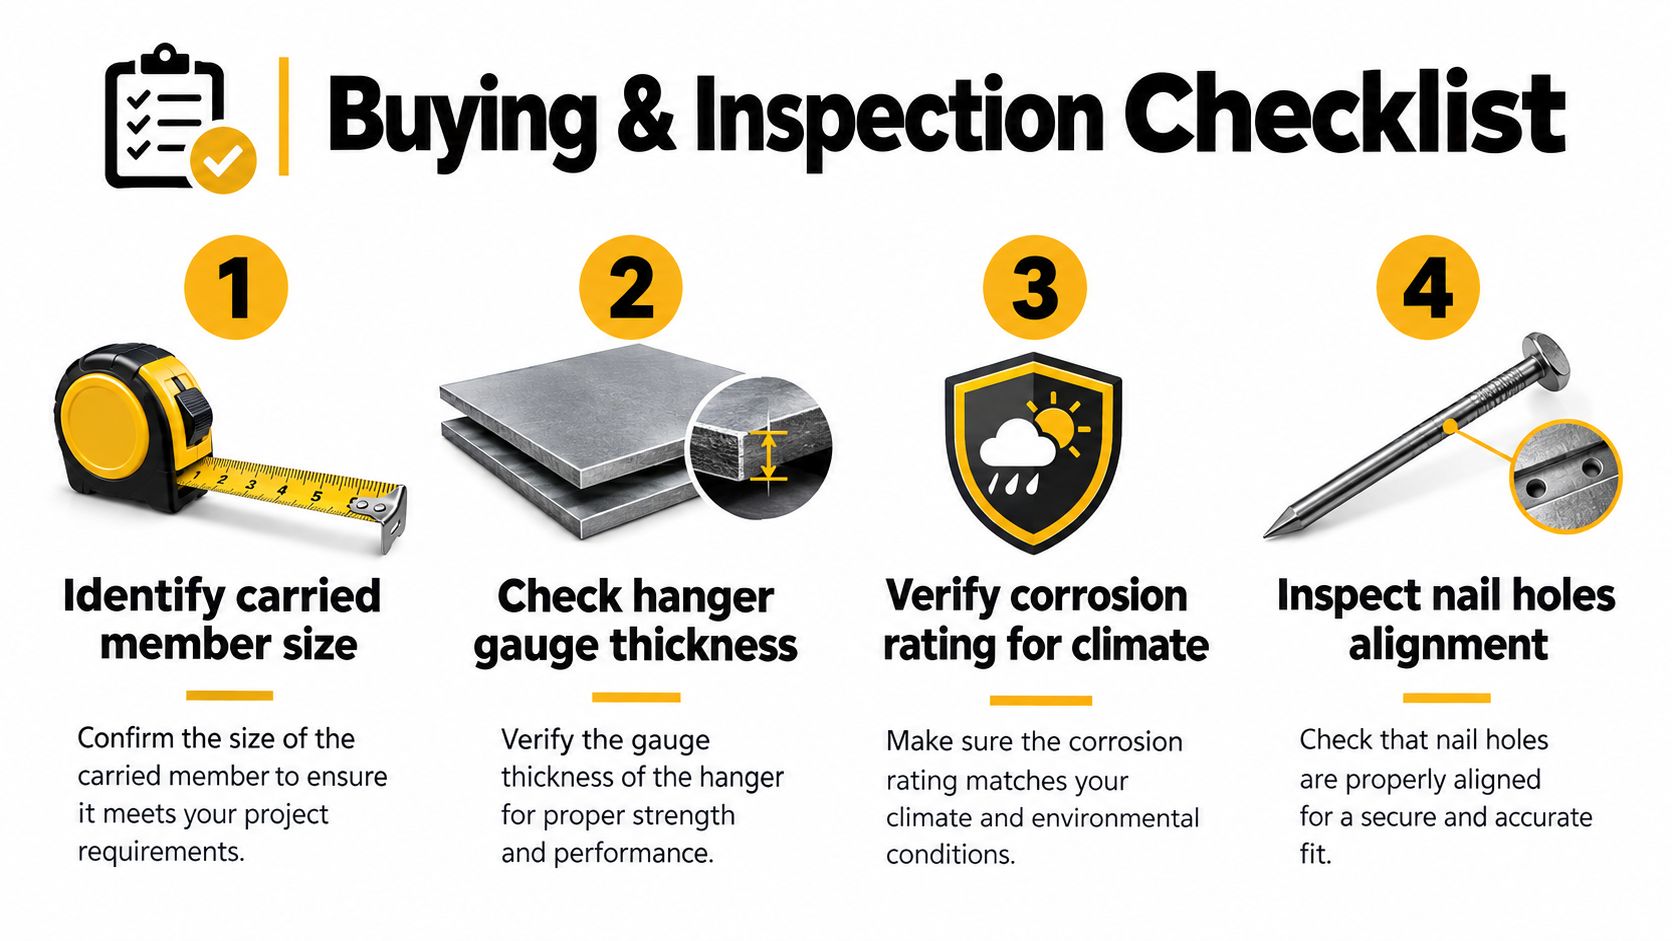
A Short Buying and Inspection Checklist
Buy the connector around the carried member, not around the empty space in the box. Identify whether you're supporting a stair stringer, landing joist, header, or trimmer, then match the hanger depth and shape to that member.
Use this order on site:
- Identify the member: Measure the actual stringer or joist depth and confirm whether it is solid-sawn lumber, an I-joist, or an engineered beam.
- Confirm the geometry: Decide whether the connection is square, skewed, sloped, concealed, or restricted by trim.
- Check the support: Verify bearing, carrying-member thickness, span, and any required beam or ledger support.
- Match the approval: Read the load table, evaluation report, fastener schedule, and corrosion requirements for the exact product.
- Plan the inspection: Keep the hanger model, installation instructions, and fastener packaging available until the framing is approved.
The finished connection should show a fully seated member, the required hanger depth, approved fasteners in the specified pattern, no field-bent flanges, and suitable lateral restraint. Check mid-span landing connections carefully, especially where a stringer or joist depends on a mechanical connector rather than direct bearing.
XTREME EDEALS INC. offers joist hangers and related deck hardware, including hanger sizes such as 2" x 6", 2" x 8", 4" x 8", and 4" x 10", along with fasteners and brackets for framing work. Visit XTREME EDEALS INC. to compare available stair and deck connectors, then confirm the selected product's load table, geometry, corrosion rating, and fastening schedule before installation.