

You pull the gate toward the latch, hear the bottom rail scrape across the paving, and give the handle another shove. The gate is no longer square, the latch misses, and winter has made every weakness in the frame more obvious. An anti sag gate kit can correct that problem, but only when the gate itself and the post are still structurally sound.
A cable and turnbuckle can pull a sound frame back into alignment. It can't repair rotten wood, a leaning post, a twisted frame, or hinges that have already bent under the load. The right decision starts with diagnosis, then moves to hardware selection, preparation, controlled installation, and restrained adjustment.
Diagnosing Your Gate and Choosing the Right Fix
A dragging latch corner usually points to a gate frame that has racked out of square, but that isn't the only possible cause. Loose or bent hinges, a shifting post, moisture-damaged timber, and an overloaded frame can produce similar symptoms. Before buying hardware, close the gate slowly and watch where the movement occurs.
If the hinge-side post remains plumb and stable while the latch corner drops, inspect the hinge plates, screws, and frame joints. Tightening sound hinge hardware may solve a minor problem. Replacing a bent hinge can also be more appropriate than adding cable tension to a frame that isn't the source of the movement.
A gate that moves with the post needs a different repair. Press the post near ground level and look for movement, a visible lean, or separation where it meets the surrounding surface. A cable brace won't permanently correct a post that is settling or a footing that has lost stability.
Look for damage before adding tension
Examine the gate rails, stiles, and fastener points for soft wood, splitting, crushed screw holes, and twisting. Composite gates need the same scrutiny, especially around hardware attachment points, because a bracket can only transfer load through material that can hold it.
Practical rule: Don't use an anti sag gate kit to hide a carpentry or foundation failure.
A kit is a sensible repair when the post is sound, the hinges still carry the gate properly, and the frame can be returned to square. Rebuild the frame when joints have opened, rails are distorted, or the material no longer holds fasteners. Replace or reinforce the hinges when they bind, bend, or allow vertical play after tightening.
A gate spring wheel, such as the hardware available from XTREME EDEALS INC.'s gate spring wheel collection, may help support a heavy swinging gate, but it isn't a substitute for correcting a moving post or a decayed frame. Treat support wheels, hinge repairs, and cable bracing as different solutions for different failure modes.
Selecting the Best Anti Sag Gate Kit for Your Fence
The simplest anti sag gate kit uses a diagonal steel cable, corner brackets, clamps, and a turnbuckle. That arrangement suits a gate that is intact but has sagged out of square. A telescoping or rigid gate frame system takes a more structural approach, replacing or reinforcing the frame so the gate resists racking instead of relying on repeated cable adjustment.
Canadian listings show kits intended for openings ranging from 24 inches to 8 feet, while another common fit range runs from 25 inches to 72 inches with no height restriction, as shown in the Canadian Onward anti-sag kit listing. Those ranges are selection references, not permission to ignore the actual gate geometry. Measure the diagonal, inspect the rails, and confirm that the brackets can land on solid material.
Match the design to the gate
| Gate Type | Recommended Kit Style | Key Hardware Requirement |
|---|---|---|
| Narrow wood walkway gate | Cable and turnbuckle kit | Sound rails, corner brackets, and wood pilot holes |
| Wider residential wood gate | Cable kit with robust brackets, or rigid frame system | Adequate diagonal capacity and secure rail attachment |
| Composite gate | Compatible cable kit or telescoping frame | Fasteners suited to the frame and manufacturer-approved attachment points |
| Large driveway gate | Rigid or telescoping frame system where the existing frame lacks stiffness | A frame designed for the opening, not just a tighter cable |
| New gate construction | Adjustable gate frame kit | A rigid frame matched to the infill material and gate dimensions |
Product-specific California retail listings identify common cable capacities of up to 90-inch diagonal bracing, or about 7.5 feet of diagonal support, which is a useful benchmark when comparing larger residential gates. The Canadian anti-sag kit selection at XTREME EDEALS INC. can be considered alongside rigid adjustable frame options when a cable alone won't provide enough structural support.
For Canadian exposure, choose zinc-finished or galvanized steel where the product specification supports it. Retail listings commonly emphasize corrosion-resistant finishes and rust protection, and that matters when wet seasons, freezing conditions, and thaw cycles repeatedly expose brackets, clamps, and cable ends to moisture. Black-plated hardware may suit appearance, but the finish and compatibility at every contact point deserve closer inspection than colour alone.
XTREME EDEALS INC. carries a Nuvo Iron Anti-Sag Gate Kit with a steel cable and turnbuckle system, as well as Nuvo Iron Adjustable Gate Frame Kits for rigid, anti-sag gate construction. These formats serve different jobs. Use cable stabilization for an existing, serviceable frame. Choose a rigid frame approach when you're building new or when the current frame has already lost too much stiffness.
Preparing the Gate and Gathering Essential Tools
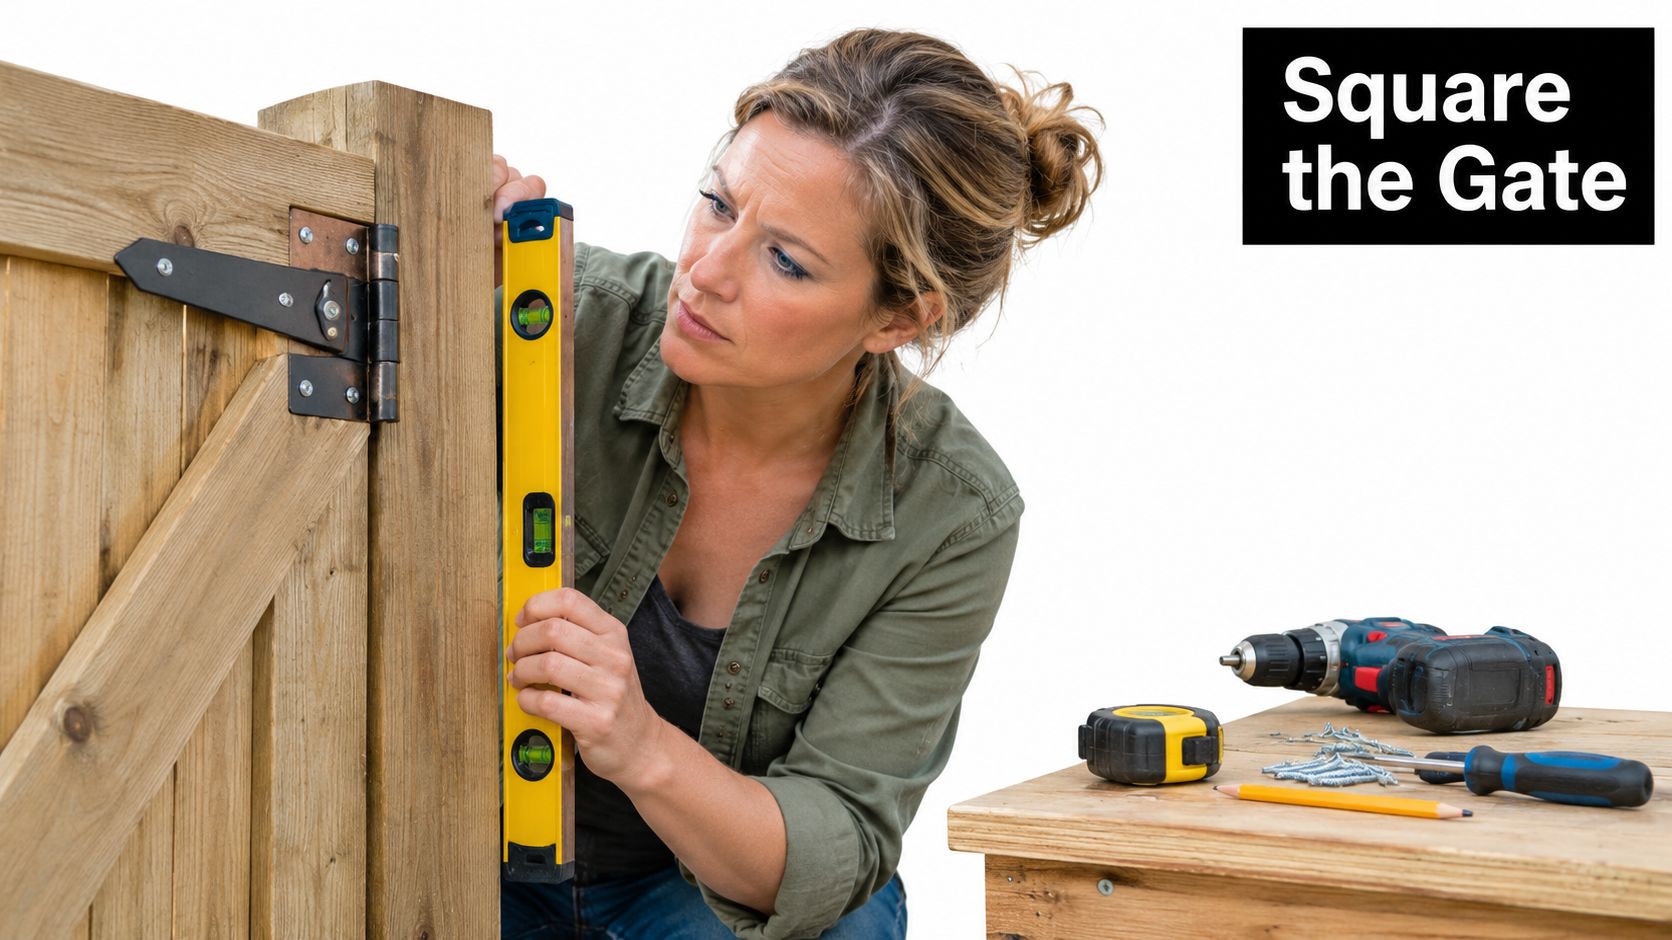
The installation goes smoothly when the gate is square before the first bracket is mounted. Open the gate, support the latch-side corner with a temporary shim or block, and adjust the support until the latch corner clears the opening and the frame sits square. The block carries the weight while you work, so don't ask the cable to perform the initial levelling.
Set up the work before drilling
Gather a drill, driver bits, a tape measure, pencil, adjustable wrench or socket set, and a spirit level. Check the kit contents before starting, including the cable, turnbuckle, hooks, corner brackets, and clamps. Missing one small fitting can lead to an improvised connection that won't carry tension reliably.
For wood, expert installation guidance recommends pilot holes of about 2.5 mm to reduce splitting, as noted in the Home Depot Canada anti-sag gate kit guidance. Use self-tapping fasteners or suitable rivets for metal gates, and confirm that composite material can accept the chosen fastener without crushing or cracking.
Independent installation guidance indicates that a typical repair kit can take about 15 to 30 minutes when the gate is already square and the post hardware is sound. That time depends on preparation, correct bracket placement, pre-drilled holes, and having the turnbuckle fully extended before attachment. The job takes longer when hinges, posts, or frame joints also need repair.
Use XTREME EDEALS INC.'s fasteners and fittings to match the mounting hardware to the gate material. Don't substitute a convenient screw if the included fastener is intended to carry a cable bracket under tension.
Step-by-Step Installation Process
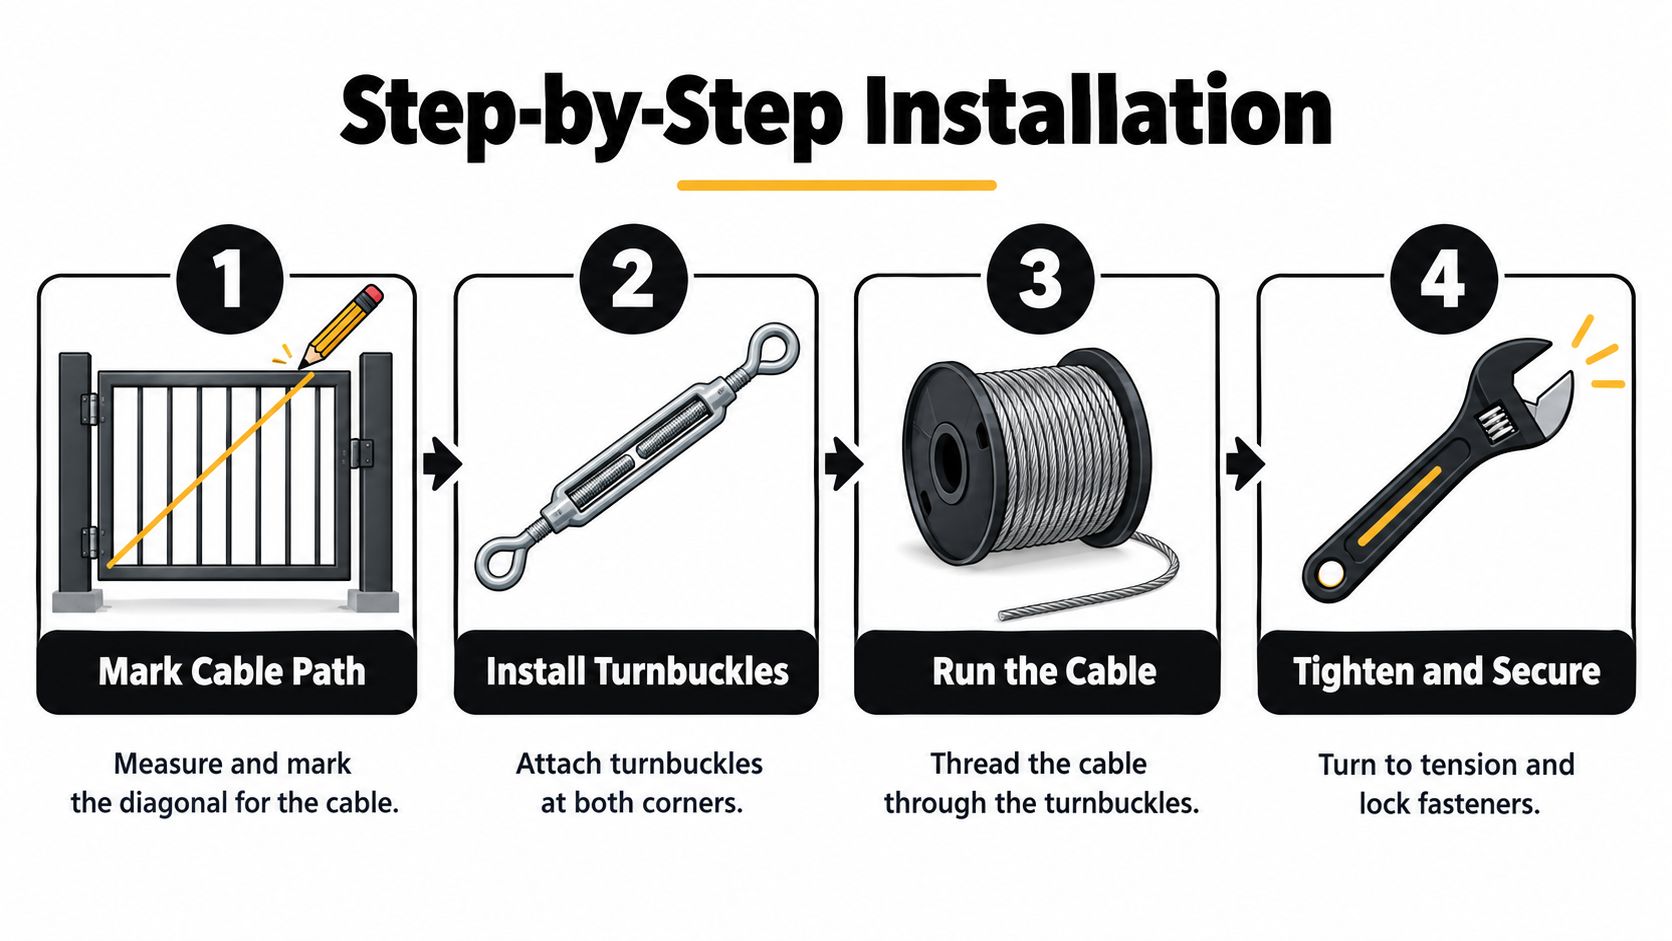
A diagonal cable works only when it pulls in the correcting direction. For a standard residential gate, the cable must run from the top hinge-side corner to the bottom latch-side corner. Reversing that path increases the sag instead of lifting the dropped corner.
Begin with the gate supported and square. Mark the bracket positions on solid portions of the frame, not on thin infill boards or split timber. The upper hinge-side bracket carries an important part of the load, so secure it first and keep the bracket aligned with the frame.
Follow the cable path carefully
Mark the diagonal. Confirm the route from the top hinge-side corner down to the bottom latch-side corner. Keep the cable clear of the latch, hinges, and the gate opening.
Attach the brackets. Mount the upper hinge-side bracket first, then install the lower latch-side bracket. Use the correct pilot holes in wood and suitable fasteners for metal or composite construction.
Extend the turnbuckle. Open the turnbuckle to its maximum length before connecting it. This leaves adjustment available after the cable is installed and prevents starting with a cable that is already too short.
Run the cable straight and taut. Thread the cable through the hooks, brackets, or turnbuckle arrangement without crossing or looping it around an unintended edge. Remove obvious slack by hand, but don't apply final tension yet.
Secure the clamps loosely at first. Keep enough flexibility to make small alignment corrections. The cable should follow the marked diagonal rather than bowing away from the frame.
Tension in small increments. Turn the turnbuckle gradually, checking the gate after each adjustment. The objective is to lift the latch corner until it clears the opening and swings freely, not to force the frame into a new shape.
This sequence transfers the gate's load toward the hinge side. A rushed installation usually fails because the installer tightens the cable before squaring the gate, mounts the bracket off the strongest part of the frame, or follows the wrong diagonal.
For a visual walkthrough of the hardware sequence, use this anti-sag gate installation video.
Adjusting Tension and Long-Term Maintenance
Tension is where a workable repair can become a damaged gate. Once the cable is attached, turn thebuckle gradually and watch the latch corner, the hinges, and the latch alignment together. Stop when the corner rises enough to clear the opening and the gate swings without rubbing.
The recommended final lift is roughly 1/8 inch at the latch corner, based on the anti-sag cable installation instructions. That small correction is deliberate. More tension can distort a wood frame, bind the hinges, or pull the latch out of line.
Make the final adjustment in stages
After each quarter-turn, operate the gate through its full swing. Check that the latch enters cleanly, the bottom edge doesn't scrape, and the frame hasn't developed a new twist. If the gate becomes harder to move, back off rather than assuming more tension will solve the problem.
Only re-tighten the cable clamps after the gate is level and the cable has settled into its final path. Tightening clamps too early can lock in slack, a crooked bracket position, or a cable route that doesn't sit directly on the intended diagonal.
Canadian weather makes follow-up checks worthwhile. Wood changes with moisture and temperature, and freeze-thaw exposure can reveal movement at hinges, posts, and fasteners. Inspect the cable, clamps, bracket screws, and turnbuckle at seasonal changes, especially after winter. Recheck swing clearance before making any adjustment, and use small corrections rather than resetting the entire system without a diagnosis.
Look for rust, cable fraying, loose clamps, opened screw holes, and fresh rubbing marks along the gate bottom. Corrosion-resistant components help, but no finish compensates for a clamp that has loosened or a bracket mounted into deteriorated wood.
Troubleshooting Common Gate Sag Issues
A tight cable doesn't prove that the repair is correct. If the gate still drags, first check the cable direction, then confirm that both brackets are attached to sound frame members. A cable routed away from the true diagonal or installed with slack can leave the gate crooked even when the turnbuckle feels tight.
Find the actual failure
- Misaligned brackets: A bracket mounted off the intended corner changes the load path. Move it only after supporting and re-squaring the gate.
- Split wood or weak pilot holes: Remove the fastener and inspect the timber. A larger or different fastening method may be needed, but rotten wood requires frame repair rather than another screw.
- Slack cable routing: Release enough tension to correct the route, make the cable straight and taut, then tension gradually.
- Latch misalignment: Back off the turnbuckle if the latch has shifted. Excessive tension may be pulling the frame or hinges out of position.
- Moving post: If the post leans or gives under pressure, stop adjusting the cable. Stabilize or replace the post before reinstalling gate hardware.
Overtightening is not structural reinforcement. It can turn a manageable sag into a warped frame with binding hinges.
If the gate is level but the clamps are loose, secure them only after the final position is confirmed. If the frame twists back as soon as the temporary support is removed, the kit is exposing a deeper frame problem. Rebuild the frame, replace failing hinges, or move to a rigid gate frame system instead of applying more turnbuckle force.
XTREME EDEALS INC. offers Nuvo Iron anti-sag cable kits, adjustable gate frame kits, brackets, fasteners, and related fencing hardware for DIY and trade projects. Visit XTREME EDEALS INC. to compare the hardware format that matches your gate material, width, post condition, and Canadian weather exposure before you start drilling.