
A gate usually starts acting up at the worst time. You've finished the fence, the hinges looked stout, the latch lined up on day one, and then the free end starts dropping. Now it scrapes the drive, digs into gravel, or needs a shoulder shove every time someone opens it.
That's the point where many people try the wrong fix first. They tighten hinges, shim posts, or plane the bottom edge. Sometimes that buys a little time. It rarely provides a lasting solution if the gate needs support at the swinging end. A Gate Spring Wheel is often the hardware that turns a dragging gate into one that rolls properly and stops punishing the hinges every time it moves.
The End of the Sagging Scraping Gate
If your gate drags, you're usually dealing with one of three jobsite realities. The gate is heavier than the hinge side can comfortably carry on its own. The opening sits over ground that isn't consistently level. Or the surface changes through the year enough that a gate which cleared nicely in summer starts rubbing later.
A spring wheel solves that in a way a rigid wheel can't. Instead of forcing the gate to follow every dip and hump, the spring lets the wheel move with the surface while still supporting the gate. That matters because the problem isn't only the scrape at the bottom. Every rough opening cycle adds stress higher up at the hinges, fasteners, and latch alignment.
Practical rule: If the latch side is dropping and the ground isn't perfectly consistent, support the gate with a spring-loaded wheel instead of trying to tune the hinges forever.
For many installations, the wheel becomes part of the gate system rather than an add-on. It helps carry the swinging end, keeps the gate from digging in, and reduces the rough jolts that make a gate feel cheap even when the frame is solid. If you're also checking whether the hinge side is doing its share of the work, this guide on proper gate hinge installation is worth reviewing before you mount any support hardware.
A good spring wheel isn't a cosmetic accessory. It's one of the simplest long-term fixes for a gate that already sags, and one of the smartest preventative parts for a gate that hasn't failed yet.
Understanding Gate Spring Wheel Mechanics
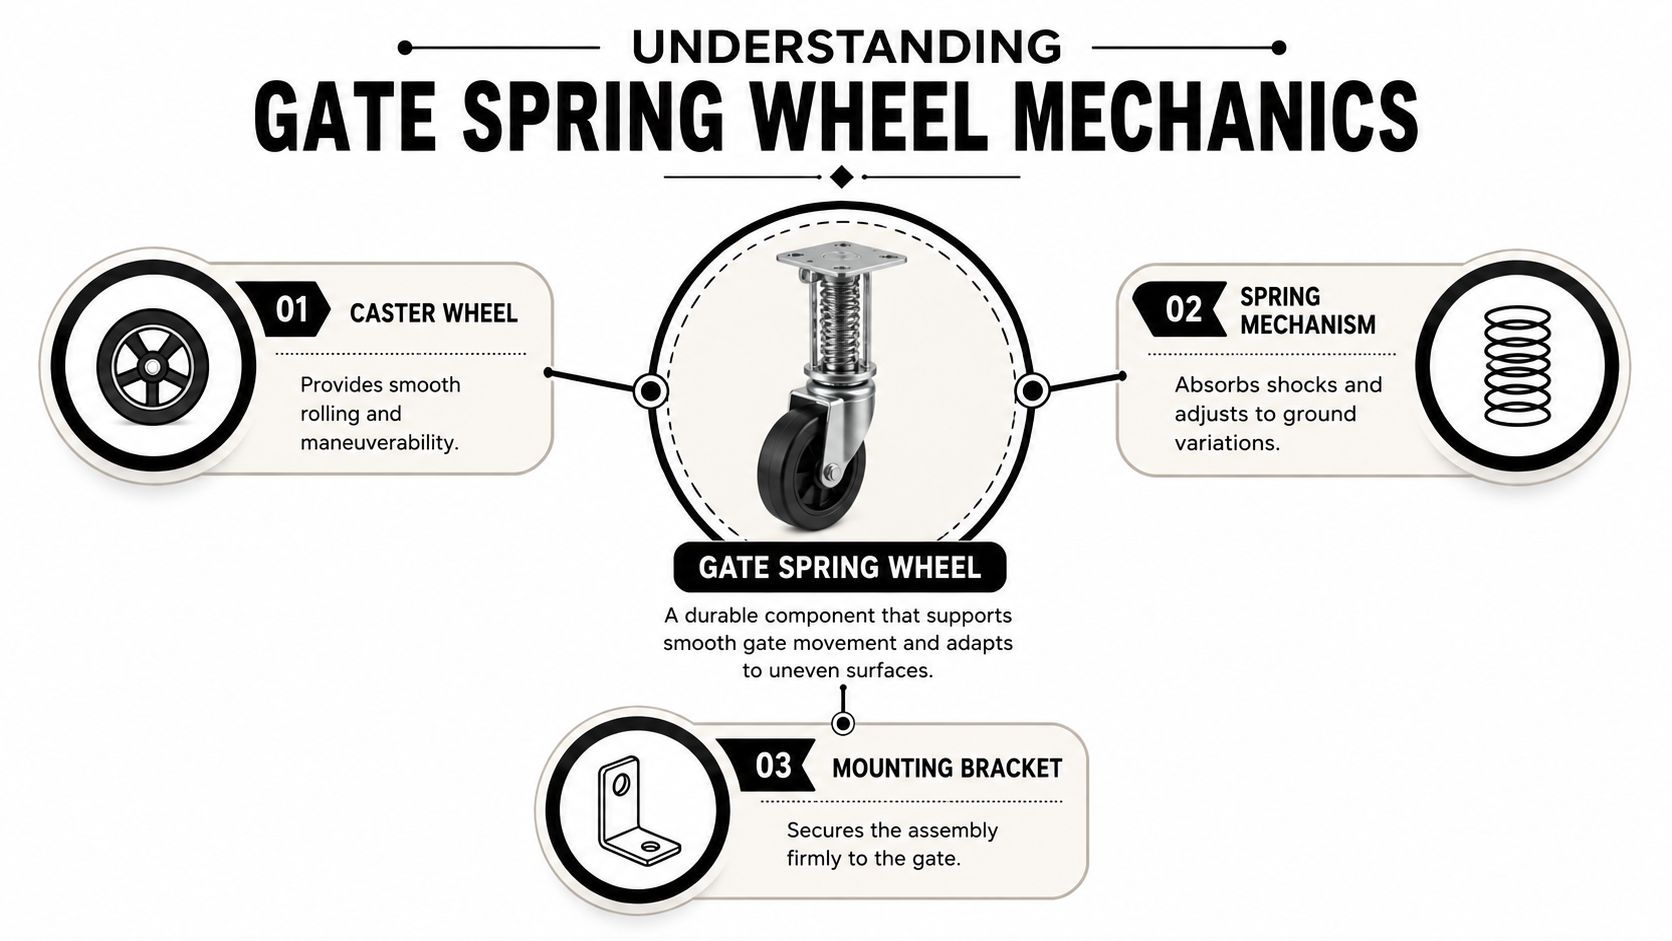
The term Gate Spring Wheel is commonly used, especially in retail conversations. In technical terms, though, the more accurate names are spring-loaded gate wheel or spring gate caster, as explained in this overview of spring gate casters. This distinction is important because it clarifies the hardware's function. It's a caster system with a spring built in, not just a small wheel bolted under a gate.
The three parts that do the work
A proper unit has three working pieces:
- Caster wheel. This is the rolling contact point. It takes the gate load at the free end and lets the gate move over concrete, packed soil, pavers, or gravel.
- Spring mechanism. This is the part that separates a useful support wheel from a frustrating one. It compresses and expands so the gate can stay supported as the ground changes under it.
- Mounting bracket. This fixes the assembly to the gate frame and transfers load from the gate into the wheel assembly.
The easiest way to think about it is a vehicle suspension. The wheel touches the ground. The spring absorbs movement. The bracket ties everything into the structure. If any one of those is weak, the whole assembly feels sloppy.
Why the spring matters more than the wheel
A plain wheel can support weight on a flat slab. It struggles once the surface stops behaving. The spring-loaded version stays in contact with the ground while allowing the gate to travel over dips, rises, and slight twists in grade. That's why contractors use them where a gate crosses gravel, rough asphalt, or a driveway apron with a crown.
A rigid wheel fights the ground. A spring-loaded wheel follows it.
That difference is what keeps the gate from bouncing, binding, or lifting its load back onto the hinges every few feet. On a real gate, the free end doesn't move through space in a perfect line. It swings in an arc, and the ground below it rarely matches that arc cleanly.
What the bracket position changes
The bracket isn't just a mounting point. Its location affects how force is applied and travel. Mount it too far inboard and you lose support where the gate needs it most. Mount it too low without the right adjustment and the wheel can hold too much weight or force the gate upward. Mount it loosely and the assembly will rack under load.
That's why the best installs feel boring in use. The gate opens smoothly, the wheel stays planted, and nothing snaps, chatters, or shudders.
Why Your Gate Needs a Spring Loaded Wheel
A gate can look fine while the hardware is already getting overworked. That's especially common on longer wooden gates, steel tube frames with cladding, and any opening where the latch side crosses rough ground. By the time the scrape becomes obvious, the hinges have often been carrying more punishment than they should.
It carries the end that always wants to drop
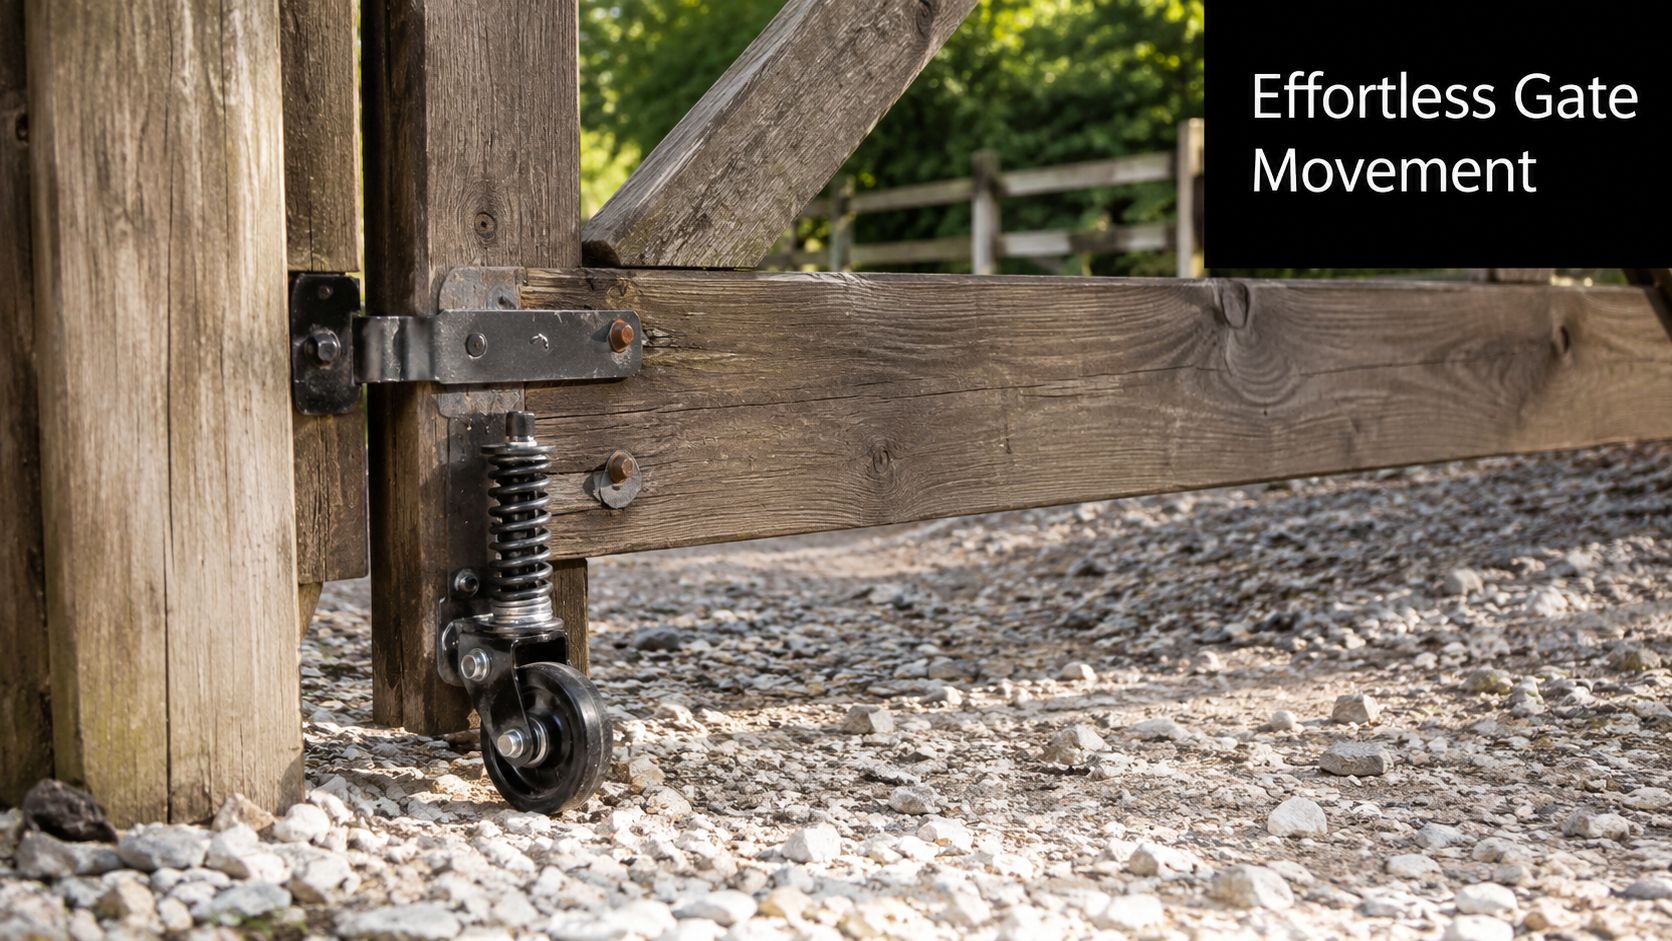
Gravity always works on the free end of the gate. The heavier the build, the more that load shows up as sag over time. A spring-loaded wheel takes a share of that burden and supports the end of the gate where the drop begins. That changes the feel immediately. Instead of dragging, the gate rolls.
It protects hinges and the rest of the frame
The bigger advantage is what you don't see at first. The spring mechanism absorbs impact and vibration during opening and closing, which helps prevent hinge damage and supports longer life for both the caster and the gate structure, as noted in this explanation of spring-loaded gate wheel function.
That's a practical trade-off worth understanding. A gate without a support wheel asks the hinges and post to manage everything. A gate with the wrong wheel may still bang and chatter. A gate with the right spring-loaded wheel shares the load and softens the shocks that loosen hardware over time.
It handles imperfect ground better than a fixed support
If the gate crosses a smooth, flat slab and never sees seasonal movement, almost any support can seem acceptable at first. Most sites aren't that tidy. Gravel shifts. Driveways settle. Lawn edges swell and dry back. A spring wheel adapts without forcing constant readjustment.
For DIY work, this is usually the difference between a gate that feels patched together and one that feels properly built. For contractors, it's the difference between a callback and a gate that keeps working after the handover.
How to Select the Perfect Gate Wheel
Buying by appearance is where most mistakes happen. The right wheel depends on load, surface, and how much vertical variation the wheel has to deal with. If you miss one of those, the gate may still move, but it won't move well for long.
A common heavy-duty benchmark is a solid-wheel assembly with a steel frame and a 4-inch swivel caster rated for 400 lb. static load capacity, with the ability to compensate for vertical surface deviation up to 1.5 inches without jamming, as described in this 4-inch gate spring roller specification. That doesn't mean every gate needs that exact configuration. It gives you a useful reference point for what a serious assembly looks like.
If you're comparing brackets, hinges, casters, and related parts in one place, the wider category of fence and gate hardware is where you want to cross-check compatibility rather than treating the wheel as a standalone purchase.
Start with the gate, not the catalogue
Before choosing a wheel, look at the gate itself.
- Frame style. A welded steel frame behaves differently from a wood-framed gate with boards that add weight unevenly.
- Surface condition. Concrete, gravel, patio stone, and turf all ask different things from the wheel.
- Movement path. A gate that crosses a crowned driveway needs more forgiveness than one swinging over a flat side yard path.
A support wheel should match actual conditions, not the best-case conditions on install day.
Match wheel type to the surface
The wheel material affects how the gate feels in daily use. Here's the practical comparison contractors usually care about:
| Gate Wheel Type Comparison | |||
|---|---|---|---|
| Wheel Material | Best For | Pros | Cons |
| Solid rubber or solid wheel | Hard surfaces, mixed outdoor use, heavier gates | Durable, low maintenance, stable feel | Less forgiving on very loose or soft ground |
| Pneumatic style | Softer ground, rougher terrain | Softer ride over bumps and looser surfaces | More maintenance, more vulnerable to damage |
| Hard plastic or light-duty caster | Very light gates on smooth surfaces | Inexpensive, easy rolling at first | Poor choice for heavier gates or rough paths |
For most fence gates, solid-wheel assemblies are the safer bet. They're simpler, tougher, and better suited to hard outdoor use. Pneumatic wheels can work well on softer surfaces, but they introduce more upkeep.
Don't ignore spring travel
A lot of buyers focus only on wheel diameter. The spring travel is often the deciding feature. If your ground moves more than the spring can accommodate, the wheel either unloads and stops helping or bottoms out and starts transferring shock back into the gate.
Buyer check: Look for enough vertical movement in the spring to match the bumps, slope changes, and seasonal rise you already know the gate will face.
This matters even more in areas with active soil or surfaces that heave and settle through the year. A wheel that looks sturdy can still be the wrong choice if the spring range is too short for the site.
Build quality still matters
Look for a stout bracket, clean swivel action, and hardware that doesn't feel undersized for the frame. If the assembly flexes in your hand, it won't improve once it's carrying a gate. In the same way that many installers favour dependable hinge and decorative metal components from lines such as Decorex Hardware, it makes sense to choose a gate wheel with the same bias toward durable construction instead of bargain-bin light duty parts.
The best wheel isn't the fanciest one. It's the one that matches the gate, the ground, and the way the opening gets used every day.
Installing Your Gate Spring Wheel Correctly
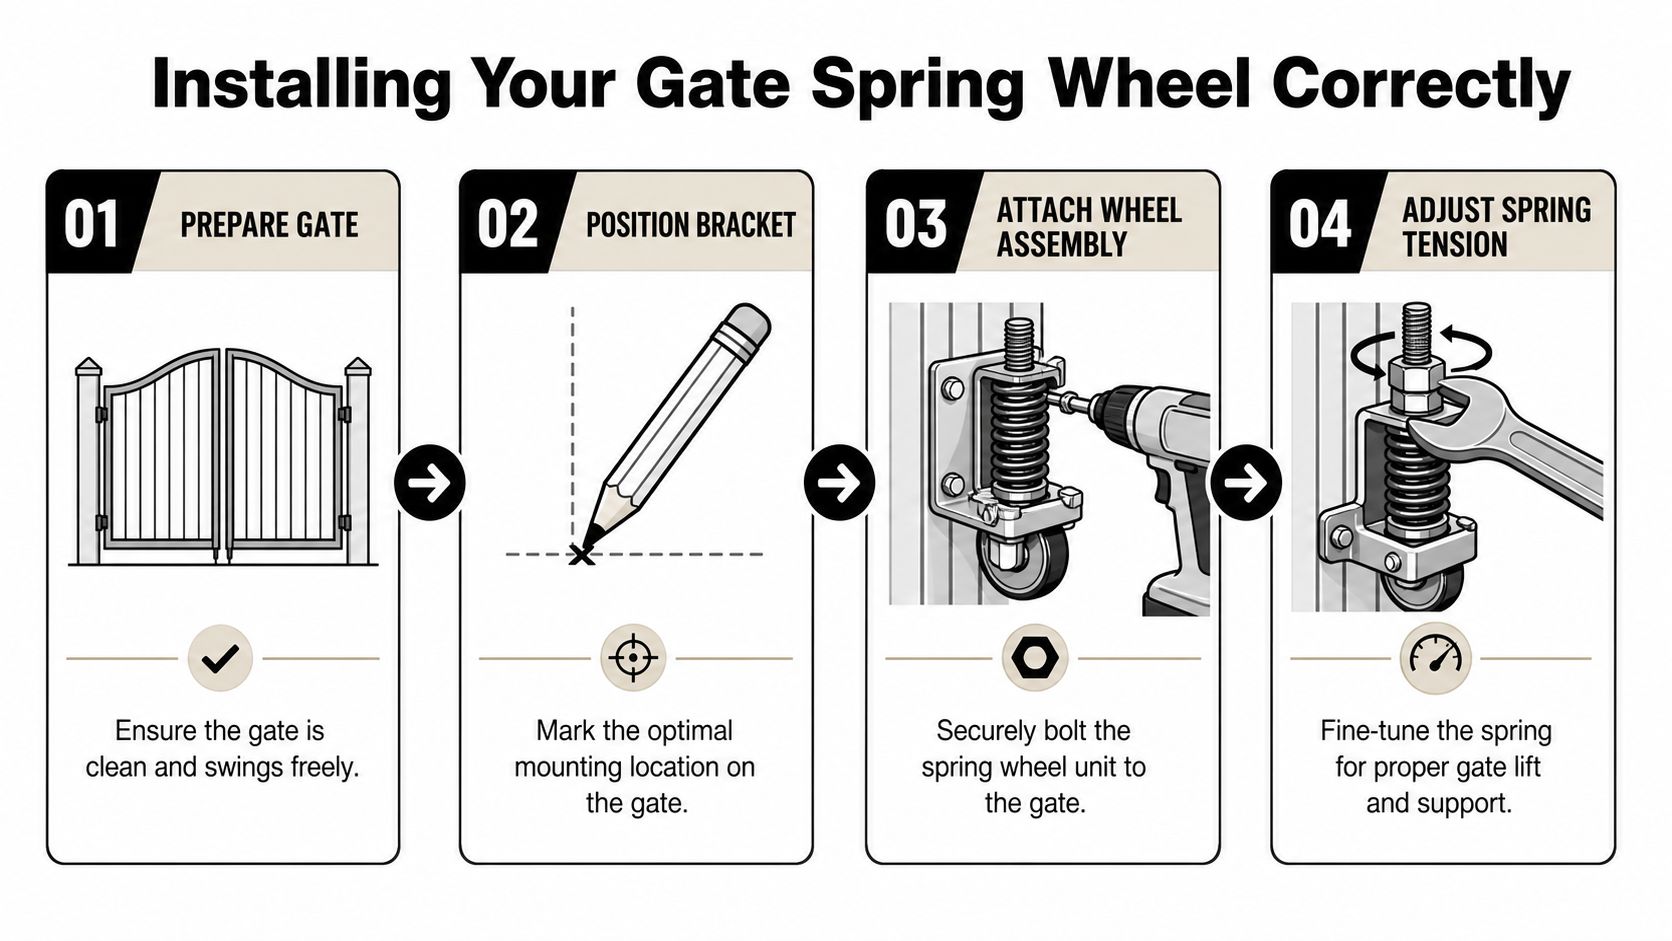
A good wheel installed badly will still behave badly. Most failures come from position, height, or preload. The gate needs to swing freely first. If the hinges are already binding or the post is out, the wheel won't fix that by itself.
Start by opening and closing the gate by hand and watching the path of the latch end. You want the wheel near the free end where it can support the gate, but not so close to the outer edge that the bracket or fasteners end up in weak material.
Position the bracket with purpose
The mounting point should land on solid frame material. On wood gates, that usually means a proper rail or reinforced corner area, not a fence board. On steel gates, use the structural member, not sheet infill. On vinyl gates, reinforcement matters even more because the skin alone isn't enough.
Three practical checks help before drilling:
- Gate swing clearance. Confirm the wheel won't hit a post base, threshold edge, or raised apron during the swing.
- Contact point. The wheel should sit where it will roll on the primary surface, not hang over an edge.
- Fastener bite. Make sure bolts or screws are going into material with enough strength to resist movement.
Set the spring with a little compression
The spring needs some preload. If the wheel only kisses the ground with no compression, it won't support the gate consistently. If you over-compress it, the wheel can lift the latch side too aggressively and throw off alignment.
Set the wheel so the spring is already working slightly when the gate is closed. That gives it room to move up and down instead of starting from neutral.
That small preload is what lets the assembly react as the gate travels. It's one of the details that separates a proper installation from one that chatters over every small change in grade.
A visual walkthrough helps if you want to compare bracket placement and adjustment in real time:
Tighten, test, then fine-tune
Once mounted, tighten everything securely and cycle the gate several times. Watch the wheel, not just the gate. You want smooth rolling, visible spring movement, and no twisting at the bracket.
If something feels off, check these points:
- Wheel skipping means the spring may not have enough preload, or the wheel is losing ground contact.
- Gate lifted too high usually means you've mounted too low or compressed the spring too much.
- Bracket flex means the mounting area or hardware isn't stout enough for the load.
Make small adjustments. One change at a time is faster than chasing three variables at once.
Maintenance and Troubleshooting Tips
A spring wheel doesn't need much pampering, but it does need occasional attention. Dirt packs around the axle. Swivels dry out. Fasteners loosen slightly after repeated cycles. If you ignore it until the gate starts squeaking or dragging again, small fixes turn into hardware wear.
What to check through the year
A simple routine keeps most assemblies working properly:
- Clean the wheel path. Stones, packed mud, and leaf debris can make a good wheel act defective.
- Lubricate moving points. The swivel and axle benefit from light lubrication when they start sounding dry. For general roller maintenance habits, Danny's Garage Door Repair recommends a light, targeted approach rather than coating everything heavily.
- Retighten hardware. Check bracket bolts and mounting screws before a little movement becomes elongated holes or a twisted bracket.
- Watch latch alignment. If the gate suddenly needs lifting to latch, inspect the wheel before blaming the hinge side.
When the spring feels wrong
Sometimes the wheel rolls fine but the support feels off. That usually shows up in one of two ways.
If the spring feels too stiff, the gate may ride awkwardly or lift at the latch end instead of following the ground. If it feels too weak, the wheel may stay in contact but not carry enough of the gate to matter. Either way, the answer is usually adjustment first, replacement second.
One issue many guides miss is seasonal ground movement. Existing content rarely connects spring compression limits with the fact that some sites can rise by 1–2 inches during wet seasons, leaving people with standard springs that may no longer accommodate the surface change, as highlighted in this discussion of spring compression limits and ground rise.
Practical fixes before you replace parts
Use a short checklist when the gate starts acting up again:
- If the wheel loses contact. Lower the assembly slightly or review whether the spring travel is enough for the current ground conditions.
- If the gate scrapes only in one season. Check the ground first. The wheel may be doing all it can while the surface has changed more than the spring can absorb.
- If noise develops. Clean, lubricate, and inspect the swivel. Noise often starts with friction, not failure.
- If the bracket shifts. Remove it and reinforce the mounting area rather than tightening the same tired fasteners again.
For broader hardware problem-solving beyond the wheel itself, these gate and hardware troubleshooting guides are a useful next step.
If you need dependable gate hardware, post caps, fasteners, and fence accessories for a repair or a fresh build, XTREME EDEALS INC. is a solid place to source the parts. Their catalogue makes it easier to match practical hardware to real outdoor jobs, whether you're a DIY homeowner fixing one sagging gate or a contractor ordering for multiple installations.