
You've got the boards stacked, the drill charged and a half-empty screw box left from another project. The screws look long enough, but you can't remember whether they're suitable for treated lumber or just indoor repairs. Buying a bigger mixed box seems convenient, until you're standing over a joist hanger wondering which compartment is safe to use.
A useful wood screws assortment starts with the connections you're making and the conditions they'll face. Piece count comes later. Organise by application and corrosion exposure, and you'll spend less time guessing without letting a convenient screw become an unsafe substitute.
What a Wood Screws Assortment Includes
Start with the box markings: gauge, length and drive designation. Gauge describes diameter, length helps you establish penetration, and the drive tells you which bit fits. Head shape and coating deserve equal attention, even when they're printed less prominently.
Canadian selection also has a standards boundary. As Construction Canada's fastening guidance explains, Canadian wood-screw design provisions cover gauges 6, 8, 10 and 12 when screws comply with ASME B18.6.1, while larger screws fall under CSA O86 lag-screw provisions; the guidance also describes conventional screw threads as extending approximately two-thirds of the total length.
That threaded proportion isn't a promise of usable embedment. The thickness of the first board, any gap and the actual thread geometry determine how much thread engages the receiving member. Fully threaded and proprietary screws also need their own product information.
Gauge, typical length and common use
These are practical shopping ranges, not connection approvals. The Canadian-provision flag identifies the conventional gauges described in the guidance above.
| Gauge | Typical length | Common use |
|---|---|---|
| #6, covered gauge | 1 in to 1-5/8 in | Cabinets, light trim and small fixtures |
| #8, covered gauge | 1-1/4 in to 2-1/2 in | Furniture, shelving and general carpentry |
| #9, outside the listed conventional gauges | 2 in to 3 in | Multi-purpose framing and sheathing, only where the design permits the particular screw |
| #10, covered gauge | 2-1/2 in to 3 in | Deck boards, fence rails and framing where specified |
| #12, covered gauge | 3 in to 4 in | Heavy wood-to-wood connections within the Canadian wood-screw range |
Choose the head and drive deliberately
- Flat head: Countersinks into the surface for a flush finish.
- Bugle head: Common in sheet-to-frame and decking applications, but the shape alone doesn't establish suitability.
- Pan head: Useful for fixtures or washer-bearing arrangements where the hardware accepts it.
- Trim head: Leaves a smaller visible profile in finish work.
For drives, Phillips works for general repairs, square drive offers positive engagement with less tendency to cam out, and Torx is a practical choice for sustained decking work. Fit matters more than preference: a worn or undersized bit damages even a good screw recess.
For a general repair kit, start with the covered gauges in lengths suited to your actual materials, commonly spanning 1-1/4 in to 3 in as a shopping selection. Include the matching driver bits and keep specialised structural fasteners separate.
Matching Screws to Decking, Fencing, Framing and Trim
The application picks the screw, not the nearest compartment. A screw that holds a deck board down isn't automatically suitable for the framing supporting that board.
The Carleton Place deck guideline requires screws substituted for nails to provide equivalent structural capacity and be at least the required nail's length and diameter, and excludes non-structural general construction screws except where specifically permitted.
Screw choice by application
| Application | Typical screw | Length rule | Structural or general |
|---|---|---|---|
| Decking boards | #10 deck screw | Follow the evaluated decking system and required embedment | General decking attachment, not structural framing approval |
| Fence rails and pickets | #8 or #10 exterior-rated screw | Pass through the attached piece and achieve the specified receiving-member penetration | General unless the connection design requires otherwise |
| Framing and sheathing | #10 framing screw where permitted | Follow the fastening schedule and receiving-member requirements | General only for non-structural work; approved structural fastening where required |
| Trim and finish carpentry | #6 or #8 trim screw | Select for trim thickness and sound backing without penetrating concealed services | General |
| Joist hangers | High-shear hanger nails or approved structural screws | Set by the hanger manufacturer | Structural |
| Ledger attachment | 1/2 in lag screws or approved structural screws where specified | Set by the deck design and building code | Structural |
For a specific decking reference, the CCMC decking evaluation specifies at least two No. 10 fasteners, 63.5 mm long, per support for its evaluated application. That's not a universal fastening schedule for every decking product.
Keep connector fasteners out of the general bin
Ordinary deck screws aren't substitutes for approved hanger fasteners. Hangers need the specified fastener geometry and shear performance, while ledger attachments require the fastening arrangement shown in the deck design. Our guide to deck screws versus construction screws helps distinguish those product categories before you buy.
Trim introduces a different trade-off: appearance matters, but backing and moisture detailing still govern attachment. For visual planning, Superior Home Improvement's exterior trim ideas for Utah homes offers useful examples of trim profiles and combinations, rather than Canadian fastening guidance.
A bigger assortment becomes a liability when it makes the wrong substitution easier.
Before opening a compartment, identify the connection, the substrate and the load. If any answer is unclear, don't select by length alone.
Choosing Coatings for Treated Lumber and Coastal Exposure
Corrosion resistance is a selection rule, not a marketing word. A brown finish may match your decking beautifully without establishing compatibility with its preservative treatment.
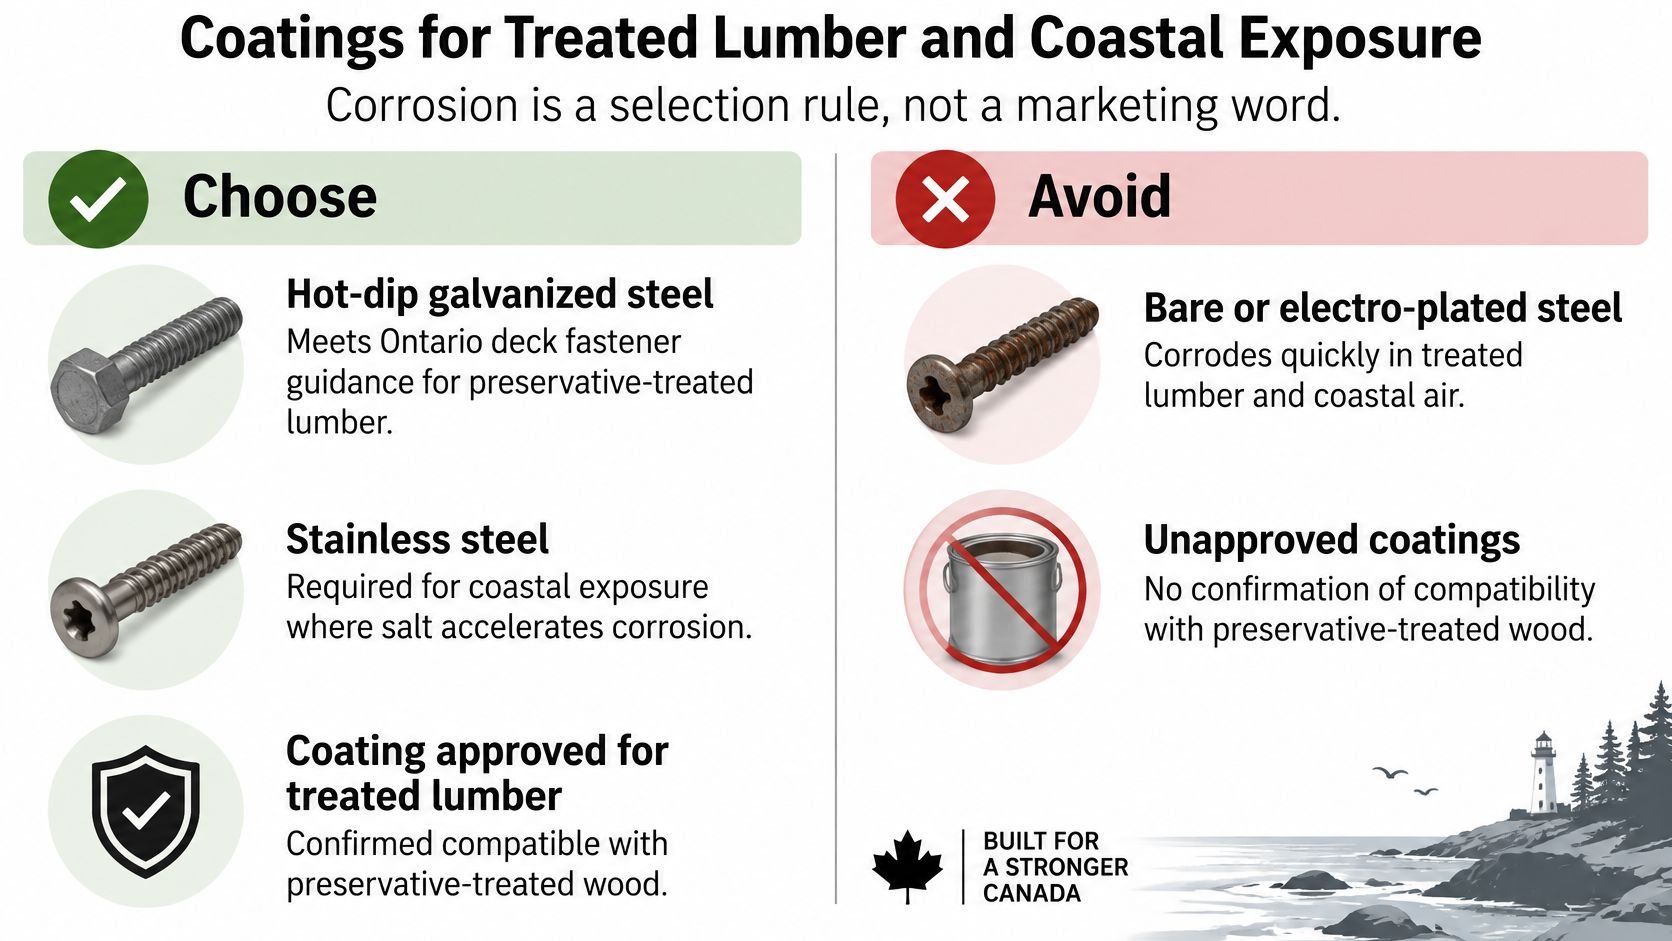
The Collingwood residential deck construction guide identifies hot-dip galvanized, stainless-steel or approved treated-lumber-compatible fasteners, with ASTM A153 galvanizing for fasteners and ASTM A653 Class G185 coating for relevant connectors. Fastener coatings and connector coatings are different specifications, so don't assume a galvanized screw makes every bracket arrangement compatible.
Use the exposure categories below to narrow the choice, then verify the actual product approval.
Screw finish by exposure
| Finish | Best exposure | Avoid in |
|---|---|---|
| Zinc-plated | Dry interior framing and cabinets | Exterior decks, treated lumber and wet ground |
| Ordinary surface-coated, including ceramic or polymer | Non-treated exterior work where the manufacturer states that use | Preservative-treated wood unless specifically rated |
| Hot-dip galvanized, ASTM A153 | Compatible pressure-treated decks, fences and above-ground posts | Coastal salt spray without checking whether an upgrade is required |
| Stainless steel, including 304 or 316 grades | Severe exposure, with the grade selected for the actual salt and moisture conditions | Dry interior work where the premium provides little practical benefit |
Pay for compatibility, not colour
A CCMC structural-fastener evaluation specifically states that its surface-coated screws weren't evaluated for applications requiring corrosion resistance and cannot be used in preservative-treated wood. That restriction applies to the evaluated products, not every coated screw on the market.
Wet ground, persistent moisture and salt exposure justify closer scrutiny than sheltered, above-ground work. Ground-contact posts may also have a different treatment specification from deck boards, so copying the decking screw choice into the post connection isn't enough.
Stainless steel can justify its premium where replacement would involve dismantling finished work or where salt exposure makes corrosion especially concerning. Properly specified hot-dip galvanized or approved coated fasteners may be the more economical choice for ordinary treated-lumber projects. Our galvanized versus stainless steel comparison explains that purchasing trade-off.
Also check compatibility between screws, washers and connectors. Don't mix metals casually, and don't treat stainless steel as permission to ignore the connector manufacturer's requirements. In snow-prone and freeze-thaw conditions, use the decking manufacturer's fastener specification rather than relying on an outdoor label.
Sizing Quantities and Organizing Storage
Count connections before choosing pack sizes. For decking, count the boards crossing each support and apply the fastening schedule for that decking system. For fences, count rail-to-post attachments separately from picket-to-rail attachments because they may require different screws.
Build a compartment worksheet
- List the application: Separate deck boards, fence pickets, rails, trim and structural connections.
- Count fastening locations: Use the approved pattern for each connection, including joints and board ends.
- Total matching specifications: Combine quantities only when gauge, length, coating and product approval match.
- Add a handling allowance: Allow for dropped screws, damaged recesses and test installations without buying an unrelated mixed assortment.
For a hypothetical small fastening area, suppose 10 boards cross 4 supports, with 2 screws at each crossing: the calculation is 10 × 4 × 2 = 80 screws. If you choose a 10% handling allowance, that becomes 88 screws, so a 100-piece box would cover that illustrative count. This is quantity arithmetic, not a recommendation for deck dimensions or support spacing.
Use our deck-board screw-spacing guide when planning the fastening layout, alongside the decking manufacturer's instructions.
Store by identity, not appearance
Keep screws dry, closed and off concrete floors. Preserve the original packaging or transfer its identification to the storage bin before you pour anything out.
Sort by gauge, then length, then coating, with an additional separation for structural products. Never combine similar-looking screws from unidentified boxes. Use older stock first, but inspect for corrosion, damaged coatings and worn recesses before returning leftovers to service.
Storage rule: If you can't identify a loose screw's coating and intended application, don't return it to an approved-project bin.
Copy this label onto each compartment:
Gauge | Length | Coating | Drive | Application | Structural or general | Product or lot reference | Remaining count
A bulk box is useful only if you can still identify its contents when the next repair arrives.
How to Drive Wood Screws Without Splitting Wood
A suitable screw can still make a poor connection if you force it through the timber. Prepare the joint, support the work and use a driver setting that lets you stop when the head seats.
The installation sequence is straightforward:
Prepare the holes before driving
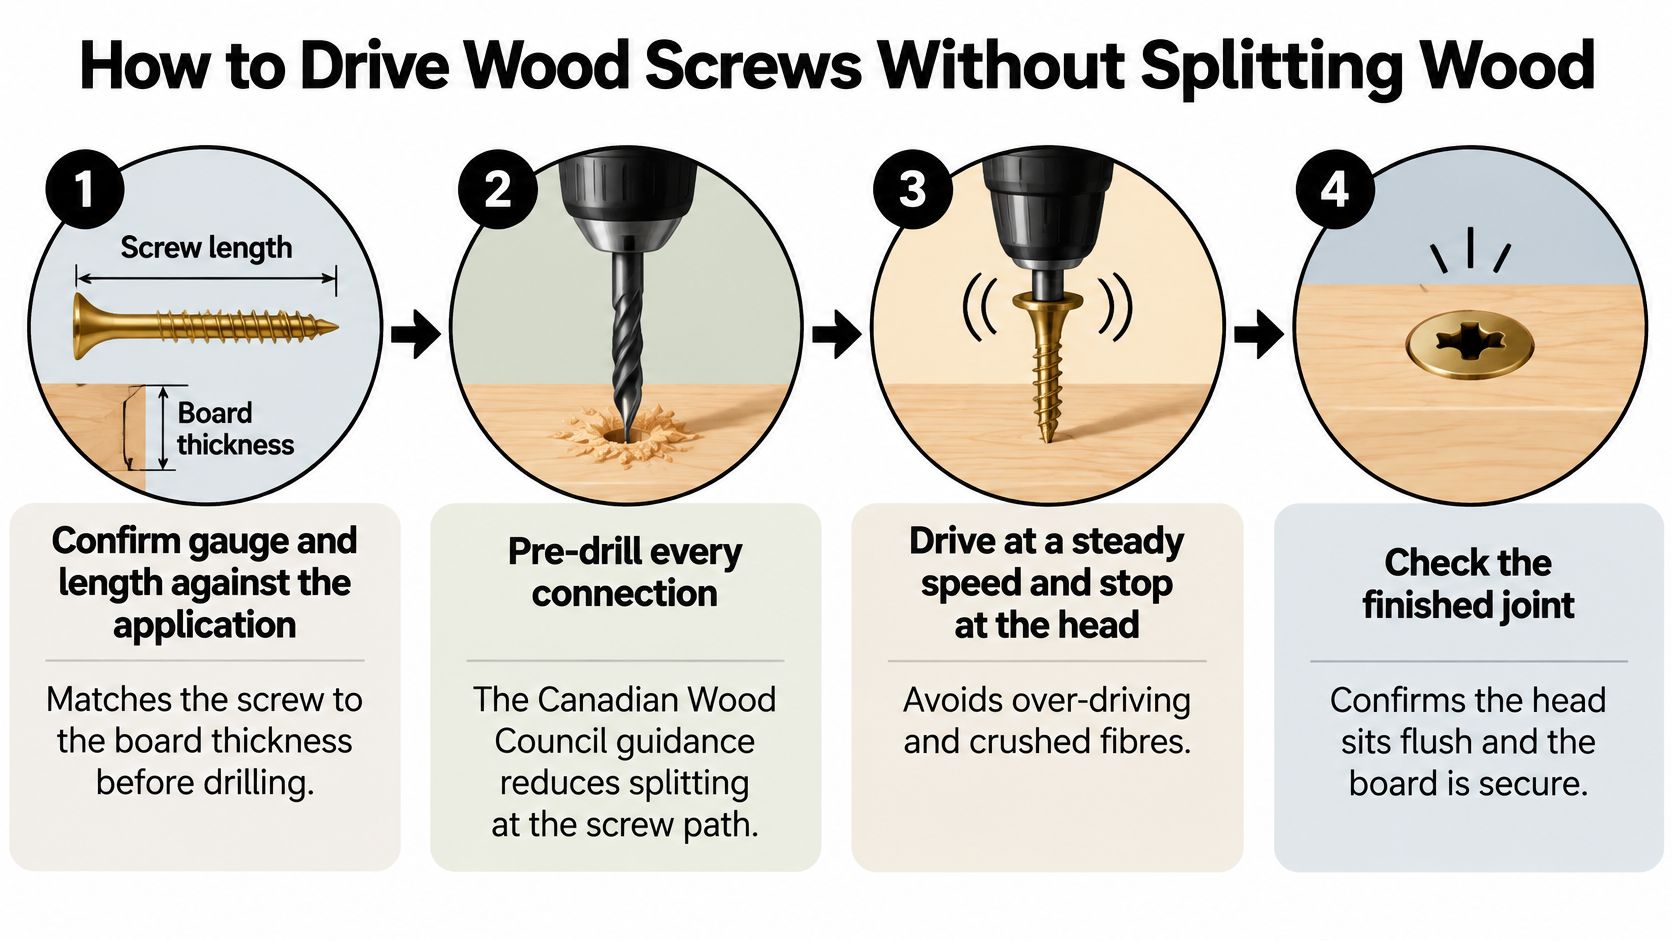
Confirm the screw specification. Check the application, board thickness, receiving member and required penetration before drilling. Clamp the pieces in their final position so they can't shift while you work.
Pre-drill the connection. The Canadian Wood Council recommends pre-drilled holes for all screw connections to reduce splitting. This is particularly important near ends, in dry lumber and with larger screw diameters.
Select the pilot bit for the threaded core. Use the manufacturer's pilot-hole guidance where available, rather than matching the bit to the outside of the threads. Make the hole deep enough for the specified installation and clear chips so the bit doesn't bind.
Provide clearance through the first piece. For a conventional clamped wood-to-wood joint, a clearance hole allows the screw to draw the outer board against the receiving member. Without it, threads can hold the pieces apart even though the head feels tight.
Countersink a flat head appropriately. Cut a clean recess instead of using driver force to crush the head into the surface. Use the head detail required by the product, especially with specialised decking or connector screws.
Control torque and placement
Drive steadily and stop at seating. Start with a low clutch setting and increase only enough to seat the screw. Overdriving can strip the wood threads, bury the head and damage the surface without improving the joint.
Respect end distances and installation angles. A CCMC structural-lumber fastener evaluation requires prescribed spacing, end and edge distances, and installation geometry. Don't improvise an angled end-grain connection because the driver fits more easily that way.
Watch the drilling and driving sequence with your own joint requirements in mind:
Common mistakes are usually preparation problems rather than a shortage of driver power:
- Dull or clogged drill bit: Replace or clear it instead of forcing a wandering hole.
- Skipped clearance hole: Correct the hole arrangement if the boards won't pull together.
- Very dry timber: Slow down, pre-drill carefully and inspect for developing splits.
- Wrong driver bit: Replace a loose-fitting bit before it rounds the recess.
A finished joint should have the intended head position, no visible splitting and no movement when checked by hand. That inspection catches workmanship problems, but it doesn't establish structural capacity.
Judging Packaging, Brand and Cost per Screw
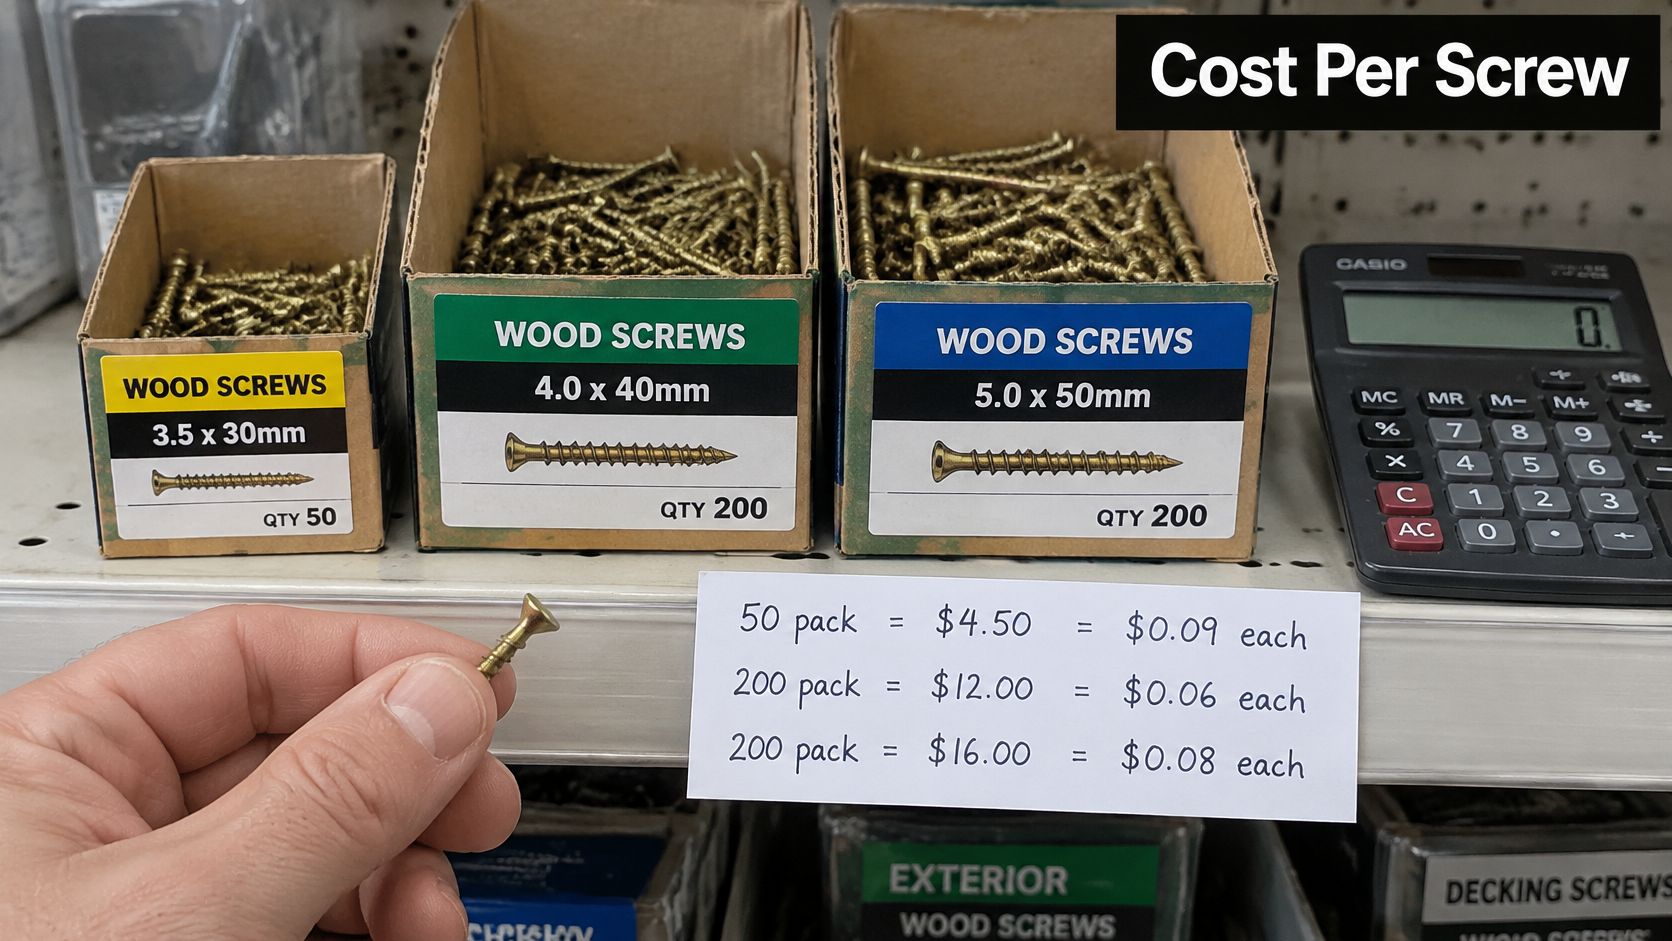
A large box can lower the price per screw and still be the wrong buy if it encourages you to use one fastener across different jobs. Compare price per piece only between screws with the same gauge, length, coating and intended application. An indoor screw is not a bargain for treated decking if its coating is unsuitable.
Use this calculation before choosing a pack size:
Construction costs fluctuate, so a suitable assortment can help reduce repeat trips for fasteners. A larger mixed box is only economical if you can keep each screw identified and matched to its intended use. Otherwise, the wrong screw can end up in a connection where its size or coating does not fit the job.
Match packaging to how you work
Bulk boxes make sense when you use the same specification repeatedly and have dry storage. Keep a smaller working quantity accessible, while retaining the product label for identification.
Small tubs suit occasional repairs and keep product details with the screws. Sealed packs contain their contents during transport, but check for moisture or damage.
Buy the specification you'll use, not the largest quantity you can afford.
Brand familiarity can help with repeat purchasing, but readable technical information matters more. Look for consistent head formation, clean drive recesses, and packaging that identifies the screw's gauge, length and coating.
Check these points before buying:
- Count: Does the usable quantity match your project worksheet?
- Coating: Is compatibility stated for the timber treatment and exposure?
- Standard or approval: Does the documentation address the application?
- Drive quality: Does the correct bit engage cleanly without excessive play?
- Identification: Are gauge, length, coating and product or lot information readable?
- Packaging: Can you store and transport the contents without losing their identity?
- Return terms: Can you review the seller's terms before ordering excess stock?
Loose, unlabelled screws make later identification difficult. A low price per piece can cost more if you have to remove boards to replace fasteners that were the wrong size or type.
Build Your Wood Screws Assortment for Your Next Project
Build the shopping list around the compartments you'll use. A deck-board compartment, a fence compartment and a structural-fastener compartment are more useful than a mixed organiser filled with sizes you selected without a connection plan.
Our range offers these specific options for that approach:
- Deck boards: Our #10 x 3″ Deck Screws have square drive, a bugle head and brown ruspert finish, supplied in a 2000-piece box. Match the quantity to your counted fastening locations rather than assuming a bulk box covers every deck.
- Fence rails and pickets: Our #8 x 2.5 Deck Screws have Torx drive, a brown ceramic-coated finish and a self-drilling point, supplied in 500-piece packs. Assign them to an exterior project only after confirming compatibility with its lumber and exposure.
- Design-specified lag connections: Our 1/2″ x 8″ Lag Bolt Screws have hex heads, are hot-dip galvanized, meet ASTM A307 and come in 10-piece boxes. That product specification doesn't replace the deck design's connection requirements.
Use the product information alongside the material list when selecting supplies:
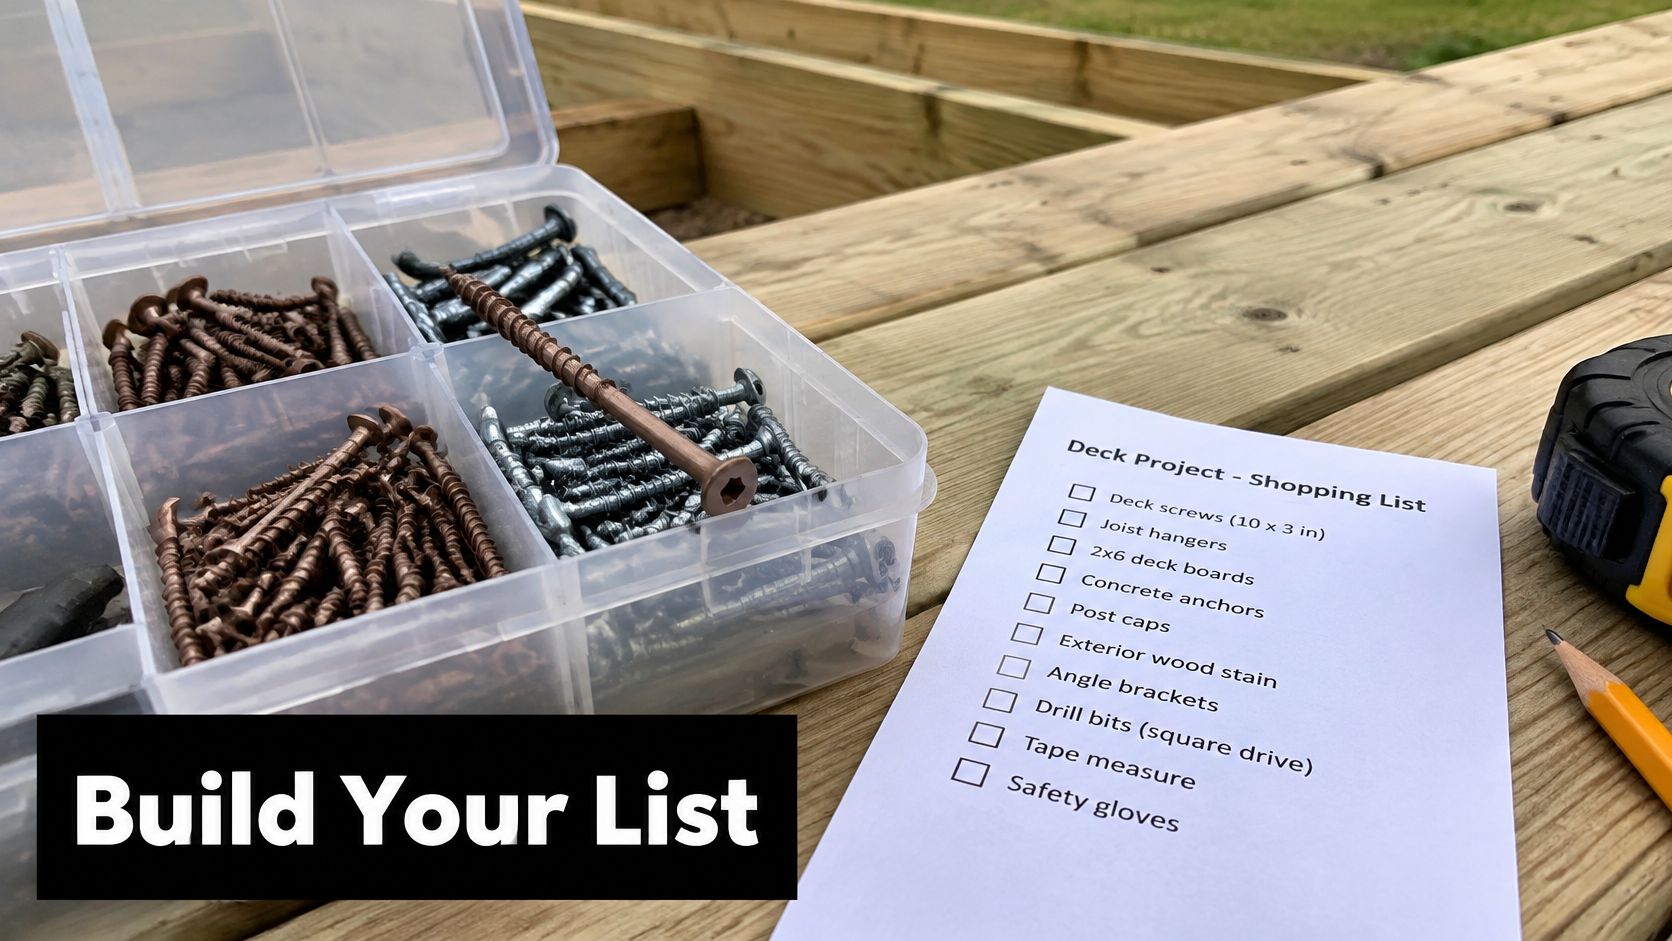
Fill the remaining compartments deliberately
For trim, choose a small-head finish screw with enough penetration into sound backing and a coating suitable for its location. Don't substitute a bulky decking head merely because the length is convenient, and don't assume a particular finish-screw size is available without checking the listing.
For non-structural framing repairs, keep the selected general-purpose framing screws in their own labelled bin. Where the work carries structural loads, buy the exact approved fastening system instead of upgrading the gauge by guesswork.
Before ordering, resolve any uncertainty about the lumber treatment, connector requirements or fastening schedule. Record the selected product beside each application, then transfer that identity and the remaining count to the storage label. You'll finish with a project-ready assortment, not just a large collection of screws.
XTREME EDEALS INC. offers deck screws, construction fasteners, lag bolts and deck and fencing accessories for building a clearly organised project kit. Visit XTREME EDEALS INC. and browse the Deck & Fencing Accessories category with your compartment list, quantities and coating requirements ready before your next build.