

You've got the post base in position, the holes marked, and a sleeve anchor in hand. The bracket hole looks like it calls for a particular diameter, but the anchor's overall length, the thickness of the fixture, and the concrete beneath it all affect whether the fastener will hold as intended. Choosing by diameter alone is how a neat-looking fit turns into a loose connection or damaged masonry.
A sleeve anchor size chart is most useful as a selection aid, not a universal load table. Read it in order: confirm the base material, match the specified diameter and drill bit, calculate length around the fixture and required embedment, then check the manufacturer's installation and capacity information for the exact anchor model. That sequence helps narrow the choice without mistaking a chart for an engineering approval.
Why a Sleeve Anchor Size Chart Matters Before You Drill
A hole is expensive to get wrong. An anchor that is too short leaves the fixture and washer eating into the length reserved for embedment. An oversized diameter driven into soft block can crack the face before the nut is even snug. The chart exists to catch these mismatches on paper, before the hammer drill comes out.
Read it as a narrowing tool. Each column rules something out:
- Substrate suitability. Suppliers separate anchors intended for solid concrete from those meant for masonry, grout-filled block, and hollow block, and those categories are not interchangeable (Canadian sleeve-anchor listings).
- Diameter and drill-bit pairing. The bit size is fixed by the anchor specification, never guessed from the fixture hole, so a bracket punched for a given bolt may still demand a specific bit the chart names.
- Fixture plus washer allowance. The thickness of whatever you are fastening, plus the nut and washer stack, comes off the anchor's overall length first.
- Required embedment. Whatever length remains has to satisfy the minimum depth the sleeve needs to expand against sound material.
That last pairing is where the sizing decision happens. Take a short anchor run through a thick ledger board: once the hardware takes its share of the overall length, the embedment left in the concrete may fall short of what the sleeve requires. Working that arithmetic before choosing a nominal diameter is the whole reason to open the chart.
What the chart cannot tell you is whether the connection is approved. Tested tension and shear values, installation torque, edge distance, and spacing live in the manufacturer's technical data, and structural anchoring in Canada is governed by design requirements such as CSA A23.3 rather than by nominal bolt size.
Practical rule: If the connection is load-bearing, exposed to wind, or safety-critical, stop at the chart and verify the design and product data before drilling.
How Sleeve Anchors Grip the Base Material
Tighten the nut and the threaded stud draws an expansion cone up into the sleeve. The cone forces the sleeve outward until it presses against the wall of the drilled hole, and that pressure is what carries the load. Manufacturer installation datasheets describe the same cone-and-sleeve sequence, and it only works if the hole matches the specified diameter and depth. Cut the hole oversize or drill it shallow and the sleeve expands without ever bearing fully on the base material.
Minimum embedment exists for that reason: the cone needs enough depth in sound material to draw in and expand the sleeve before the anchor can hold anything.
The substrate column on a chart is really describing that bearing condition. Dense, sound concrete gives the sleeve a continuous surface to press against. Hollow block, soft brick, or cracked masonry may not, because the sleeve can expand into a void or crush the surrounding face instead of gripping it. A row intended for concrete should not be read as approval for hollow block.
Sleeve anchors also grip differently from wedge anchors and through-bolts. Wedge anchors generally develop higher holding values, while sleeve anchors tend to suit more delicate masonry where aggressive expansion could crack the base. A through-bolt clamps through an assembly instead of expanding inside a hole, so swapping anchor types changes the mechanism, not just the diameter.
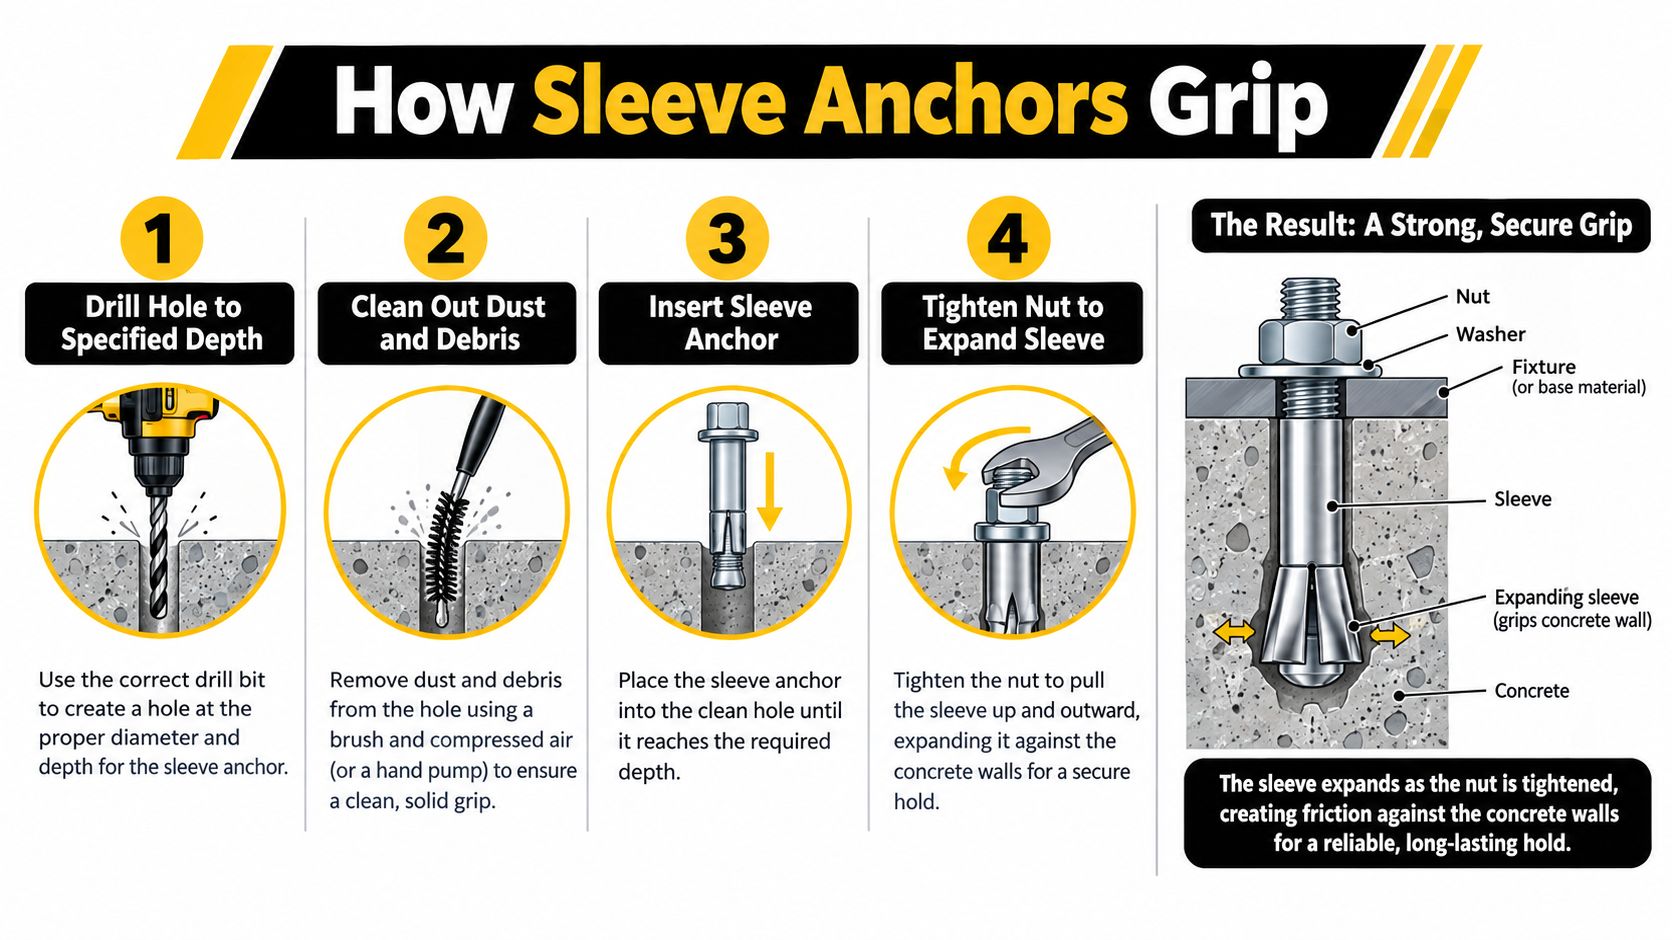
The sequence in the image, drill, clean, insert, tighten, describes the mechanism rather than the specification. Hole dimensions and tightening requirements remain model-specific, so follow the instructions packed with the anchor you are installing.
Reading the Chart Columns One at a Time
A contractor grabs a box because the diameter matches the plate hole, then finds the anchor runs short once the washer, nut, and embedment are counted. Charts exist to prevent that trip back to the truck. Read one as a selection aid: each column either narrows the choice or flags a spec that only the manufacturer's data can settle.
| Chart Field | What It Means | Why It Matters |
|---|---|---|
| Nominal diameter | The anchor's stated diameter | Identifies the model and required hole size; capacity still comes from the load data |
| Overall length | Total length of the anchor | Includes the portion used by the fixture and hardware, so it isn't the same as embedment |
| Threaded length | Length of the section with usable threads | Affects how the nut can engage after the fixture and washer are in place |
| Drill-bit diameter | Required diameter of the hole | Must match the specified anchor model to avoid an oversized or undersized hole |
| Minimum hole depth | Published drilling depth for installation | Provides room for the anchor and the installation conditions specified by the manufacturer |
| Minimum embedment | Required depth of anchor engagement in the base material | Must remain available after fixture thickness and hardware allowance are considered |
| Fixture thickness range | Permitted thickness of the attached material | Helps determine whether the anchor has enough length for both the fixture and embedment |
| Substrate | Materials the product is intended for | Keeps a concrete entry from being mistakenly applied to a different masonry condition |
Overall length is not usable embedment. Part of the anchor's length stays outside the concrete, passing through the fixture and leaving room for the washer and nut. Take a typical catalog line: a 1/2-inch diameter anchor at 3 inches overall with a 3/8-16 thread. Those figures describe the anchor itself, and they leave the working embedment undecided until the assembly is stacked on top.
Measure the assembly first. Add fixture thickness and the hardware allowance to the required embedment, then compare the resulting length with the model's published dimensions.
The three quantities interact. Thicker steel eats into the length available for embedment. A bigger washer stack does the same. The required embedment itself stays fixed by the model and base material, so changing any one variable can push a nominal diameter that looked correct into the wrong row.
Check whether the chart gives a fixture-thickness range, a minimum hole depth, or both. If it omits the substrate limit or the manufacturer's load data, use the chart only to shortlist options and pull the product documentation before buying.
Worked Examples for Fence, Deck, and Bracket Attachments
Worked arithmetic beats shelf guessing. Each case below prices out the same three quantities, fixture thickness, hardware allowance, and required embedment, inside a different assembly before any diameter gets chosen.
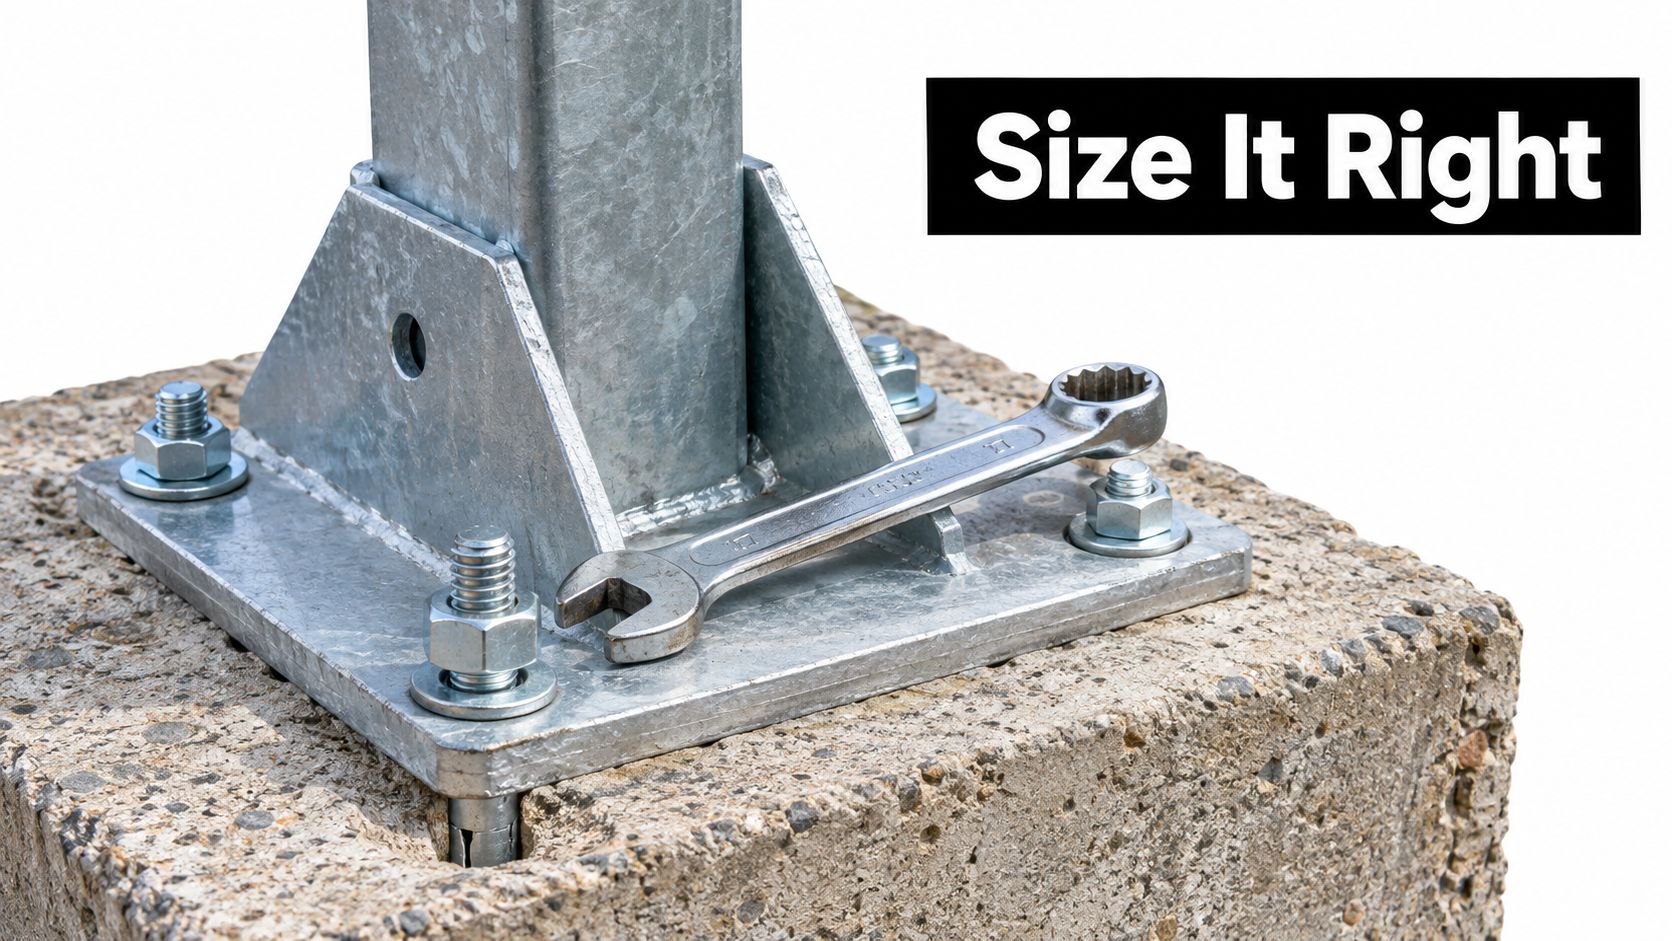
Fence post base on a concrete pier. Say the base plate measures 1/4 inch where the anchor passes through, the washer and nut stack needs about 3/4 inch above the plate, and the chosen model lists a 2-inch minimum embedment for solid concrete. That stack puts the minimum overall length near 3 inches, and only then does diameter enter the decision. A shorter anchor in a matching diameter still fails the stack-up.
Deck ledger or side-load bracket. Establish what the bracket is designed to carry and whether a sleeve anchor is even permitted for that connection, because many deck connections call for a different fastener entirely. As an example of what local rules can impose, some municipal deck guides specify at least 4 inches of embedment for anchor bolts in solid concrete or grout-filled masonry. That figure belongs to those jurisdictions and those fasteners, so verify the requirement where you build instead of transferring it onto a sleeve-anchor chart.
Exterior railing flange on solid concrete. Treat railings as safety-critical connections. Identify the exact model, then check its evaluated tension and shear data along with spacing and edge-distance limits in the product documentation. A flange hole diameter tells you what fits and nothing more.
Patio covers raise the stakes again, since the anchorage sits inside a larger structural scope. Homeowners weighing that scope can use resources that compare patio cover contractors Sacramento to frame contractor conversations, while local requirements and product approvals still govern the fastening itself.
Capacity questions belong to the specific model, so consult the sleeve anchor weight capacity guide before settling on a diameter. XTREME EDEALS INC. lists sleeve-anchor products and selection material for buyers comparing fasteners; confirm the exact size and application against the product documentation before ordering.
Matching the Anchor to Concrete, Brick, and Block
The base material under the fixture decides how much of the size chart still applies. Fixture thickness and washer allowance already consume part of an anchor's usable length, and a substrate with voids consumes more of it before the sleeve ever bears on anything.
Solid, sound concrete is the reference case. The sleeve expands against a continuous wall, so the published embedment, spacing, and edge-distance values reflect the condition the manufacturer tested. Cracked members, thin slabs, and holes set near an edge still reduce what the anchor can carry, which is why the same chart reads differently on a new pour than on an old, patched wall.
Grout-filled concrete block gives the sleeve a continuous bearing surface where the grout surrounds the anchor. Solid brick can work the same way, provided the unit is sound and the anchor seats in the unit rather than a mortar joint. A guide to choosing blockwork for your extension helps with reading the masonry assembly itself, while the anchor manufacturer's substrate approval decides whether that material qualifies.
Hollow cells change the arithmetic. Part of the anchor's length now spans a void, so the embedment you measure at the surface includes empty air, and the expansion cone can crack a thin face shell before it grips. A listing that says "suitable for block" may mean grout-filled cores only, so check the exact model's instructions before treating a hollow wall as covered.
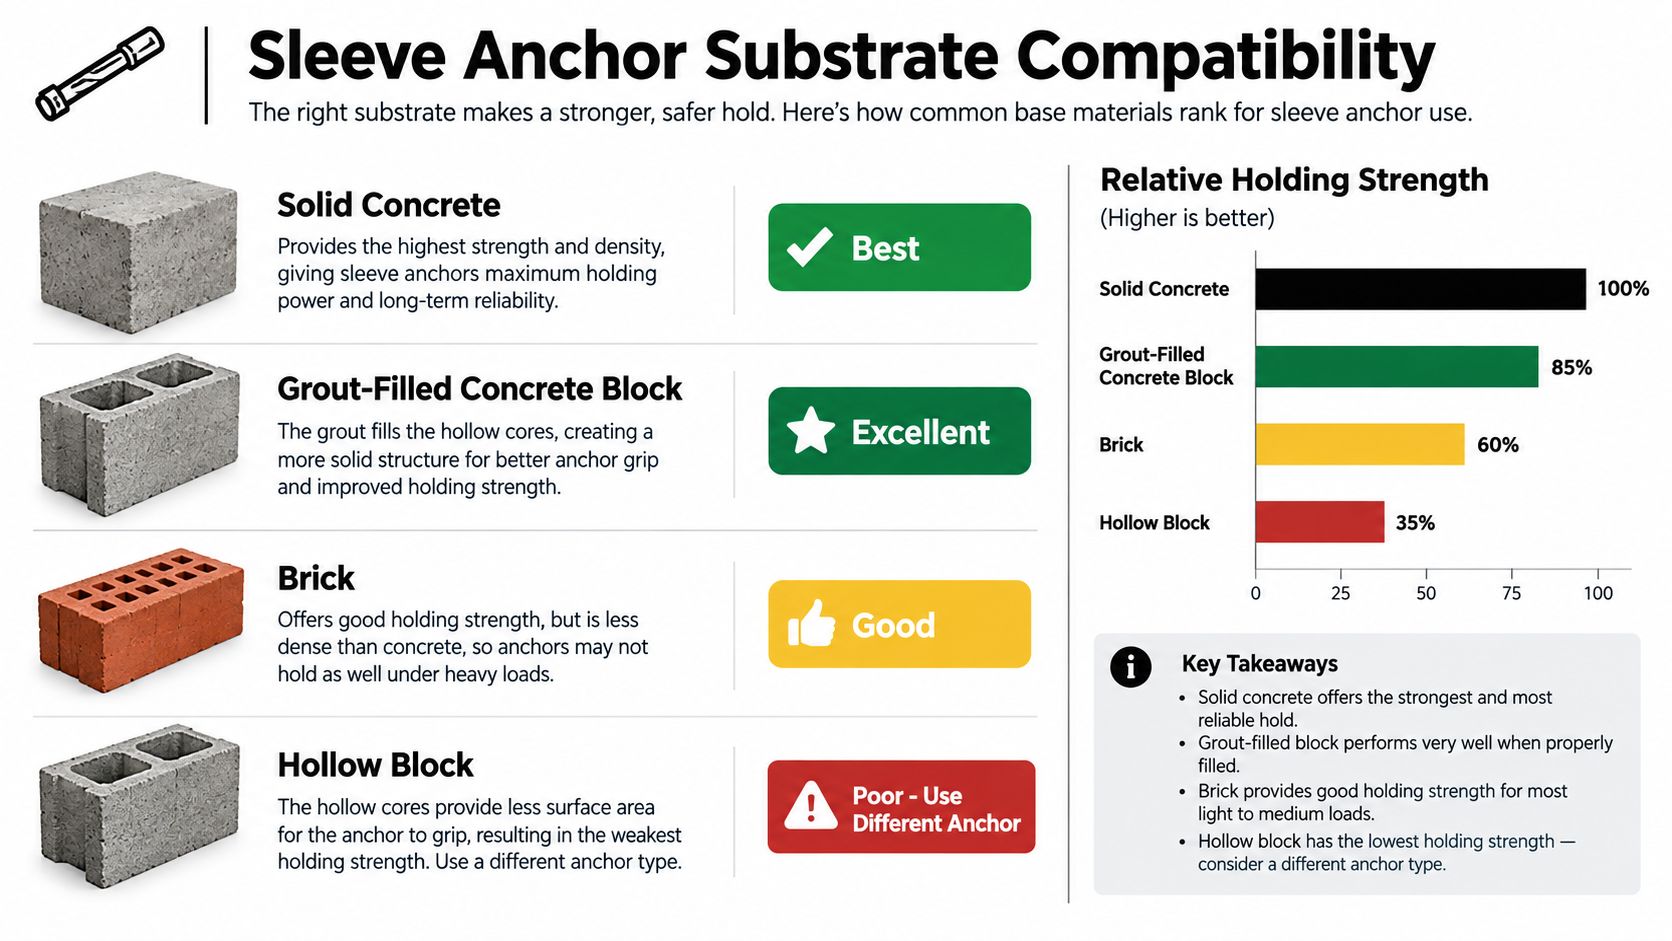
Treat the infographic as a compatibility prompt rather than a capacity ranking. For brick walls specifically, the sleeve anchors for brick guidance walks through placement and unit condition, and the product's own installation data still governs the final call.
Duty class matters alongside the material. A mailbox bracket and a guardrail post can share a diameter on the chart while carrying very different consequences if they pull out. For anything structural, the anchor's evaluation report and the governing code for your jurisdiction set the limits; the chart only narrows which sizes fit the hole, the fixture, and the embedment you have.
Drilling, Cleaning, and Torquing to Spec
A correctly chosen anchor can still underperform in a poor hole. Use the manufacturer's specified bit diameter and minimum depth, and keep the drill aligned so the finished hole matches the anchor's requirements. A hammer drill with a suitable carbide masonry bit is a common tool for concrete, but the product instructions control the method and dimensions.
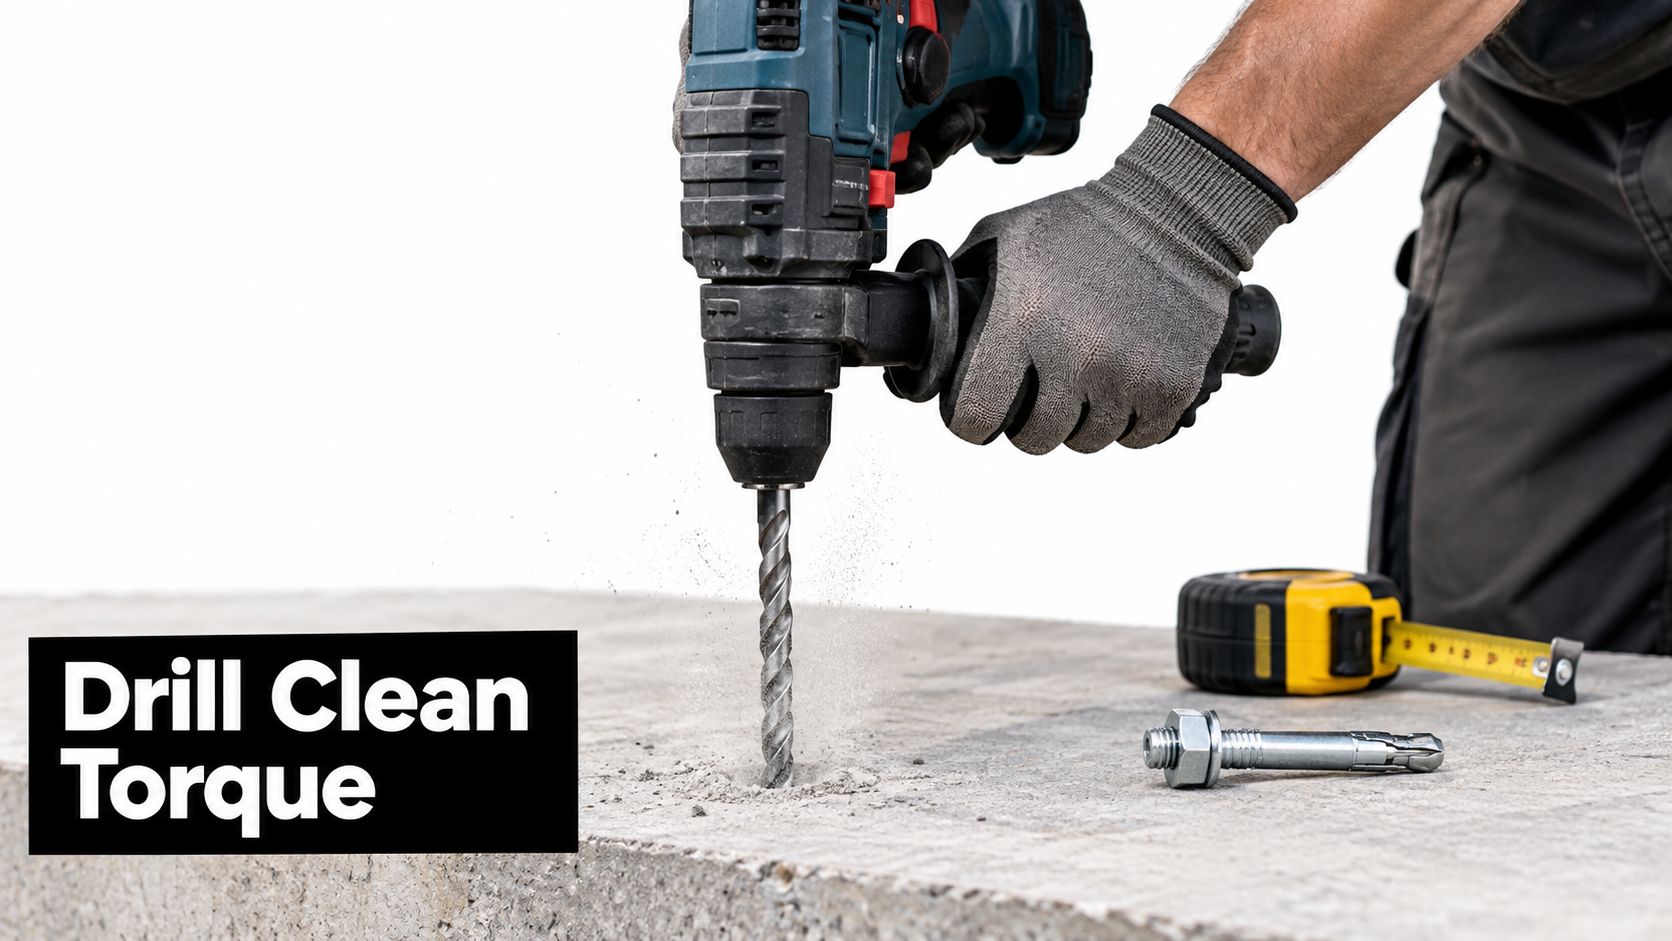
Use this jobsite sequence:
- Mark and drill. Check the anchor's required bit diameter and hole depth before starting. Drill to at least the published depth, while ensuring the concrete member can safely accommodate the hole.
- Clean the hole. Remove dust and loose debris using the cleaning method specified by the manufacturer. Dust left in the hole can prevent proper seating and interfere with installation.
- Place the fixture and anchor. Align the parts and insert the anchor as directed. Don't force an anchor into a hole that's too small or rely on a loose fit in an oversized one.
- Tighten to specification. Use the torque value provided for that exact product. Under-tightening can leave the sleeve insufficiently expanded; over-tightening can damage the anchor or crack weak masonry.
Check the hole, substrate, and assembly before tightening. If you encounter cracked concrete, an edge too close to the hole, or a substrate that differs from the product's approved use, stop and reassess rather than trying to compensate with extra torque. Canadian installation guidance ties structural anchor work to qualified personnel and the manufacturer's printed instructions (CSA A23.3 Annex D installation guidance).
For a fuller walkthrough, use the sleeve-anchor installation guide. Torque and drilling instructions are model-specific; don't borrow values from a different brand or anchor type.
Diameter to Embedment and Diameter to Drill Bit Correlations
A 3/8-inch anchor holding a 2-inch bracket leaves a different amount of thread in the hole than the same anchor holding a 1/4-inch strap. Fixture thickness and washer allowance eat into the effective length first, and the embedment column on a size chart tells you what is left. One datasheet shows the range clearly: effective embedment runs from 1-1/8 inches for a 1/4-inch anchor to 3-3/8 inches for a 3/4-inch anchor (sleeve-anchor reference data). Read that as a selection aid, not a capacity number.
The drill-bit column is the check I run before the rotary hammer comes out of the truck. The bit diameter normally matches the nominal anchor diameter, and the model's printed instructions settle any doubt. Oversizing the hole lets the sleeve spin instead of bite. Substituting a close metric bit does the same damage.
Hold embedment and total length apart when you read a chart. Ontario's residential anchorage provisions call for foundation anchors embedded at least 100 mm, measured into the foundation itself rather than through the sill plate and hardware (Ontario residential anchorage reference). Municipal deck guides apply their own embedment requirements to anchor bolts set in concrete or grouted masonry, and the specified depth differs by jurisdiction. Neither requirement translates directly to a sleeve-anchor row, so keep code values and product values in separate columns in your head.
Canadian packaging pairs imperial and metric labels, so match the exact bit and embedment to the model on the shelf rather than rounding to whatever is in the bit case. A chart without a model name, substrate, and required embedment is a starting point, not a spec.
When a Sleeve Anchor Is the Wrong Choice
Say the chart gives you a clean row: the right diameter, the right bit, embedment and fixture thickness accounted for. That still leaves the bigger question of whether a sleeve anchor belongs in the connection at all. Through-bolts, cast-in anchors, wedge anchors, and adhesive systems exist because certain loads and substrates demand them, and swapping in a sleeve anchor changes how force travels into the base material.
Put the chart down when:
- The connection carries structural or safety-critical load. Guardrails, overhead hangers, structural brackets, and wind-exposed assemblies need a designed anchorage. Canadian practice directs post-installed anchor design toward CSA A23.3 Annex D provisions covering design, installation, and quality assurance (CSA A23.3 Annex D guidance).
- The concrete is still green. Uncured concrete is not the approved base material a post-installed anchor was evaluated in.
- The masonry is hollow or damaged. The sleeve needs a sound expansion path. Where the unit cannot provide one, pick an anchor made for that construction.
- The plans name another system. A through-bolt or cast-in anchor on the drawing is a specification. A sleeve anchor that happens to fit the hole does not substitute for it.
- Edge distance or load conditions are uncertain. Sustained tension, thin members, cracked concrete, and tight edge distances call for a design check. Upsizing the anchor does not answer them.
Code provisions for sill-plate anchorage set specific dimensions and placement rules, but they belong to that building-frame context rather than to every deck, fence, or nonstructural attachment (Ontario residential anchorage reference). When the plans, the code, or the engineer name a different system, the chart's job is done.
Troubleshooting Pull-Outs, Spinning, and Spalling
On a job last spring I watched an installer keep torquing a spinning anchor for a solid thirty seconds before admitting the hole was oversized. Tightening harder felt productive. It accomplished nothing. Pull-out, spinning, and chipped concrete each point to a different combination of sizing, substrate, and installation conditions, so the first move is diagnosis, not more torque.
| Failure | Likely cause to check | Corrective action |
|---|---|---|
| Anchor pulls out | Embedment may be inadequate, or the hole may be too deep or oversized | Verify the required embedment and hole dimensions for the exact model; a damaged hole needs manufacturer-approved repair guidance before reuse |
| Anchor spins while tightening | The hole may not match the specified diameter, or the expansion cone may not be engaging correctly | Stop tightening, pull the anchor, inspect the hole, and follow the manufacturer's instructions for replacement |
| Concrete or masonry spalls | The hole may sit too close to an edge, or the material may be too weak for the expansion force | Reassess the substrate and location; confirm edge-distance requirements and pick a system suited to that material |
Upsizing feels like the obvious fix for a pull-out. It rarely is. A larger diameter changes the required hole, embedment depth, spacing, edge distance, and the load it places on the base material. Manufacturer evaluation data treats tested capacity and installation geometry as a package, which is why cracked or hollow masonry punishes guesswork so quickly.
If an anchor spins or the substrate fractures, unload the connection and inspect the surrounding material before touching a replacement. When the hole itself is compromised, shifting the anchor location often beats repairing it, provided spacing and edge distance still work. For structural connections, have a qualified person assess the failure against the product's published data.
Quick Reference for the Next Hardware Run
Before you buy, write down the four chart fields that narrow the choice fastest: nominal diameter, overall length, drill-bit size, and substrate category. Then check fixture thickness, washer-and-nut allowance, required embedment, and the manufacturer's instructions. A size label alone doesn't confirm that the anchor suits your load or base material.
Use the chart as a starting point, then open the technical information for the exact anchor model. Verify the published tension and shear data where relevant, along with installation torque, hole depth, spacing, edge distance, and substrate limits. For structural or safety-critical work, confirm the applicable provincial or territorial requirements and get the connection checked by a qualified professional.
For the practical selection sequence, revisit Reading the Chart Columns One at a Time. For assembly sizing, use Worked Examples for Fence, Deck, and Bracket Attachments as a method, not as a universal specification. XTREME EDEALS INC. offers deck and fencing accessories, fasteners, and home-improvement hardware through its online catalogue, alongside product information and practical guides. Compare the listing with the manufacturer's technical data before choosing an anchor.
XTREME EDEALS INC. offers sleeve anchors, deck and fencing hardware, and related fasteners for DIY projects and trade work, with online product listings to help you compare available options. Visit XTREME EDEALS INC. to browse the catalogue and check the product details before your next installation.