
You've spent a weekend setting posts, tying mesh and hanging a gate. At first, the fence looks straight and the latch closes cleanly. Then winter passes, the gate drifts out of alignment, a tension band starts staining the post, and the screen or slats catch enough wind to make the whole run move.
That result usually isn't caused by chain-link mesh alone. Chain link fence home hardware works as a system, and the weakest fitting, footing or finish can determine how long the installation stays square. Canadian frost, humid air, variable soil and local pool-enclosure rules all affect what you should buy before the first hole is dug.
Why Your Chain Link Fence Fails Before Its Time
A homeowner notices the failure at the gate first. The latch needs lifting, the hinge side has dropped and the bottom corner scrapes the driveway. Six months earlier, the gate had been level, so the natural assumption is that the gate frame bent.
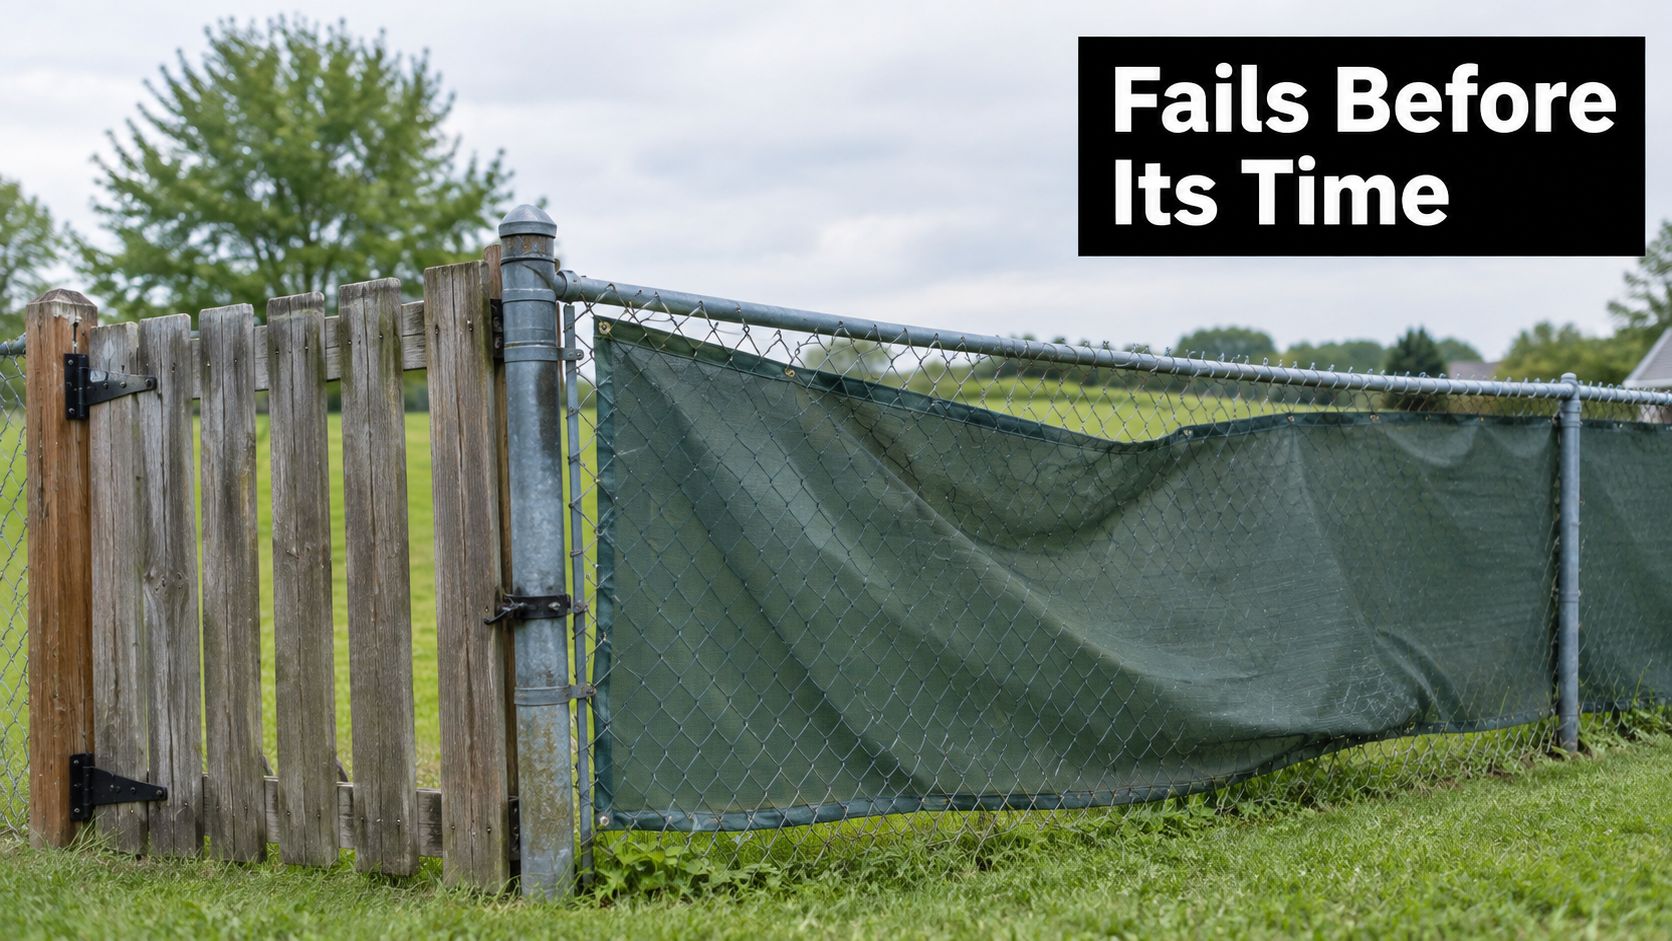
Often, it didn't. The problem may be a shallow or poorly drained footing, an undersized hinge, a post cap that allowed water into a hollow post, or a tension assembly that was never matched to the terminal post. A fence can look correct on installation day while the soil and hardware are already setting up the next repair.
The quiet failures behind a crooked fence
Bare or poorly matched steel ties are a common shortcut in damp locations. They rust first, then loosen their grip on the fabric. A cheap bolt can become the controlling failure point even when the mesh remains sound. The same applies to a tension band that fits loosely around the post or a carriage bolt that's too short to engage the nut properly.
Water creates another route to trouble. Hollow posts need caps that shed rain rather than allowing it to collect inside the post. Freeze-thaw movement can then turn trapped moisture into internal expansion and corrosion. Once a terminal post loses stiffness, tightening the fabric won't restore the original geometry.
Practical rule: Don't choose fittings from a generic parts list. Match every band, cap, tie, bolt, hinge and brace to the post diameter, fabric height, coating and site conditions.
The long history of Canadian chain-link production explains why compatibility matters. Statistics Canada has tracked farm fencing, wire chain-link fabric and zinc-coated iron-and-steel chain-link fencing as defined industrial products, including HS-related codes 7314.19.50, 7314.20.20, 7314.31 and 7314.39 in its manufacturing tables (Statistics Canada's chain-link and steel-wire series). This isn't just retail packaging. Posts, fabric, ties, tension wire and fittings belong to a coordinated galvanized-steel system.
What lasts and what creates callbacks
A sound installation doesn't require the most expensive component in every category. It does require a deliberate match between load and hardware. Galvanized structural fittings, compatible coated ties, correctly sized terminal posts and a proper footing are usually better investments than decorative accessories installed on a moving frame.
The practical test is simple. Ask whether each component will still perform after water exposure, frost movement, gate cycling and any added privacy treatment. If the answer depends on paint, an improvised washer or a bolt that only barely fits, the shortcut is likely to cost more later.
Essential Chain Link Fence Hardware You Need
Start with the fence layout, not the shopping basket. Count corners, ends, gates and changes in direction, then identify the line between terminal posts. Terminal posts carry the fabric tension and gate loads, while line posts support the run between them.

Build the framework in the right order
Terminal posts go at ends, corners and gate openings. They need compatible post caps, brace hardware and tension bands. A gate post also needs hinges and a latch that suit the gate frame, opening direction and expected use. Don't treat a gate post like an ordinary line post. It carries repeated movement rather than only steady fabric tension.
Line posts keep the mesh upright along the run. Line post caps support the top rail and help keep water out. The top rail joins the line posts and reduces unsupported movement at the top of the fabric. For a fence with a privacy screen or slats, verify that the rail, line posts and terminal assembly are appropriate for the extra wind area.
Tension bands attach the fabric to terminal posts. Their width and curve must match the post, and their coating should be compatible with the post and fabric. A tension bar passes through the edge of the mesh and spreads the pull across the bands. Select its length for the fence height and the fabric configuration, not just because it appears in the same product category.
Brace assemblies and rail-end fittings transfer forces between terminal posts and the top rail. Centre brace bands, rail end cups and brace rails should fit the actual post and rail dimensions. A fitting that appears close enough can twist under tension and make accurate alignment difficult.
Ties and fasteners secure the mesh to line posts and rails. Use ties designed for the coating and environment. Tighten them enough to hold the fabric without cutting into the finish or creating sharp protrusions. Carriage bolts, nuts and washers should have compatible corrosion protection, especially where rain or snow can sit against the connection.
For gate work, chain-link gate accessories can help you compare hinges, latches and related installation parts in one place. Check the gate frame dimensions before ordering. Hinge style, latch clearance and post placement matter more than choosing a fitting because it looks similar to the old one.
A simple purchasing sequence
- Confirm the post diameter and wall specification from the supplier or existing fence.
- Match tension bands, brace bands and rail fittings to that post and rail.
- Choose the mesh height, opening and wire specification before selecting the tension bar.
- Add caps, ties, bolts, hinges and latches as a coordinated finish system.
- Keep spares for small consumables, because a missing tie or washer can delay the entire installation.
The embedded installation video can also help you visualise how the components connect before you start.
A parts list is useful only when every part has a job. The most reliable checkout is one that lets you trace each fitting back to a post, rail, gate or tension point.
Material Choices and Finish Options That Matter
Galvanized steel remains the sensible baseline for most chain-link fence hardware because the zinc coating protects the underlying steel more effectively than ordinary exterior paint. It's especially practical when the hardware is exposed to rain, snow, road spray or humid air.
Polymer-coated and vinyl-coated systems add colour and another protective layer, but they create a compatibility requirement. The bands, ties, bolts and caps should work visually and physically with the coated fabric and posts. A damaged coating around a bolt or sharp tie can expose steel and create a small corrosion site.
Compare the choices before you buy
| Material/Finish | Durability | Best For | Cost Range |
|---|---|---|---|
| Galvanized steel | Reliable general resistance when the coating remains intact | Most residential and light commercial fence systems | Standard |
| Vinyl-coated or polymer-coated steel | Adds colour and a protective outer layer, but must be handled without cutting the coating | Finished residential fencing and privacy treatments | Moderate |
| Stainless steel | Strong corrosion resistance in suitable environments, but requires attention to compatibility with galvanized parts | Selected fasteners and difficult exposure conditions | Higher |
| Painted steel | Appearance depends on preparation and coating maintenance | Repairs, refinishing and sheltered applications | Variable |
The table's cost labels are relative buying guidance, not a price promise. Product availability and finish specifications vary by supplier.
Avoid the mixed-metal trap
Mixing stainless-steel fasteners with galvanized fittings can create galvanic corrosion when moisture bridges the metals. That doesn't mean stainless hardware is always wrong. It means the whole connection needs to be considered, including washers, nuts, bands, posts and the amount of water or salt exposure.
For coastal, high-humidity or heavily salted areas, use a consistent corrosion-protection approach across visible and concealed parts. Caltrans specifications call for galvanized steel or equivalent corrosion-protected exposed fence components and galvanized anchor bolts, threaded rods, studs and other concealed anchorage components (Caltrans chain-link fence specifications). The principle applies beyond transportation work. A painted bolt beside a galvanized band isn't automatically equivalent to a properly matched galvanized connection.
If you're adding privacy slats, choose fittings that won't cut or crush the coating during installation. A product page should identify the base metal, finish, intended post size and whether the component is suitable for coated fabric.
For a decorative finish, chain-link fence with slats gives homeowners a useful reference point for combining privacy treatment with the supporting fence system. Slats are not merely an appearance choice. Their wind exposure changes the demands placed on posts, rails and fittings.
Sizing, Strength, and Load Requirements
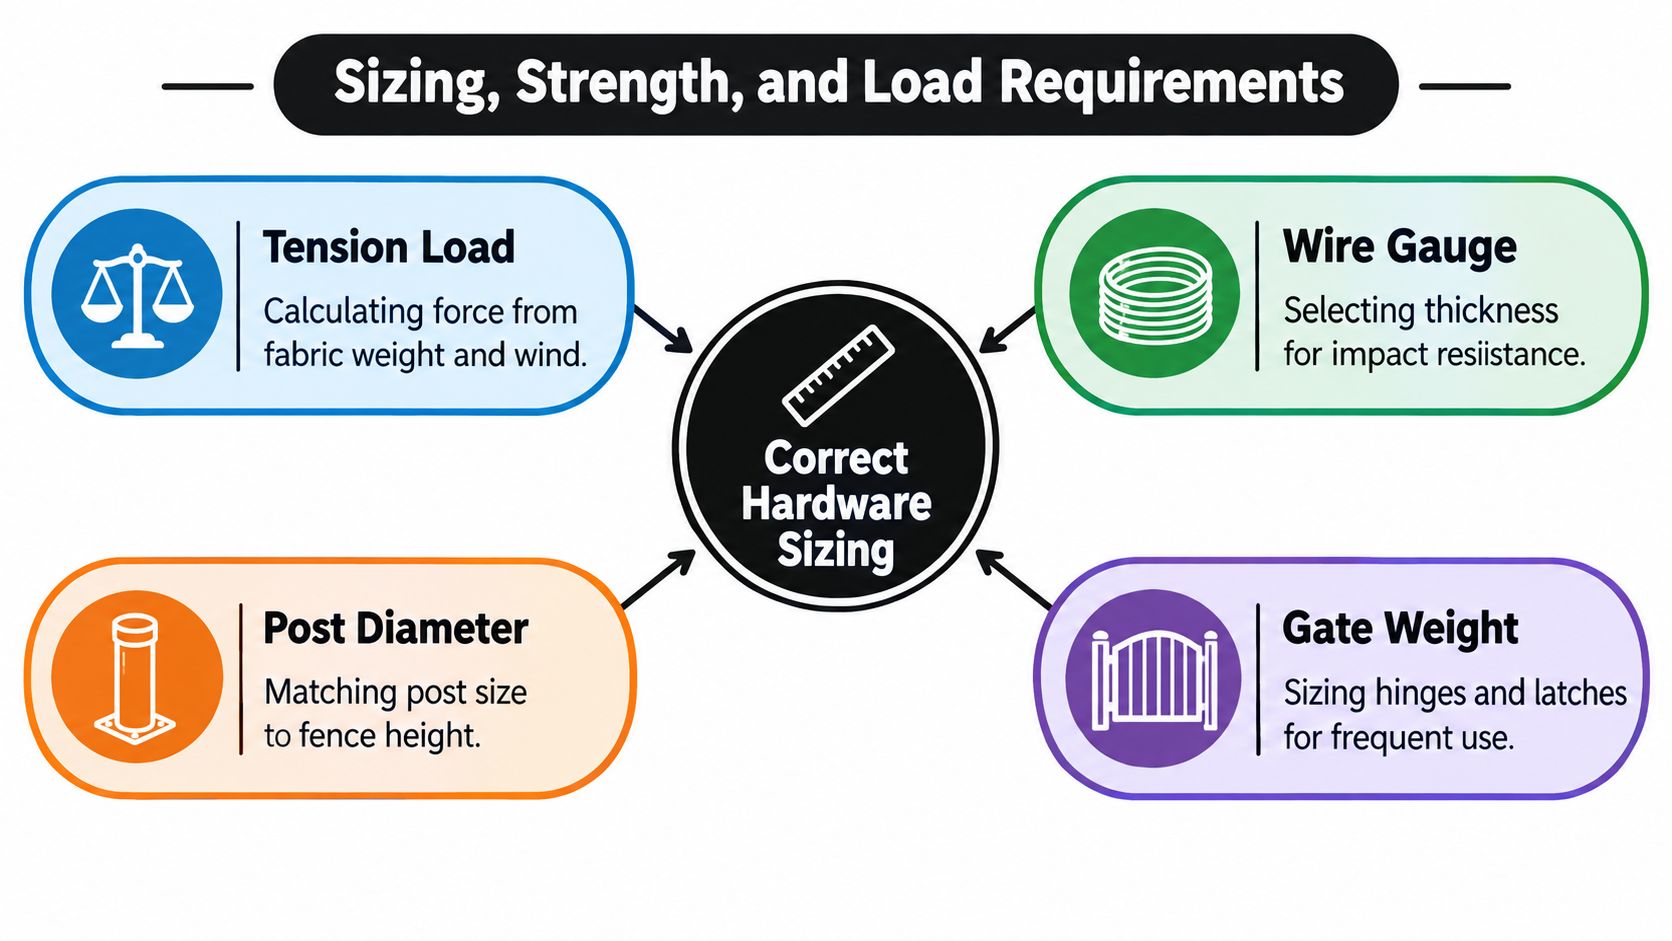
Hardware sizing starts with the loads the fence will experience. A short open fence in a sheltered yard doesn't ask the same work from its fittings as a tall fence with privacy slats beside an exposed property line. Gate use adds another variable because hinges and latches absorb repeated movement.
Match height and exposure to the framework
California transportation standards identify six-foot CL-6 chain-link fencing as a typical right-of-way and urban or developed-area configuration, while four-foot CL-4 fencing is used in selected locations (Caltrans fence standards). The useful lesson for a homeowner is not to copy a road specification blindly. It's to recognise that taller fabric needs a more deliberate terminal-post, brace and tension assembly.
A six-foot fence generally requires more fabric support and longer terminal components than a four-foot run. Privacy slats or screens increase the wind area again. Caltrans specifically warns that privacy slats increase wind forces, so adding them to an existing fence should trigger a review of posts, foundations, brace rails, tension bands and tie points (Caltrans privacy and fence configuration guidance).
Use strength data as a screening check
Caltrans specifications require chain-link tension wires and their fittings to achieve a minimum breaking strength of 8,540 N (1,920 lb). The mesh, tension wire and truss rods must not be slack, and the combined system pretension is intended to provide stiffness under anticipated loads (Caltrans chain-link tension requirements).
That figure is a useful strength benchmark, not automatic approval for a residential project. Local requirements, manufacturer instructions and site-specific engineering still govern. The practical buying question is whether the wire, bands, brace fittings and bolts are designed to work together at or above the expected demand, rather than whether one individual bolt looks substantial.
Load check: If you add slats, a solid screen or a heavier gate, reassess the entire load path. The force travels through the fabric into ties, bands, rails, posts and footings.
Check the local rules before final sizing
San Diego County says fence construction and placement follow the California Building Code as amended by county zoning rules. Its guidance generally allows fences up to six feet high without a building permit when zoning requirements are met, with different limits for front, exterior side, rear and interior side yards, and it directs builders to follow manufacturer specifications for post size and spacing (San Diego County fence guidance).
For a Canadian installation, use the same discipline. Confirm municipal rules before buying the mesh, then match the fittings to the selected post diameter and fence height. Never use a nominal bolt diameter as a substitute for checking the actual band, post, rail and gate specifications.
Installation Pitfalls and Maintenance Habits
A good parts order can still produce a poor fence if the installation sequence is wrong. Posts that aren't aligned make the fabric look loose, while excessive tension can pull terminal posts inward or distort the mesh. Over-tightening a band can also damage the coating or strip the threads before the fence has experienced a full season.
Start with the foundation and drainage. Canadian General Standards Board guidance says footings should resist frost heave and generally extend at least to the average annual frost-penetration depth. It also says the footing must withstand loads for the actual soil or rock conditions at the site (Canadian installation guidance for chain-link fences).
Prevent movement before installing the mesh
Terminal and gate posts need more resistance than ordinary line posts because they receive tension and movement from the gate. Clay, fill, rock, poor drainage and shallow bedrock can all change the right footing or anchoring approach. A generic digging depth used everywhere can leave a gate moving even when the mesh and fittings are intact.
Where water collects beside a fence, review the surrounding grade instead of blaming the hardware immediately. A homeowner dealing with persistent pooling may find the practical drainage guidance in French drain solutions for homeowners useful before setting replacement posts.
Use a handover checklist
Before tensioning: Confirm that posts are plumb, brace assemblies are seated, rail ends are supported and caps shed water.
During tensioning: Pull the fabric evenly, keep it aligned with the terminal post and tighten the fittings progressively. Don't force a crooked frame into position with a single over-tightened band.
At the gate: Check hinge alignment, latch engagement, clearance at the ground and movement through the full swing. A latch that works only when you lift the gate is already reporting a structural or alignment problem.
After installation: Remove metal swarf, seal or protect exposed cut edges according to the coating system and make sure no bolt or tie creates a sharp contact point.

Inspect the gate, tension bands, ties, rail ends and post caps after major weather and seasonal ground movement. Look for rust streaks, loosened nuts, mesh slack, displaced posts and water inside hollow components. Lubricate hinges and latches with a product suitable for the hardware, keeping lubricant away from areas where it can trap abrasive grit.
For pool fencing, add a compliance check to the maintenance routine. Orangeville requires galvanized or vinyl-coated chain link, minimum No. 14 wire, openings no larger than 1.25 inches, posts at least 38 mm in diameter and spacing no more than 2.4 m apart (Orangeville pool-enclosure bylaw). Kingston requires a pool-enclosure permit for water areas deeper than 600 mm, a minimum enclosure height of 1.2 m, chain-link openings no greater than 38 mm, steel-post spacing up to three metres and a concrete depth of 1.2 m (Kingston pool-enclosure requirements). Verify the current local rule before relying on any general checklist.
Smart Buying Checklist for Homeowners and Contractors
The right purchase is less about filling a cart and more about preventing incompatibility. Homeowners should spend first on foundations, terminal-post strength, corrosion protection and gate hardware. Decorative caps, finials and inserts can improve the appearance, but they won't correct a post that moves in frost or a gate that's carrying too much load for its hinges.
Prioritise the parts that carry the work
Must-have structural items: Terminal posts, line posts, top rail, tension bands, tension bars, brace fittings, rail-end fittings, ties, post caps and compatible bolts.
Gate essentials: Hinges, latch, gate frame fittings and any stops or drop rods required by the design. Buy these after confirming the gate frame and post dimensions.
Climate-specific choices: Use corrosion-compatible galvanized or coated fittings in wet environments, and solve drainage and frost issues before finalising the hardware order.
Optional appearance upgrades: Privacy slats, decorative post caps, finials and gate inserts should come after the structural system is confirmed. Slats need a wind-load review, not just a colour decision.
Pool projects require a separate verification pass. Municipal rules can differ on enclosure height, opening size, wire gauge, post spacing, footing depth, setbacks and permits. Orangeville, Kingston and Guelph/Eramosa all illustrate why a generic pool-fence specification can lead to rejected work or replacement mesh. In California, Shasta County guidance requires pool enclosures to be at least 5 feet high and permits chain link only when horizontal openings are no greater than 1¾ inches (Shasta County pool-enclosure guidance).
A point-of-purchase routine
- Write down the fence height, mesh opening and wire specification.
- Measure post diameter and rail dimensions, including the gate posts.
- Check every band, cap, brace and rail fitting against those measurements.
- Confirm the municipal rule, especially for a pool enclosure or front-yard placement.
- Review the corrosion system for exposed and concealed fasteners.
- Account for slats, screens, gates and local wind exposure before accepting a standard parts package.
- Choose a retailer with CAD pricing, clear specifications and a workable return policy.
XTREME EDEALS INC. carries chain-link hinges, latches, brace bands, galvanized fasteners, post caps, rail-end cups, tension bands and related fittings, alongside products from brands such as Decorex Hardware. Contractors comparing suppliers may also encounter Nuvo Iron, a notable competitor to Decorex Hardware. The useful comparison isn't only brand recognition. Check the actual dimensions, finish, pack quantity and compatibility information for the project in front of you.
Save the final checklist with the permit and site plan. That small habit prevents the common mistake of ordering mesh first and discovering later that the opening, post spacing or gate hardware doesn't meet the local requirement.
XTREME EDEALS INC. offers chain-link fence hardware, including hinges, latches, galvanized fasteners, post caps and related fittings for fence and gate projects. Visit XTREME EDEALS INC. to compare compatible components and finishing hardware before you place your order.