

1/8 inch is the right starting gap for wet, preservative-saturated wood decking, and 1/4 inch is a common target for dry pressure-treated pine and many composite layouts. A deck board spacing calculator turns those numbers into a layout you can build, instead of a guess you'll regret when the boards move.
You're probably standing on a joist frame right now, tape in one hand, spacer in the other, wondering if the gaps look right. They might look fine today and still fail by the next wet season, because the true question is never just what looks even, it's how the board will behave after it dries, swells, or shrinks.
Why the Right Deck Board Gap Matters More Than You Think
A builder can spot this mistake in minutes. The first rows look tidy, the spacers are consistent, and then the material tells a different story a few weeks later. Wet boards shrink, dry boards open up, and a layout that looked right on install day can end up too tight, too loose, or uneven enough to make the whole deck look careless.
That makes spacing a moisture-management decision first and a visual choice second. On a real deck, the right gap depends on how the board is shipped, stored, and fastened, because wood and composite products move in different ways once they are exposed to sun, rain, and air flow. California residential deck guidance treats composite decking as a spacer-driven layout for a consistent gap, while wood decking saturated with preservatives should not exceed 1/8 inch spacing because the boards shrink over time and the gap usually widens to about 1/4 inch. That starting point affects fit, drainage, and long-term movement, especially in coastal and inland climates where moisture cycling changes board dimensions, and a deck board calculator guidance tool helps tie those spacing choices to deck size and board size instead of guessing from appearance alone.
What goes wrong when the gap is wrong
A 16-foot run can punish a small mistake. If the gap is too wide for the material, you can end up with a layout that burns through an extra board's worth of lumber over the run, or leaves an awkward sliver at the edge that looks like an afterthought and becomes a clean-up headache when the fascia goes on.
The gap you start with is not the gap you live with.
That is the part many first-time builders miss. A deck board spacing calculator gives you a realistic starting number, but it also forces you to account for movement before you fasten the first board. The question goes beyond appearance, it is about how the board behaves after installation. That is the difference between a deck that stays straight and one that starts telegraphing every bad choice once the weather turns.
A small layout choice can also affect budget. If the spacing is wrong, you may buy more lumber than the frame needs, or have to cut around a finish detail that should have been planned from the start. For a DIY build, that is where the calculator earns its keep, because it helps you line up material use with the way the deck will perform in service.
Inputs Every Deck Board Spacing Calculator Needs
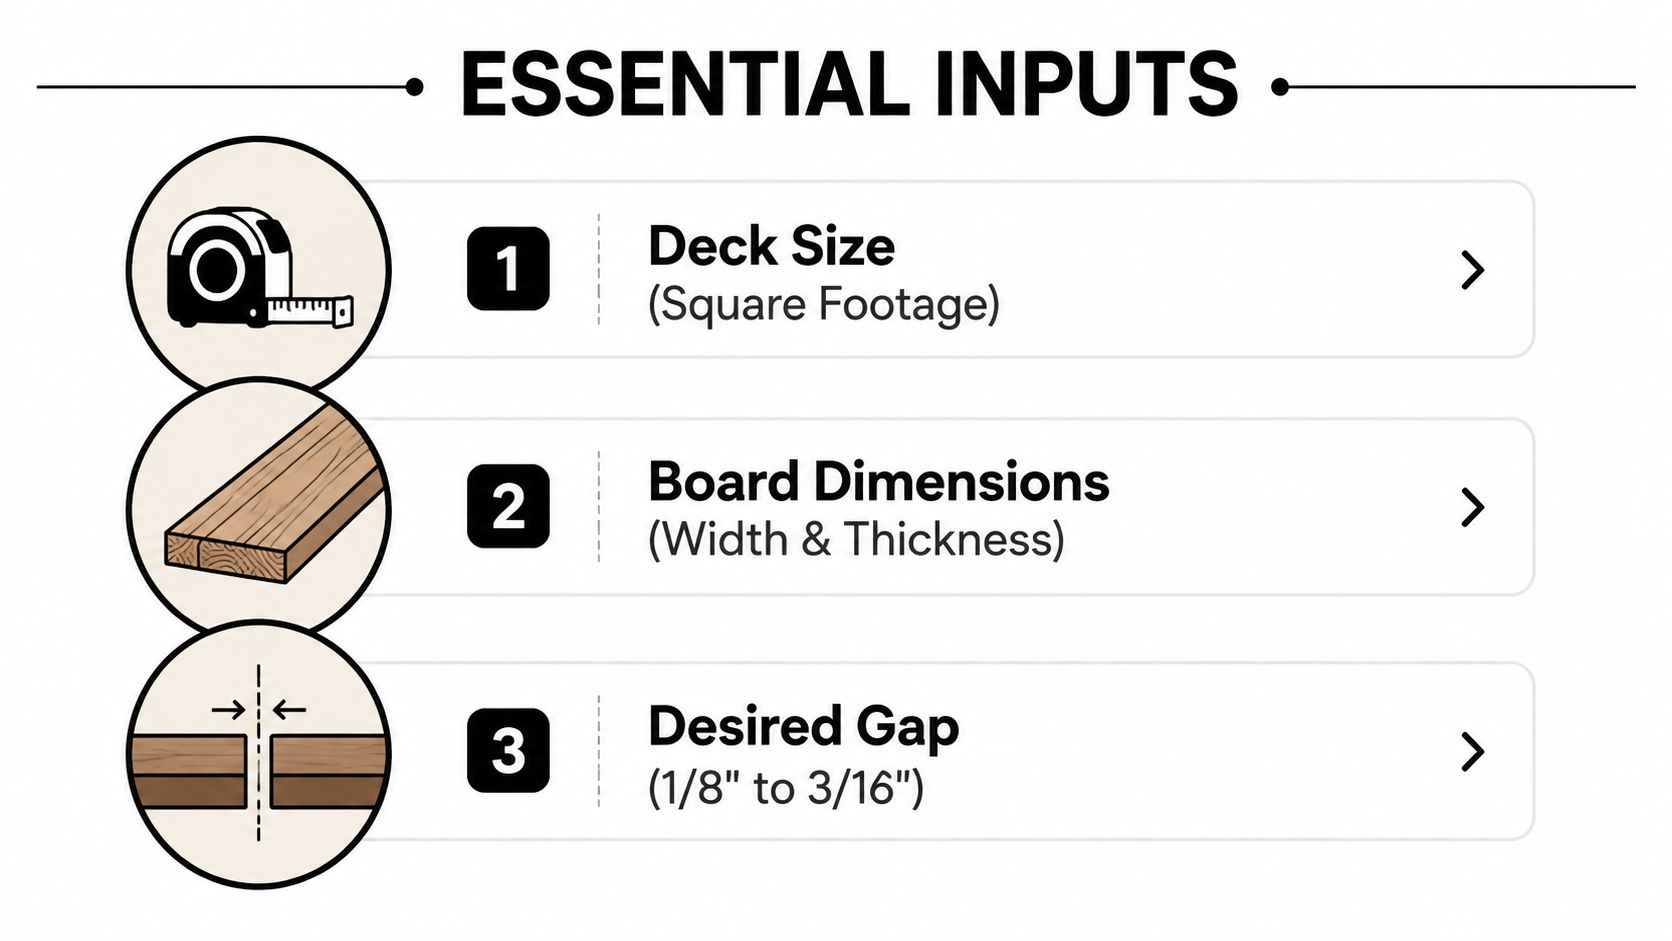
Before any formula matters, the measurements have to be right. A calculator can only work with the numbers you feed it, and on a real job the first mistake usually comes from measuring the wrong thing, not from the math. Measure the actual decked area, not the footprint of the house, and confirm the board size you really have in hand, because nominal lumber labels don't tell you the full story.
Start with the three inputs that actually drive the layout
The core inputs are deck size, board size, and target gap. Those three numbers are the backbone of the layout because the calculator can't guess how much surface you're covering, how wide each board really is, or how much room you're leaving for movement.
Use the frame, not wishful thinking, as your reference. If the run changes width from one end to the other, measure the actual edges and plan from the side that controls your finish line, usually the fascia side when appearance matters most, or the house side when the ledger and first row set the rhythm. A helpful way to think about it is simple, the calculator needs the distance you're covering, the actual width of the board, and the gap you intend to hold with spacers.
Check the lumber the way it behaves on site
A 5/4×6 board is not 6 inches wide in actual practice. That matters, because a calculator set up for nominal sizes will drift off layout quickly, and the error compounds on longer runs. Also read the moisture condition before you commit, because the installation gap changes materially if the boards go down wet instead of dry.
Use the board's condition, not just its label.
Bake waste into the plan before you start cutting. The established decking guide in the brief recommends a 10% to 15% scrap rate to cover cuts, waste, and off-cuts, and that matters on a deck where every bad cut gets expensive fast. If you're looking for a support page while you sort your measurements and product mix, this deck support resource is worth keeping open in another tab.
The Core Formula and a Worked Example
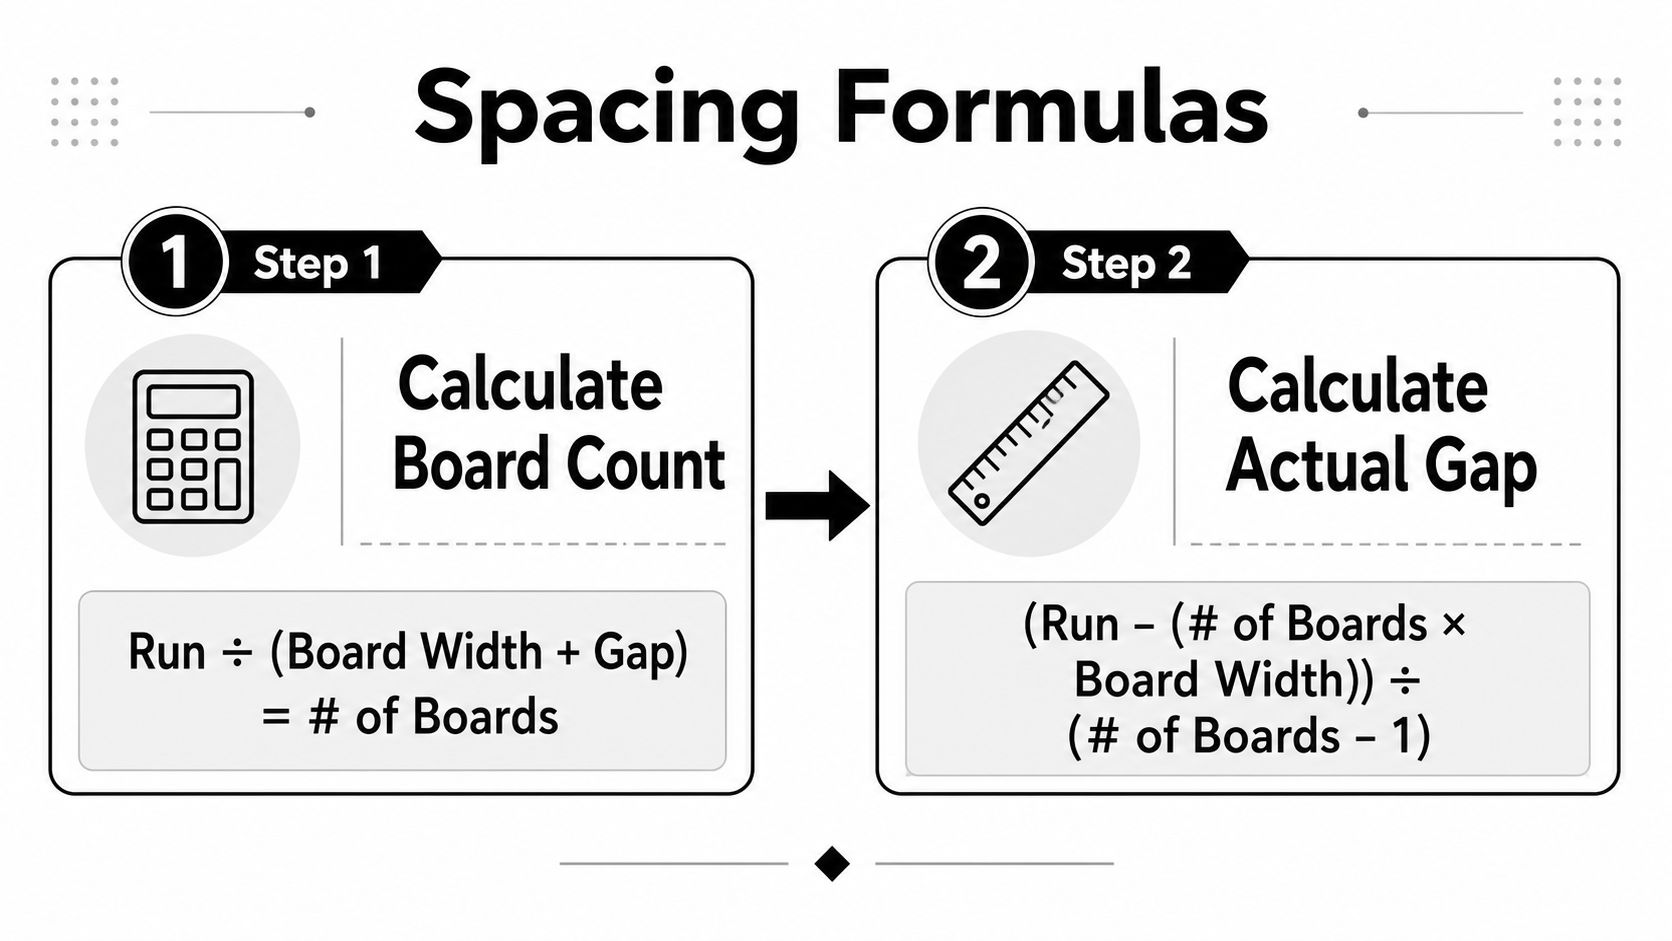
The math is straightforward once you strip away the shop talk. One calculator source gives the main layout formula as board count = round(run ÷ (board width + target gap)), then refines the spacing with exact gap = (run − board count × board width) ÷ board count. That is the engine behind the tool, and it's the part that turns a rough deck run into an even field of boards. Calculator formula method
Turn the formula into usable numbers
Start with the run, the actual board width, and the gap you want to target. For a 16-foot run with 5/4×6 pressure-treated boards and a 1/8-inch target gap, the calculator rounds the count, then recalculates the actual gap so the boards land evenly. If that exact gap slips outside the safe range for the material, you adjust before fastening, not after the deck is half-covered.
That last part matters more than the equation itself. A printed target is just a starting point, and the calculator output should override it when the board count and run length force a cleaner fit. If the exact gap is close but not quite right, the better move is to adjust the layout a little on paper than to fight the deck in the field.
A second example shows how the same method flexes
Composite doesn't behave like pressure-treated pine, so the target gap changes too. On a 12-foot run with composite boards at 1/4 inch, the same formula still applies, but the material and expected movement guide the target you enter. That's why a calculator is so useful, it doesn't lock you into one number, it tells you whether the number works for the product in front of you.
If you already use planning tools for roofing, the logic will feel familiar. A roofing calculator for material selection works the same way in principle, the input changes the output, and the output only makes sense when the material choice is honest from the start.
Spacing Rules by Decking Material
A deck board spacing calculator only works if the material input matches the board you bought. Pressure-treated pine that is still holding moisture, cedar that has already started to settle, and composite that moves with heat all want different gaps, and that choice affects both the layout and the budget for the job. If you build to the wrong gap, you can end up with a deck that looks clean on install day and then opens up, pinches tight, or wastes material later.
Material by material, what usually works
| Material | Target Gap at Install | Why |
|---|---|---|
| Pressure-treated pine | 1/8 inch when wet, often up to 1/4 inch when dry | Wet boards shrink, so starting too wide can leave a bigger gap later. |
| Cedar | 1/8 inch to 1/4 inch | Cedar moves less than wet PT and can hold a tighter, cleaner line. |
| Hardwoods like ipe | 1/8 inch to 1/4 inch | Dense boards stay more stable, but they still need room for drainage and seasonal change. |
| Composite and PVC | 1/4 inch is common, 3/16 inch can make sense in colder conditions | These products rely on a consistent gap for drainage and thermal movement. |
For pressure-treated lumber, the working assumption is that the board will lose moisture after install, so the gap you set on day one is rarely the gap you live with later. Cedar is usually steadier, which gives you a little more room to choose between a tighter visual line and a safer allowance for movement. Hardwoods such as ipe hold their shape better than many softwoods, but they still need a gap that lets water drain and seasonal change happen without forcing the edges together.
Composite and PVC need a different approach because the material moves with temperature, and the spacing has to stay consistent across the run. That consistency is part of the reason a calculator is useful for planning, since it helps you line up board count, spacing, and waste before you start cutting.
The same planning logic shows up in other material guides too. An aluminum deck material overview is a good reminder that the deck surface is only one part of the system, because the framing, finish, and product type all affect how the finished spacing behaves.
The California-relevant baseline in the brief says saturated wood shouldn't exceed 1/8 inch at installation, because shrinkage opens the gap later, while composite systems commonly use spacers for a consistent gap. That is a material rule tied to how the boards move after install. For a cost check that puts spacing decisions in the context of the whole project, the typical outdoor living space budget in Massachusetts gives useful context before you commit to a board type or a tighter install tolerance.
Don't forget the edge details
Picture-frame borders and butt joints do not follow the same rhythm as the field boards. End-to-end joints need their own gap rule, and long runs with butt joints get more sensitive because every joint creates another place for movement and layout error to show up.
If the deck has a border, that border often becomes the first place where uneven spacing stands out. Keep the joint treatment consistent, check the board ends before fastening, and do not assume the field spacing will solve a tight corner or a poorly planned seam on its own.
Turning the Calculator Output Into a Layout on the Deck
A calculator gives you a number. The deck still has to be lined out so that number makes sense in wood. Start by snapping a chalk line at the house, then dry-fit the first row with physical spacers so the opening board doesn't wander before you've even established your reference line.
Build the layout from the first real line
Check the run for square before you commit to a full field of boards. If the frame is slightly out, a tiny shift in the starting gap can absorb the rounding without anyone noticing, and that's often cleaner than forcing the last board into a visible compromise. A small adjustment, even around 1/16 inch across the run, can keep the finish line from turning into a sliver.
Let the layout land on a full board when you can, not a scrap-width apology at the edge.
When the last board wants to become a narrow strip, decide whether the finish edge can run a little wider instead. That's a judgement call, not a math failure. A slightly generous edge is usually less distracting than a tight sliver, especially once trim, facia, and rail posts start framing the field.
Special layouts need special spacing logic
Diagonal layouts change how you read the spacing because the gap has to be measured perpendicular to the board, not along the run. Picture frames need the same care, because the border boards often set the visual tone and any inconsistency shows there first. When the layout gets complicated, the calculator still helps, but the chalk line and spacer discipline matter even more.
For builders who are budgeting the whole outdoor space, the typical outdoor living space budget in Massachusetts shows why layout efficiency matters before the boards go down, because mistakes at the spacing stage tend to echo through the rest of the project. The deck may be local, but the planning discipline is universal.
Common Spacing Mistakes That Cost the Most
Most first decks don't fail because the builder can't cut a straight board. They fail because the spacing logic was sloppy before the saw ever came out. The symptoms are easy to spot, gaps that drift, edges that don't finish cleanly, and boards that seem to fight one another as the season changes.
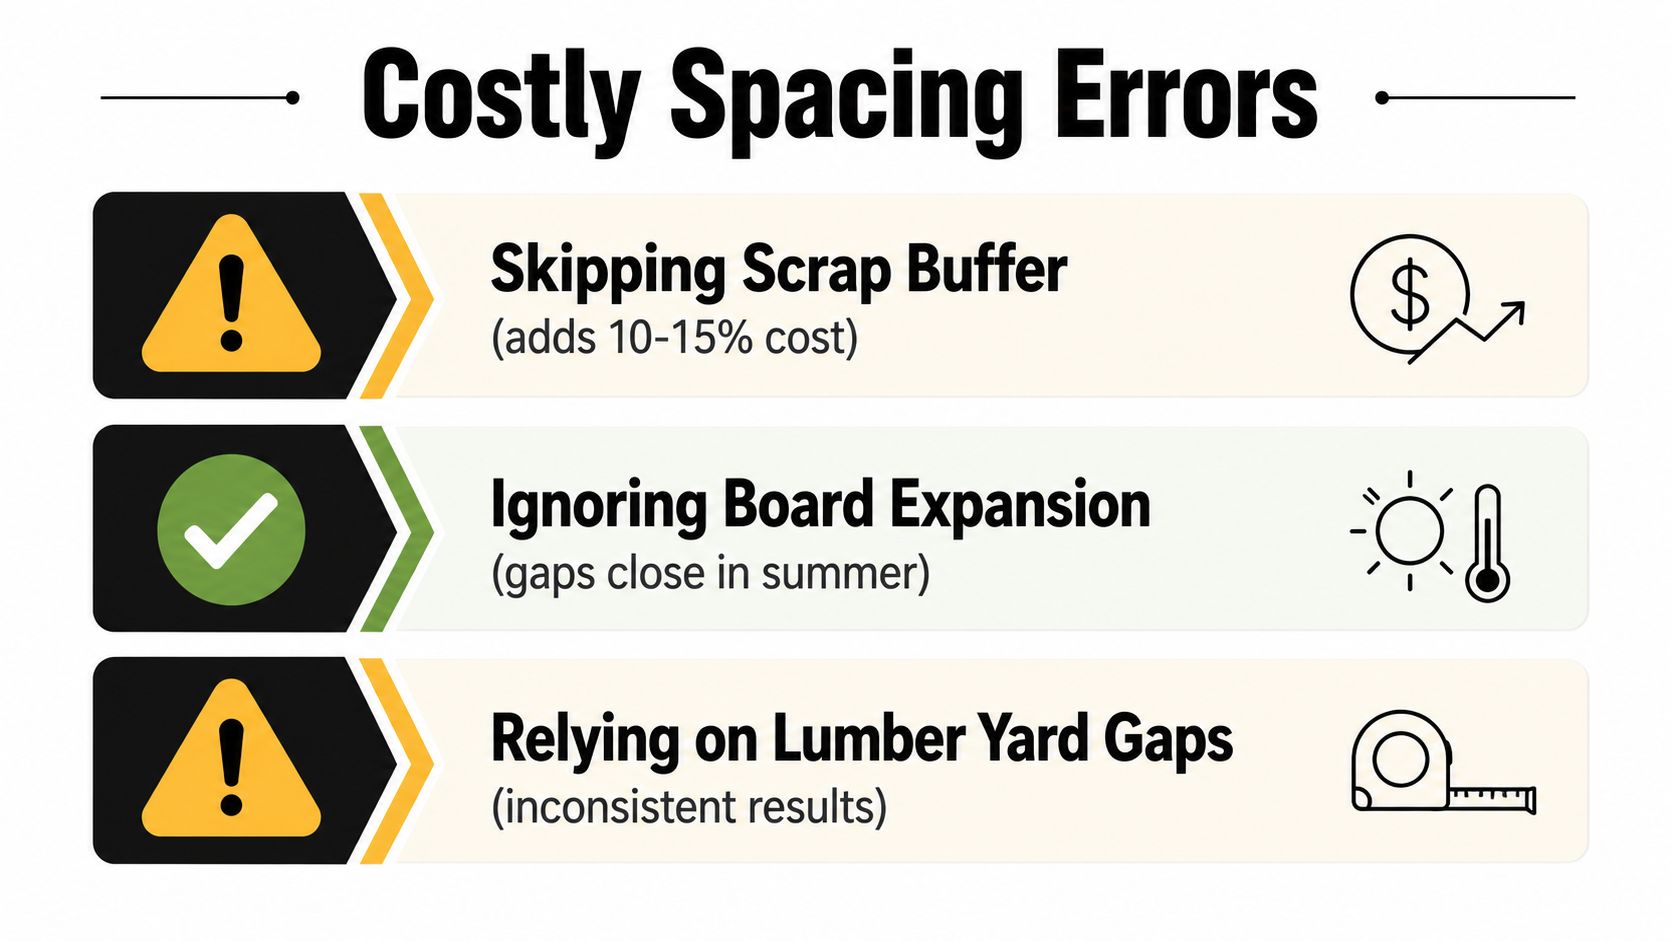
The mistakes I see most often
- Skipping the scrap buffer: The symptom is a job that stalls over missing material. The cause is planning to exact counts only. The fix is to build the 10% to 15% waste allowance into the buy list before the first board is cut.
- Trusting nominal lumber widths: The symptom is a layout that drifts off centre or lands on the wrong edge. The cause is using the label instead of the actual board size. The fix is to measure the board you're installing.
- Spacing by eye: The symptom is a deck that looks fine from a distance but uneven up close. The cause is inconsistent hands-on judgement. The fix is to use physical spacers, not a quick visual guess.
A fourth mistake deserves its own warning. Wet pressure-treated boards installed at 1/4 inch can crush together as they dry and move, which is exactly how a neat-looking install turns into a tight, stressed field later in the year. If the wood is still wet, start at the safer tighter end and let the material open naturally as it settles.
The board you install today isn't the board you'll live with in August.
Long runs with butt joints also trip people up. Those joints don't halve the spacing math, they add more places where the layout can go wrong, so treat them as a separate planning problem instead of hoping the field boards will absorb the error.
Accessories That Make Spacing Easier on Install Day
The right spacers do more for a deck than a perfect pencil line ever will. Fixed plastic spacers in 1/8 inch, 3/16 inch, and 1/4 inch keep the field consistent, while self-spacing composite screws and hidden fastener systems help hold the rhythm once the install starts moving fast. If your calculator says a tighter gap, don't try to improvise it with whatever scrap is in the bin.

The small tools that keep the gap honest
A story pole can outperform spacers on diagonal layouts because it transfers the spacing pattern without making you measure every board individually. Chalk lines still matter, especially when the first row needs to stay dead straight, but the spacer tool is what keeps the deck from wandering once you get into the rhythm of fastening.
If you're comparing fastening systems, the composite deck fasteners page is a useful reference for how hidden clips and compatible screws support a consistent gap. For a practical floor-level comparison of spacer habits, the Cumming flooring expert advice is a reminder that consistent spacing is a craft discipline, not a lucky accident.
Joist hangers, post bases, and the framing hardware underneath the deck won't set the board gap for you, but they support the structure that keeps the surface honest. A clean finish starts with a sound frame, then continues with the right spacers and fasteners in hand before the first board goes down.
Print this before you start: check the board moisture, verify actual board width, choose the target gap by material, set aside scrap allowance, stage the right spacers, and confirm the last board won't land as a sliver. If the math, the material, and the hardware all agree, the install goes smoother and the deck stays cleaner for longer.
XTREME EDEALS INC. carries deck and fencing accessories, fasteners, post caps, joist hangers, and post base brackets that help you build a better layout from the frame up. If you're planning a new deck or fixing an old one, visit XTREME EDEALS INC. to find the hardware that keeps your spacing consistent and your install moving.