
You're usually looking into fence gate closures after the gate has already started annoying you. It drags, it slams, it stops short of the latch, or it swings shut just fine until the weather changes and then suddenly won't catch. If the gate is near a pool, a side yard, or a driveway, that stops being a nuisance and becomes a safety problem.
A lot of people shop for a latch when what they need is a closure system. The hinge, closer, latch, post rigidity, gate width, soil movement, and code requirements all work together. Get one part wrong and the rest of the hardware spends its life compensating for it.
Beyond Just Shutting the Gate
A gate that doesn't return to closed and latched every time is telling you something. Either the hardware is undersized, the geometry is off, the post is moving, or the gate was never built to carry the closing force in the first place.
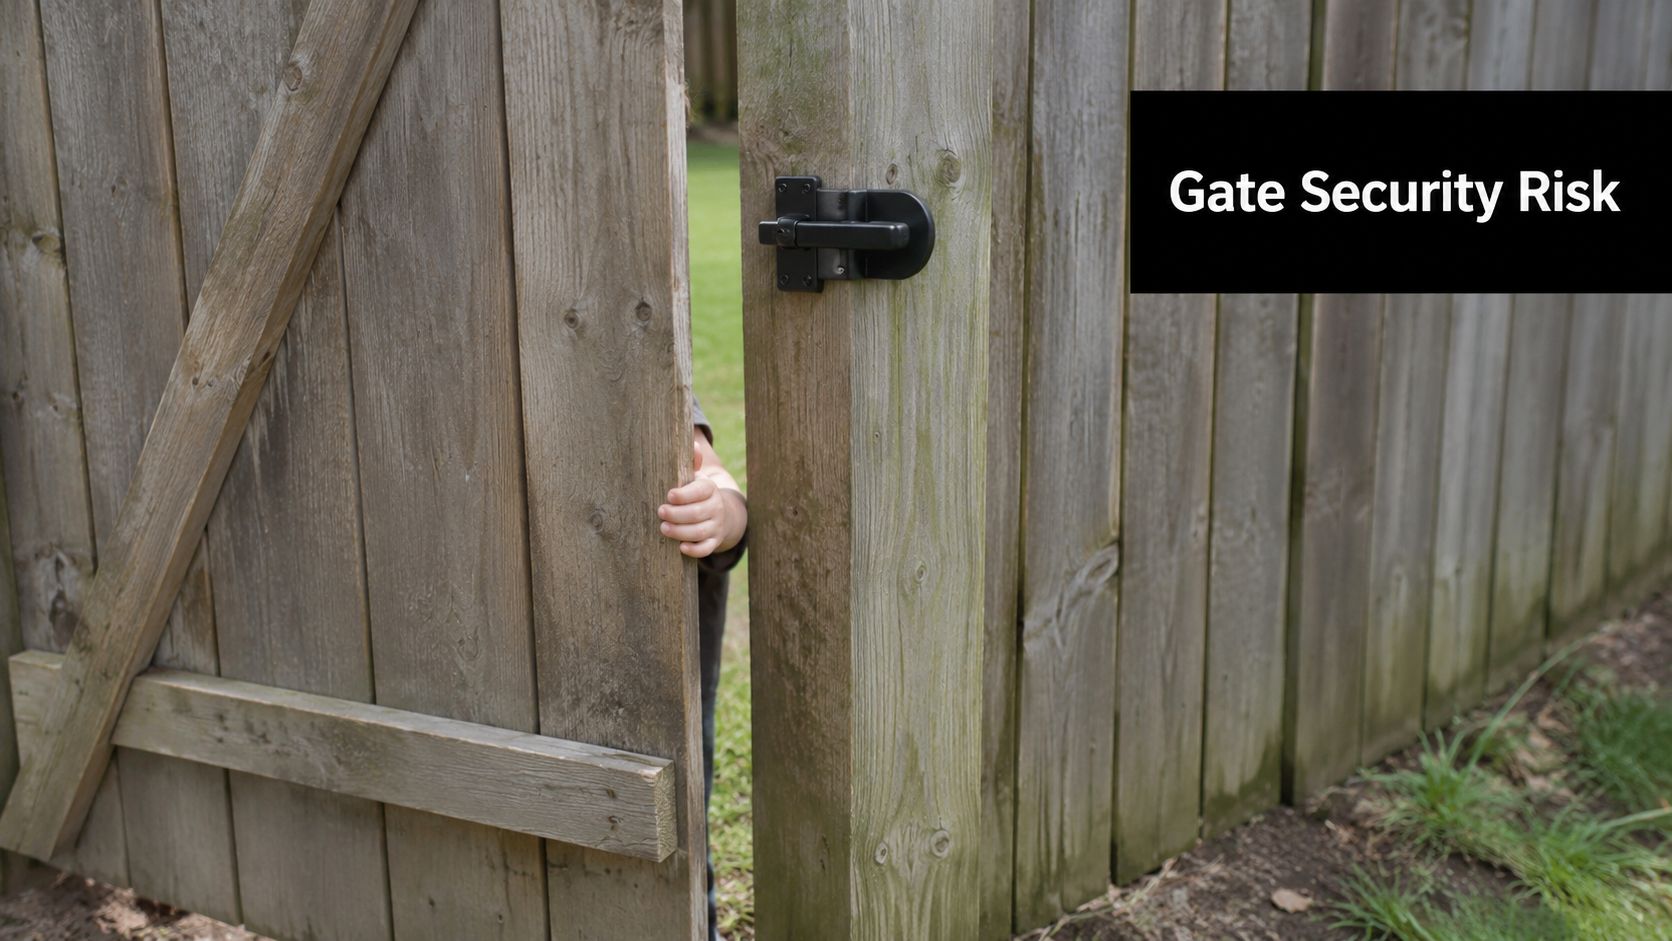
For simple garden gates, a light-duty spring hinge and a basic latch can be enough. For privacy gates, pet gates, or anything that sees daily use, that setup often turns into a callback waiting to happen. Pool gates are stricter still. They need dependable self-closing and self-latching performance, not “good enough most of the time”.
The same applies when a gate is tied into access control. If you're pairing a secure latch or lockable closer with remote entry, it helps to understand how cellular gate openers work so the mechanical hardware and the access system don't fight each other.
What actually makes a gate close well
Three things matter more than most DIY guides admit:
- The gate has to swing freely. If the frame is twisted or sagging, no closer will fix that for long.
- The post has to stay put. A closer adds constant force. Weak posts slowly lose alignment.
- The latch has to forgive small movement without becoming sloppy. That's where better latch design earns its keep.
Practical rule: If you have to push the gate that last inch by hand, the problem usually isn't just the latch. It's the whole closure setup.
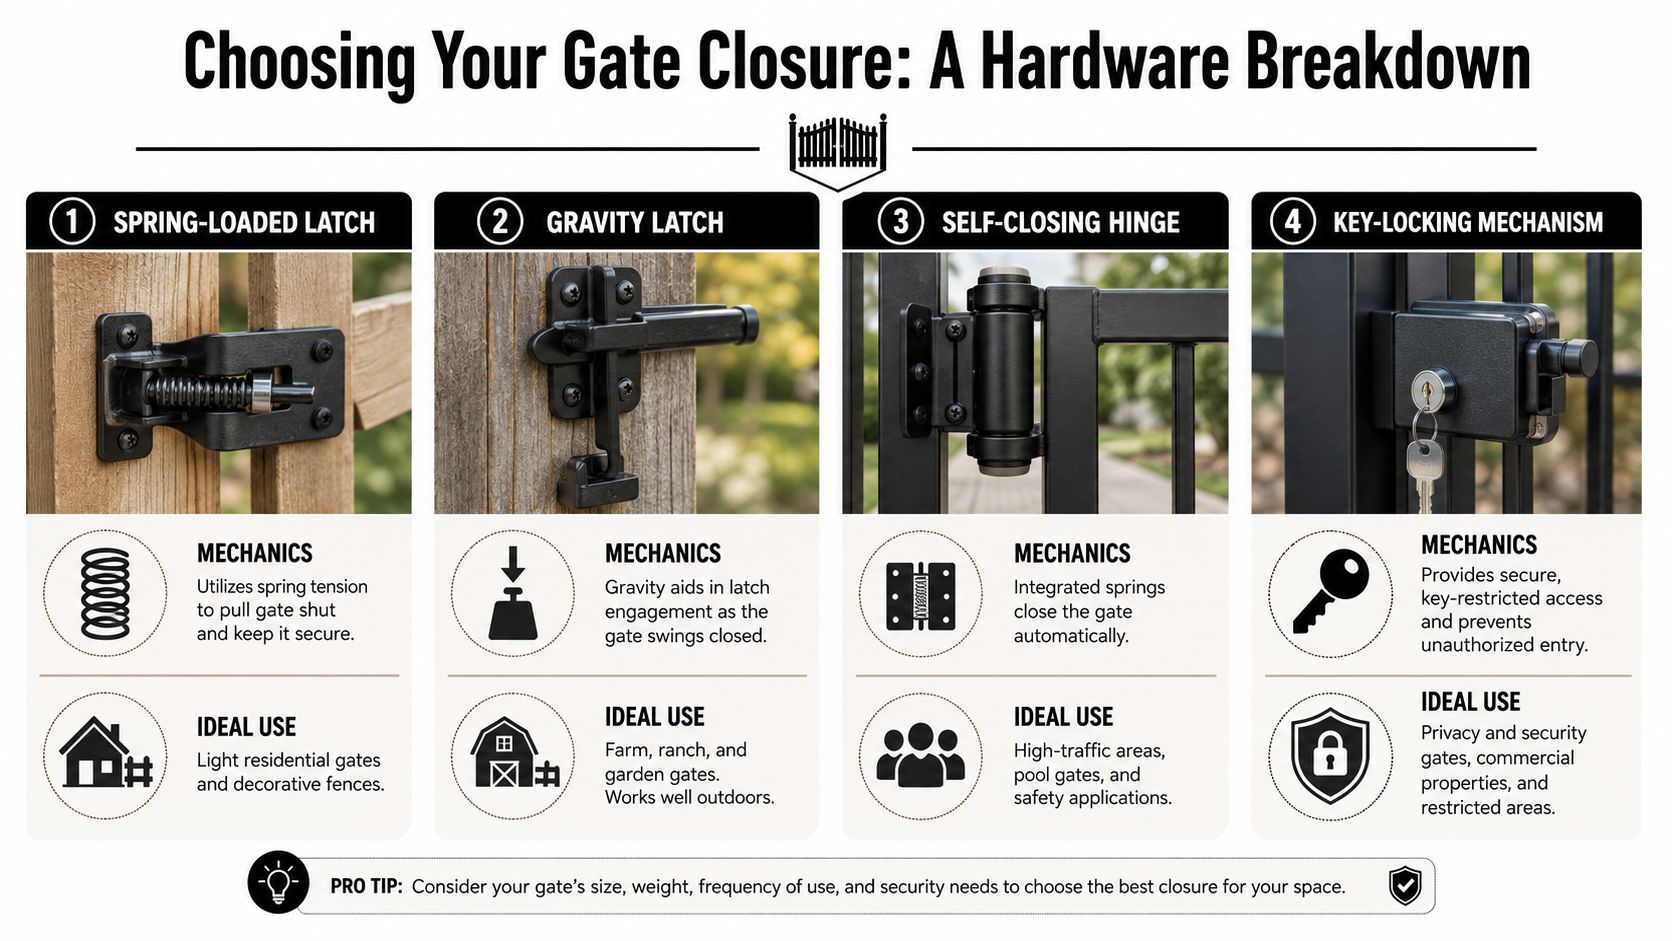
Most fence gate closures fall into a few camps. Spring hinges are cheap and common. Wrap hinges give more support on wood gates. Gravity and slam latches handle everyday catch-and-release duty. Magnetic latches are a better fit where consistent engagement matters. Hydraulic closers cost more, but they give you control over swing speed and final latching speed, which is why they're worth it on heavier or code-sensitive gates.
Choosing Your Closure A Breakdown of Gate Hardware
Not all fence gate closures solve the same problem. Some are built to pull a light gate shut. Others are built to control a heavy leaf, absorb daily abuse, and still latch predictably after weather, movement, and wear.
Spring hinges and wrap hinges
A spring hinge stores tension in the hinge body and uses that force to pull the gate back toward closed. They're common on side gates, bin enclosures, and lighter timber gates. The upside is simplicity. The downside is limited control. If the spring is too loose, the gate won't latch. Too tight, and it slams.
Self-closing wrap hinges spread load over more of the gate stile. That matters on medium-weight wooden privacy gates where a narrow butt hinge can start chewing up fastener holes over time. Decorex Hardware hinge sets are a practical example in this category because they suit the kind of medium-duty residential work where you want a cleaner install without jumping straight to hydraulic hardware.
Gravity latches and slam latches
Gravity latches are simple. The moving catch drops into place by weight. They're fine on farm gates, garden gates, and low-consequence pedestrian gates. They don't like misalignment, and they're not my first choice when a gate has to latch every time under changing conditions.
Slam latches are better when the gate gets pushed shut often and you want a positive catch without fussing. You see them on privacy fences and service gates. They're fast, familiar, and forgiving enough for normal movement, but they still depend on decent alignment.
A latch can only catch what the hinges deliver. If the gate arrives low, twisted, or too fast, the latch gets blamed for a structural problem.
Magnetic latches and key-locking hardware
Magnetic latches are a stronger option when reliability matters more than purchase price. They engage more cleanly than many basic mechanical catches and tend to tolerate small changes in alignment better. On gates where child safety or controlled access matters, this style makes sense.
Key-locking gate hardware adds another layer. It doesn't replace a self-closing function, but it does help when the gate borders a lane, alley, shared access point, or front approach where unauthorised entry is the bigger concern than simple containment.
If you're comparing product styles and compatibility across hinges, latches, inserts, and brackets, a broad fence and gate hardware collection is useful because it lets you match the closure type to the gate build rather than forcing one hardware type onto every job.
Hydraulic closers
Hydraulic gate closers are the closest thing to a professional upgrade that a homeowner can feel. They control the swing through the whole arc instead of just yanking the gate with spring tension. That means less slam, better final approach, and more precise adjustment.
Professional-grade closers used in California projects are specified for an all-weather operating range of -20°F to 120°F, with a failure rate of less than 2% over 3 years when installed with the correct 8.75-inch pivot offset and adjusted for specific latching speeds according to Waterson technical specifications. That's why these closers show up on demanding residential and commercial work.
Fence Gate Closure Comparison
| Closure Type | Best For | Key Feature | Typical Load |
|---|---|---|---|
| Spring hinge | Light garden and side gates | Simple self-closing tension | Light |
| Self-closing wrap hinge | Medium-weight wood privacy gates | Better load distribution on timber frames | Light to medium |
| Gravity or slam latch | Everyday pedestrian gates | Fast mechanical engagement | Light to medium |
| Magnetic latch | Pool and safety-focused gates | More consistent latch engagement | Medium |
| Hydraulic closer | Heavy, high-use, or code-sensitive gates | Adjustable swing and latching control | Medium to heavy |
What works and what doesn't
- Works well: Matching the closer to gate weight, width, and traffic.
- Fails often: Treating every gate like a lightweight garden gate.
- Works well: Using magnetic or hydraulic systems where reliable latching matters.
- Fails often: Installing cheap spring hardware on broad privacy gates and expecting smooth operation.
Sizing It Up Measurements and Material Considerations
Before you buy hardware, measure the gate you have, not the gate you think you built. Width, frame style, infill weight, hinge spacing, post condition, and swing clearance all affect closure performance.
Start with width and support
Residential walk gates usually sit in a manageable range, while equipment or service access gates run much wider. As a practical baseline, standard walk-through widths are 36 to 48 inches, equipment access gates are 60 to 72 inches, and gate posts should be buried at least 3 feet, with 3.5 feet preferred for gates wider than 5 feet or in frost-heave zones according to this privacy fence gate contractor guide.
That post depth matters because closers don't just close gates. They apply repeat force into the hinge side post every single cycle.
Post rigidity decides whether the closer succeeds
Weak posts create fake hardware problems. The latch misses, the strike rubs, the closer seems underpowered, and people keep adjusting tension when the underlying issue is movement at the hinge side.
Common installation pitfalls include insufficient post rigidity, which causes a 40% higher rate of latch failure over 12 months due to post sagging according to this gate installation analysis. That's why I'd rather overbuild the hinge post than overspec the closer.
If the hinge post flexes when you pull the gate by hand, the closure hardware is already working from behind.
Wide gates need wheel support
Once the gate exceeds 48 inches, the gate wheel stops being an accessory and starts becoming part of the structure. The same source notes that including a gate wheel and pin reduces hinge stress by approximately 35%, directly correlating to a 90% success rate in maintaining self-closing functionality over a 5-year period.
That changes hardware choice in a hurry. A wide cedar privacy gate with no wheel asks the hinges and latch to fight gravity all day. Add wheel support and the closer can focus on controlled movement instead of carrying dead load.
Material affects tuning
Use these practical rules:
- Softwood frames move more and can loosen fasteners sooner.
- Cedar gates resist weather well but still sag if the frame is underbuilt.
- Steel and aluminium frames hold alignment better, but they hit latches harder if the closer is set too aggressively.
- Composite-filled gates often weigh more than they look. Don't size hardware by appearance.
Measure hinge-side clearance, latch-side reveal, and bottom clearance before you order anything. A well-sized closer on a badly supported gate still performs badly.
The Installation Playbook From Box to Securely Closed
A gate closer usually gets blamed for problems it did not create. I see it on pool gates all the time. The hardware gets swapped, tension gets cranked up, and the gate still misses the latch because the post is out of plumb, the jamb spacing is inconsistent, or the concrete moved after a wet season.
Start with layout. Good sequencing saves holes, fasteners, and time.
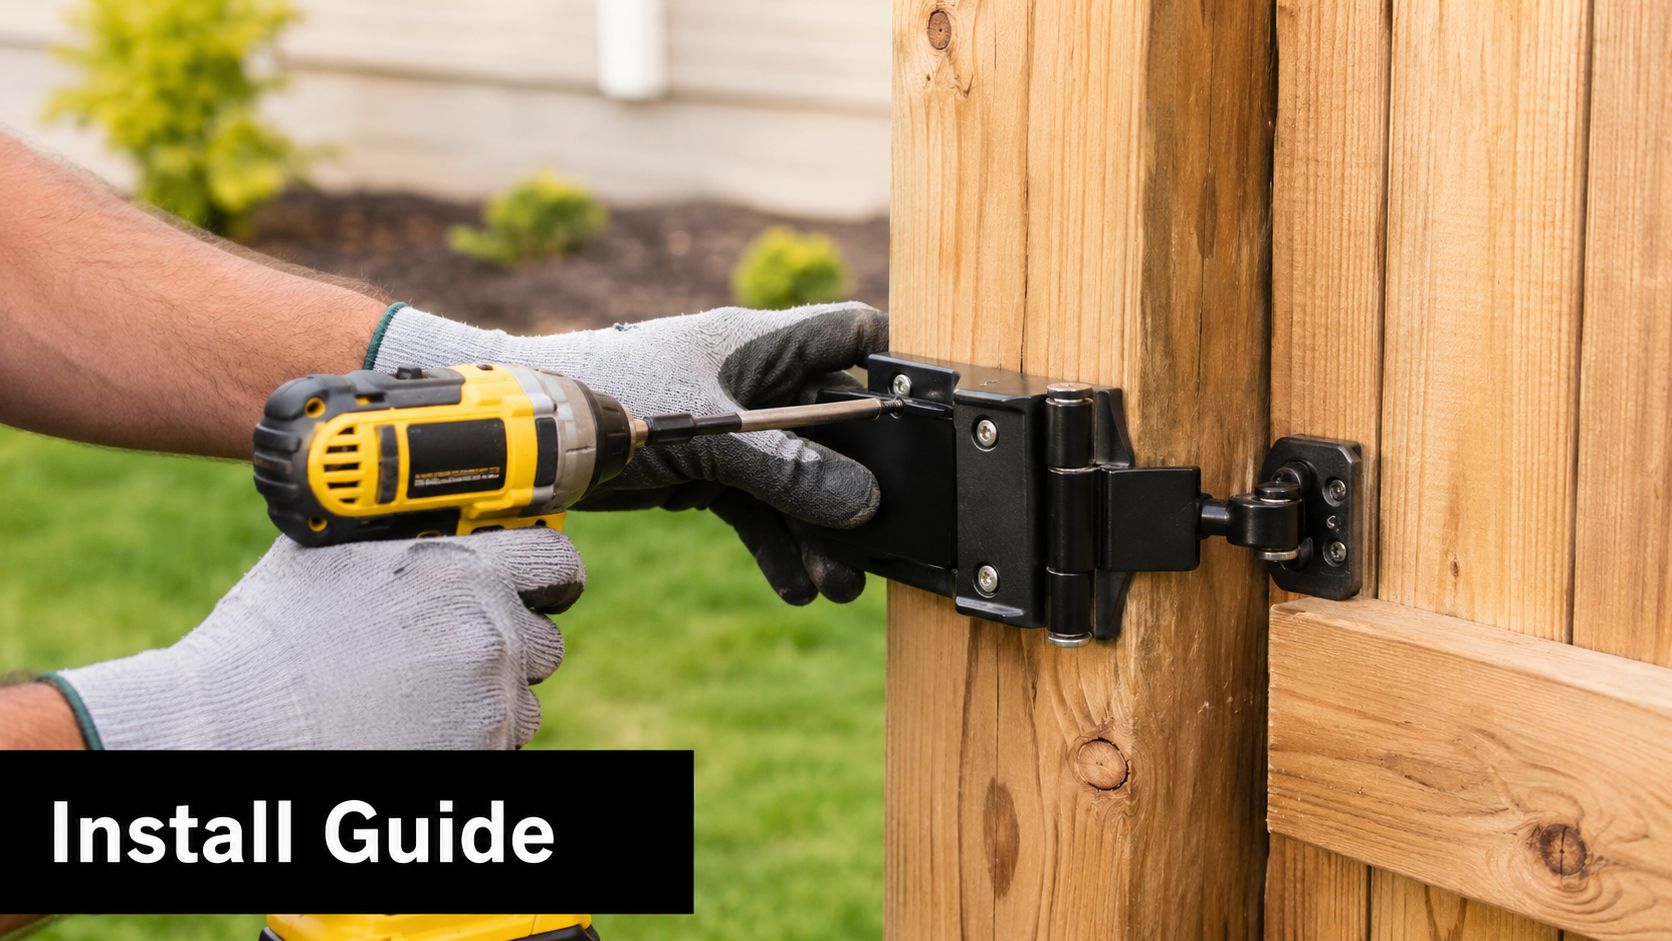
Tools that save time
Keep these within reach before the box gets opened:
- Drill and impact driver
- Sharp bits for wood or metal
- Tape measure
- Speed square or combination square
- Level
- Clamps
- Pilot bit and countersink if needed
- Exterior-rated fasteners
- Shims
- Pencil or layout knife
If the gate needs more than a closer swap, a matched fence gate kit can cut fitting time because the hinge and latch parts are built to work on the same geometry.
Start with the gate, not the closer
Before any brackets go on, swing the gate by hand through the full arc. It should move freely and land on the latch line without lifting, dragging, or twisting. If it does not, fix that first.
On California jobs, I also check for site movement before installation. Expansive clay can lift one side of a walk gate enough to change the latch approach, and minor settlement around a pool deck can throw off clearances that looked fine on day one. In higher seismic areas, hardware that has a little adjustability is easier to service later than a rigid setup with no correction room.
Installing a self-closing spring hinge
Spring hinges need accurate hinge alignment and a gate that already swings cleanly. They are common on lighter wood and metal gates, but they have limits. On a heavy privacy gate or a gate that sees wind exposure, too much spring tension can make the latch hit hard and loosen screws over time.
Use this order:
- Clamp the gate in its final position. Hold the reveal consistent at the top and latch side.
- Lay out the hinges square. Keep both leaves in the same plane.
- Predrill every fastener hole. This matters on cedar and other softer species.
- Snug the screws, then test swing. Do not fully torque fasteners until the gate moves cleanly.
- Add spring tension in small steps. Test from partly open, halfway, and near closed.
One common mistake is using the spring to pull a warped gate back into line. That never holds for long. The spring should close the gate, not correct frame geometry.
Installing a hydraulic closer
Hydraulic closers are less forgiving during layout, but they give better control once installed. The bracket position matters because the arm has to track through the same path every cycle. Measure from the true hinge pivot, not from the face of the post, trim cap, or hinge leaf.
A practical install sequence looks like this:
- Verify free swing first. No rubbing at the bottom rail, no latch interference, no post twist.
- Mark the mounting points from the hinge centerline. Follow the closer template exactly.
- Dry-fit the body and bracket. Check arm travel through the full opening range.
- Fasten loosely at first. Recheck alignment before final tightening.
- Cycle the gate several times. Watch for binding, arm overtravel, or bracket movement.
- Tune closing and latching speeds last. Final adjustment comes after the latch is set.
For pool gates, this step matters even more. The gate has to self-close and self-latch reliably from small opening angles, not just from fully open. That is the test inspectors care about, and it is where rushed installs usually fail.
A visual walkthrough helps when you're matching bracket position and arm travel:
Adjusting speed the right way
Hydraulic units have two separate behaviors to tune. One controls the main swing through most of the travel. The other controls the final push into the latch. Set them independently, as shown in this hydraulic gate closer installation demonstration.
That distinction matters in the field. A gate can look perfect from fully open and still stall in the last few inches. On aluminum frames, too much latching force can make the strike noisy. On wood gates, too little final force often shows up after the rails swell in damp weather.
Make small adjustments. Quarter-turn changes are safer than chasing the setting back and forth.
Final checks before you call it done
Workshop habit: Open the gate a small amount, halfway, and fully open. If it only latches from one position, it isn't dialled in yet.
Run these checks before you pack up:
- Fastener check: Nothing backing out or biting at an angle.
- Latch engagement: The latch catches cleanly without lifting or pushing the gate by hand.
- Return test: The gate closes from several opening positions.
- Clearance check: No scrape at the bottom and no rub at the strike side.
- Pool safety check where required: Self-closing and self-latching action works consistently with the gate opened only part way.
- User test: One-hand operation for an adult, child-resistant function where required.
Fine-Tuning and Troubleshooting Common Issues
Most closure problems show up after installation, not during it. The gate works for a week, then starts missing the latch in the morning. Or it closes softly in dry weather and slams after rain. That isn't random. Gates move, posts shift, and closers need recalibration.
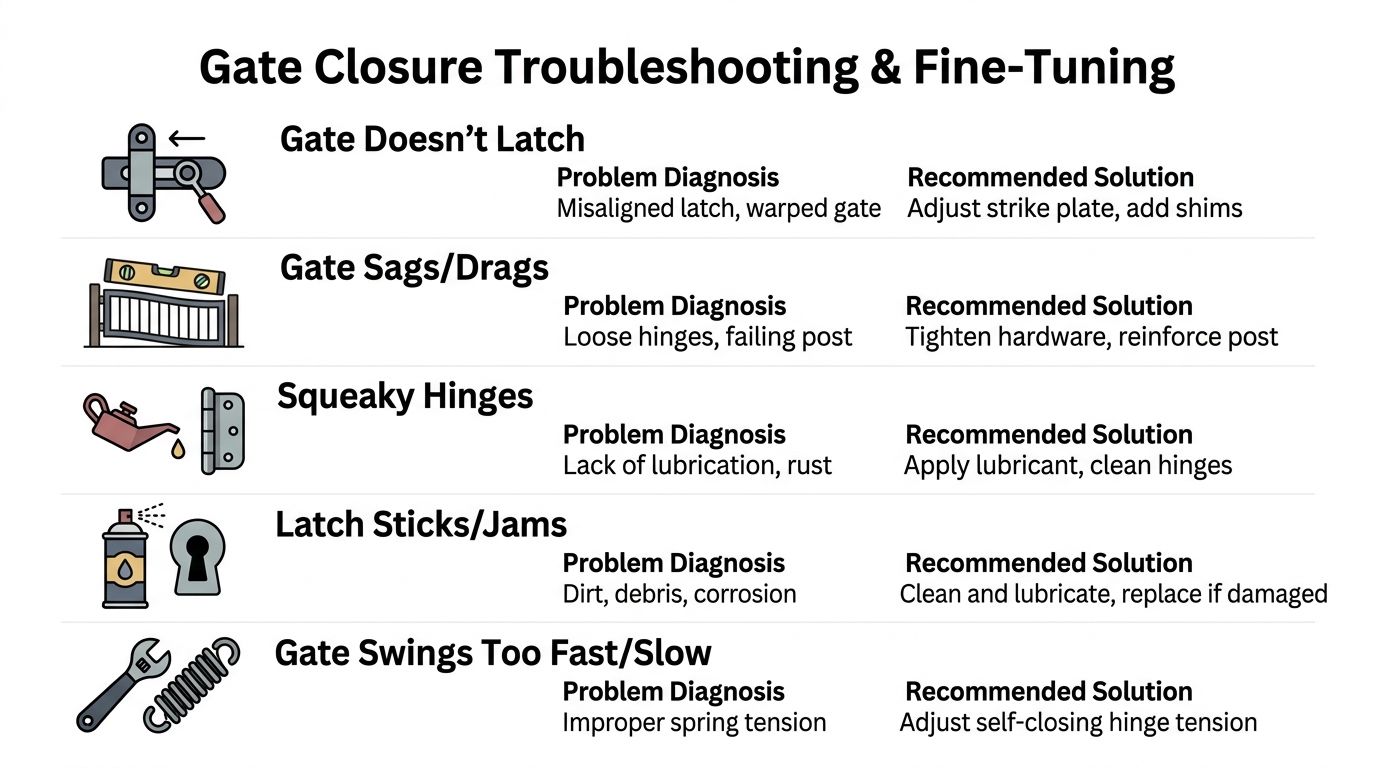
When the gate won't latch
Start at the latch side, but don't stop there. If the strike is slightly off, adjust it. If the gate arrives too slowly, increase final latching force on the closer. If the gate arrives low, look back at hinge alignment and post movement.
A lot of people replace a perfectly good latch because they don't check whether the gate is approaching the strike on the right line.
When the gate sags or drags
This is usually structural. Tighten hardware, inspect the hinge-side post, and check whether the gate frame has racked. On wider timber gates, wheel support and anti-sag reinforcement do more good than solely adding spring tension.
If the closer gets cranked tighter to “fix” a sagging gate, the hardware often wears faster and the latch line gets worse.
When the speed keeps changing with the season
California contractors see this a lot in dry, expansive ground. In California's dry, expanding clay soils, post shift causes 45% of closing mechanism malfunctions within 18 months, often because the closer tension wasn't adjusted for seasonal movement rather than because the product failed, according to this analysis of gate issues in expanding soils.
That means your troubleshooting list should include the ground, not just the hardware.
- Check post plumb: Even slight lean changes latch approach.
- Recalibrate the closer: Small seasonal adjustments beat one major overhaul later.
- Inspect the gap pattern: Uneven reveal often shows movement before the latch fully fails.
- Add anti-sag support: Especially on timber gates that already carry some downward pull.
Soil movement can make a good closer look bad. Always rule out post shift before blaming the hardware.
When the gate is noisy or sticky
That's usually the easy one. Clean debris from the latch, lubricate approved moving points, and inspect for corrosion or bent hardware. Hydraulic units should move smoothly. If they hesitate at the same spot each time, look for bracket misalignment or binding in the arm path.
Safety Codes and Long-Term Maintenance
A gate can pass on Friday, then fail inspection after the first wet winter or a minor ground shift. That happens more often in California than many homeowners expect, because code compliance is tied to how the gate performs over time, not just how it looked on install day.
Pool and safety compliance
Pool gates get the most scrutiny, and for good reason. According to California pool gate latch requirements, the self-latching device must be no lower than 60 inches above the ground, and the gate must open outward, away from the pool.
Barrier geometry matters too. California pool fence laws require a maximum vertical clearance of no more than 2 inches at the bottom, and openings must be small enough that a 4-inch sphere cannot pass through.
A proper self-closing and self-latching gate hardware setup is a solid starting point, but hardware alone does not make a pool gate compliant. Latch height, swing direction, bottom clearance, hinge-side gap, and post movement all have to stay within spec after the gate settles.
California movement, seismic shift, and hardware choice
California adds two jobsite problems that generic gate guides usually skip. Posts move in expansive clay, and light seismic movement can throw off a latch line even when nothing looks badly damaged.
That affects how I build and maintain closures.
On gates in seismic areas or unstable soil, rigid hardware can become unforgiving. A latch that needs perfect alignment may work fine at handoff, then start missing after small post rotation or footing movement. Hardware with some adjustment range, slotted brackets, and latch designs that tolerate slight vertical or horizontal drift usually hold up better. On heavier pedestrian or pool gates, I also prefer post footings sized for local soil and wind exposure, because a self-closing hinge cannot compensate for a post that keeps creeping out of plumb.
For automatic gates, safety standards go beyond the latch. As summarized in this UL 325 gate safety overview, slide gates and adjacent fencing must not allow a 2.25-inch sphere to pass through up to 48 inches from the ground, and exposed weight-bearing rollers and pinch points below 8 feet must be guarded.
Maintenance that keeps a gate compliant
Long-term maintenance is mostly basic work done on schedule.
- Check that the gate still self-closes from a partially open position
- Confirm the latch catches without a push or lift
- Inspect both posts for lean, cracking, or loose footings
- Tighten hinge, closer, and latch fasteners
- Clean debris from latch bodies, strikes, and hinge pivots
- Lubricate only where the manufacturer allows
- Recheck operation after seasonal soil movement or any noticeable tremor
One trade mistake shows up all the time. People adjust spring tension again and again when the problem is post shift. That can wear out the closer, increase slam force, and still leave the gate out of code if it stops latching reliably.
A gate stays safe when it still closes, latches, and holds its clearances months after installation. In California, that means treating soil movement and seismic tolerance as part of the closure system, not as separate problems.