
A lot of deck projects start the same way. The boards are down, the railing is finally in, and then you look at that bare perimeter and think it needs something living. Herbs by the grill. Trailing flowers by the seating area. Maybe a row of green along a balcony that feels too exposed.
Then the practical questions hit. Can the rail take the load. Will water stain the top cap. What happens in a storm. If a planter shifts, does it just spill soil, or does it loosen the railing itself.
That caution is healthy. Railing deck planters look simple because they're small, but they put weight, moisture, and force right at one of the most important safety parts of the deck. I've seen good-looking installs that were one windy day away from failure because the owner treated the railing like a shelf instead of a guard assembly.
A sound setup has two jobs. It has to grow plants properly, and it has to leave the railing secure, stable, and code-conscious. If either side gets ignored, the project turns into maintenance at best and a safety problem at worst.
From Deck Dream to Green Reality
One of the most common situations goes like this. A homeowner buys a pair of long planter boxes, sets them over the top rail, fills them with damp soil, waters heavily, and admires the result for a week. Then one box starts leaning outward because the rail cap is slightly crowned, the bottom rubs the balusters, and runoff begins sitting against the wood finish. Nothing dramatic happens at first. That's why people miss the problem.
The trouble with railing-mounted planters is that failure is rarely instant. More often, the load works on the same connection points day after day. A bracket shifts. A screw hole elongates. A post that already had a little play gets worse. What looked like a garden project becomes a railing repair.
Practical rule: If you wouldn't trust the mounting method to hold through a soaking rain and a windy evening while nobody's watching, it isn't ready.
The good news is that a secure planter install isn't complicated when you approach it like a builder instead of a decorator. Start with the planter style. Match it to the rail profile. Check where the weight transfers. Use hardware meant for outdoor load and vibration. Protect the rail surface from trapped moisture and abrasion.
That's also where a lot of DIY jobs separate into what works and what doesn't. The good installs don't rely on friction alone. They don't use bargain clamp tricks. They don't treat the planter as if it's floating independently from the guardrail below it.
A deck can absolutely carry greenery without becoming risky or sloppy. It just needs the same mindset you'd use for any exterior detail. Load path first. Water control second. Looks third.
Choosing the Right Railing Planter
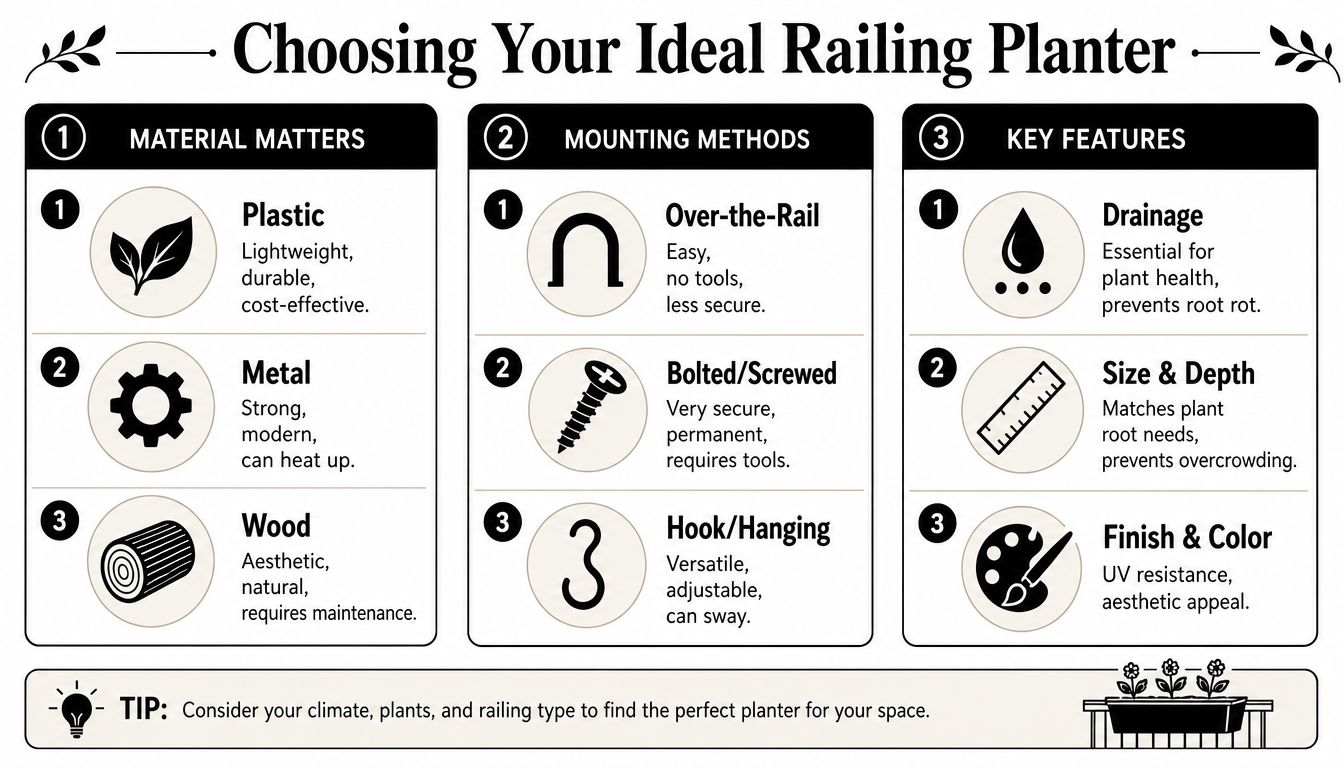
The planter itself decides half the installation before you ever touch a drill. Material, shape, depth, and drainage all affect how much stress the railing sees and what kind of hardware will make sense.
Start with material, not colour
Plastic and resin planters are usually the easiest place to start. They're lighter, they don't rust, and they're more forgiving if you need to remove them seasonally. For most homeowners, that lower empty weight makes installation simpler and puts less constant demand on the rail.
Metal planters have a clean look and good rigidity, but they can heat up and they don't hide mounting mistakes well. If the bracket fit is off by a little, you usually see it. Wood planters can look excellent on cedar or pressure-treated decks, but they need more maintenance and they hold moisture longer at contact points.
Match planter size to plant density
Crowding plants is bad for growth and bad for the planter because it pushes people to overfill with soil and water. A useful rule of thumb comes from Root and Vessel's planter spacing guide. 10 to 12 inch planters accommodate 3 to 4 plants, 14 to 16 inch planters support 4 to 6 plants, and 16 to 20 inch planters hold 6 to 8 plants.
That matters for more than root health. It helps you avoid buying a long shallow box and then trying to force too much planting into it. Overpacked boxes stay wetter, dry unevenly, and often end up heavier than they need to be.
For succulents or shallow-rooted accent planting, shape matters just as much as volume. If you're weighing decorative options, this roundup of pots for succulents is useful because it shows how container form affects drainage, plant spacing, and maintenance access.
Choose a mounting style that suits the rail
Not all railing planters mount the same way, and that's where many buying mistakes start.
- Over-the-rail or saddle planters sit across the top rail. They're quick to place and often don't need visible side hardware, but they depend heavily on a close rail fit.
- Side-mount boxes attach to brackets or plates on the inside or outside face of the railing. These are usually easier to secure properly because you can control the hardware.
- Hook or hanging styles work for lighter decorative planting, but they can sway and create rubbing points if the hook doesn't lock in well.
The best planter isn't the one that looks cleanest on the shelf. It's the one whose shape lets you create a stable, inspectable connection to the railing.
Drainage is not optional
A planter without proper drainage is rough on plants and rough on decks. Water needs to exit the container cleanly instead of pooling against the rail cap, bracket seat, or siding face of the planter.
Look for a planter with clear drain outlets and enough bottom clearance that water can escape freely. If the drainage exits directly onto a finished wood top rail, expect staining, raised grain, and finish wear unless you add a separation layer and keep the box slightly raised.
A good planter choice makes the rest of the job easier. A bad one forces you to improvise around the wrong shape, wrong weight, and wrong contact points.
Calculating Weight and Protecting Your Railing
Many attractive installs go wrong because people think about planter weight as the empty box, when the railing only ever experiences the loaded version. Soil gets soaked. Plants mature. Water collects after rain. The rail doesn't care what the tag said in the garden centre.
Think in wet weight, not shelf weight
The number you need to work around is the wet weight of the complete planter. That means the container, damp potting mix, plants, and retained water. Even a modest-looking box changes character once it's saturated.
If you can't verify the load comfortably by the way the railing is built and attached, stop and inspect before mounting anything. The rail has to resist not only downward force but also outward pull, rocking, and repeated movement from wind and daily handling.
What to inspect on the railing
A quick check tells you a lot. Don't focus only on the top rail. Look at the whole assembly.
- Posts first. If a post has any wobble, the railing isn't ready for added load.
- Top cap condition. Split wood, soft spots, or loose cap boards are warning signs.
- Fastener integrity. Corroded screws, undersized hardware, or wallowed-out holes mean the assembly already has weakness.
- Connection to framing. The strongest bracket in the world won't help if the post-to-frame connection is poor.
For homeowners who want a simple checkpoint before adding accessories, this deck support reference is a practical place to compare what a properly supported assembly should look like.
Why code basics matter here
A lot of people ask whether a planter can do double duty as part of the guard. That's the wrong way to think about it. In most areas, the planter is an accessory, not the fall-protection system. Cascade Fence & Deck notes that in most jurisdictions, a residential deck that is 30 inches or higher off the ground legally requires a 36-inch tall railing, which means planter boxes cannot serve as a primary fall-protection guard unless they meet that height threshold.
That should change how you place boxes. Don't let them interfere with gripping the top rail where people naturally steady themselves. Don't let them push users toward leaning over the edge to water or prune.
Protect the rail while you protect the plants
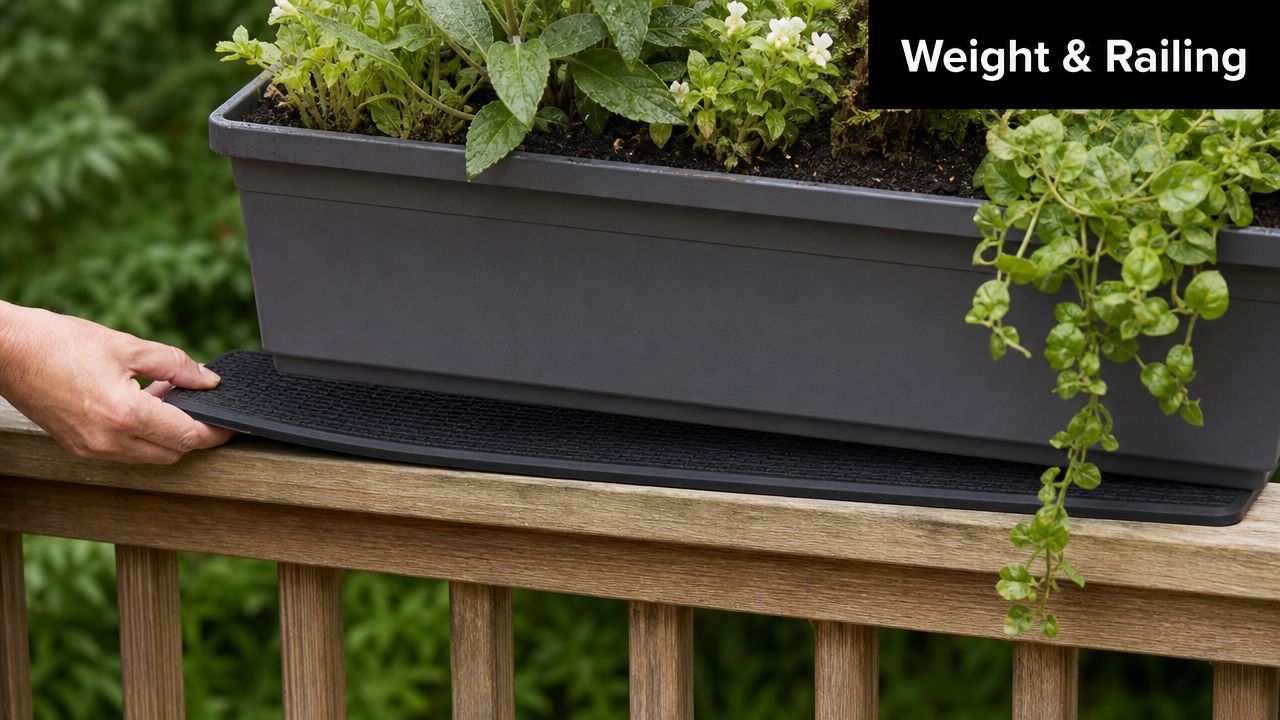
Load is only half the issue. Moisture and abrasion do quieter damage. A thin anti-slip separator or protective pad under the planter contact points helps reduce scuffing and keeps water from sitting directly against the finish.
Wood rails need extra attention because trapped moisture tends to show up first as finish failure and surface wear. If you're refreshing or sealing exterior timber before mounting planters, it's worth learning from TimberSol Ltd experts on how outdoor wood protection holds up under weather and standing moisture.
The simplest rule is this. If the railing already needs repair, don't hide it behind plants. Fix the structure first, then add the planter.
Secure Mounting Techniques and Essential Hardware
A stable planter doesn't happen by luck. It comes from matching the bracket style and fastener type to the rail material, the planter shape, and the direction the load wants to move.
What works and what fails early
The most dependable setups use purpose-built brackets, corrosion-resistant fasteners, and positive restraint. That can mean adjustable steel planter brackets, direct-mount support angles, or through-fastened hardware where the rail design allows it.
What doesn't hold up well is improvised clamping. Hardware-store C-clamps, light-duty spring clips, and indoor shelving brackets aren't made for outdoor vibration, wet cycles, or the side-loading that happens when a full planter shifts outward. They may feel snug during installation and still loosen over time.
If you're comparing outdoor-rated hardware categories, a dedicated fasteners and fittings selection makes more sense than trying to piece together random interior hardware.
Mounting methods by rail type
Wood railings give you the most flexibility. You can use heavy-duty steel brackets and exterior-rated screws into solid wood members, but you still need to hit real structure. A screw into a trim cap is not the same thing as fastening into a substantial top rail or blocking.
Composite railings need more caution. The visible shell may look solid while the internal support layout limits where hardware can go. Follow the rail manufacturer's allowance for attachments, and avoid crushing the profile with over-tightened fasteners.
Metal railings often benefit from bracket systems that clamp or bolt to designated structural points. Drilling can be appropriate in some cases, but only when the railing design permits it and corrosion protection is maintained.
A planter bracket should control downward load and outward rotation. If it only handles one of those, the install is incomplete.
The 42-inch railing problem
This issue catches plenty of DIY installers, especially in California-style code contexts and on taller guard systems. Trex notes that for decks with 42-inch high railings, DIY installation success drops to 68% when planters lack a top connector brace, and 32% of those installations become unstable within 6 months because standard designs fail to bridge the gap properly.
This explains why some off-the-shelf saddle planters feel fine in the store and awkward on the deck. The geometry doesn't suit the rail height or infill spacing. A top connector brace gives the planter a defined tie point over the top rail instead of leaving it to hang and twist.
Hardware examples that make sense
When I'm looking at a secure install, I want to see outdoor steel hardware with a clear job. Decorex Hardware brackets are a good example of the kind of product category that belongs here because they're built for exterior use and pair properly with deck fasteners instead of relying on decorative clips.
Use hardware with a reason behind it:
- Exterior deck screws for fastening brackets into sound wood members where manufacturer guidance supports that method.
- Carriage bolts with washers and nuts where through-bolting is appropriate and access to both sides exists.
- Lag bolts for heavier bracket loads into substantial structural wood, not thin trim.
- Washers to spread pressure and reduce crushing at bracket holes.
- Protective pads or isolators between metal hardware and finished rail surfaces.
A short install demonstration helps if you want to compare bracket placement and rail fit before committing to your own layout.
Recommended Fasteners for Railing Planters
| Planter Wet Weight | Railing Material | Recommended Fastener (Xtreme eDeals Example) | Why It Works |
|---|---|---|---|
| Light | Wood | Exterior deck screws with a steel planter bracket | Good for properly supported small boxes when screws bite into solid wood |
| Medium | Wood | Carriage bolts with washers through a heavy-duty bracket | More secure where access allows through-fastening |
| Heavy | Wood | Lag bolts with washers into structural wood plus a rigid bracket | Better resistance to pull-out and bracket movement |
| Light to medium | Composite | Manufacturer-compatible bracket with approved corrosion-resistant fasteners | Helps avoid damage to the railing shell and hidden support layout |
| Light to medium | Metal | Outdoor-rated clamp or bolt-on bracket hardware suited to the railing profile | Controls movement without relying on friction alone |
If there's one lesson that keeps repeating on these jobs, it's this. The planter should feel like part of a planned assembly, not a temporary object balanced on the guard.
Planting and Seasonal Care for Lasting Beauty
Once the box is mounted properly, the next job is keeping it healthy without punishing the deck every time you water. The best-looking railing planters are usually the ones that are easiest to maintain, not the ones packed most aggressively on day one.
Use a mix that drains cleanly
Dense soil stays wet too long and adds unnecessary load. A good container mix drains well, holds enough moisture for roots, and doesn't turn the planter into a muddy block after every watering. If you want a solid primer on what makes a container blend work, Leaves & Soul's guide for houseplant soil is useful because the same drainage and aeration principles apply to outdoor planter boxes.
A liner also helps. It keeps damp soil off the planter walls, reduces staining, and makes seasonal cleanout easier. In wooden boxes especially, liners can extend service life by reducing direct moisture contact.
Water with the deck in mind
Railing deck planters dry faster than ground beds because they're exposed on multiple sides, but that doesn't mean soaking them constantly is smart. Water slowly so the mix absorbs it instead of flushing straight out over the rail.
Try this routine:
- Check moisture by hand rather than watering on habit.
- Water at the soil line to limit splash and runoff.
- Keep drainage holes open so water exits instead of pooling inside the box.
- Wipe the rail cap occasionally if runoff leaves residue or fertilizer stains.
Wet soil is fine. Permanently wet hardware, rail caps, and bracket seats are not.
Plan for the off-season
Seasonal care is what keeps a good install from becoming a spring repair. Before freezing weather or long periods of disuse, reduce stress on the setup. Remove dead roots, empty neglected annuals, and inspect every contact point.
In colder climates, freeze-thaw cycling is rough on containers and brackets. Soil expands, trapped water lingers in corners, and brittle planters crack when left full. If the box is easy to remove, take it down, clean it, and store it. If it stays mounted, lighten it and make sure drainage stays open.
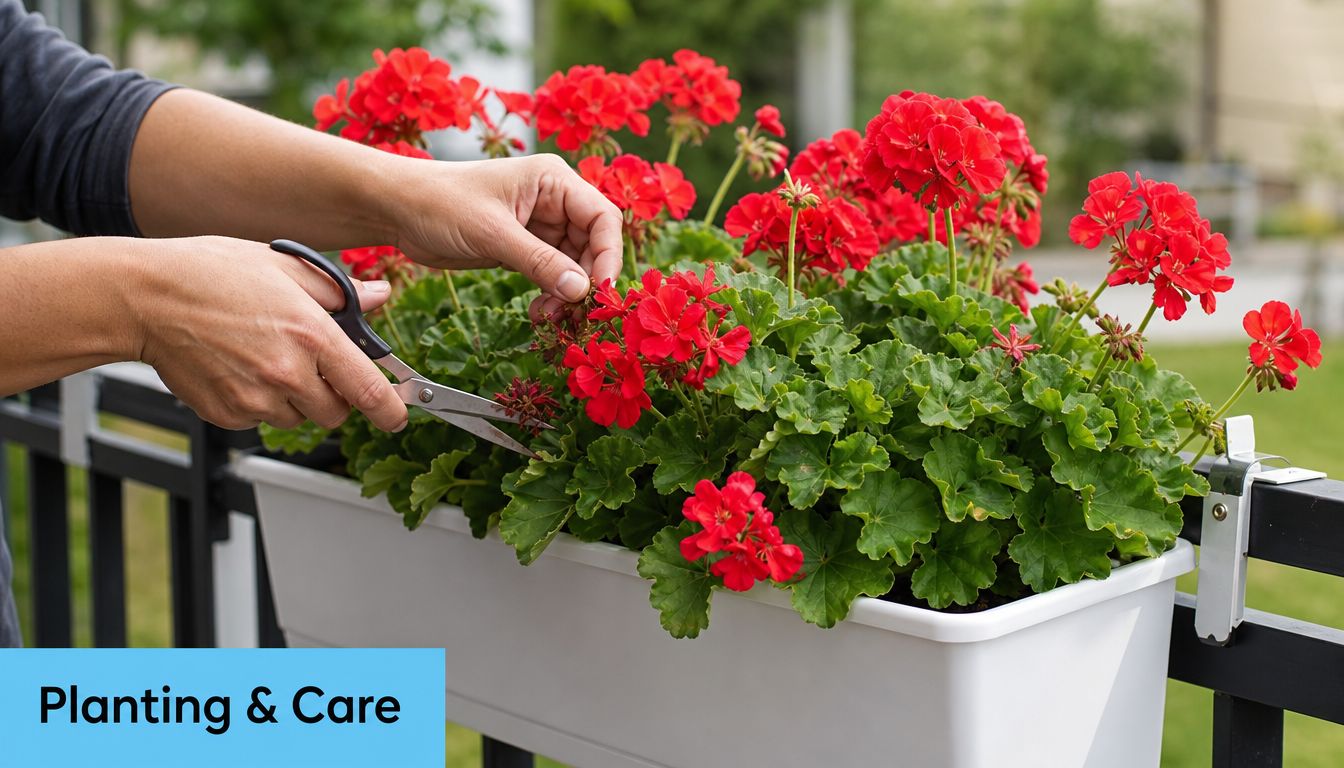
Pruning through the season also matters. Plants that become top-heavy can catch wind and shift the centre of force outward. A tidy planter usually puts less strain on the mount than one that's overgrown and saturated.
Final Safety Checklist and Common Mistakes
A finished planter install should pass a simple reality check. Grab the box gently and test for movement. Look underneath for trapped water. Sight across the rail to confirm the load isn't pulling the assembly out of line.
Quick checklist before you call it done
- Fasteners tight. Recheck after the first watering cycle.
- Planter level. A box that leans will load one side harder.
- Drainage clear. Water needs an exit path that doesn't soak the rail.
- Rail sound. No wobble at posts, caps, or attachment points.
- Access safe. You can water and prune without leaning dangerously over the edge.
The biggest misconception is also the most dangerous one. Planters are not a substitute for a proper guardrail. Discussion around building-code questions shows this confusion is common, and code interpretation in places like Ontario confirms that using planters in place of required guards for elevated decks is unsafe and non-compliant.
The mistakes I see most often
Underrated hardware
Decorative hooks and light clamps get used where structural brackets belong.Uneven load distribution
One side of the rail gets the weight while the opposite side receives the opposing force.Ignoring the railing's condition
People mount a fresh planter to a tired guard and hope the greenery hides the problem.
For a final pass before adding any accessory to a deck guard, this deck inspection checklist is a useful reference.
A safe planter install should disappear into the background. You notice the flowers, not the wobble, stains, or sketchy hardware.
If you're upgrading a deck, fence, or railing and want dependable brackets, fasteners, post hardware, and outdoor project supplies in one place, XTREME EDEALS INC. is a solid source for practical hardware that suits real-world installs.