
You've got the posts in, the panels leaning nearby, and the job feels nearly done. Then you hit the part that decides whether the fence stays tight for years or starts rattling loose after the first hard season. The connection between the cattle panel and the wood post is where good projects separate from frustrating ones.
Most failures don't start with the panel. They start with the wrong fastener, too few attachment points, or a post that was never prepared for real outdoor service. If you want to learn how to attach cattle panels to wood posts properly, the answer isn't just “use staples” or “buy clips”. It's choosing the right connection for your use case, then installing it so the load spreads through the post instead of fighting against it.
Building a Fence That Lasts
A lot of DIY fence builds stall at the same moment. The layout is done, the line looks straight, the wood posts are set, and now there's a panel in your hands and a question in your head: what holds this thing properly?
That question matters more than commonly understood. A cattle panel used as a garden trellis doesn't ask much from the connection. A panel on a livestock run, a side-yard barrier, or a long property line asks a lot more. Wind, movement, seasonal wood shrinkage, irrigation, and everyday flex all work on the same weak spot. The attachment point.
What works is matching the fastener to the pressure the fence will see, not just grabbing whatever's cheapest off the shelf. For lighter-duty builds, traditional staples or U-nails can do the job if they're installed carefully and in enough places. For heavier-duty work, purpose-built panel connectors or bolted hardware give a cleaner, more repeatable hold.
Practical rule: Don't judge the fence by how solid it feels on install day. Judge it by whether the connection will still be tight after weather, movement, and repeated flexing.
I've seen good materials wasted by bad fastening. A rigid panel attached with too few points can twist a post face, chatter in the wind, or pull loose at one section while the rest still looks fine. That's why builders working on farm and acreage projects spend as much thought on hardware as they do on panel choice. If you're comparing layouts, materials, or broader farm fencing options, keep the attachment method high on the list from the start.
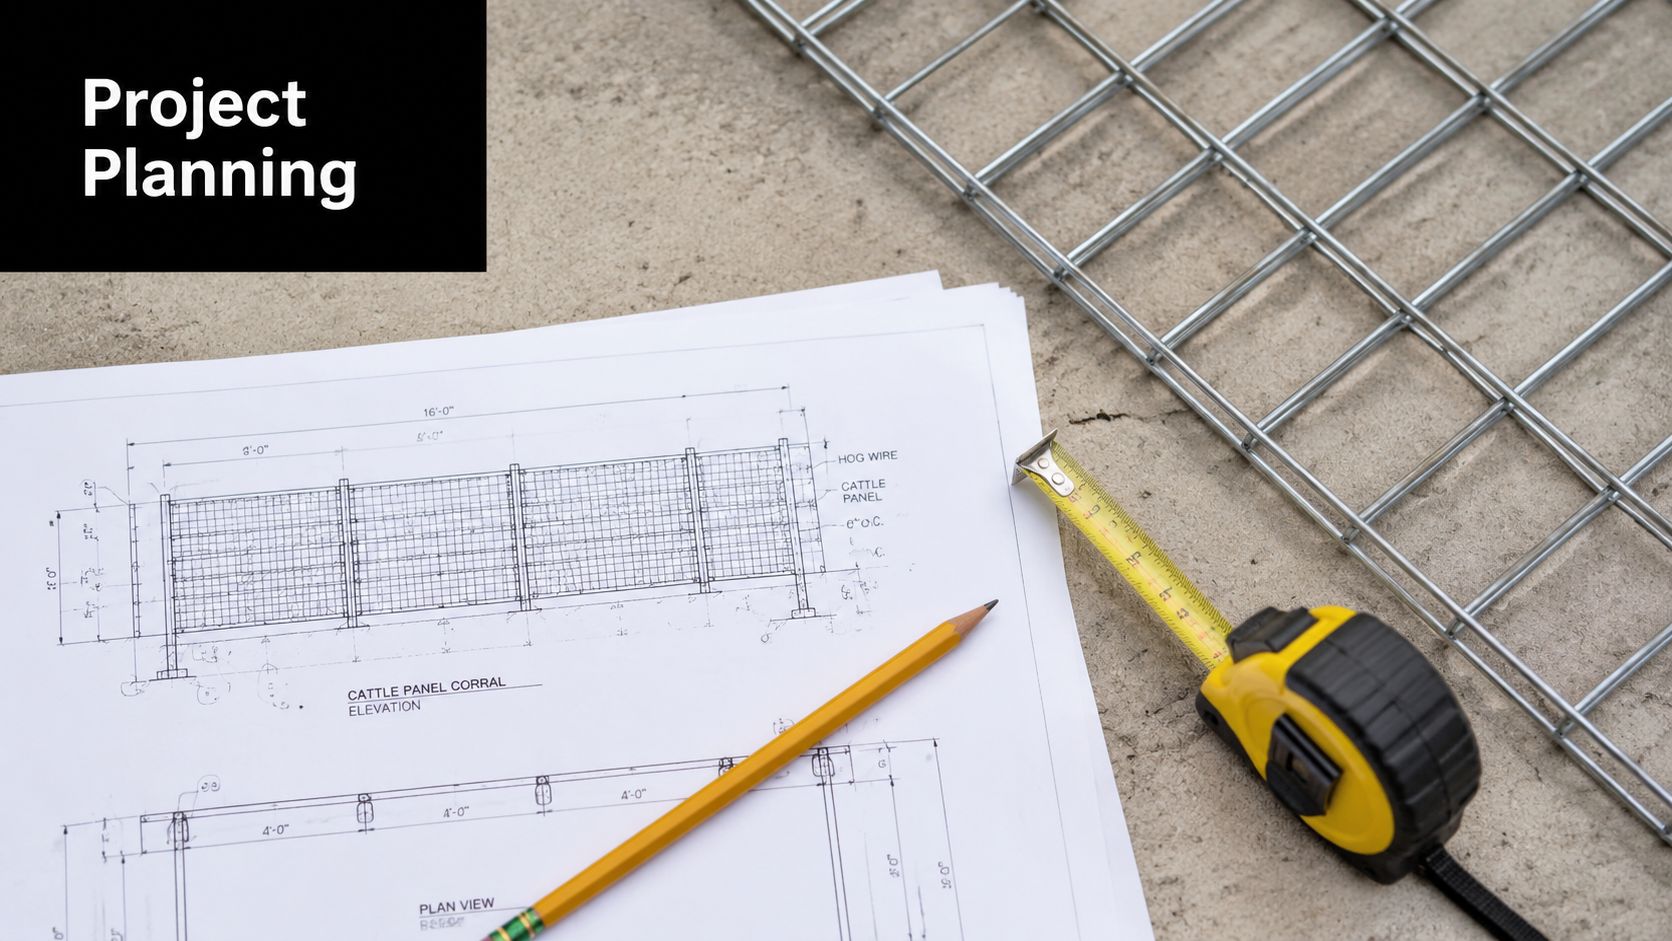
Planning Your Project and Gathering Materials
A clean installation starts before the first staple is driven or the first hole is drilled. When people rush this part, they usually pay for it later with crooked runs, mismatched gaps, or a second trip for hardware they should've bought the first time.
Start with the post and panel relationship
Before you think about fasteners, confirm that your post layout suits the panel run. The panel needs support where it carries load, changes direction, or meets another section. If the posts are placed awkwardly, no fastener will rescue the job.
Look at the site the same way a builder does:
- Ground conditions: Soft or wet ground changes how much the post will move over time.
- Fence purpose: A decorative garden edge and a livestock barrier don't need the same connection strategy.
- Exposure: Open runs catch more weather and more panel movement than sheltered sections.
A DIY guide recommends fastening panels to wood with staples, fencing clips, or U-nails every 12 to 18 inches and using multiple attachment points rather than relying on a single fastener line. The same guidance also recommends setting wood posts in concrete and sealing the wood against moisture for longer service life, which is especially relevant in exposed or wet conditions (fastener spacing and post protection guidance).
Tools and materials that make the job easier
You don't need a truckload of specialist gear, but you do need the right basics on hand. For most installs, the core kit looks like this:
- Measuring and layout tools: Tape measure, level, string line, and marking pencil.
- Drilling and tightening tools: Drill, appropriate bits, socket set, and spanners or wrenches.
- Fence handling tools: Fencing pliers, hammer, clamps, and work gloves.
- Installation hardware: Staples, U-nails, screws, washers, connectors, or bolts based on your plan.
- Post protection supplies: Exterior sealant or paint if the posts are bare.
Set out the hardware by post before you start. That small habit keeps spacing consistent and stops you from “making do” halfway through a run.
A practical pre-start checklist
Walk through this before lifting the first panel:
- Check each post for plumb. A slightly leaning post turns into a visibly uneven fence fast.
- Confirm bottom clearance. A consistent gap keeps the fence looking intentional and helps with alignment.
- Pre-stage panels along the run. You'll spot layout problems early.
- Separate corner hardware from line-post hardware. Corners and openings often need stronger fastening.
Preparation isn't glamorous, but it's what makes the installation feel controlled instead of improvised.
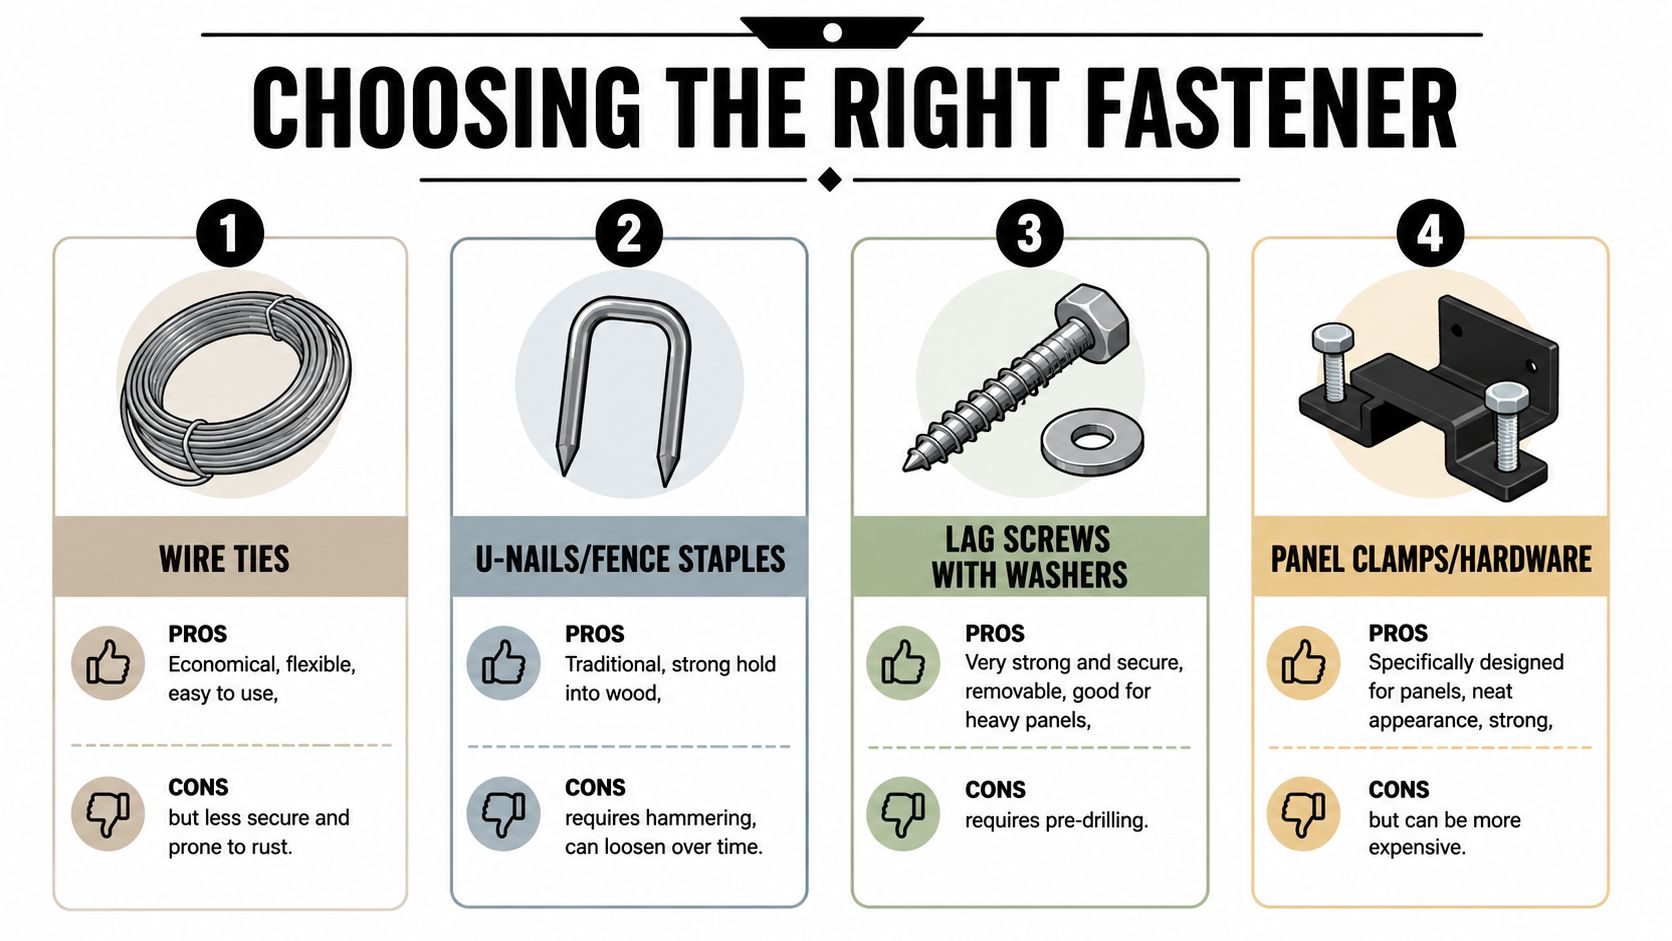
Choosing the Right Fastener for Your Fence
If there's one decision that affects the finished result most, it's the fastener choice. Not because one option is always “best”, but because each one solves a different problem. Some are cheap and quick. Some are strong but slower. Some look tidy. Some are made for pressure and repeat use.
The decision matrix that actually matters
When deciding how to attach cattle panels to wood posts, I sort the job by four factors:
- Livestock pressure: Will animals lean, rub, or test the fence?
- Appearance: Do you want a rough farm look or a cleaner finished line?
- Budget: Is this a quick functional build or a long-term installation?
- Longevity: Do you want to remove panels later, or leave them in place for years?
If the build is light-duty and cost-sensitive, traditional staples or U-nails can still make sense. If the panel needs to come off later, reusable hardware starts to look far better. If the line includes framed openings, corners, or high-stress spots, bolted fastening is usually the smarter call.
What each fastener does well
| Fastener Type | Best For | Pros | Cons |
|---|---|---|---|
| Wire ties | Temporary holds, light garden use | Flexible, quick to apply, simple for alignment | Less secure, can loosen, doesn't look as finished |
| U-nails or fence staples | Traditional fence runs, budget builds | Familiar method, fast to install, easy to source | Can loosen as wood moves, easy to overdrive, not ideal for repeated adjustment |
| Lag screws with washers | Heavier panels, removable installs | Strong hold, removable, tidy when placed carefully | Needs pre-drilling and proper screw selection |
| Panel clamps or connector hardware | Permanent or semi-permanent builds | Repeatable hold, clean fit, reusable hardware options | Higher upfront hardware cost |
For heavier-duty work, purpose-built livestock panel connectors are an upgrade worth considering. Installation guidance shows the connector fixed to the wood post with screws or bolts, then the panel wire sits in the slot and is locked with a nut. That method is reusable and less prone to loosening from vibration or panel flex than staples (livestock panel connector method).
Where bolts earn their keep
Bolted hardware isn't necessary everywhere, but it shines at stress points. Framed openings, gate-adjacent sections, repairs, and places where you don't want fastener creep are prime candidates. A good carriage bolt creates a more structural connection than a casual screw driven into the post face.
That's also where material selection matters. If you're using screw-based fastening anywhere on the build, this guide on choosing the right wood screws is useful for sorting through thread style, coating, and general fit for outdoor woodwork. For the fence-specific side of the shopping list, it also helps to compare available fencing fasteners and fittings before you commit to one method across the entire run.
A rookie mistake is mixing fastener types randomly. The fence ends up with different holding strength from post to post, and the weak connection always shows up first.
The Installation Process from Posts to Panels
You feel a bad panel install in the first few minutes. The panel fights you, the height keeps drifting, and every fastener starts doing alignment work it was never meant to do. A clean install starts with control. Set the panel where it belongs, hold the line, then fasten it in a sequence that matches the load the fence will take.

Set the first panel correctly
Start at a corner or end post. Stand the panel in place and block it up off the ground if you want a consistent bottom gap. That one step saves a lot of wrestling, especially when you are working alone, and it keeps the panel from sinking into soft soil while you line it up.
Check the post faces, sight down the run, and confirm the panel height before you drive the first permanent fastener. Every panel after the first one copies its mistakes.
A practical method is to dry-fit the next few panels before you commit to final fastening. That shows you where spacing will tighten up, where the ground starts to rise, and whether an overlap lands cleanly on a shared post. On framed openings, use carriage bolts where the panel or frame will see repeated stress. Screws are faster, but bolts hold alignment better over time when gates slam or livestock lean on the section.
Fasten from the middle outward
This is the habit that keeps a fence looking straight. Set the first attachment near the middle of the panel, then work toward the top and bottom. After that, fill in the remaining points on the post.
That sequence lets the panel settle in its natural position. If you start at one corner and force the rest to follow, you can trap a twist or a bow into the wire. Then the fasteners spend their life resisting spring pressure instead of holding the panel where it belongs.
Use enough attachment points for the job. A garden divider and a cattle lot do not get the same pattern. Light-duty sections can get by with fewer connectors or staples. For livestock pressure, spread the hold vertically across the post so one point is not carrying the whole load.
If the hardware has to pull the panel into shape, the install is already off track.
A simple working sequence looks like this:
- Position the panel on blocks or spacers.
- Check plumb and line against the post faces.
- Set the first fastener near the middle to stop drift.
- Add upper and lower fasteners while checking alignment.
- Install the remaining attachment points based on the hardware you chose and the pressure you expect on that section.
- Tighten fully after the panel is sitting cleanly.
If you are using connector hardware instead of staples or screw clips, mount the connector square to the post first, seat the panel wire fully in the slot, then tighten the locking hardware evenly. Keep the top and bottom connectors spread apart on the post so the panel cannot pivot between them. That wider spread gives a firmer hold than stacking the connectors too close together.
For a visual walkthrough of fence-building basics, this video is a useful companion while you work:
Handle overlaps and transitions neatly
Where two panels meet on one post, line them up before you tie or clamp anything together. If the overlap is loose, the joint will buzz in the wind, shift under pressure, or show a jog that stands out across the whole run.
Shared posts deserve more attention than beginners give them. They often carry load from both directions, and they are where a mixed fastener plan starts showing weaknesses. If you used staples on one panel and a rigid connector on the next, one side may flex while the other side stays fixed. The fence can still stand, but it will not move as one system.
On hybrid builds, a few broader framing habits still apply. These DIY timber fence construction insights are useful if you are working through alignment, structure, and transitions between framing elements. If your posts are not set yet, review this fence post installation guidance before you spend money on hardware trying to correct a crooked line.
Adding Rails Bracing and Finishing Touches
A fence line often looks fine the day you hang the panels. Then the first hard push at a corner, a gate that gets slammed all summer, or a winter freeze-thaw cycle shows where the frame still needs help. Rails, bracing, and finish work are what turn a basic panel install into a fence that stays straight and tight.

Why a top rail changes the feel of the fence
A top rail does two jobs. It cleans up the sightline, and it ties the posts together so they do not act like separate pieces. On a long run, that shared stiffness matters more than beginners expect.
It also changes the fastener decision. If the fence is mainly decorative or meant to contain light animals, a top rail can take some of the visual and structural burden off the panel attachments. If the fence will see real livestock pressure, the rail helps, but it does not let you get away with light-duty panel fasteners. That is a common rookie mistake. They spend money on a nice rail, then attach the panel with hardware that loosens, bends, or chews into the post face.
Wood species and rail size matter too. A narrow rail can finish the look, but it will not resist twisting like a heavier piece will. On working fences, I prefer a rail that has enough section to hold screws cleanly without splitting and enough stiffness to keep the line honest over time.
Bracing belongs at stress points
Corners, gate posts, and sharp direction changes carry more load than line posts. Treating them the same is how fences start leaning. A cattle panel between straight posts may only need the right attachment hardware and good spacing. A corner or gate opening needs framing that can resist pull, rack, and repeated movement.
Use diagonal bracing, an H-brace, or a properly framed corner assembly based on the load. For a light garden fence, simple diagonal support may be enough. For animals that rub, crowd, or test weak spots, step up to a braced assembly with through-bolted connections where it counts. Carriage bolts or structural bolts hold better than relying on screws alone in these high-stress spots because they clamp the assembly instead of just biting into wood fibers.
The decision matrix again plays a role. Budget builds often use staples or clips for the panel field and save the heavier hardware for corners and gates. That is a smart compromise. Spending the money at the stress points gets better returns than overbuilding every line post and underbuilding the places that move.
Finish the parts people usually ignore
The last details decide how the fence ages.
- Trim or turn in sharp wire ends: Exposed cut wires catch clothing, scratch animals, and make maintenance miserable later.
- Cap or seal post tops: Water enters through end grain fast, especially on cut posts. Protecting the top slows checking, rot, and premature splitting around fasteners.
- Coat bare steel cuts: Any cut or scraped coating on the panel should be touched up before rust gets started.
- Check rail ends and screw placement: Fasteners driven too close to the end of a rail split wood now or after the first dry spell.
- Clean up the line visually: Small alignment fixes at the end are easier now than after the fence settles.
None of that is cosmetic fluff. It prevents snags, moisture damage, rust, and call-backs.
A good finish also reflects the priorities of the project. If appearance matters, keep rail heights consistent and hardware lines neat. If longevity matters most, put the extra effort into sealing cuts, protecting end grain, and using exterior-rated hardware that matches the service life you want. If the fence is doing both jobs, choose details that support both instead of treating finish work like an afterthought.
Common Pitfalls and Pro Maintenance Tips
The biggest mistake I see is using a fastening method that doesn't match the job. Staples on a light garden panel can be fine. Staples on a panel that gets pushed, flexed, or shaken regularly often turn into a maintenance routine.
Another common error is trying to make a rigid panel follow ground that should've been stepped. When the terrain changes sharply, keep each section level and adjust in stages. Forcing the panel to mimic the contour usually leaves the run looking twisted and puts stress where you don't want it.
Keep your maintenance simple and consistent:
- Walk the fence line periodically: Look for movement, looseness, or post-face wear around the fasteners.
- Tighten what can be tightened: Connector hardware and bolted points reward quick inspections.
- Watch moisture around the posts: Soil and vegetation piled against wood speed up deterioration.
- Check outdoor hardware quality: Interior screws have no business on an exterior fence.
If a fence starts making noise, shifting at one post, or showing a slight wave in the line, don't wait. Small movement is easier to correct than a section that's already pulled out, split wood fibres, or worn an oversized hole around the fastener.
A cattle panel fence lasts when the connection stays honest. Tight, properly spaced, and suited to the load. That's the part rookies rush and experienced builders never do.
XTREME EDEALS INC. makes it easier to source the hardware details that turn a basic fence into a durable one. If you need post caps, carriage and lag bolts, deck and fencing fasteners, or other outdoor hardware for your next build, browse XTREME EDEALS INC. for practical options suited to DIY projects and professional installs alike.