

You're usually at the same stage when solar post caps start to make sense. The deck is framed, the railing is on, the fence line looks clean in daylight, and then evening hits. The whole project disappears into shadow, and suddenly the top of every post feels unfinished.
The goal is to avoid turning that last step into an electrical job. This eliminates the need for conduit, holes through finished surfaces, a call to an electrician, or a bundle of wire hidden under a deck skirt. The preference is for light where it helps, a finished look, and an install that can be handled without opening up work already completed.
The Perfect Finish Without The Wiring
A lot of outdoor projects stall at the same point. The structure is done, but it still lacks that final layer that makes it feel complete at night. A row of post caps solar fixes that neatly because it adds a visual top line to the railing or fence and gives you low-level light without tearing into finished work.
That's why these products have moved from novelty to standard accessory on many deck and fence jobs. Small-format solar hardware is no longer a gimmick tied to one style of house. California alone produced 31.6% of the nation's solar electricity in 2024, and that broader solar adoption has helped normalise reliable no-wiring residential products such as solar post caps, as noted in this overview of solar vs. hardwired post cap lights.
In practice, clients usually want one of three things:
- A finished railing line that doesn't look bare after dark
- Safer movement around stairs, corners, gates, and deck edges
- Less installation hassle than hardwired fixtures
Practical rule: If the goal is soft perimeter light and a polished look, solar post caps are often the cleanest answer. If the goal is flood-level brightness, they're the wrong product.
That distinction matters. Solar post caps work well when you treat them as accent and wayfinding hardware. They mark the shape of a deck, define a fence line, and make outdoor space more usable at dusk. They don't replace a proper wall light at a back door or a dedicated security fixture over a side yard.
The upside is simple. You can add lighting after the build is done, with very little disruption, and still make the whole project look intentional.
How Solar Post Caps Actually Work
A solar post cap is a small self-contained lighting system. It isn't just a decorative cap with a bulb inside. Each unit has a solar panel, a rechargeable battery, an LED, and a light sensor that tells it when to turn on.
The daily cycle
During the day, the panel collects sunlight and sends that energy into the battery. At dusk, the sensor detects the drop in ambient light and switches the LED on automatically. When daylight returns, the sensor shuts the light off and the charging cycle starts again.
That automatic cycle is what makes these caps attractive for decks, gates, and fences. Once they're installed properly, there's no switch to remember and no timer to program.
Think of each cap as a small rooftop system built for one post. It charges by itself, stores its own power, and runs its own lamp.
The parts that matter
Not every cap performs the same way because not every cap uses the same quality of components. The core parts are straightforward:
- Solar panel captures daylight and determines how well the cap charges
- Battery stores energy for night-time runtime
- Photocell or light sensor handles automatic on and off operation
- LED board produces the actual light output
A weak panel, undersized battery, or poor seal around the electronics usually shows up quickly in real use. The cap may work well in summer and then struggle the moment days shorten or the post sits near a tree, privacy screen, or neighbouring wall.
Why placement matters more than buyers expect
Most performance complaints aren't really about the cap. They're about placement. If the top of the post gets partial sun, reflected light, or afternoon shade, charging drops. The cap can only store what the panel collects.
That's why solar post caps do well on open deck rails, sunny gate posts, and fence runs with clean southern or western exposure. They do poorly under heavy tree cover, beside tall walls, or tucked into deep urban shade.
A good install gives you a few practical wins:
- No trenching or wire runs across finished surfaces
- No utility power draw for the fixture itself
- Simple retrofit potential on existing posts
- Automatic night operation with minimal effort
A solar cap is only as dependable as the daylight it receives. Buyers often compare products when they should first compare locations.
If you approach them that way, the buying decision gets easier. Start with the site, then choose the cap.
Choosing The Right Material And Style
Material is where many buyers make the wrong compromise. They focus on shape and colour first, then end up with housings that fade, crack, or loosen long before the deck or fence itself shows any age. In real outdoor use, the shell matters as much as the light.
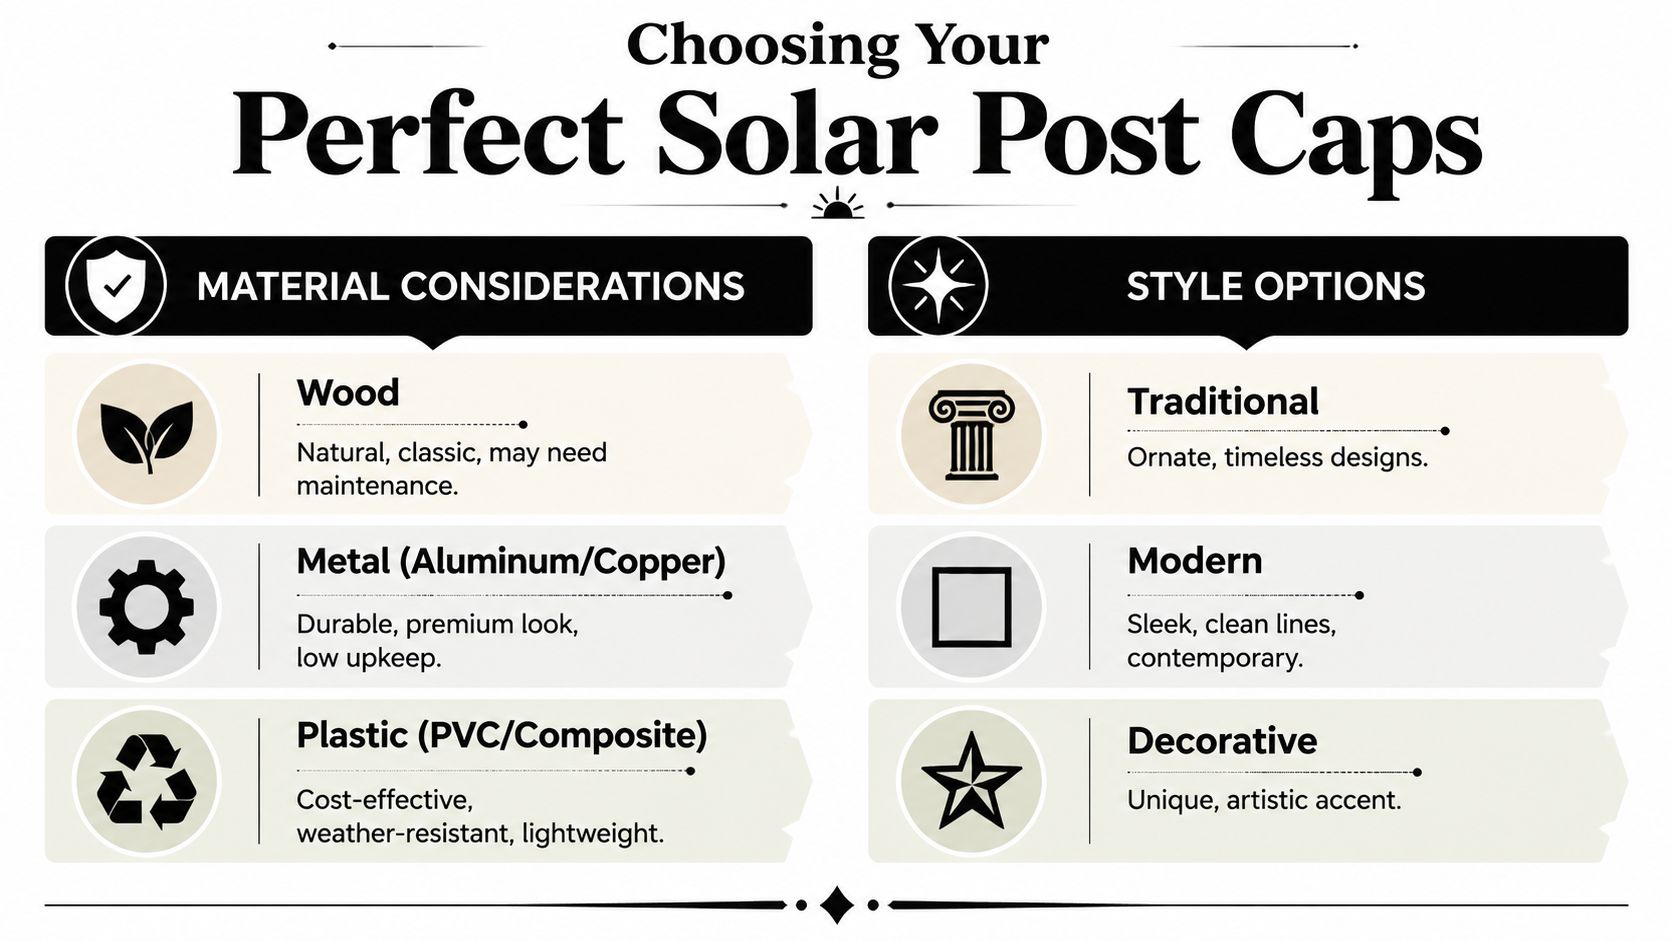
What materials hold up better
For outdoor durability, the safer choices are UV-stable polymer housings and powder-coated aluminium. Those materials resist degradation better than thin decorative plastics, and they're better suited to exposure from sun, moisture, and airborne salt. Product guidance also notes that many solar caps sit around 15 lumens, which is suitable for accent and wayfinding use, not primary security lighting, as described in this review of Classy Caps post cap specifications.
In Canadian conditions, that translates into a simple hierarchy.
| Material | Pros | Cons | Best For |
|---|---|---|---|
| Powder-coated aluminium | Strong shell, premium look, lower upkeep, handles exposure well | Higher upfront cost | Decks, front entries, exposed fence lines |
| UV-stable polymer or PVC | Good weather resistance, lighter weight, broad style range | Can look less substantial than metal | Composite decks, vinyl fences, lower-maintenance installs |
| Thin decorative plastic | Lower purchase cost, many shapes available | More prone to fading, brittleness, and short service life | Temporary updates or very budget-conscious projects |
| Wood-body decorative caps | Natural appearance, easy visual match on timber projects | More upkeep, more finish maintenance | Traditional wood railings where appearance matters most |
Why style still matters
The cap has to suit the project, not just fit the post. A pyramid cap works well on traditional wood fences and deck rails because it echoes the lines of conventional carpentry. A flat-top cap reads cleaner and more modern on composite systems, square-profile railings, and darker finishes. Decorative tops can work, but only when the rest of the job has enough detail to support them.
If the railing is minimalist and the cap is highly ornate, it looks like two different projects bolted together. If the house has classic trim, large square posts, and warm-toned wood, a severe modern cap can feel equally out of place.
For homeowners comparing looks before they buy, this guide on styling your home's exterior lights is useful because it frames exterior lighting as part of the whole façade, not just a hardware choice.
Matching style to project type
Use the simplest match first.
- Traditional decks and fences usually suit pyramid or gently tapered caps
- Modern builds look better with flat, square, low-profile forms
- Formal front-yard fencing can carry more decorative detail
- Backyard perimeter runs usually benefit from restraint rather than ornament
If you're comparing cap formats and post sizes in one place, the category selection at post caps for decks shows the range of shapes commonly used across wood and metal post projects.
Buy the material first, then the look. A beautiful cap made from weak housing material becomes a replacement job. A durable cap in the right profile just keeps doing its work.
Decoding Performance For Reliable Light
Performance is where marketing tends to get ahead of reality. Buyers see phrases like “all night” and assume every cap behaves the same in every season. It doesn't. Real output depends on charge quality, battery health, panel exposure, and how much light the fixture is trying to produce from a limited stored charge.
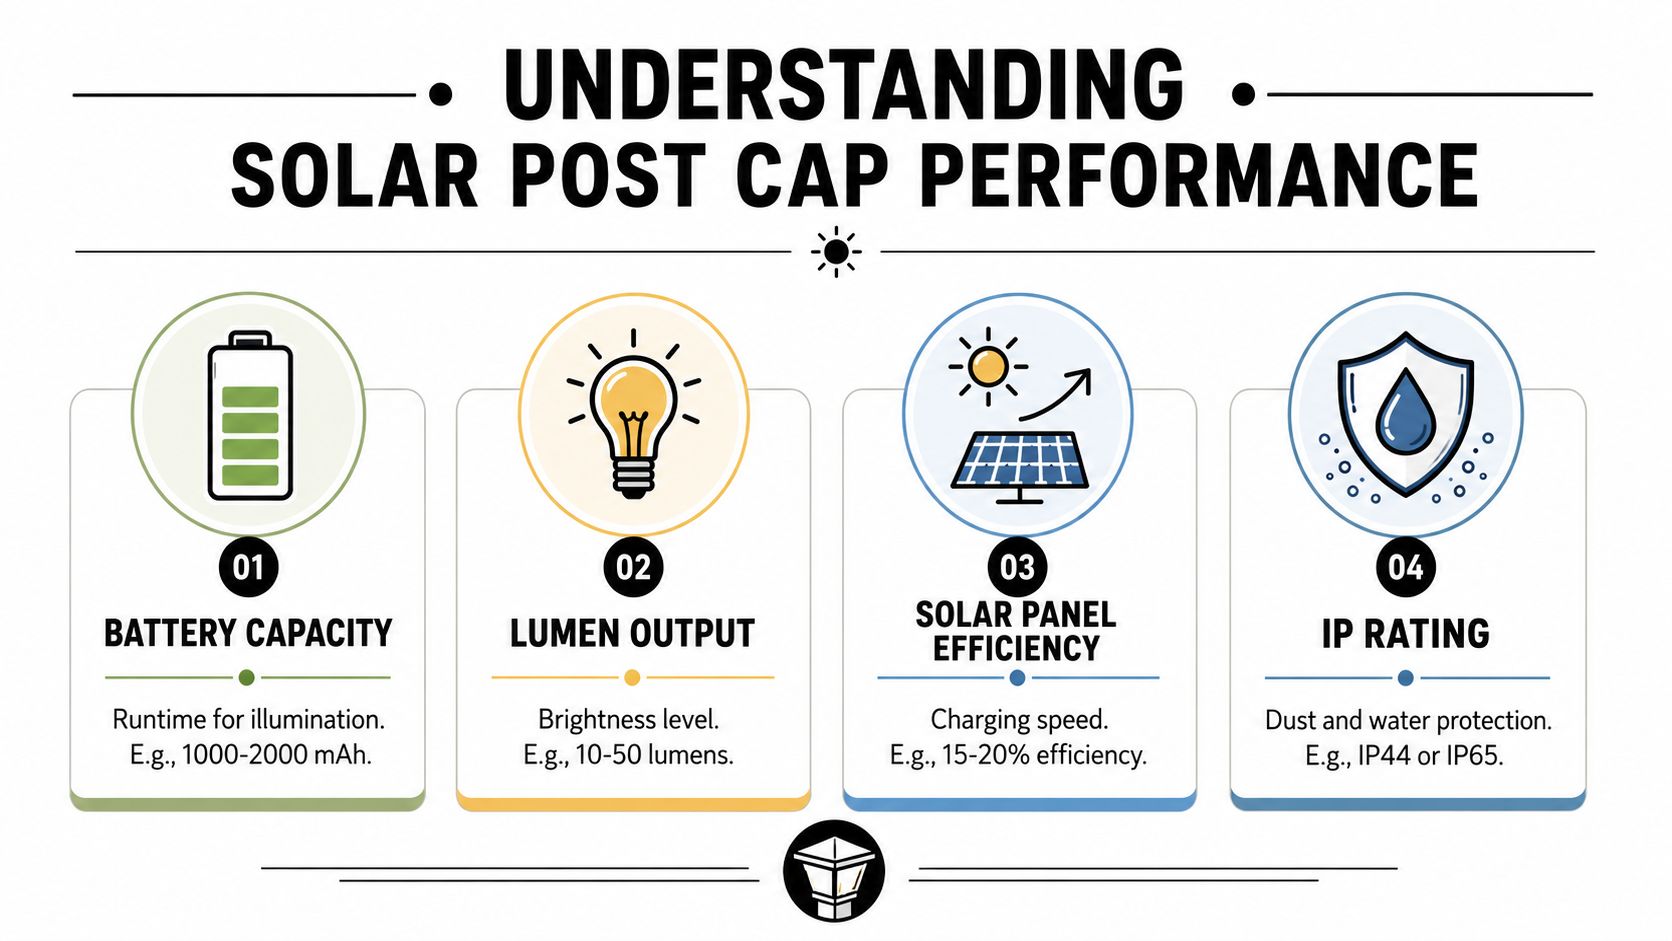
What the specs actually tell you
The first thing I tell clients is not to chase brightness blindly. A solar post cap is usually there to mark edges, stairs, and perimeter lines with a comfortable glow. More output can be useful, but only if the panel and battery are sized to support it.
The next useful checkpoint is startup and service life. Most solar post caps need an initial charge in direct sunlight for 24 to 48 hours, and guidance for this product class says rechargeable batteries typically last about 2 to 3 years, while higher-quality units can last roughly 5 to 7 years with proper maintenance, according to this lighting engineer's guide to best solar post lights.
Reading performance like a contractor
When comparing products, I look at the cap as a package, not a single feature.
- Battery quality decides whether the light still performs after regular cycling and colder stretches
- Panel area and exposure decide how fully the battery charges during a normal day
- LED output level affects whether the cap gives a soft marker light or tries to push more visible brightness
- Housing and seal quality affect whether moisture gets inside and shortens service life
A cap that looks bright on day one can still disappoint if the battery is poor or the panel is too small for the demand placed on it.
Real-world expectations
This is the part buyers appreciate once it's stated plainly. Summer performance is not winter performance. A cap on an open railing in long daylight will often look far better than the same cap in shorter, duller conditions. That doesn't mean the product is defective. It means the operating conditions changed.
For clients who want a stronger comparison point against wired systems, this guide to deck post lights and low-voltage easy installation helps clarify when low-voltage hardware makes more sense than solar.
Don't buy solar post caps based on a peak-condition promise. Buy them based on how they'll behave on your actual posts, on your darkest weeks, in your real weather.
A reliable setup usually comes from balanced specs. Decent panel size, sensible light output, replaceable batteries if possible, and a weather-sealed body. That combination beats flashy claims every time.
Getting The Right Fit For Your Posts
The most common buying mistake is simple. People order by the label on the lumber, not by the top of the actual post sitting in their yard. That's how a cap arrives, looks right in the box, and still won't seat properly.
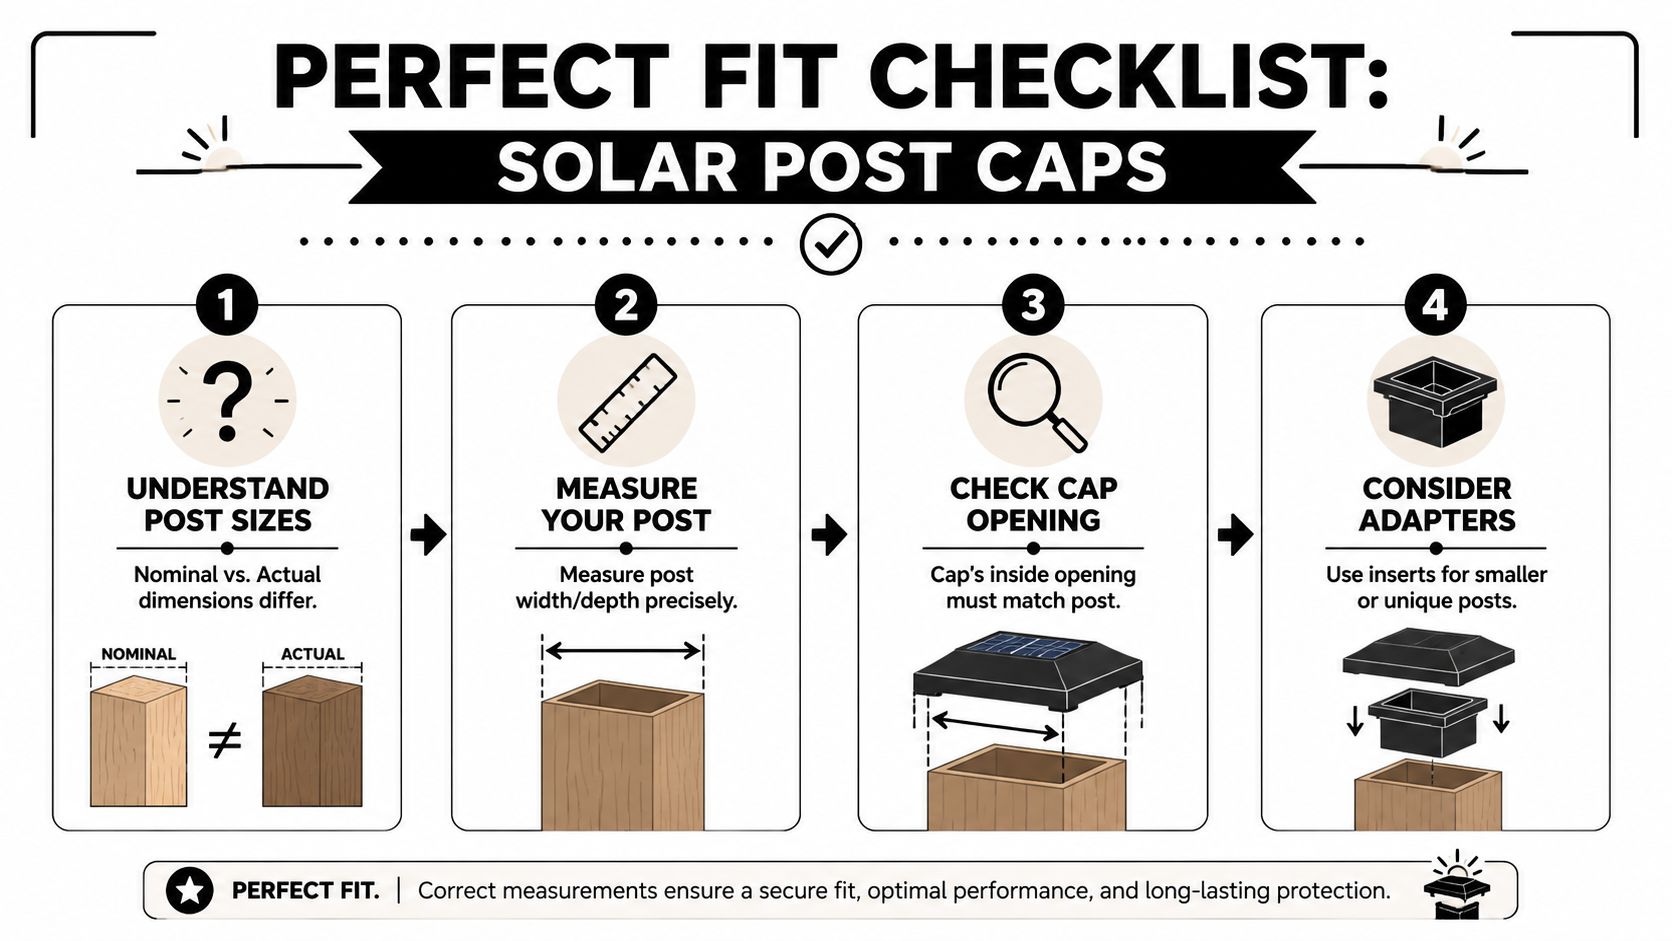
Nominal size and actual size are not the same
A nominal 4×4 wood post is typically smaller in actual measured dimension. The same issue applies to larger posts and many metal or composite sleeves. If you buy by assumption instead of measurement, you risk a cap that rocks, binds, or leaves ugly gaps.
Measure the very top of the installed post. Don't measure lower down where swelling, trim, wraps, or irregular cuts can mislead you.
Measure twice and check the opening
Use a tape measure and check both directions across the top surface. If the post isn't perfectly square because of paint build-up, minor warping, or a wrapped finish, use the largest true outside measurement and compare it with the cap's inside opening, not just its advertised post category.
For visual buyers, this short video is useful before ordering:
A simple fitting routine avoids most problems:
- Measure the top face after the post is fully installed
- Confirm the inside cap dimensions from the product listing
- Check whether the cap is made for wood, metal, vinyl, or sleeve applications
- Use adapters only when the product allows for them
Where buyers usually slip up
The trouble spots are predictable.
- Wrapped posts can be larger than expected because of the added sleeve or trim build-out
- Older wood posts may have slight movement, swelling, or uneven cuts on top
- Metal posts often need application-specific caps rather than wood-post caps
- True-size posts must be matched carefully because not every cap follows the same tolerance
If you need caps sized specifically for larger posts, the selection at 6 x 6 post caps is the kind of category worth checking because it separates larger-format options from standard small-post assumptions.
A snug fit matters for more than looks. It keeps the cap seated properly, protects the post top better, and gives the fixture a cleaner, more durable installation.
Easy Installation And Long Term Care
Installation is usually the easy part if the cap fits. The posts need to be clean, dry, and square on top. If the top cut is rough or crowned, fix that before you mount anything. A solar cap installed on a bad surface won't sit level, and a crooked light line always shows once dusk comes.
A clean install from the start
Most caps attach with exterior-grade adhesive, small screws, or both, depending on the model. Follow the cap's hardware method rather than mixing approaches blindly. If a manufacturer provides screw points, use them carefully and keep the cap centred before fastening. If adhesive is allowed, use an exterior product suitable for the post material and don't over-apply it.
A practical install checklist looks like this:
- Clean the post top so dust, saw residue, and pollen don't affect adhesion
- Dry-fit first to confirm full seating and alignment
- Level the cap visually before committing with screws or adhesive
- Charge before judging performance so the first night doesn't give a false impression
The maintenance that actually matters
Solar post caps don't need much care, but they do need some. Dirt on the panel cuts charging. Loose mounting shortens lifespan. Ignoring battery replacement leads people to think the whole cap has failed when often the battery is the actual problem.
Do these checks through the year:
- Wipe the panel lens so dust, grime, and seasonal debris don't block charging
- Clear snow and leaf build-up when caps sit in covered or sheltered areas
- Inspect mounting points after storms, vibration, or freeze-thaw movement
- Replace batteries when runtime drops rather than waiting for total failure
Secure mounting isn't optional. Outdoor hardware gets hit by movement, weather, and seasonal expansion. A cap that starts loose only gets looser.
There's also a durability point many basic guides skip. In harsh conditions, standard plastics can degrade 40% faster, leading to brittle failure, so strong materials and secure mounting are worth prioritising, as highlighted in this discussion of long-term durability and mounting concerns.
If you keep the panel clean, the housing secure, and the battery fresh when needed, solar post caps are a low-maintenance part of the project, not a recurring headache.
A Guide For Contractors And Property Managers
A townhouse complex needs better definition along deck lines and gate entries, but the budget does not allow trenching, low-voltage runs, or electrician call-backs. Solar post caps fit that kind of job well. They give the site a finished look, add light where people expect to see edges and transitions, and keep the scope focused on carpentry and hardware instead of electrical coordination.
Where they make sense at scale
For contractors, the value is predictability. For property managers, it is consistency across units and common areas. A good post cap program is not just about how the fixture looks on day one. It is about being able to match sizes later, replace a damaged cap without chasing a discontinued model, and choose a material that will hold up in local weather.
That matters even more in Canada. Plastic caps can be fine on sheltered jobs with a tight budget, but they tend to show age sooner under freeze-thaw cycles, strong sun, and repeated snow exposure. Metal caps usually cost more up front, yet they often make better sense on exposed fences, waterfront decks, and higher-end builds where faded finishes or brittle housings turn into service calls.
XTREME EDEALS INC. carries post caps in common wood and metal post sizes, along with related deck and fence hardware. That helps on projects where the buying decision is tied to fit, finish, and replacement planning, not just the light itself.
The strongest applications usually include:
- Deck perimeters and shared amenity spaces that need a more finished edge
- Fence and gate lines where wiring would add labour, disruption, or permit questions
- Retrofit upgrades on completed builds where owners want better curb appeal without opening finished surfaces
- Multi-unit or repeat-build work where matching hardware later matters as much as first install
How to avoid callbacks
Set the expectation properly at tender and handover. Solar post caps are accent and wayfinding lights. They are a poor substitute for security lighting, stair lighting that must meet code intent, or any location where reliable high output is required through long winter nights.
Material choice is usually where experienced crews save the client money over time. A warm copper or powder-coated metal cap can suit a premium entrance or heritage-style fence, but only if the finish quality matches the exposure. A lower-cost resin cap may still be the right call for rear lot lines or rental stock where uniform appearance and easy replacement matter more than a premium patina five years from now.
Cleaning plans also affect performance on larger sites. If the maintenance team already schedules exterior washing, add the cap lenses and small solar panels to that routine. Crews familiar with South Mountain solar panel cleaning already understand the basic issue. Dirt cuts charging, and neglected panels shorten runtime.
The jobs that hold up best are specified with clear priorities from the start. Match the cap to the post properly. Choose a housing that suits the exposure. Sell the light for what it does well.