
A lot of gates are structurally fine and visually forgettable. The fence looks decent, the posts are solid, the latch still works, but the gate itself feels like the plain cutout in an otherwise finished yard. That's usually the moment homeowners start looking at fence gate inserts.
A good insert changes more than the middle of the gate. It gives the opening some shape, ties the gate into the rest of the fence design, and can make an older wood gate feel intentional again instead of patched together. Done properly, it also supports the gate assembly rather than just decorating it.
Transform Your Gate from Simple to Stunning
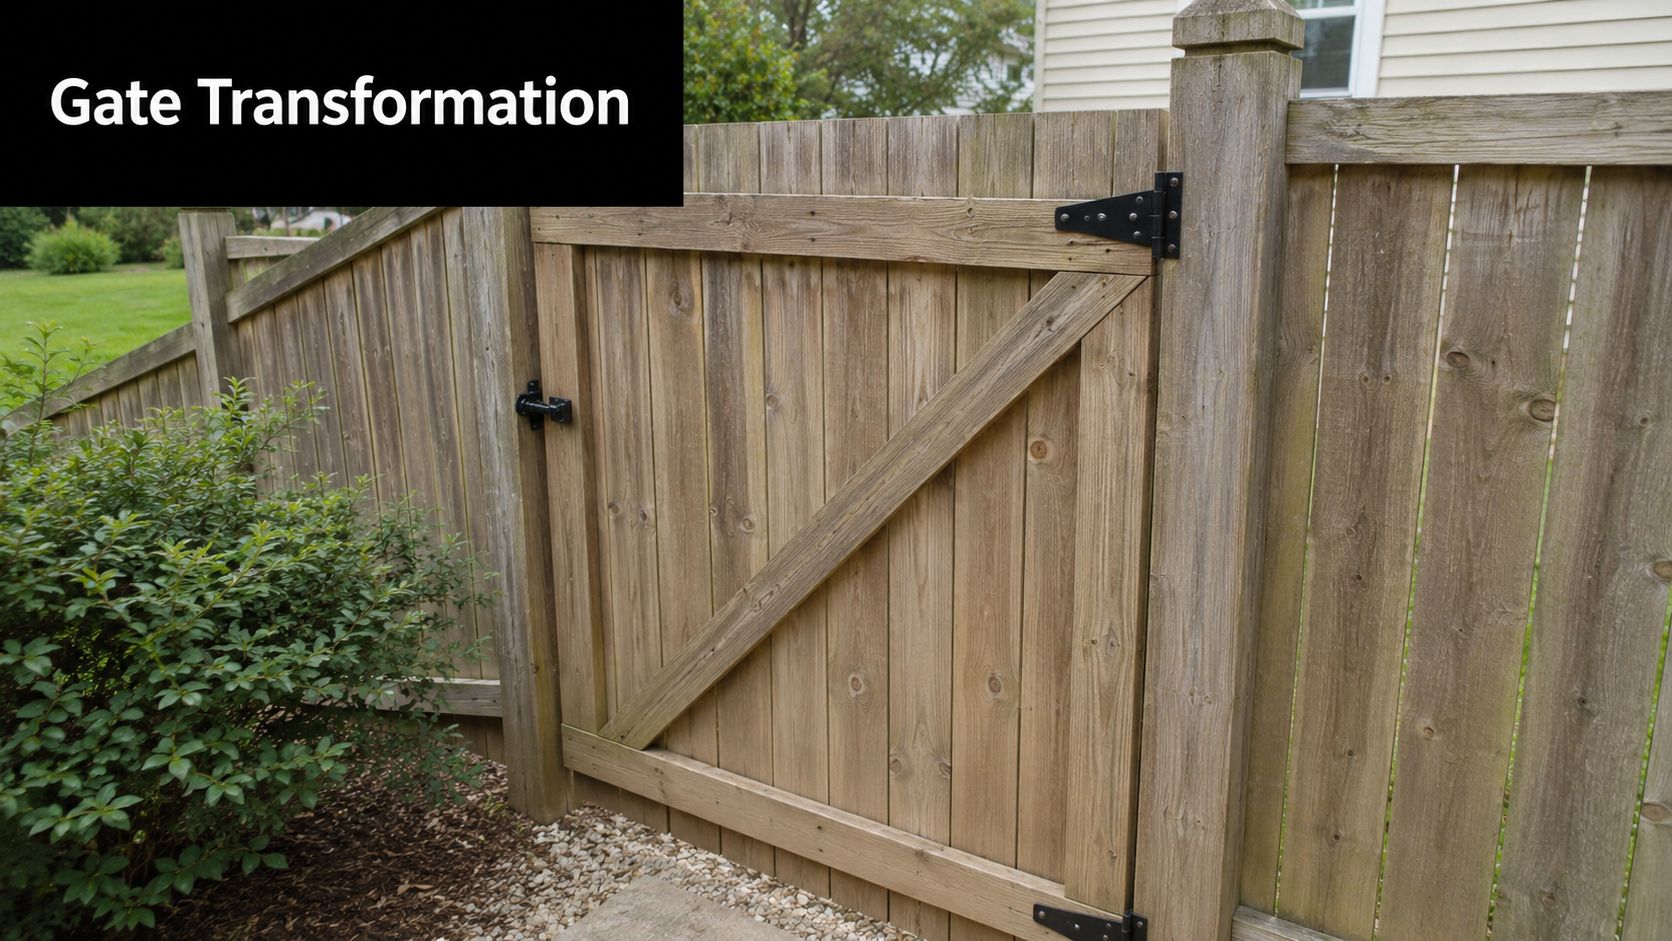
The most common situation is simple. You've got a serviceable backyard gate that opens and closes fine, but it doesn't add much to the space. Maybe the boards have been repainted, the fence line is straight, and the hardware works, yet the gate still looks flat and unfinished.
That's where fence gate inserts make sense. They're installed into a cutout in the gate or fence section, and they add both visual detail and a more finished look to the opening. In practical terms, they can turn a blank wood panel into something that matches the style of the home, whether that means a clean square design, a softer oval, or a more decorative pattern.
Fence and gate hardware sits inside a much larger renovation market. As noted in a piece on the history of fencing, fence gate hardware is part of Canada's massive home renovation market, and gate inserts belong to a mature upgrade category rather than a novelty purchase (history of fences and renovation context). That matters because most buyers aren't shopping for an insert in isolation. They're improving curb appeal, updating worn materials, or trying to make an existing outdoor space feel more complete.
What an insert actually adds
A quality insert can help in three ways:
- Better curb appeal: A plain slab gate becomes part of the outdoor design instead of an afterthought.
- Cleaner visual balance: The opening looks centred and proportioned, especially on wider wood gates.
- Useful structure: Some inserts are built to act as accessories that contribute stiffness within the gate assembly, not just ornament.
Practical rule: If the gate is the first thing you see from the driveway, side yard, or patio, upgrading the gate often has more visual impact than replacing a few random fence boards.
If you're also thinking more broadly about outdoor design, it helps to look at examples of enhancing Twin Cities outdoor spaces to see how details like gates, pergolas, and structural accents work together visually. The same design logic applies in Canadian backyards.
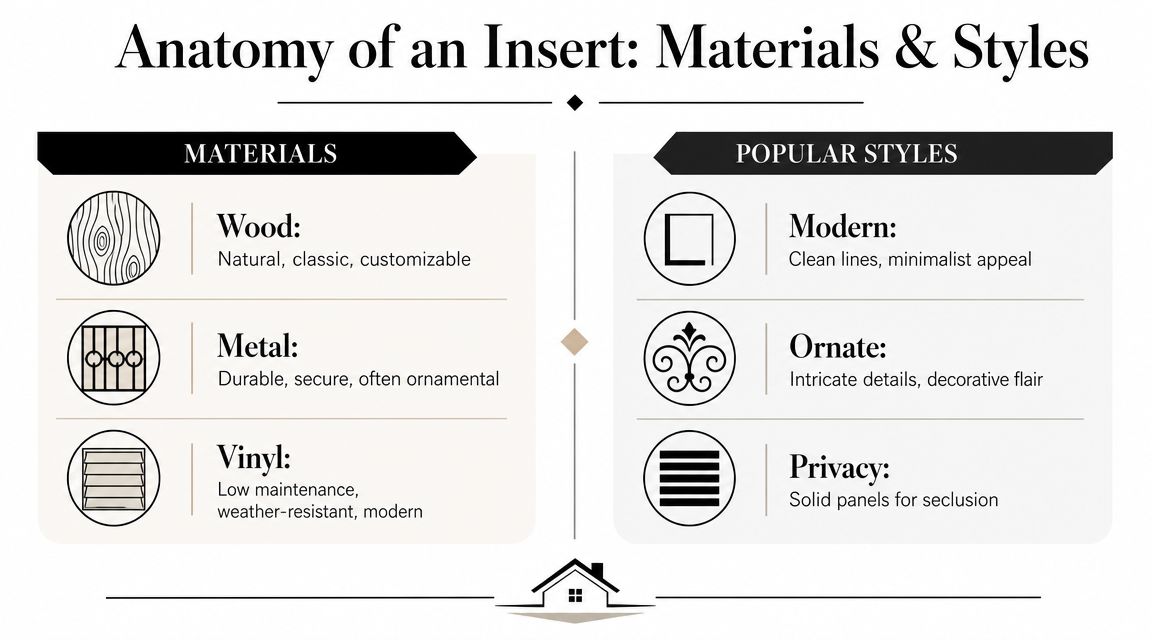
Anatomy of an Insert Materials and Popular Styles
Not all fence gate inserts perform the same once they're exposed to rain, snow, road salt, and repeated freeze-thaw cycles. Material choice affects rust resistance, finish life, weight, and how often you'll need to touch anything up.
Material choices that matter
The most practical option for many homeowners is cast aluminum with a powder-coated finish. One common Nuvo Iron insert is listed as cast aluminum, powder-coated, rust resistant, and sized at 17 inches actual length and 13 inches width on the product listing (Nuvo Iron cast aluminum insert listing). That combination is important because non-ferrous metal plus a protective finish generally gives you a better chance of avoiding the red-rust problems that show up on cheaper ferrous decorative parts.
Steel can still work, but only if the coating quality is good and the installation is careful. Once steel gets chipped at the cut edge or fastener point, corrosion starts there first. In Canadian winters, that small finish failure is where a lot of disappointment begins.
PVC and composite inserts have their place, especially when a homeowner wants low maintenance and a softer visual. The trade-off is that they rarely deliver the same crisp decorative detail or rigid feel as metal inserts. Wrought-iron style pieces look strong and traditional, but if the piece is ferrous and not well protected, maintenance becomes part of ownership.
Fence Gate Insert Material Comparison
| Material | Durability | Maintenance | Cost | Best For |
|---|---|---|---|---|
| Cast aluminum, powder-coated | Strong corrosion resistance, good long-term outdoor performance | Low to moderate | Moderate | Wood gates, coastal or damp climates, most retrofit projects |
| Powder-coated steel | Can be durable, but depends heavily on finish quality and scratch control | Moderate to high | Moderate | Security-focused designs, heavier traditional looks |
| Wrought iron or ferrous ornamental metal | Strong visual impact, but vulnerable if coating fails | High | Higher | Classic decorative gates where upkeep is acceptable |
| PVC | Weather-resistant and low fuss | Low | Moderate | Low-maintenance designs with simple styling |
| Composite panel insert | Stable appearance and easy upkeep | Low to moderate | Moderate to higher | Privacy-focused or modern designs |
Style should follow the house and the gate
Most buyers gravitate to one of three style groups:
- Modern geometric designs: Best on newer homes, horizontal fence layouts, and simple trim packages.
- Ornate scroll or curved patterns: Better on garden gates, traditional homes, and softer landscaping.
- Privacy-style or solid panel inserts: Useful when you want decoration without opening sightlines too much.
Decorex Hardware and Nuvo Iron both sit in the decorative insert conversation, but the right choice usually comes down to how much weight your gate can support, how exposed the gate is to weather, and whether you want the insert to read as subtle or decorative.
The insert should match the gate first, then the fence, then the house. If you reverse that order, the gate often looks forced.
A good rule is to avoid treating the gate like a separate art piece. It should still belong to the fence line. The same principle shows up in smaller entry details too. If you've ever looked at interchangeable mats and seasonal doorstep decor, you've seen how repeated shapes and finishes make an entrance feel deliberate rather than random.
How to Select the Perfect Gate Insert for Your Project
Most buying mistakes happen because people shop by pattern first and fit second. That's backwards. If you want an insert that still looks good after years of Canadian weather, start with compatibility, finish quality, and gate condition. Style comes after that.
Measure the opening you can safely create
Before you order anything, inspect the gate frame. Look at the rails, stiles, latch area, hinge side, and any existing diagonal bracing. If cutting the opening means removing too much wood from a weak section, the insert isn't the problem. The gate is.
Available installation guidance for this product category points to a process using a template, 5/8-inch holes, a jigsaw cutout, and compatibility with 3/4-inch or 1 1/4-inch thick material in some applications. Those details are useful for the cutting process, but they don't answer the more important retrofit question: whether your existing gate should be cut at all.
Prioritise lifecycle performance over first impressions
Many DIY buyers often make a mistake. They see a clean decorative panel online and assume the job is mostly visual. It isn't. As a Nuvo Iron blog discussion puts it, the critical question is not just whether an insert looks good, but how powder-coated aluminum or fabricated steel will hold up after years of weather exposure (durability and lifecycle performance discussion).
For Canadian homes, that means thinking through:
- Finish quality: Powder coating matters, but so does how well it covers edges and corners.
- Metal type: Cast aluminum generally gives a better rust-resistance profile than ferrous decorative metal.
- Sun exposure: South-facing gates age differently than shaded side-yard gates.
- Moisture exposure: Snow buildup and wet-dry cycles punish lower gate sections.
- Wind load: A decorative opening changes how the gate behaves. Large cutouts on weak gates can introduce movement.
Don't buy a design you'll need to baby. Outdoor hardware should suit the site, not demand constant attention from the homeowner.
Check weight and hardware relationships
The insert has to work with the hinges and latch already on the gate. If the gate is narrow, lightly built, or already sagging, adding a decorative metal insert won't solve the underlying issue.
Use this quick decision filter:
- Confirm the gate is square enough to keep working after modification.
- Leave enough material around the cutout to preserve strength.
- Keep the insert clear of latch bodies, striker plates, and hinge screws.
- Choose a shape that fits the rail spacing instead of forcing a larger opening.
If you're comparing available options, a practical starting point is the catalogue of fence and gate hardware that includes insert-compatible accessories and related hardware categories. It helps to evaluate the insert as part of the whole gate, not as a stand-alone purchase.
Match the insert to the gate material
Wood gates are the most common retrofit candidates because they're easy to cut and reinforce. Vinyl and composite gates need more caution. Their frames and skins don't always tolerate field modification well, especially when the opening lands close to hardware points.
For wood gates, the best outcomes usually come from:
- Solid frame members: You need sound lumber around the opening.
- Sealed cut edges: Exposed end grain will absorb moisture if left untreated.
- Balanced placement: A centred insert almost always looks and performs better than an awkward offset.
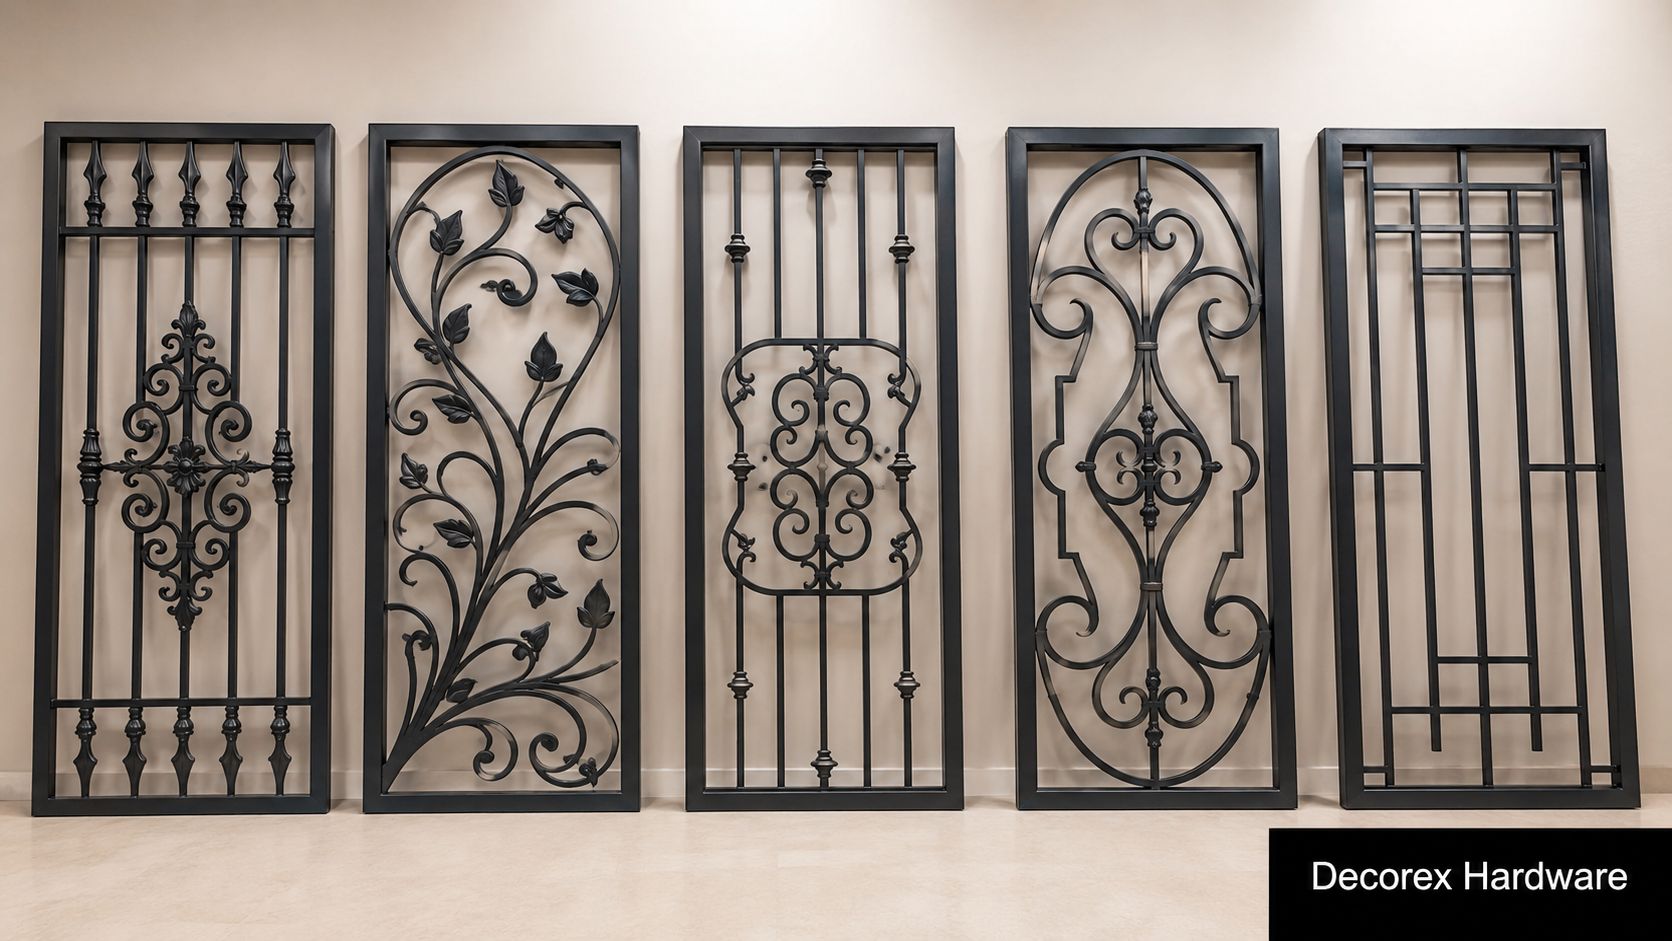
Showcase Top Picks from Decorex Hardware
Product selection gets easier once you stop shopping by abstract category and start thinking about the gate in front of you. Some inserts suit a clean suburban side gate. Others belong on a garden entrance or a privacy wall panel where the decorative opening needs more presence.
Where Decorex Hardware fits
If you're comparing decorative options, the Decorex Hardware insert selection is the type of range that makes sense for retrofit work because it covers multiple shapes and styles rather than forcing one visual direction. That matters when one homeowner needs a simple square insert for a side yard gate and another wants a more noticeable decorative feature facing the patio.
Three common project matches
The modern backyard gate
A square or rectangular black insert usually works best on straight-board wood gates with clean horizontal or vertical lines. This style suits newer homes, black hardware, and simple post caps. It gives contrast without making the gate look busy.
The traditional garden entry
An oval or curved insert softens a wood gate and works well with older homes, planting-heavy yards, and more decorative fence profiles. This is the style people tend to choose when they want the gate to feel welcoming rather than sharp.
The privacy wall accent
Some homeowners don't want a gate to become transparent or too ornamental. In those cases, a more contained decorative insert or grille-style opening gives detail while keeping the fence line visually solid. This is often the better call for side-yard access or neighbour-facing runs.
What works and what doesn't
Here's what consistently works in the field:
- Black finishes on wood gates: They coordinate easily with hinges and latches.
- Simple shapes on narrow gates: They're easier to place and less likely to crowd hardware.
- Proportionate sizing: The insert should look centred within the rails, not oversized for the panel.
What often disappoints:
- Overly ornate patterns on very plain fences
- Large inserts on already-flexing gates
- Decorative choices that ignore latch placement or brace layout
Nuvo Iron remains a common comparison point in this category, especially for cast aluminum decorative formats. Decorex Hardware makes more sense when the goal is to line up the insert style with the fence design and keep the upgrade visually coherent rather than generic.
A Guide to Installing Your Fence Gate Insert
Most insert installations are straightforward, but the cutting stage is where DIY projects either look clean or go sideways. Accuracy matters more than speed. Once you remove material from the gate, you don't get a second chance.
Start by reviewing a product-specific walkthrough such as this gate insert video guide if you want to see the sequence before touching the gate.
Check the gate before you cut
Retrofitting is common, but it isn't automatic. Installation guidance in this category stresses that you need to assess the gate's existing structure first and make sure the new opening won't interfere with hinges, latches, or the gate's overall integrity (retrofit caution for existing gates).
Before any cutting, confirm:
- The gate isn't already sagging: Fix alignment problems first.
- The latch area stays intact: Don't weaken the section carrying latch loads.
- The hinge side remains strong: That side handles repeated movement.
- The frame has enough sound material around the cutout: Rotten or split wood is a stop sign.
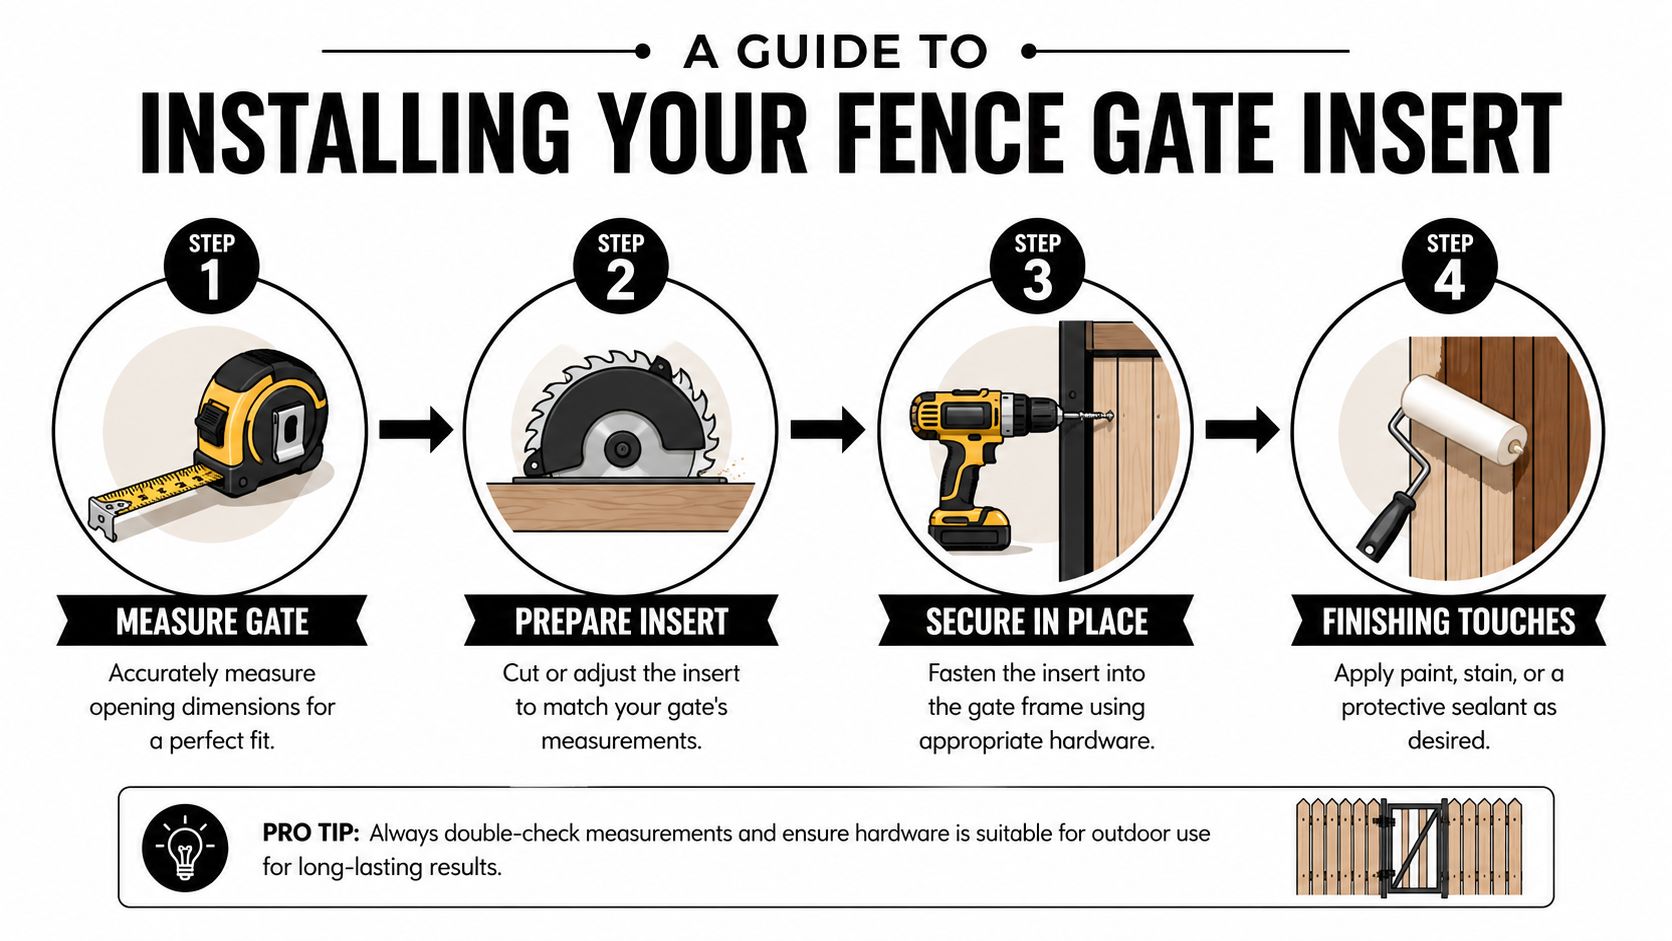
Basic installation sequence
Mark the location carefully
Use the template supplied with the insert if one is included. Centre it visually between rails and away from latch hardware.Drill starter holes
Follow the insert's instructions. Some installation material in this category specifies 5/8-inch holes before the jigsaw cut.Cut the opening slowly
A jigsaw works well for controlled curves and corners. Support the gate properly and keep the cut smooth.Dry-fit the insert
Test the fit before fastening anything. If it binds, adjust the cut carefully instead of forcing the part.Fasten and seal
Install the insert with the proper hardware, then seal all exposed wood edges so moisture doesn't wick into the cutout.
A clean cut and sealed edge matter as much as the insert itself. Most failures around wood gates start at exposed raw material, not at the decorative panel.
A visual walkthrough can help if you prefer to watch the process:
Tools that make the job cleaner
You don't need a full shop setup, but a few tools make a big difference:
- Measuring tape and square: For accurate placement.
- Template or cardboard mock-up: Helpful when centring the opening.
- Drill with the right bit: Needed for starter holes and fasteners.
- Jigsaw with a clean-cut blade: Best for controlled interior cuts.
- Exterior wood sealer or paint: Essential on exposed cut edges.
If the gate is expensive, custom-built, or structurally questionable, hiring a contractor is usually cheaper than replacing a gate that was cut badly.
Long-Term Care and Common Troubleshooting
A fence gate insert isn't a fit-and-forget item. It becomes part of the gate assembly, so long-term performance depends on both the insert and the surrounding gate staying sound.
Nuvo Iron's product information is useful here because it notes that inserts can act as stiffening and reinforcement elements, and that regular maintenance should include checking fasteners to preserve alignment and proper latch engagement over time (Nuvo Iron insert product information PDF).
Maintenance that prevents bigger problems
Keep maintenance simple and regular:
- Wash off grime gently: Dirt holds moisture against finishes.
- Inspect fasteners: Tighten anything that has loosened with gate movement.
- Watch the wood around the cutout: Cracks, swelling, or soft spots need attention early.
- Touch up finish damage promptly: A scratch on steel matters more than a scratch on cast aluminum.
Common problems and likely causes
| Problem | Likely cause | Practical fix |
|---|---|---|
| Insert feels loose | Fasteners backed off or wood movement | Re-tighten hardware and inspect surrounding wood |
| Gate latch no longer lines up | Gate sag or stress around modified panel | Adjust gate hardware and inspect frame rigidity |
| Finish damage at edges | Abrasion, impact, or poor handling during install | Clean area and repair according to material type |
| Wood darkening around cutout | Moisture intrusion at exposed edges | Dry, seal, and repair affected area before rot spreads |
If a gate starts dragging after the insert goes in, don't blame the insert first. Check whether the gate already had hinge wear, weak framing, or moisture damage before the modification.
A well-chosen insert should still look intentional years later. The projects that age best are the ones where the installer respected the gate's structure, sealed the cut edges, and chose a material suited to the local climate.
If you're planning a gate upgrade, XTREME EDEALS INC. carries fence and gate hardware, decorative inserts, and related accessories that can help you match the insert to the gate instead of forcing a one-size-fits-all solution.