
There's nothing quite like that feeling of being on display to ruin a perfectly good afternoon on the deck. If you're tired of feeling watched, you've come to the right place. This guide is packed with practical privacy ideas for deck railings that look great and, more importantly, get the job done. We'll cover everything from living green walls to sleek, modern screens to help you turn your exposed deck into a personal retreat.
Reclaiming Your Deck: An Introduction to Outdoor Privacy
An open-concept deck is great in theory, but in reality, it can feel more like a stage than a sanctuary. The fix is to work with your existing railing, not against it, by adding elements that create a sense of seclusion. This isn't about walling yourself in; it's about carving out a comfortable space where you can kick back and relax without worrying about the neighbours or people walking by.
Forget the generic, one-size-fits-all advice. We're going to get into real, practical solutions I've seen work time and time again. You’ll see just how much you can change the feel of your deck with a few key additions:
- Lush, Green Barriers: Think of a wall of planters filled with tall grasses or climbing vines. It's a beautiful, natural way to screen your space.
- Modern Privacy Panels: For a clean, contemporary look, nothing beats installing sharp-looking privacy screens.
- Classic Lattice: You can't go wrong with timeless wood or vinyl lattice. It’s a budget-friendly option that offers a traditional feel.
Here's a tip from my experience: the secret to a project that lasts is using the right hardware. It’s something people often overlook, but it’s critical for both safety and getting that polished, professional look.
The right hardware isn’t just a finishing touch—it’s the foundation of a safe, durable privacy project. You absolutely have to choose components that can handle the extra weight and wind load from whatever screen or panel you add.
For example, heavy-duty Nuvo Iron Post Extenders are a must if you want to raise your railing height for taller screens. You’ll also need robust brackets to make sure everything stays put, especially in a storm. Products from Xtreme eDeals are designed to provide the strength you need for these kinds of add-ons.
Throughout this guide, we'll walk through how to get that perfect balance of privacy, light, and airflow without messing up your deck's style. For even more inspiration, you can also check out our other post with more ideas for privacy on a deck. Let’s get started and turn that deck into the private oasis you've been wanting.
Planning Your Privacy Strategy Before You Build
It's tempting to jump straight to picking out materials, but a beautiful and lasting privacy addition actually starts with a solid plan. Rushing into a project is the fastest way to end up with something that doesn’t quite work, or worse, runs afoul of local building codes.
First, you need to get crystal clear on your specific privacy goal. Are you trying to block a direct line of sight to a neighbour's second-storey window? Or are you aiming for a more general sense of enclosure, creating a cozy retreat on your deck? The answer will steer your entire project.
Blocking a single nosy window might only need one well-placed panel or even a tall planter. If you want total seclusion, however, you're looking at a more involved solution, like adding screens around the entire deck railing. Get specific about the problem you're trying to solve.
Defining Your Level of Seclusion
Next, think about just how much privacy you actually want. Not all privacy ideas for deck railings are created equal; they exist on a spectrum from completely solid to lightly suggested. Finding your sweet spot is the key.
- Total Seclusion: If you want a complete visual block, you'll be looking at solid panels. Think metal, composite, or tongue-and-groove wood that leaves no gaps for prying eyes.
- Semi-Private: Maybe you just want to blur the view and create a sense of separation without feeling walled in. Options like lattice, slatted screens, or even frosted glass panels are fantastic for this. They let light and air through while still providing a good amount of screening.
- Suggested Privacy: Sometimes, all you need is a visual hint to define your space. This can be achieved with low planters, interesting balusters, or outdoor curtains without building a solid wall.
A critical mistake is assuming you need a six-foot solid wall for privacy. Often, a four-foot semi-private screen is more than enough to create a feeling of comfortable separation while preserving an open, airy atmosphere on your deck.
Checking Codes and Assessing Your Structure
This is the part you absolutely cannot skip. Before you get your heart set on a specific design, you have to check your local building codes and any Homeowner’s Association (HOA) rules. Many areas have strict regulations on how high you can build on a deck, with a common maximum height being around six feet from the deck floor.
A quick call to your local planning or building department will give you the exact numbers. Remember, adding height or a solid screen also adds significant wind load to your deck railing. Your existing structure has to be strong enough to handle that extra force safely. Give your posts a good shake and make sure the entire railing system is in top condition.
Finally, you need to think about weight. Heavy additions, especially large planters filled with damp soil, can add hundreds of pounds of stress. Make sure your deck’s framing and foundation are rated to support that extra load. Nailing down these details now ensures your project is not just beautiful, but also safe, compliant, and built to last. Once you have this groundwork sorted, you can confidently start looking at hardware and materials from a trusted supplier like Xtreme eDeals.
Comparing Deck Railing Privacy Solutions and Materials
With so many options out there, picking the right privacy solution for your deck can feel like a chore. Let's cut through the noise. Here, we'll stack up the most popular privacy ideas for deck railings, looking at the real-world pros and cons of each one so you can make a decision you feel good about.
We’ll dig into everything from quick-and-easy fabric screens and classic wood lattice to sleek metal panels and beautiful living walls. The goal is to match what you actually need—whether that’s driven by budget, style, or the level of privacy you're after—with the best possible fit.
Breaking Down the Main Options
Every privacy method comes with its own trade-offs. You're usually balancing cost, how tough it is to install, and how much work it'll be to keep it looking good. A vertical garden, for instance, creates an incredible living wall but needs regular watering and care. On the other hand, a simple vinyl panel gives you instant privacy with almost zero future maintenance.
Here’s a quick rundown of the most common approaches I see homeowners take:
- Fabric and Mesh Screens: These are usually the fastest and most affordable way to get privacy. They're made from tough, UV-resistant material and just attach to your railing with zip ties or grommets for an instant fix.
- Lattice Panels: A timeless choice for a reason. Wood or vinyl lattice gives you semi-privacy while still letting light and air through. It’s a really versatile option you can paint or stain to match your deck’s vibe.
- Solid Panels (Wood, Composite, Metal): If you want total seclusion, this is your answer. You can go with natural wood slats, modern aluminum, or low-maintenance composite boards to create a complete visual block.
- Planter Boxes and Vertical Gardens: A "living wall" is an absolutely beautiful, green solution. By filling railing-mounted or built-in planters with tall grasses, climbing vines, or leafy shrubs, you can build a natural screen that changes with the seasons.
- Outdoor Curtains: For a softer, more flexible feel, outdoor curtains are a great choice. Hung from a pergola or a custom frame, they can be drawn for privacy or pulled back to open things up, adding a touch of resort-style class.
To get started on the right foot, take a moment to figure out your main goal. This little decision tree can help point you toward the right family of solutions, depending on whether you need to block a specific sightline or just create a general sense of enclosure.
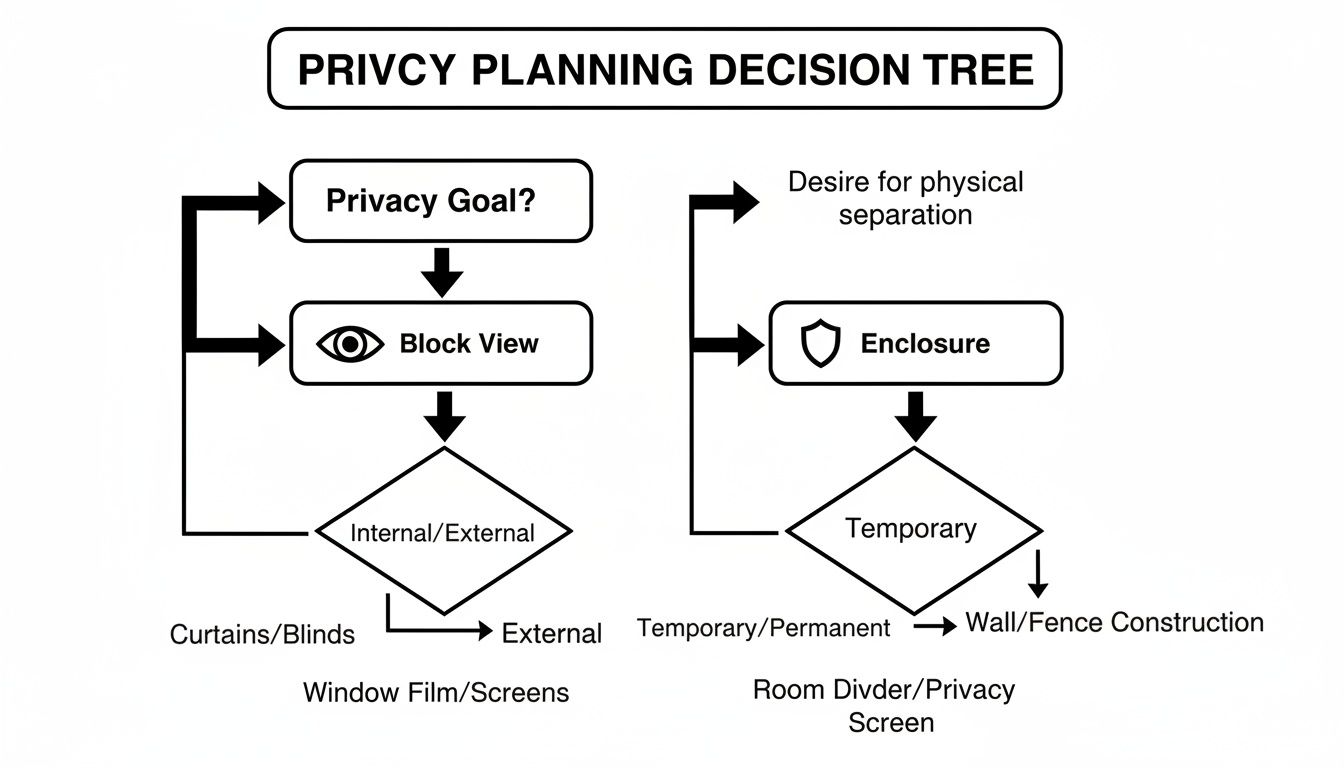
The biggest takeaway here is to define your "why" first. Figuring out if you need total blockage or just a feeling of separation is the fastest way to narrow down the right materials and design for your project.
A Head-to-Head Comparison
To make things even clearer, let's put these options side-by-side. I've put together a simple table that weighs the key factors—cost, privacy level, and installation—to give you an at-a-glance overview.
Comparison of Deck Railing Privacy Solutions
This table compares popular deck privacy methods based on cost, maintenance, installation complexity, and overall privacy level to help you choose the best fit.
| Privacy Solution | Estimated Cost (per linear ft) | Privacy Level (Low/Med/High) | Maintenance Needs | Installation DIY-Friendliness |
|---|---|---|---|---|
| Fabric/Mesh Screen | $3 – $10 | Medium to High | Low (occasional cleaning) | Very High |
| Wood Lattice | $10 – $25 | Medium | High (staining, sealing) | High |
| Vinyl Lattice | $15 – $35 | Medium | Low (occasional cleaning) | High |
| Wood Slats | $20 – $50+ | High | High (staining, sealing) | Medium |
| Composite Panels | $40 – $100+ | High | Very Low | Medium |
| Metal Panels | $50 – $150+ | High | Very Low | Low to Medium |
| Railing Planters | $25 – $75+ | Medium to High | High (watering, plant care) | High |
| Outdoor Curtains | $15 – $40 | High (when closed) | Low (seasonal washing) | High |
This comparison shows the clear trade-offs you have to make. For example, fabric screens are super DIY-friendly and won't break the bank, but they might not give you the high-end look or longevity of composite or metal panels.
On the flip side, premium metal panels deliver a sleek, maintenance-free solution but come with a higher upfront cost and can be trickier to install perfectly. If you're leaning toward a modern style, it's worth exploring options for sleek aluminum deck materials that offer a great balance of durability and design.
I see this all the time: people choose a material based on looks alone. Always, always think about the long-term maintenance. A beautiful wood lattice screen can turn into an eyesore in just a couple of seasons if it isn't sealed and cared for properly.
Creative Alternatives and Combinations
Don't feel like you have to limit your privacy solution to just the railing. Thinking vertically can open up a ton of new ideas, especially if you have a pergola or some other overhead structure. You could combine railing planters below with a hanging screen from the pergola above to create a really nice, layered look.
It's also worth looking beyond the railing itself. You can find some fantastic pergola privacy screen ideas that can really boost your outdoor seclusion. This strategy works wonders for creating a cozy, "room-like" atmosphere on your deck, shielding you from both neighbours and the harsh afternoon sun.
In the end, the best privacy ideas for deck railings often come from a mix-and-match approach. You might put up solid panels on the side facing a close neighbour but use a semi-private lattice on another side to keep a great view. Once you understand the pros and cons of each material, you can piece together a custom solution that perfectly fits your deck's layout and your family's need for privacy.
Don't Skimp on Hardware: The Nuts and Bolts of a Lasting Privacy Screen
Your beautiful new privacy screen is only as strong as the hardware holding it all together. It's easy to get caught up in the look of the panels or planters, but the real workhorses of any durable outdoor project are the fasteners, brackets, and supports. These small pieces do the heavy lifting, making sure your new setup can stand up to wind, rain, and time.
Picking the right hardware is more than just a finishing touch; it's a critical safety issue. Any privacy addition, especially a solid one, basically acts like a sail. It catches the wind and puts a whole new kind of stress on your deck railing. This is why using robust, appropriate hardware isn't just a recommendation—it's an an absolute must.
Selecting Weather-Resistant Fasteners
One of the most common mistakes I see homeowners make is grabbing the wrong screws for the job. Using standard indoor screws for an outdoor project is a guaranteed failure. They'll start to rust within a single season, leaving ugly stains and, far more seriously, weakening the entire structure.
For any project exposed to the elements, you have to use fasteners specifically rated for exterior use. This typically boils down to two main options:
- Coated Deck Screws: These are your go-to for most projects. They have special ceramic or polymer coatings designed to resist corrosion from moisture and the chemicals in treated lumber. They're effective and widely available.
- Stainless Steel Screws: If you're in a coastal area with salt spray or a region with a lot of rain, stainless steel is the best choice for maximum rust prevention. It's a bit more of an investment upfront, but the longevity is unmatched.
This same rule applies to every single piece of metal hardware, from bolts and nuts to washers. Every component needs to be weather-resistant. For all your essential hardware needs, you can find a wide variety of durable fasteners and fittings designed for outdoor construction.
Anchoring Your Structure for Strength and Safety
The hardware you select has a direct impact on the structural integrity of your deck. This isn't something to take lightly. A tragic and stark reminder is the 2015 Berkeley balcony collapse, which led to California's SB 721 law. This law now mandates rigorous inspections for elevated decks, highlighting just how crucial proper hardware and installation methods are.
When you add a privacy screen, you have to make sure your posts can handle the extra load. If your existing posts are solid, you may just need some specialized brackets. But if you need to add height or create a stronger anchor point, you'll need purpose-built hardware.
A privacy screen adds forces your original railing was never designed to handle. Relying on the existing setup without reinforcing it with proper hardware is a significant safety risk.
This is exactly where well-designed products can make all the difference. For example, Nuvo Iron Post Extenders are a fantastic solution for safely adding the height you need for taller privacy panels. Instead of just screwing another piece of wood to your existing post—a risky and unstable method—these steel extenders create a strong, secure connection that's built to last.
Likewise, if you’re installing new posts to support a heavy screen, using Nuvo Iron Post Bases is non-negotiable. These anchor the post firmly to the deck's surface, properly distributing the load and preventing any wobble.
Choosing the Right Brackets and Connectors
Finally, think about how you'll attach your privacy material—whether it’s lattice, solid panels, or individual slats—to your railing posts. The right brackets not only provide essential strength but also give your project a clean, professional-looking finish.
To ensure your privacy project stands the test of time, proper high-quality hardware and essential accessories like these fixings are crucial for stability and longevity. Look for U-brackets, L-brackets, or specialized panel clips that are designed for your specific material.
When you're picking out brackets, keep a few things in mind:
- Material Compatibility: Make sure your brackets won't react with your fasteners. For instance, pair galvanized steel brackets with similarly coated or hot-dip galvanized screws to prevent corrosion.
- Load Capacity: Check that the brackets are rated to hold the weight of your panels. This is especially important if you're working with heavy composite or solid wood.
- Adjustability: Some brackets offer a little wiggle room, which can be a real lifesaver when you're trying to get everything perfectly level and plumb during installation.
Spending a little extra time and money on high-quality, weather-resistant hardware is the smartest move you can make. It's a small investment that protects your privacy screen, your deck, and most importantly, your family and friends.
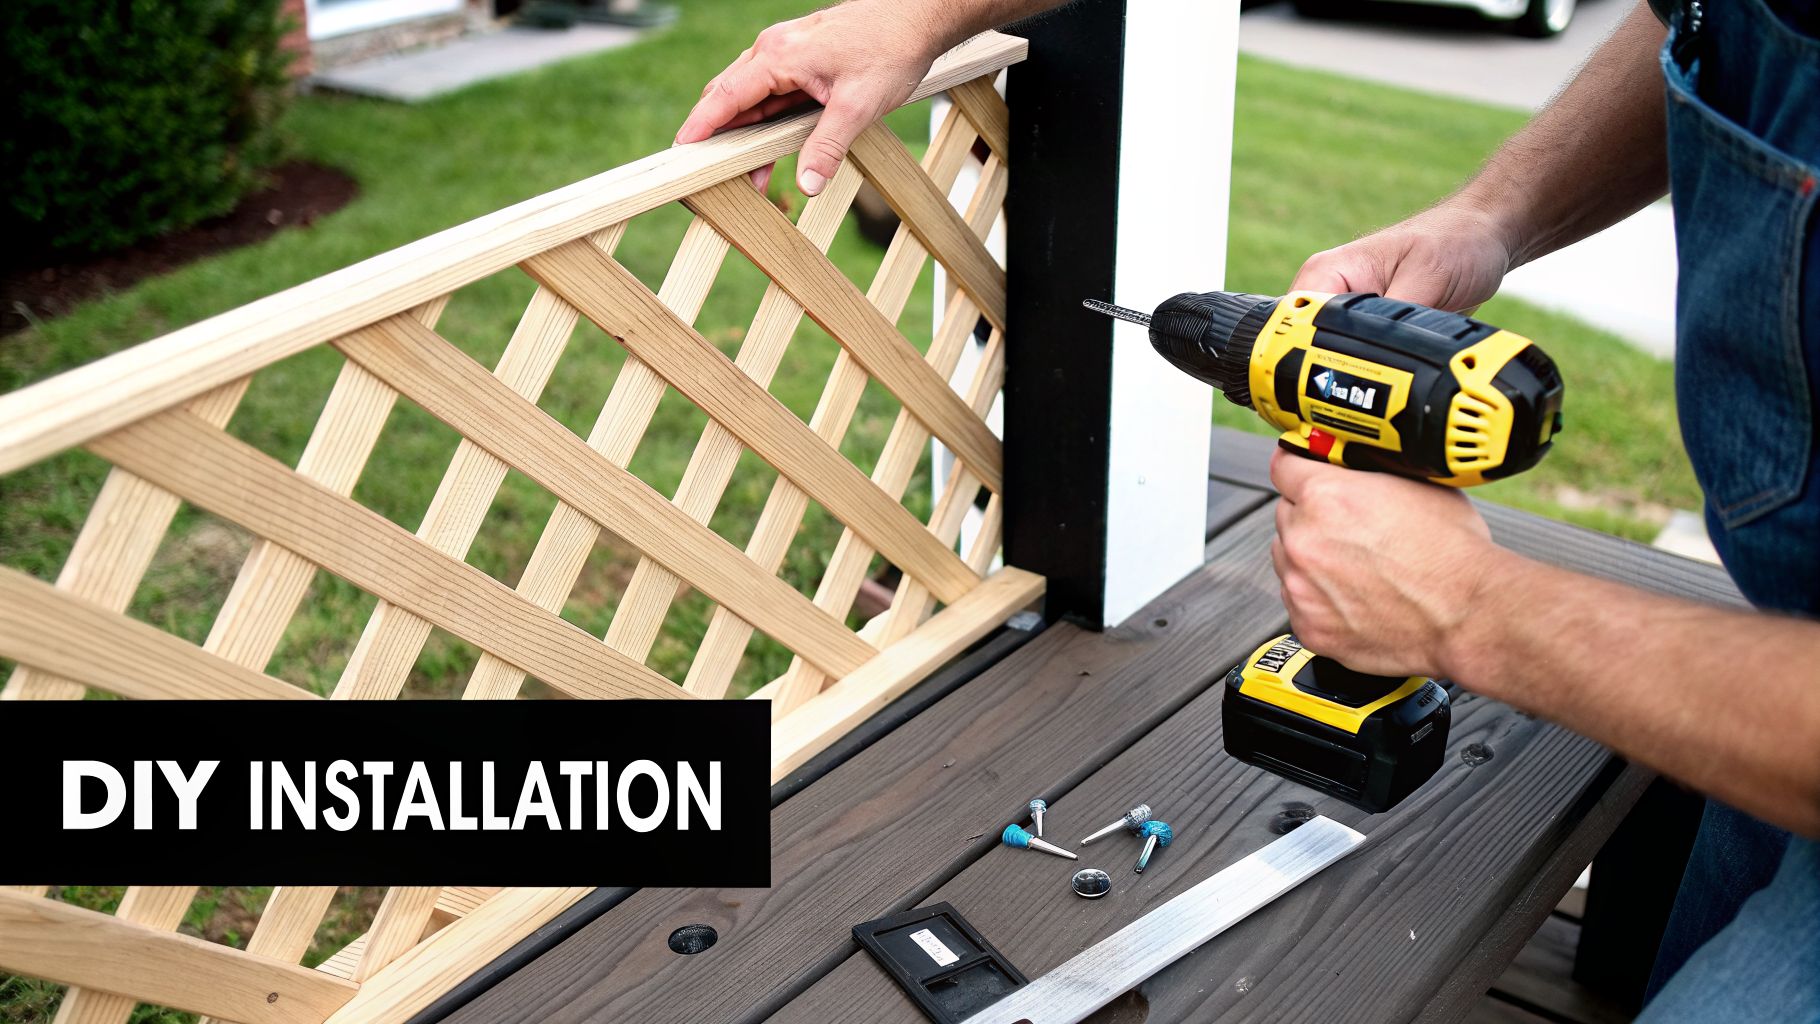
Alright, you've got your materials and hardware. Now for the fun part: turning those deck privacy ideas into a reality. We’ll walk through the installation for two of the most popular DIY solutions out there: flexible fabric screens and the classic look of wood lattice.
What might seem like a big job is really just a weekend project when you break it down. Let's get to it.
Installing a Fabric Privacy Screen
Fabric screens are a fantastic choice if you want fast, effective privacy. They’re lightweight, easy on the wallet, and don't require a workshop full of tools. The real secret to a professional result is getting the screen tight and sag-free.
Start by unrolling the screen along the section of railing you want to cover. At one end, use a quality, UV-resistant zip tie to loosely secure the top corner to your top rail or post. Don't cinch it down all the way yet—you'll want some slack for adjustments.
Move to the opposite end and attach that top corner, pulling the fabric taut. Now you can work your way back along the top edge, fastening the rest of the grommets every 12 to 18 inches. Once the top is set, do the same for the bottom, pulling down just enough to smooth out any wrinkles.
Here’s a pro tip for a really clean look, especially on longer decks: run a thin, vinyl-coated tension wire through the grommets. A wire at the top and bottom is the best defense against the dreaded "fabric sag" that can happen over time from sun and wind. You can find all the necessary fasteners and fittings, from zip ties to tensioning hardware, at Xtreme eDeals.
The final touch is securing the vertical sides of the screen to your deck posts. This is a critical step that keeps the screen from flapping and making noise in the wind.
Installing Wood or Vinyl Lattice Panels
Lattice gives your deck a more solid, architectural feel. It takes a bit more measuring and cutting, but the installation itself is pretty straightforward once you have your panels sized up.
Your first job is to cut the lattice panels to fit snugly between your deck posts. A circular saw with a fine-tooth blade works best here, giving you a clean edge on both wood and vinyl. Always remember the old carpenter’s rule: measure twice, cut once. It’s always better to trim a panel down than to end up with an ugly gap.
With your panels cut, you have two main ways to attach them:
- Direct Attachment: This is the simplest method. You just screw the lattice directly to the inside face of your deck posts. If you're using wood lattice, always pre-drill your screw holes to avoid splitting the wood.
- Framing the Panel: For a more polished and durable installation, build a simple frame around the lattice using 1×2 lumber. This "sandwich" not only looks cleaner but adds a ton of rigidity to the panel.
When you're driving screws into wood lattice, avoid the overlapping joints. The wood is thicker there and very prone to splitting under pressure. Instead, place your screws in the single slats right next to the joints for a solid hold that won't cause damage.
Whichever method you pick, make sure you use the right screws. You'll want exterior-rated deck screws that are long enough to get a good bite into the posts without poking through the other side. For a job like this, a 1.5 to 2-inch coated deck screw is usually the perfect fit.
Attaching Hardware for a Professional Finish
For a truly top-tier installation, look into specialized brackets. Products like Nuvo Iron U-Channels or panel clips are made specifically for holding lattice panels. You simply mount the channel to your posts, and the lattice slides right into place.
This approach has some major advantages:
- A Clean Look: It hides the cut edges of the lattice completely, giving you a seamless, professional appearance.
- Room for Expansion: It gives wood and vinyl panels space to expand and contract with temperature changes, preventing buckling.
- Easy Replacement: If a panel ever gets damaged, you just slide it out and pop a new one in—no need to back out a dozen screws.
These kinds of hardware solutions from brands like Nuvo Iron give you a secure fit and a sleek finish. These small upgrades can make a huge difference in the final quality and lifespan of your deck privacy project, ensuring your new retreat is both beautiful and built to last.
You’ve built your private outdoor space—congratulations. But the job isn't quite finished. Now comes the part that ensures your deck stays a true retreat for years: proper maintenance.
It’s easy to overlook, but simple, consistent upkeep is what separates a temporary fix from a long-term investment. Different privacy materials have different needs, so let's walk through how to protect each one. This isn't just about appearances; it’s about making sure your private oasis remains safe and secure.
How to Care for Different Privacy Materials
Every privacy solution, from fabric to foliage, requires its own kind of care. Getting it right prevents small issues from turning into costly replacements down the line.
For fabric screens, gentle cleaning is your best friend. A soft brush, some mild soap, and water are all you need to lift away dirt, dust, and pollen. Be careful to avoid pressure washers or harsh chemicals. They might seem like a quick fix, but they can strip the UV-protective coating and drastically shorten the screen's lifespan.
Wood lattice and panels demand a bit more hands-on attention to fend off rot and weather damage. Plan on re-staining or sealing your wood elements every two to three years, though you might need to do it more often in a harsh climate. This barrier is crucial for repelling moisture that leads to warping, splitting, and insect infestations.
I often see people wait until their wood looks grey and weathered before they re-seal it. That’s a mistake. By the time you see visible wear, moisture has already worked its way into the wood fibres. The key is to stay ahead of the damage with a regular schedule.
If you’ve opted for a living wall, your maintenance routine will follow the seasons. Here’s a simple checklist to keep your green screen looking lush and full:
- Spring: As the weather warms up, prune back any dead growth from the winter. It’s also the perfect time to add fresh compost or soil to the planter boxes and start a regular watering schedule.
- Summer: This is all about consistent watering, especially during hot, dry spells. Keep an eye out for pests and feed your plants as needed to encourage the dense growth that gives you privacy.
- Autumn: Trim back any overgrown branches and start to taper off your watering as the days get cooler. A layer of mulch will help insulate the roots against the coming cold.
Don't Forget to Inspect Your Hardware
The screens get all the attention, but the hardware is what holds it all together. Think of it as the unsung hero of your privacy setup.
At least once a year, set aside a few minutes to do a thorough inspection of all your fasteners, brackets, and posts. You’re looking for any signs of rust or corrosion, particularly on screws and bolts where water can pool.
Give your posts and privacy panels a firm but gentle push. Is there any wobble or looseness? If you spot a loose fastener, tighten it right away. A wobbly connection will only get worse, eventually creating a serious safety hazard. These quick checks are exactly how you prevent the kind of structural failures that lead to new deck safety regulations, ensuring your private space is also a safe one.
Common Questions About Deck Railing Privacy
Even with the best-laid plans, a few questions always seem to come up when you’re in the middle of a deck privacy project. We get it. Here are some of the most common things homeowners ask when adding privacy to their railings, with straightforward answers from our experience.
How High Can I Build My Deck Privacy Screen?
This is a big one, and the answer almost always comes down to your local municipal bylaws and any Homeowner’s Association (HOA) rules you might have.
Generally, you’re looking at a total height of 6 to 7 feet measured from the surface of your deck, but this isn't a hard and fast rule everywhere. Before you even think about buying materials, your first step should be a quick call to your local planning department to get the exact regulations for your area.
What Is the Most Cost-Effective Privacy Idea for a Large Deck?
If you need to cover a lot of ground without breaking the bank, outdoor-rated fabric privacy screens are usually your most economical bet. They give you instant coverage and are incredibly easy to install, often just with zip ties or grommets.
While they might not last as long as a composite panel or a wooden lattice, their low upfront cost is a huge plus for big decks.
Remember, cost-effective isn't just about the cheapest price today. You have to weigh the initial cost against any future maintenance or replacement to find the true best value for your project.
Can I Add a Privacy Screen to an Existing Metal Railing?
Absolutely. Attaching fabric screens to metal railings is a breeze using UV-resistant zip ties or even bungee cords.
For something more rigid like lattice or decorative metal panels, you'll want to look for specialized clamps and brackets in our collection, which are designed for different railing shapes. Just make sure you’re using hardware that plays nice with your railing—like stainless steel fasteners on an aluminum railing—to avoid any nasty corrosion down the line.
For all the hardware you need to bring your deck privacy ideas to life, from specialized brackets to weather-resistant fasteners, XTREME EDEALS INC. has you covered. Explore our full selection of decking and fencing accessories to find the perfect components for a secure and stylish installation.