
If you're looking to give your property a clean, contemporary edge, a horizontal wood fence is a fantastic choice. By running the fence boards parallel to the ground, you create strong, clean lines that can make your entire outdoor space feel bigger and more open. It’s a design that pairs beautifully with modern architecture and delivers a serious boost to your home's curb appeal.
For homeowners wanting both style and privacy, this design has quickly become a favourite.
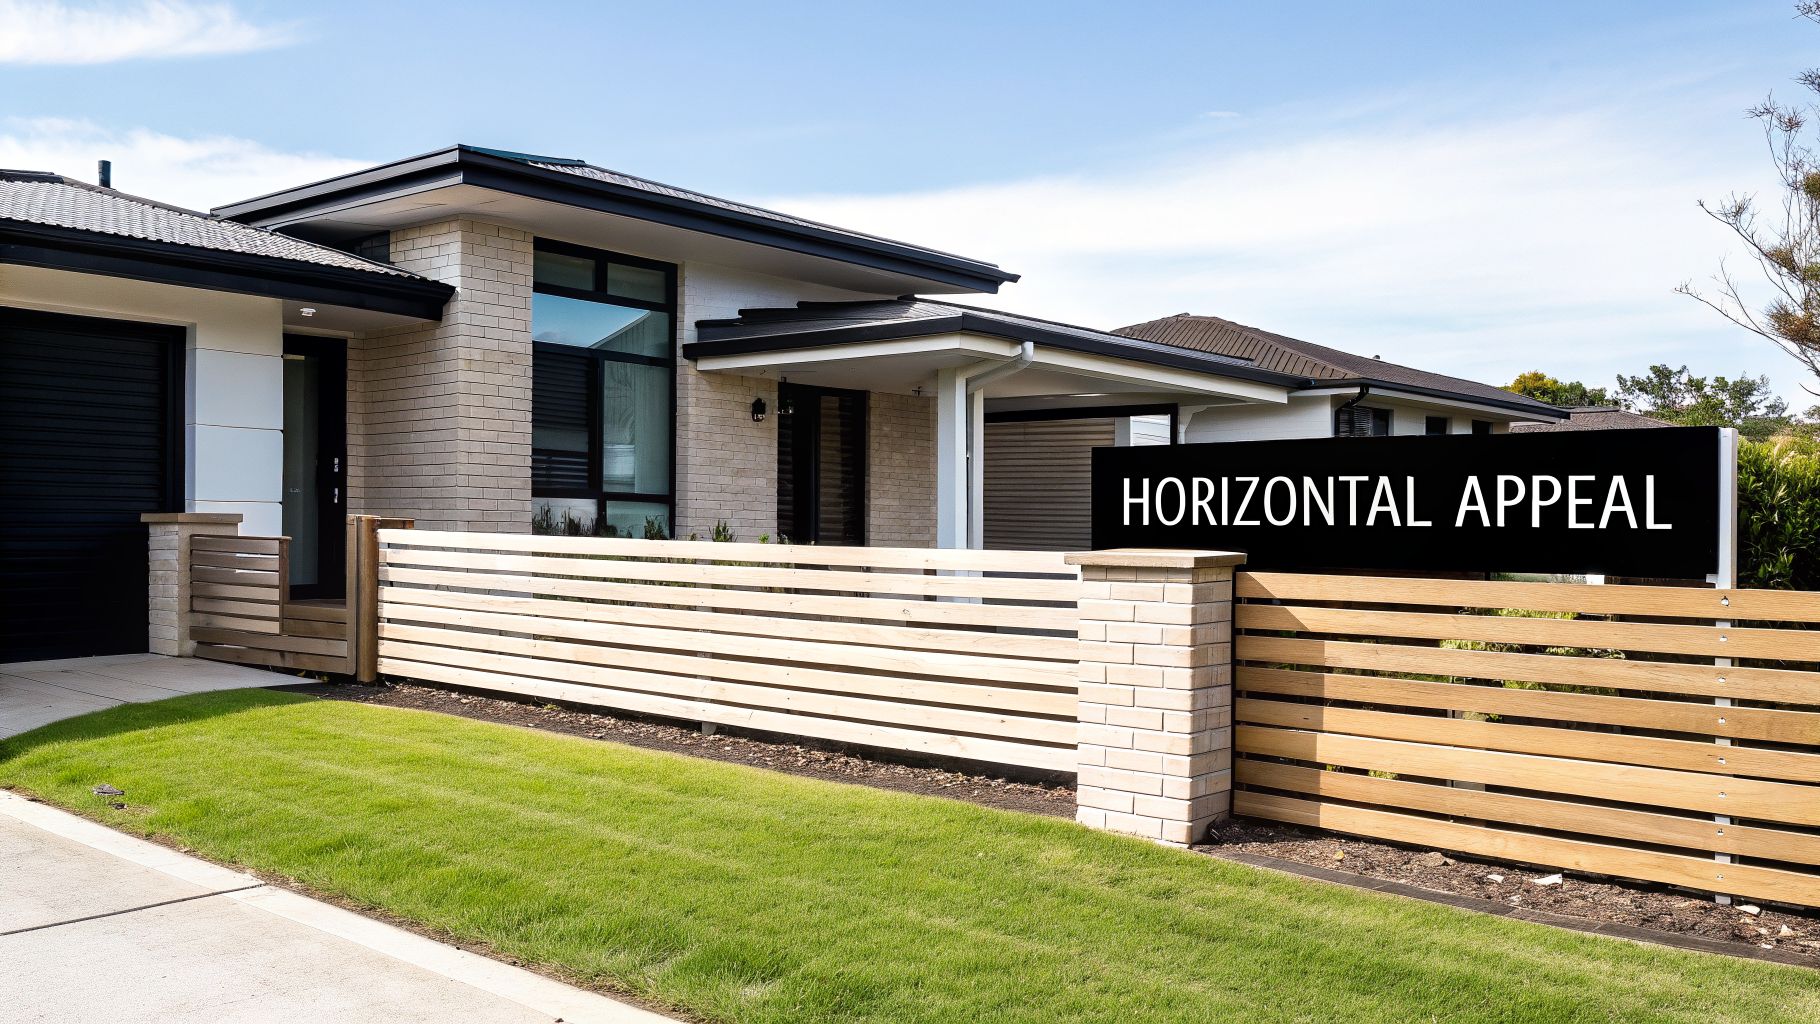
Why Horizontal Fences Are a Modern Must-Have
While the classic vertical picket fence certainly has its place, wood fences with a horizontal orientation have become the top choice for anyone wanting to make a real style statement. This isn't just about following a trend; it's a smart design move that can completely change the feel of your property.
Those long, continuous lines trick the eye, drawing it outward and making your yard seem much wider than it is. It's a powerful visual tool, especially if you're working with a smaller or narrower lot where you want to create a sense of space.
A Solid Investment in Curb Appeal
This look is here to stay. A well-built horizontal fence gives off a high-end, contemporary vibe that instantly signals a modern, well-cared-for home. In some markets, this design is so popular that it can directly impact a home's value.
For instance, data from fencing pros in Sacramento shows that horizontal fences are the number one design choice for boosting a home's appraisal value right now. You can see more on those 2026 Sacramento fence cost findings.
The move toward horizontal fences shows a bigger shift in what homeowners want. It's not just about marking a property line anymore. It's about creating an outdoor living area that feels like a true extension of the home.
That appeal brings real benefits, whether you're planning to sell in a few years or staying put for the long haul. It's a project that pays off immediately with a stunning new look and continues to pay off as a long-term investment.
More Than Just Good Looks
The aesthetic upgrade is obvious, but a properly constructed horizontal fence is also a functional workhorse. With minimal gaps between the boards, it offers excellent privacy and can even help muffle neighbourhood noise. And when you use quality materials and the right techniques, you get a fence that's built to stand strong.
This guide is here to walk you through the entire process of building your own show-stopping horizontal wood fence. We'll cover everything from the initial planning and choosing materials to the final finishing touches. You don’t have to be a seasoned contractor to get a professional-looking result.
For a bit more inspiration before you start, check out our guide on 11 creative fence design ideas. With the right game plan, you can build a feature that's not only beautiful but truly built to last.
Your Blueprint for a Successful Fence Project
A great-looking horizontal wood fence doesn’t just happen. It doesn’t start with a saw or a post-hole digger—it starts with a solid plan. I've seen it time and again: a little bit of groundwork upfront can save you from huge headaches, unexpected costs, and a fence that just doesn't turn out right. Think of this as your pre-build playbook, walking you through the critical thinking that needs to happen before you even break ground.
Trust me, this planning phase is more than a suggestion; it's essential. More and more homeowners are investing in stylish fencing, and it’s easy to see why. The U.S. fence construction market actually hit $9.1 billion in 2024 and is on a clear path to reach $13.7 billion by 2032. With California and the rest of the West leading this trend, projects just like this are becoming a hot commodity. You can dig into more of the U.S. fence market trends if you're curious.
Navigating the Rules and Red Tape
Before you buy a single board, your first call should be to your local municipality's planning or building department. Every city and county has its own rulebook, and ignoring it is a recipe for disaster. You could face fines or, even worse, be forced to tear your brand-new fence down.
Here’s what you need to get clarity on:
- Setbacks: These are the rules that dictate how far your fence must be from property lines, sidewalks, and streets.
- Height Restrictions: Don't assume you can build an 8-foot privacy fence anywhere. Front yard fences are often limited to a much lower height (like 4 feet), while backyard fences might be allowed up to 6 or 8 feet.
- Permit Requirements: Many areas require a building permit for fences over a certain height. Find out if your project needs one and what the application process looks like.
- HOA Guidelines: If you live in a community with a Homeowners' Association, they're the other authority you have to answer to. They often have very specific rules about fence styles, materials, and even colours. Get a copy of their guidelines before you fall in love with a design.
A quick phone call or a few minutes on your city’s website can save you from some very expensive mistakes.
A quick word of advice from experience: Don't just eyeball your property lines. If there's any uncertainty at all, a professional survey is a smart investment. Building even a few inches onto your neighbour's property can spiral into a serious legal headache you don't want.
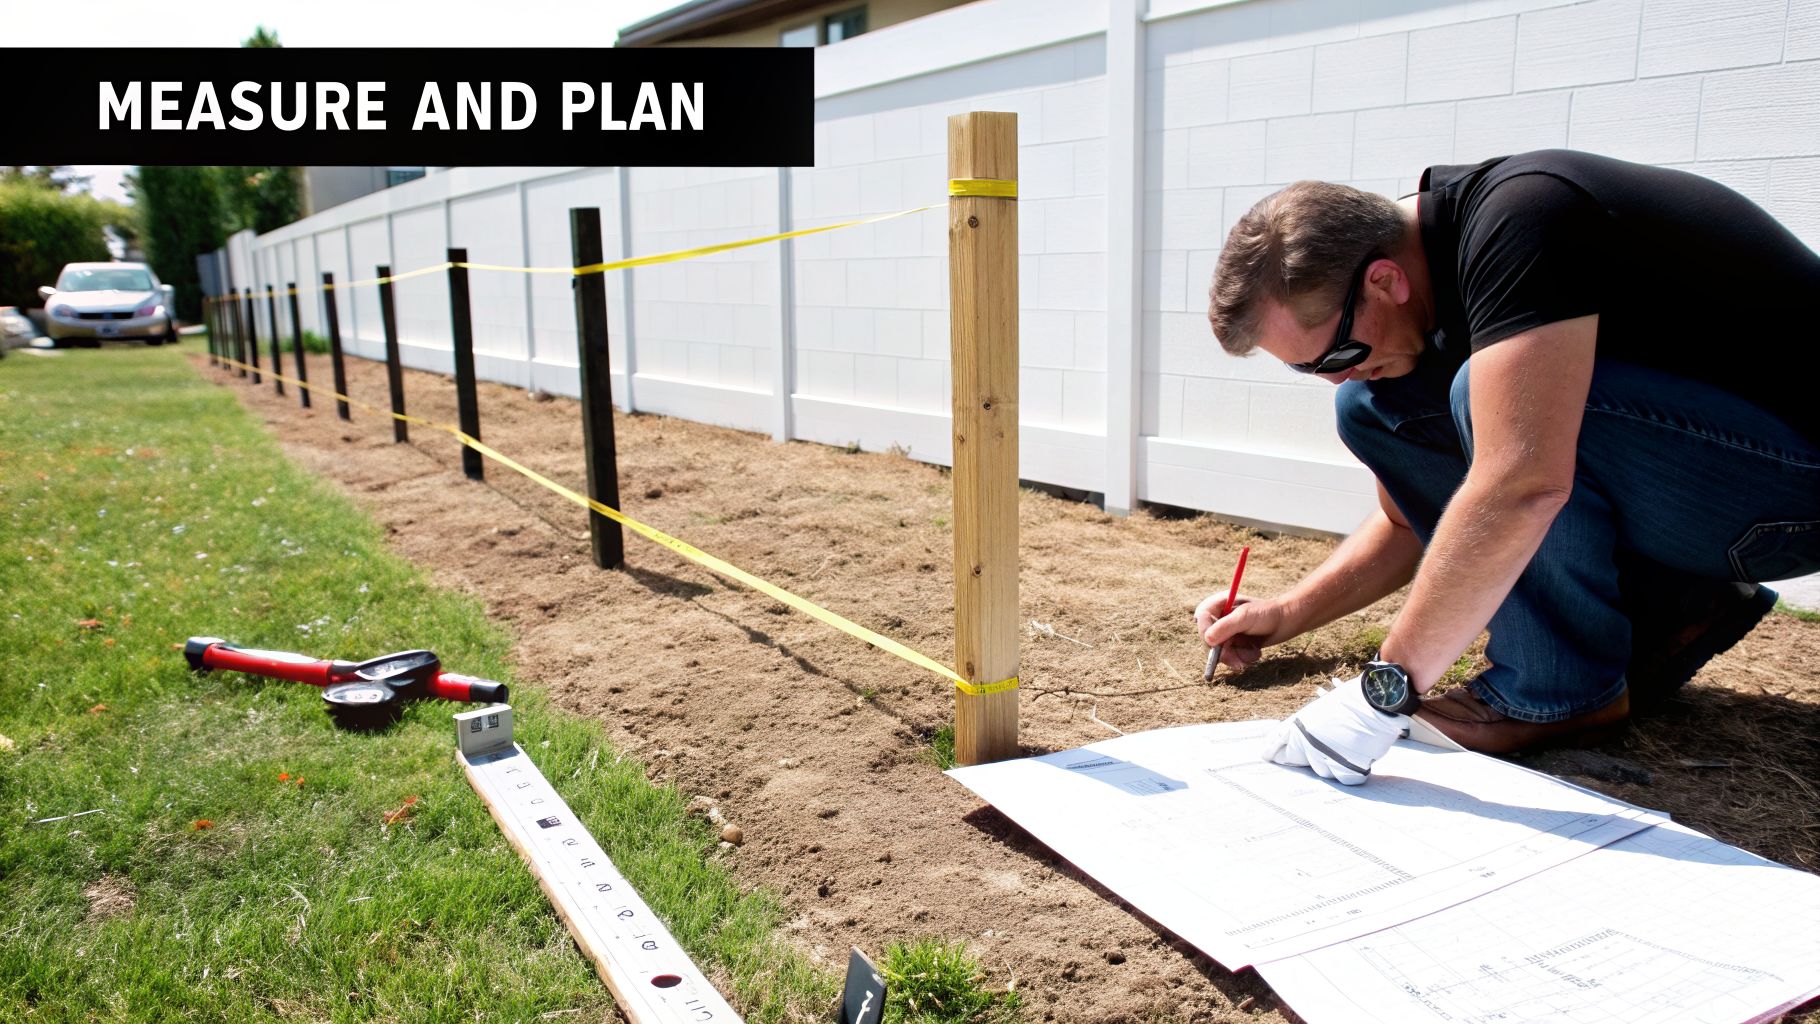
Creating Your Site Plan
Once you've got a handle on the local rules, it's time to map everything out on your own property. Grab a good tape measure, some wooden stakes, and a ball of mason's string. Creating a physical layout helps you spot potential issues—like tricky slopes or surprise utility boxes—that you might miss on paper.
Start by getting an accurate measurement of the entire perimeter where you plan to build. Hammer stakes into the ground to mark the corners, then run a taut string line between them. This simple step is the key to ensuring your fence line is straight and true.
Next, you'll need to decide on your post spacing. For wood fences horizontal in design, you really don't want to space your posts more than 6 to 8 feet apart. Any wider, and you risk those beautiful horizontal boards sagging over time. Mark each post location with another stake or a shot of spray paint. Don't forget to plan for your gates, too—mark their exact width and where they'll swing.
Estimating Materials and Nailing Down Your Budget
With a detailed site plan in hand, you can finally build an accurate materials list. A precise count is what separates a smooth project from one plagued by endless trips to the hardware store. It also lets you build a budget you can actually stick to.
Your shopping list is going to look something like this:
- Posts: Just count the number of stakes you placed for each post location.
- Fence Boards: Calculate the total linear footage of your fence and divide by the width of the boards you've chosen. Always add 10-15% extra to account for cuts and the inevitable mistake.
- Fasteners: This is not the place to cheap out. You need high-quality, exterior-grade screws. Using the wrong ones will leave you with ugly rust streaks and a structurally weak fence.
- Concrete: A good rule of thumb is at least one bag of concrete mix per post hole. This is what gives your fence a rock-solid foundation.
- Hardware: This covers all the critical connection points, like sturdy brackets, gate hinges, and latches. Sourcing reliable hardware from a supplier like XTREME EDEALS ensures your fence operates smoothly and can stand up to whatever the weather throws at it.
Finally, tally up all your costs. Remember to factor in potential tool rentals, like a power auger or a miter saw. A well-prepared budget, with a little extra set aside for surprises, gives you the confidence to see your project through to the finish line.
Alright, you’ve got your plan sketched out. Now for the fun part: gathering the materials that will turn that plan into a solid, beautiful horizontal fence.
This is where your project really starts to feel real. The choices you make now—the wood, the tools, the hardware—will define how your fence looks and, more importantly, how long it lasts. Cutting corners on materials is a classic rookie mistake, and it almost always leads to a fence that sags, warps, or starts showing ugly rust stains within a couple of years.
Let’s get into the three key areas: the lumber for the fence itself, the tools you'll need to build it, and the hardware that holds everything together.
Selecting the Right Wood
Your choice of wood is hands-down the most critical decision you'll make. It affects everything from the final look to how your fence handles moisture, bugs, and our tough Canadian seasons. Before locking in your choice, it’s worth taking a look at the different wood fence options out there just to get a feel for what’s available.
For a horizontal fence, stability is everything. Since the boards run lengthwise, they are much more likely to droop or sag over time compared to a vertical fence. You need a wood species that will stay straight and true.
Here are the best contenders for the job:
- Western Red Cedar: This is the gold standard for a reason. Cedar is naturally resistant to rot and insects, and it doesn't warp or shrink nearly as much as other woods. It has that beautiful, rich colour that you can either let weather to a distinguished silver-grey or keep fresh with a good stain.
- Redwood: Much like cedar, redwood boasts fantastic natural durability and decay resistance. It's known for its gorgeous reddish-brown tones and straight grain, making it an incredible material for wood fences horizontal in design. It does sit at a higher price point, but the finish is undeniably premium.
- Pressure-Treated (PT) Pine: This is your go-to budget-friendly option. The pine is infused with chemical preservatives to fend off rot and insects. While it’s tough, it's also heavy and has a tendency to twist or cup as it dries out. If you go with PT, make sure you buy kiln-dried lumber and give it time to acclimate at your house before you start building.
My personal advice? If the budget has any wiggle room, go with Cedar. Its natural stability makes it so much more forgiving for a DIY project. It’s simply easier to work with and gives you a better shot at achieving those crisp, clean lines that make this fence style so popular.
To help you visualize the trade-offs, here’s a quick comparison of the most common wood types.
Wood Species Comparison for Horizontal Fences
This table breaks down the key differences in cost, durability, and upkeep for popular fencing woods, helping you pick the right one for your climate and budget.
| Wood Type | Typical Cost | Rot/Insect Resistance | Best For |
|---|---|---|---|
| Western Red Cedar | High | Excellent (Natural) | Homeowners wanting a stable, beautiful fence with lower long-term maintenance. |
| Redwood | Very High | Excellent (Natural) | Those seeking a premium, high-end look where budget is less of a concern. |
| Pressure-Treated Pine | Low | Good (Chemical) | Budget-conscious builders who don't mind the extra weight and potential for warping. |
Ultimately, the best wood is the one that fits your wallet while still giving you the durability your local weather demands.
Your Essential Tool Checklist
Having the right tools makes the entire process smoother, safer, and far more accurate. You don’t need a professional workshop, and you can always rent the big-ticket items for a day or a weekend.
Here’s a no-fluff list of what you'll need to get this done:
- Post-Hole Digger or Power Auger: A manual digger will get the job done, but renting a gas-powered auger will save you a ton of time and a seriously sore back.
- Miter Saw (or Chop Saw): This is non-negotiable. You need one to get perfectly clean, square cuts on your fence boards.
- Drill/Driver: A good cordless drill is going to be your best friend. You’ll be driving hundreds, if not thousands, of screws.
- Level (4-foot and 2-foot): A long 4-foot level is essential for setting posts perfectly plumb, and a shorter one is great for checking individual boards.
- Tape Measure and Speed Square: For getting your measurements right and marking straight cut lines. Absolutely essential.
- String Line and Stakes: This is the only way to guarantee your fence line stays perfectly straight from the first post to the last.
- Shovel and Wheelbarrow: Basic but necessary for moving dirt and mixing concrete for the post footings.
The Hardware That Guarantees Longevity
Now, let's talk about the unsung heroes of your fence: the hardware. These are the metal bits—the screws, brackets, and hinges—that provide the real structural integrity. This is where you can separate a decent fence from a great one.
Here’s the golden rule: use only exterior-grade, corrosion-resistant fasteners. If you use standard indoor screws, I guarantee you’ll see ugly black or orange rust streaks running down your beautiful new fence boards after the first big rain. Those streaks aren't just cosmetic; they're a sign that the fastener is failing and your fence is getting weaker.
For a build like this, it pays to get your components from a supplier that knows outdoor projects. Our full catalogue of XTREME EDEALS fasteners and fittings has the professional-grade hardware your fence deserves. This includes:
- Post Base Brackets: If you’re mounting posts directly onto a concrete slab or deck, our Post Base Brackets give you a secure footing that prevents rot. We carry options for various post sizes to fit any project.
- Structural Screws and Joist Hangers: For building out any internal frame or supports, our line of structural connectors and screws ensures your connections are rock-solid and rated for outdoor loads.
- Durable Gate Hardware: Don’t cheap out on your gate. We offer complete gate kits that include heavy-duty hinges and a quality latch, so your gate won’t sag, drag, or fall out of alignment after a year.
By being deliberate with your lumber, gathering the right tools, and using high-quality hardware, you’re setting yourself up for a fence that doesn’t just look amazing on day one, but stays strong for years to come.
Building Your Fence From the Ground Up
Alright, the plans are drawn and the materials are stacked. Now for the fun part: turning that pile of lumber into a stunning wood fences horizontal project. This is where your vision really starts to take shape, piece by piece. We're going to cover setting a rock-solid foundation for your posts and then carefully attaching the boards to get that clean, modern look you're after.
Honestly, everything that follows depends on getting these next steps right. The long-term strength and straightness of your fence come down to perfectly plumb posts set in concrete. There are no shortcuts here.
This flowchart gives you a good overview of the key pieces you'll be working with as you move from planning to building.
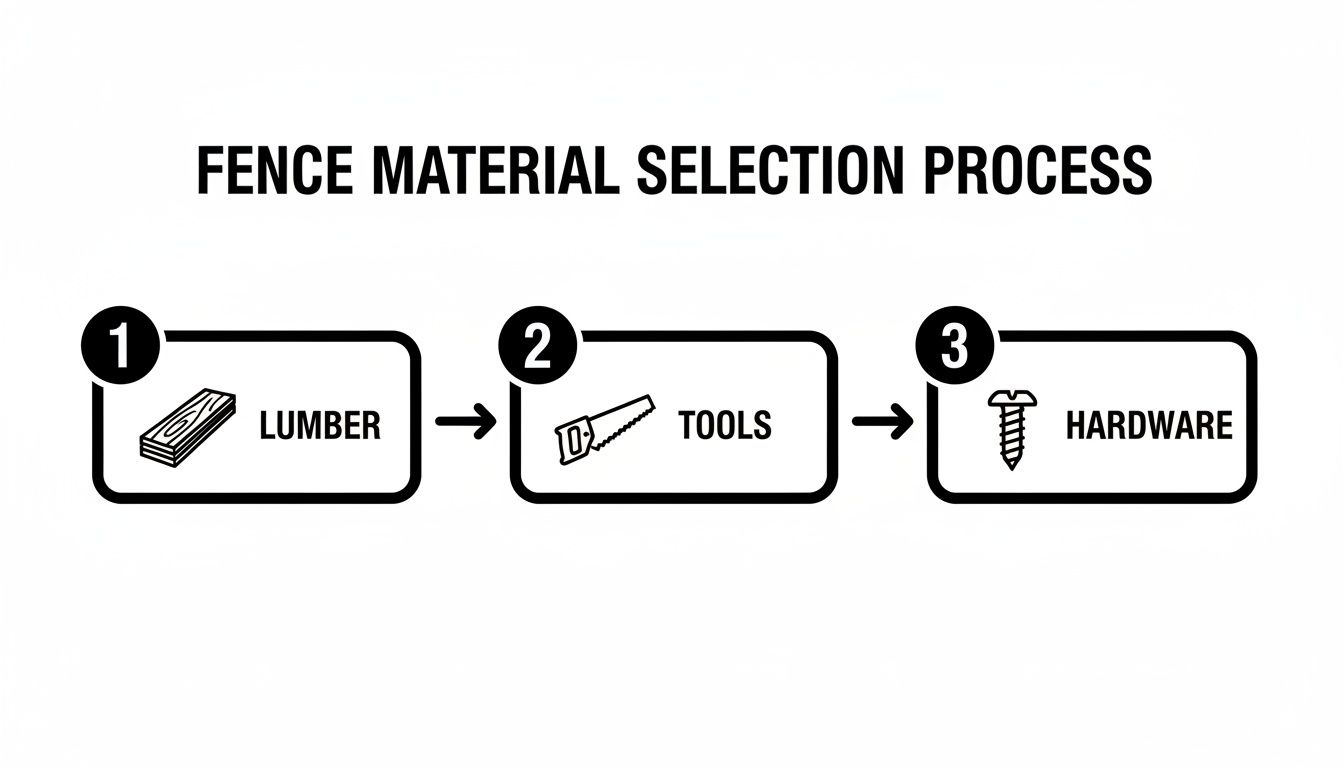
As you can see, a great fence is all about how you bring these different elements—lumber, tools, and hardware—together into one solid system.
Setting Posts With Solid Precision
Think of your fence posts as the skeleton. If they’re weak or crooked, the whole structure is compromised from day one. Our goal is to get every single post perfectly vertical (that’s what “plumb” means) and lock it into the ground so it won't budge for decades.
A huge part of this is understanding the role of concrete footings for supporting your structure. These are what anchor your posts against wind, frost, and time.
For a typical 6-foot-tall fence, you'll want to dig your post holes at least 24 to 30 inches deep. A good rule of thumb I've always used is to bury about one-third of the post's total length. Make the hole's diameter roughly three times the width of the post itself. This leaves you enough room to pack in the concrete.
Before you drop the post in, toss a few inches of gravel into the bottom of the hole. It’s a small step, but it’s critical for letting water drain away from the bottom of the wood, which is your best defence against rot.
Anchoring Posts in Concrete
With the gravel in, it's time to set the post in the centre of the hole. Grab a 4-foot level and check for plumb on two adjacent sides. It’s much easier with a helper, but if you’re working solo, you can use temporary 2×4 braces tacked to the post and staked into the ground to hold it steady.
Now, mix your concrete. Follow the bag's directions until you get a thick, consistent texture, kind of like oatmeal. Shovel the concrete into the hole, using a stick to poke around the post and get rid of any air pockets. Fill it until the concrete is slightly above ground level, and then shape the top so it slopes away from the post. This helps shed rainwater.
You absolutely must let the concrete cure for at least 24 to 48 hours before you attach any rails or boards. I've seen people get impatient, and it never ends well. If you want to dive deeper into getting this right, check out our detailed guide on how to install a fence post.
Attaching Your Horizontal Boards
This is the moment of truth when it all starts to look like a real fence. The secret to a professional-looking job is consistency—every board needs to be perfectly level, and every gap needs to be identical.
Here's a pro tip: make a "spacing jig." It's just a couple of small wood blocks cut to the exact size of your desired gap, maybe 1/4 inch or 1/2 inch. You just rest them on top of the last board you installed to position the next one perfectly. No guesswork, no constant measuring.
Start with the bottom board and make sure it is absolutely level. If your yard has a slope, don't follow it with the boards. Instead, you'll use a "stepped" method, where each panel between the posts is level, creating a clean, stair-step look down the hill.
One of the biggest pitfalls with horizontal fences is board sag. That's why keeping your post spacing to a maximum of 8 feet (and preferably 6 feet) is so important. For longer spans or with heavier woods, I always add a vertical "backer board" in the middle of each section for extra mid-span support.
Use two high-quality exterior-grade screws to attach each board at every post. Take a moment to pre-drill pilot holes, especially near the board ends. It's the best way to keep the wood from splitting.
Troubleshooting Common Installation Issues
Even with the best plans, things can go sideways. Knowing how to fix common problems on the fly will save you a ton of frustration.
- A Board Goes on Crooked: Don't ignore it. It will be painfully obvious and will throw off every board above it. Just back the screws out, use your level to get it right, and fasten it again. A few minutes now saves a major headache later.
- Building on a Slope: As I mentioned, the stepped method is the way to go for wood fences horizontal in style. Each section stays level. This means your downhill posts will stick up higher. Don't worry—you'll trim all the posts to a uniform height after all the fence boards are on.
- Dealing with Warped Boards: You're bound to get a few boards with a slight bow or cup. For minor warping, you can often use a clamp to pull the board flush against the post before screwing it in. If a board is badly warped, just set it aside. You might be able to use it for shorter cuts later, or you might just have to discard it.
By taking your time with the foundation, staying consistent with your spacing, and tackling problems as they come up, you're not just building a barrier. You're crafting a beautiful, durable feature that adds real value to your home. Measure twice, cut once, and trust the process.
Adding Finishing Touches for Lasting Beauty
Alright, you’ve done the hard part. The posts are set, the boards are up, and it’s finally starting to look like a real fence. But the job isn’t quite finished. Now comes the part that separates a good fence from a great one—the finishing touches.
These final details are more than just cosmetic. They're what will protect your hard work from the elements and give it that professional, polished look. Think of it as the last 10% of the effort that makes 90% of the difference in how long your fence lasts and how good it looks.
Protecting Your Wood with Stains and Sealants
Leaving wood raw, even a tough species like cedar, is just asking for trouble from moisture and UV rays. If you want to preserve the beautiful colour and integrity of your wood fences horizontal design, applying a quality finish is a step you can't skip. Your two main choices are stain or sealant.
- Stains: These products soak into the wood, providing both colour and protection from within. Oil-based stains penetrate deeply for rich colour, while water-based options have lower VOCs and make for an easier cleanup. A semi-transparent stain is usually a safe bet, adding a touch of colour while letting the natural wood grain shine through.
- Sealants: Sealants form a clear coat on the wood's surface. They do a fantastic job of repelling water but generally have less UV protection than stains. This means the wood will still naturally grey over time, which some people actually prefer.
For the best application, I've found that a sprayer gives the most even coverage, followed by a quick pass with a brush to really work the product into the grain. Just make sure the wood is bone dry before you start, and hit every single exposed surface—especially the tops and bottoms of boards—to block moisture from getting in.
Add Character and Protection with Post Caps
The tops of your fence posts are their weakest point. The exposed end grain acts like a straw, soaking up rain and snow. Before you know it, you're looking at splitting and rot. Installing post caps is easily the best way to shut that problem down before it starts.
Beyond just protecting the post, caps are a great opportunity to add a custom look to your fence. At XTREME EDEALS, we carry a huge variety of post caps that bring both durability and style to the table, including some fantastic designs from trusted brands like Nuvo Iron.
You can really tailor the look to match your home:
- Pyramid Post Caps: A classic, clean style that's also great for shedding water. Our Black Aluminum Pyramid Post Caps are a popular choice for a sharp, modern finish.
- Solar Post Caps: Add ambient lighting to your yard without any wiring. These caps feature a small solar panel and LED light, adding both beauty and function.
- Decorative Metal Caps: Made from materials like aluminum or galvanized steel, these add a modern, high-end feel and offer unmatched protection. Our Nuvo Iron line includes intricate designs that can become a focal point.
Installation couldn't be simpler. Just run a bead of exterior-grade construction adhesive on the post top and press the cap on firmly. It’s a small detail that pays off big by extending the life of your posts.
This focus on durable, long-lasting hardware isn't just a smart building practice; it's part of a larger trend. For example, there's growing interest in pairing traditional wood with resilient metal components for better longevity. In some regions, like California, there are even green fence incentives encouraging more sustainable materials. It’s a clear signal that the market is shifting towards building things to last. You can read more about these emerging fencing market trends.
Final Gate Installation and Adjustments
Let's be honest, a fence is only as good as its gate. Nothing ruins the look and feel of a great project faster than a gate that sags, drags, or just won't latch properly.
Start by mounting your heavy-duty hinges securely to the gate post. Prop the gate up on some wood blocks to get it to the right height, check that it's level, and then attach the hinges to the gate frame. Next, install your latch and handle, making sure everything lines up perfectly before you kick the blocks out. Our adjustable, self-closing gate hinges are a great option for ensuring a smooth, reliable close every time.
Now, give it a few test swings. If it binds up or doesn't close smoothly, you'll need to make some small adjustments. Many quality hinge sets are designed with built-in adjustability for exactly this reason, letting you fine-tune the alignment for a perfect swing. Spending a few extra minutes here will save you years of frustration.
Clearing Up Your Horizontal Fence Questions
Building a horizontal fence is a bit different from your standard vertical design, and it's natural for a few questions to pop up along the way. These fences have their own unique quirks and challenges. Let's tackle some of the most common things we hear from DIYers to make sure your project ends on a high note.
How Far Apart Should My Posts Be?
For a horizontal fence, you absolutely need to place your posts closer together than you would for a vertical one. I always recommend a maximum spacing of 6 to 8 feet apart.
It really just comes down to gravity. Those long, horizontal boards are fighting a constant battle against sagging. Bringing your posts closer together provides that crucial mid-span support they need to stay straight and true. Skimp on this, and you'll lose those crisp, clean lines that make this style so popular in the first place.
What’s the Best Way to Stop Boards from Warping?
Warping is the number one enemy of a good-looking horizontal fence, but you can win this fight with a bit of prep work. The single most important thing you can do is seal all six sides of every board before you install them.
Taking the time to pre-finish the lumber prevents it from soaking up moisture unevenly, which is what causes wood to twist, cup, and warp. It's also smart to start with high-quality, properly seasoned lumber. When you're fastening the boards, use two good-quality exterior-grade screws at each post—one at the top, middle, and bottom. This really helps lock the board in place.
Look, I get it. Pre-sealing every board and using extra fasteners feels tedious. But trust me on this: prevention is your best strategy. A little extra time now will save you from a wavy, warped fence down the road.
Can I Put a Horizontal Fence on a Slope?
You sure can. The best way to handle a sloped yard is to use the "stepped" method. This is where you build each fence panel between its posts to be perfectly level, and then you "step" the next panel up or down to follow the grade of the hill.
This method keeps the boards parallel to the ground within each section, preserving that clean, modern look. You might see some vertical fences use a "raked" method where the boards follow the slope, but that just doesn't work for a horizontal design—it ends up looking awkward and messy.
Is a Horizontal Fence More Expensive?
In many cases, yes, it can be. The material cost for the wood itself might be similar, but wood fences horizontal in style demand more labour and precision to get the alignment just right. That extra time and focus can drive up the cost if you're hiring it out.
On top of that, because of the risk of sagging, many builders—myself included—will steer you towards premium, more stable lumber like Cedar or Redwood, which are pricier. Some designs also need vertical "backer boards" between the posts for added support, which adds another line item to your materials budget.
Now that we've cleared up those common hurdles, you should be ready to build a fence that's not only stunning but built to last. For all the hardware that holds it all together—from decorative post caps that add a finishing touch to heavy-duty fasteners that provide real strength—check out the professional-grade catalog at XTREME EDEALS INC.
You can shop our complete collection at https://www.xtremeedeals.ca to find everything your project deserves.