
You’re usually in one of two situations when you start looking at rod iron gates. The old gate has sagged, rusted, or never really latched properly. Or the front of the property feels unfinished, and you want something that adds security without making the place look boxed in.
That’s a frequent misstep. Shoppers often prioritize appearance, then discover the gate is too light for the opening, too heavy for the posts, wrong for the slope, or built with hardware that won’t last through a few hard seasons. A good gate project works the other way around. Start with the material, match the style to the property, measure carefully, choose hardware that suits the load, and only then install it.
Rod iron gates can look simple from the street. In practice, they’re a system. The frame, pickets, welds, coating, hinges, latch, posts, anchors, and finish all have to work together. When they do, the gate swings cleanly, stays square, and keeps its finish far longer. When they don’t, you end up chasing sag, rust, and alignment problems.
Decoding Materials What Rod Iron Gates Are Really Made Of
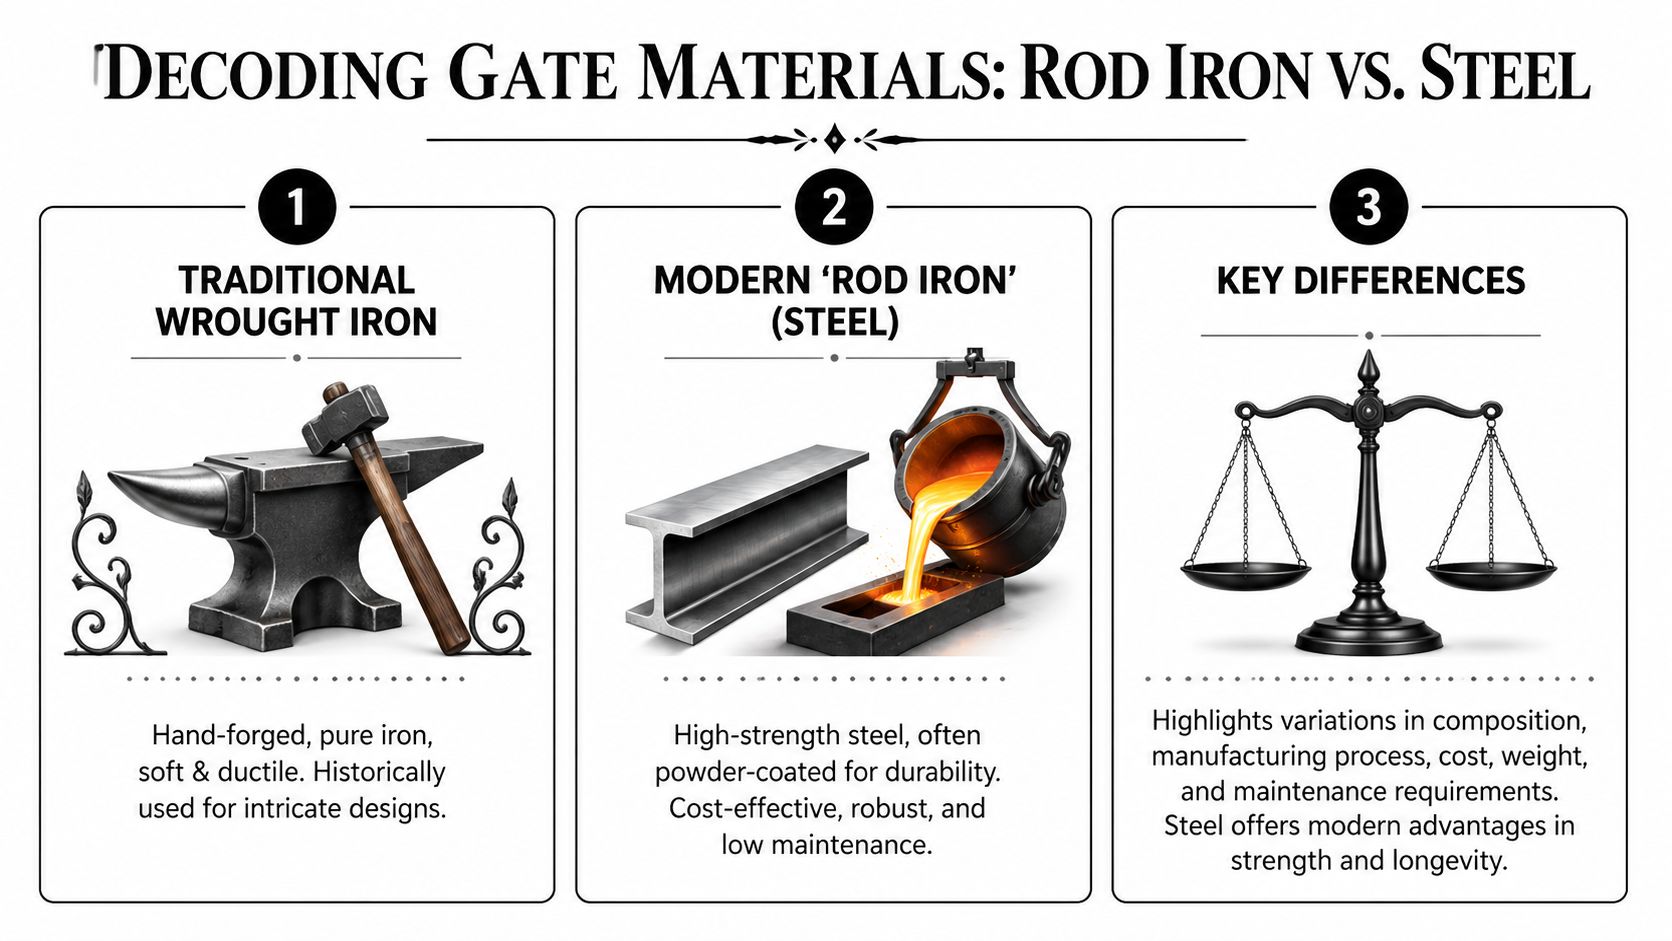
The first thing to clear up is the name. Most modern rod iron gates sold today aren’t true wrought iron. They’re fabricated from steel rod, tube, or bar stock and shaped to resemble the traditional look people associate with wrought iron.
That isn’t a downgrade. In most residential and light commercial work, it’s the practical choice.
Historically, real wrought iron mattered because it could be worked by hand into decorative forms. The development of blast furnaces in the 15th century and the puddling furnace in 1784 made larger-scale wrought iron production possible, with demand peaking in the 1860s. The Victorian era from 1837 to 1901 pushed decorative, scroll-heavy ironwork into mainstream architectural taste, and that’s still the look many buyers want today, as noted in this history of wrought iron gates and fences.
What most buyers are actually choosing
Think of gate materials the same way you’d think about vehicle frames. Steel is the strong workhorse. Aluminum is the lighter option with less corrosion worry. True wrought iron is the specialist product with artisan appeal and a much narrower use case.
For most projects, the pertinent comparison is steel versus aluminum.
| Material | Strength | Rust Resistance | Weight | Cost | Best For |
|---|---|---|---|---|---|
| Traditional wrought iron | Strong but softer and more artisan-driven in use | Needs consistent protection | Heavy | High | Historic restorations and bespoke decorative work |
| Mild steel | Strong and widely used for fabricated gates | Depends heavily on coating and upkeep | Heavy | Moderate | Security-focused and decorative residential gates |
| Galvanized steel | Strong with better corrosion protection than bare steel | Better suited to wet or coastal exposure | Heavy | Moderate to higher than bare steel | Long-term exterior installations |
| Aluminum | Lighter and easier to handle | Naturally better at resisting rust | Light | Varies by design | Low-maintenance residential openings |
The trade-offs that matter on site
Steel gives you stiffness and mass. That matters on active gates, especially wider pedestrian entries or driveway leaves that see frequent use. A steel gate feels planted when it closes. It also pairs well with stronger hinge sets and security latches.
Aluminum is easier to move and easier on posts. If the opening is awkward, the site is hard to access, or the owner wants lower maintenance above all else, aluminum can make sense. But a light gate doesn’t feel the same, and in exposed locations it may not be the best answer.
Practical rule: Buy a gate for the site conditions first, then for the catalogue photo.
Galvanized steel is often the sweet spot. If you want the visual presence of a rod iron gate but don’t want to fight corrosion sooner than necessary, start with steel that already has a better defensive layer before the finish goes on.
Where decorative choices fit in
A lot of homeowners want the classic ironwork look without commissioning custom forging. That’s realistic. You can build up a standard gate with scrolls, post caps, rings, collars, and finials and get a far more finished result. If you’re looking at how decorative metal accents work in outdoor spaces generally, this guide to best metal lawn decorations is useful for seeing how metal details affect the overall look of a yard, not just the fence line.
For buyers comparing ready-made gate and fence options, browsing a broad range of metal fence and gate styles helps clarify what’s mass-produced, what’s modular, and what still needs fabrication work.
What works and what doesn’t
What works is matching the material to the climate, opening size, and expected use. What doesn’t work is buying by label alone. “Wrought iron” in retail language often means ornamental steel. That’s fine if you understand what you’re getting.
If you want a gate that feels substantial, accepts decorative fabrication well, and can be repaired or refinished over time, steel is usually the stronger choice. If you want the least fuss and can accept a lighter feel, aluminum earns its place. True wrought iron is still beautiful, but it’s no longer the default material for a practical modern gate job.
Choosing a Style That Complements Your Property
Style isn’t just curb appeal. On a gate, style changes privacy, climb resistance, sightlines, and even how the entrance feels when it opens.
A simple vertical-picket gate reads clean and disciplined. Add scrollwork and collars, and the same opening feels older, softer, and more architectural. Swap spear tops for flat caps, and you change both the look and how welcoming or defensive the entrance appears.
Traditional, transitional, and modern looks
Traditional rod iron gates usually lean on scrolls, rings, baskets, and finials. They suit brick homes, stone pillars, older neighbourhoods, and properties with established landscaping. The design language has been around so long that it rarely looks out of place.
Modern gates go the other direction. Straight pickets, square frames, geometric inserts, and restrained ornament suit newer homes and cleaner facades. These designs also tend to be easier to keep visually tidy because there are fewer crevices, fewer weld transitions, and less visual clutter.
Transitional gates sit in the middle. A plain frame with a modest arch, a few decorative collars, or a restrained top detail can bridge a traditional house and a more current outdoor design.
Dense ornament can improve visual screening, but too much decorative relief also creates more edges, joints, and corners that need coating and inspection later.
Design details that do more than decorate
Some details are worth adding because they serve more than one purpose.
- Finials and spear tops add a classic profile and can discourage climbing.
- Tighter picket patterns improve visual screening without fully enclosing the gate.
- Arched tops soften a hard entry and often work well between masonry columns.
- Decorative inserts let you personalise a standard gate without paying for a fully custom frame.
- Post caps finish the opening and help tie gate hardware to nearby fence sections.
Modular decorative pieces demonstrate their worth. Decorex Hardware components are useful when a plain fabricated gate needs a more finished look without rebuilding the whole leaf. A few well-placed accents almost always look better than overloading every rail and picket.
Matching the gate to the property, not just the house
A gate has to fit the approach. A narrow urban walkway can carry much more ornament than a wide driveway entrance because the viewer is close to it. On a broad frontage, overly delicate details can disappear. On a compact front garden, bulky details can feel cramped.
Commercial and mixed-use properties often need a plainer expression. Security, traffic flow, and durability usually matter more than flourish. For readers comparing heavier-duty layouts and operational priorities, this overview of Wilcox Door Inc. gate expertise gives a helpful contrast to purely decorative residential thinking.
Privacy and security are design choices too
An open rod iron gate gives visibility. That can be a benefit. You can see who’s approaching, and the entrance feels less closed off. But if the property sits close to the pavement or faces neighbouring windows, a more layered design may make sense.
A useful middle ground is partial screening. Decorative panels, carefully spaced inserts, or climbing support elements can soften visibility without turning the gate into a solid wall. That matters in places where a full enclosure would look heavy or conflict with neighbourhood rules.
The best-looking rod iron gates are usually the ones that stop one step before excess. Enough detail to look deliberate. Enough openness to stay light. Enough height and top detail to signal security without making the entrance feel hostile.
How to Measure for a Perfect Gate Fit
A gate that looks square on paper can still miss the opening on site. I see this on sloped driveways, older masonry columns, and side-yard entries where one post has shifted just enough to throw off the reveal. In coastal and storm-prone areas, wind exposure changes how much clearance and hardware room you should plan for. In seismic regions, small alignment errors matter even more because posts and anchors need a bit of tolerance without letting the gate rack.

Measure the opening like an installer, not a shopper
Take the clear width at the top, middle, and bottom. Use the smallest number unless you are correcting the opening itself. That one habit prevents a lot of bad orders.
Then measure height from finished grade, not rough dirt or temporary gravel. Check both the hinge side and latch side. If the ground rises across the swing path, note where the bottom rail will pass at its tightest point. A gate can clear at 90 degrees and still clip the surface in the first third of its swing.
Posts and columns also need a plumb check. A steel post that leans slightly can often be worked with. A masonry pillar that is out of plumb may force custom hinge spacing or a narrower leaf than expected.
The field checklist that prevents expensive mistakes
Treat the opening like a fit-up job.
- Record width in three places. Top, centre, bottom.
- Check both sides for plumb and parallel. Openings that taper change your usable width.
- Measure from finished grade. Pavers, asphalt lifts, and future concrete overlays all affect bottom clearance.
- Mark the swing direction early. In-swing and out-swing change hinge placement, latch access, and code or HOA compliance in some neighbourhoods.
- Allow for hardware gaps. The gate leaf is not the same as the opening size. Hinges, latch spacing, and reveal all take room.
- Check the full swing arc. Downspouts, retaining walls, parked vehicles, and planters regularly get missed.
- Note site exposure. Windy corners and long open drive approaches often justify tighter planning around stop points and latch engagement.
- Photograph the opening straight on and from each side. A supplier or fabricator can catch site issues from photos that numbers alone do not show.
A gate can be level and still fit badly if the opening is out of square.
Site conditions change the measurement strategy
A light pedestrian gate gives you more forgiveness. A heavier rod iron gate does not. Extra weight improves stability, but it also puts more demand on hinge alignment, post stiffness, and latch-side accuracy. If the opening is wide and exposed to prevailing wind, I leave no guessing around hinge clearance or stop placement.
Regional conditions matter here. In freeze-thaw climates, heaving at one post can change the reveal over a season. In earthquake-prone areas, anchor selection and post attachment details need enough tolerance to avoid binding after minor movement. In HOA-controlled communities, privacy add-ons or screening inserts can change the effective weight and wind catch of the gate, so measure for the final design, not the bare frame.
Where DIY measurements usually fail
The common misses are predictable. Homeowners often measure one width, assume the columns are square, and forget the latch needs its own landing space. Another frequent problem is measuring from soil before final hardscape goes in, then losing the bottom clearance after pavers are installed.
A few checks keep the job honest:
| Measurement point | What to check | Why it matters |
|---|---|---|
| Top width | Pinch points and column taper | Protects upper rail and hinge alignment |
| Middle width | True usable opening | Best baseline for gate sizing |
| Bottom width | Grade spread and threshold changes | Prevents drag and bad bottom gaps |
| Hinge side height | High spots and footing buildup | Maintains swing clearance |
| Latch side height | Slope and landing area | Keeps latch alignment consistent |
For hardware sizing, hinge spacing, and latch clearance, it helps to compare your site notes against actual fence and gate hardware options before you place the order.
A measuring habit that saves service calls
Mark the hinge side first. Stand in the swing path and check the arc from fully closed to fully open. Then verify the bottom gap against the highest point along that path, not just the point directly under the closed gate.
If the opening is irregular, build or order to the actual conditions. Do not count on field fixes to hide bad numbers. A rod iron gate looks right when the reveals are even, the latch meets cleanly, and the bottom clearance looks intentional. That result starts with careful measuring on site.
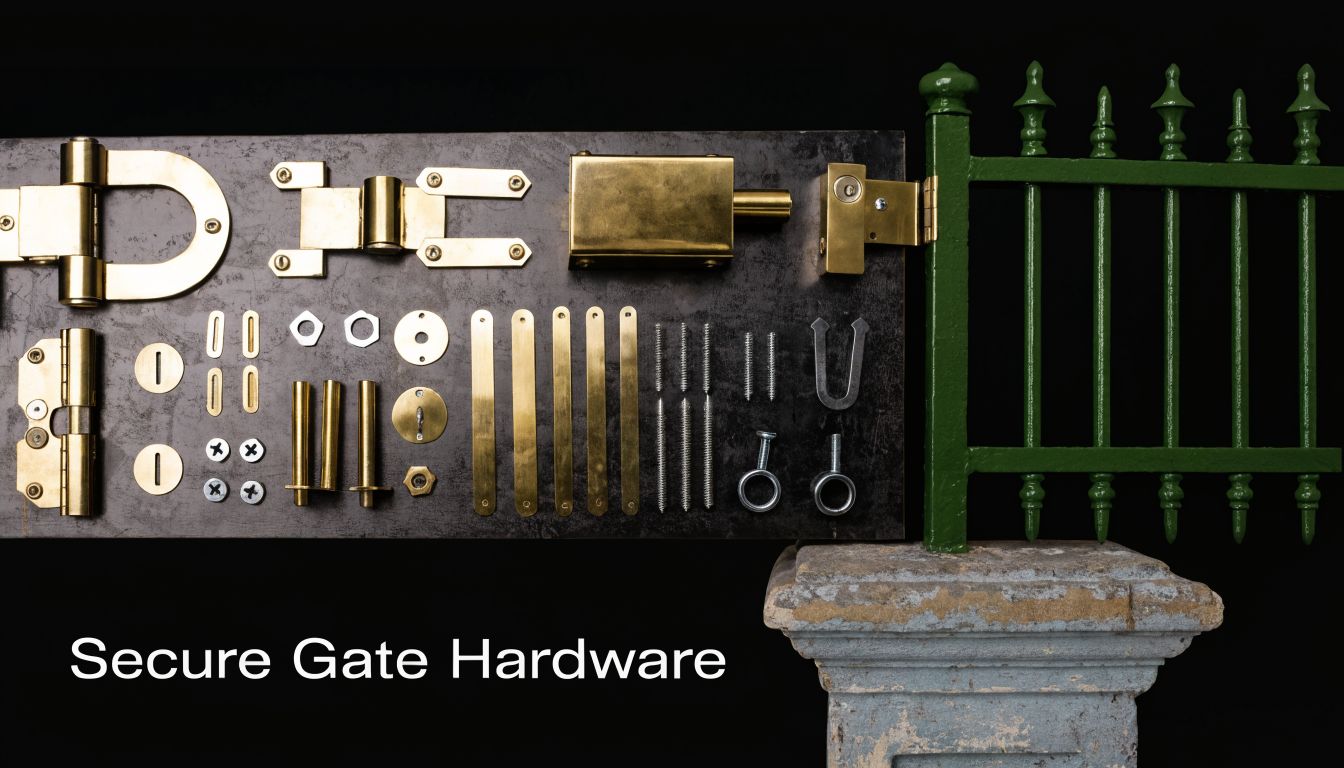
Selecting Compatible Hardware for Security and Function
A strong gate with weak hardware is still a weak gate. Hardware carries the load, controls the movement, and decides whether the gate feels precise or sloppy after a season of use.
Many rod iron gates reveal their quality over time; they either age well or start misbehaving. Sagging hinges, cheap latch bodies, thin fasteners, and decorative pieces that trap water all show up later as service calls.
Start with the hinge, not the latch
The hinge does the hardest job. It supports dead load, handles movement, and absorbs misuse. On steel gates, that usually means choosing hardware that can handle both the weight and the frequency of opening.
For pedestrian rod iron gates, heavy-duty adjustable hinges are often the right starting point. They give you room to fine-tune alignment after hanging, which matters because the gate, the posts, and the site rarely behave exactly as planned. Nuvo Iron hinge and anchor options are especially useful when the install needs stronger support and a cleaner hardware match.
Then choose the latch around actual use. A side-yard gate, a pool approach, and a front pedestrian entry don’t need the same latch behaviour.
Hardware choices that make sense
- Adjustable hinges are the safest default for fabricated steel gates because they allow correction after installation.
- Self-closing hinges suit gates that must return to closed position consistently.
- Gravity latches are simple and durable for many residential openings.
- Key-lockable latches make more sense where access control matters.
- Drop rods and cane bolts belong on paired or active/inactive gate sets, not as a workaround for poor alignment.
- Post caps and finials should finish the look, but they also need to shed water rather than hold it.
A well-stocked source for fence and gate hardware makes it easier to match hinges, anchors, post caps, latches, and bolts without piecing the project together from four suppliers.
Privacy hardware needs more thought than most guides admit
Privacy upgrades on rod iron gates are common, but the hardware has to support the added load and wind exposure. In California, this gets more nuanced because HOA rules often restrict full enclosure, and CAL FIRE requirements in high-risk zones can require specific mesh gaps for ember deflection, as outlined in this privacy guidance for wrought iron gates.
That affects hardware selection directly. Add a privacy insert and you may need better hinge support, a more positive latch, and stronger fasteners through the frame. A decorative insert that looks light on paper can still change how the gate catches wind and how it settles over time.
Hardware should match the gate you’ll have after accessories are added, not the bare frame you started with.
Decorative parts still need jobsite discipline
Decorex Hardware pieces can enhance a plain gate fast. Scrolls, inserts, collars, and post toppers help avoid the flat, stock-panel look. But decorative parts should never interfere with latch throw, hinge travel, or coating coverage.
The right approach is simple. Put load-bearing parts first. Hang and align the gate. Confirm latch engagement. Then add or finalise decorative details once the gate works properly.
That order matters because function is difficult to add later if the visual choices took priority too early. A gate should look finished, but it also needs to close cleanly every day without forcing, scraping, or rebounding.
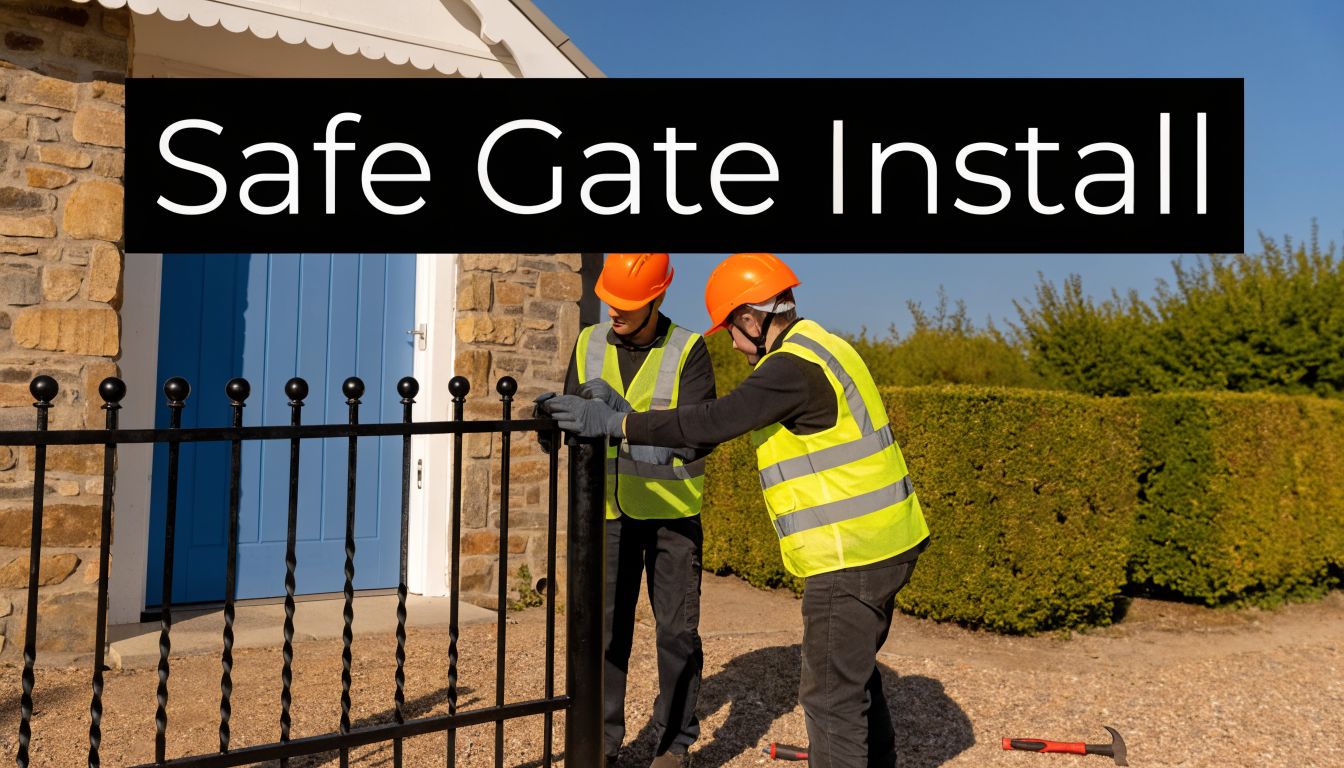
A Guide to Safe and Secure Gate Installation
A gate can look perfectly straight on day one and still fail in the first windy season if the posts, clearances, and anchors were treated as an afterthought. That is the part homeowners usually do not see. The install decides whether the gate will swing cleanly for years or start dragging, latching poorly, and pulling hardware loose.
For rod iron gates, the support system is the job. The leaf is only one part of it. Posts, footings, hinge placement, latch alignment, and corrosion protection all have to work together under daily use, weather, and ground movement.
Start with the posts and the ground
The hinge post carries more than dead weight. It takes twisting force every time the gate opens, closes, catches wind, or gets pushed against the stop. If that post shifts even slightly, the problem shows up fast at the latch.
Good installation starts with layout. Set the opening square to the finished driveway or walkway, confirm grade, and establish the bottom clearance before the gate comes off the truck. On sloped sites, a gate that clears at one point in the swing can still clip concrete or gravel at another, so check the full arc, not just the closed position.
Footings should match site conditions, frost depth, soil quality, and gate size. In expansive soils or fill, I would rather overbuild the footing than return later to reset a leaning post. In seismic regions, the connection between post and concrete matters just as much as footing size because lateral movement can crack rigid installations or throw a gate out of plane.
A sound field sequence looks like this:
- Lay out the opening from finished surface to finished surface.
- Set and brace posts plumb from two directions.
- Let footings cure properly before hanging the gate.
- Dry-fit the leaf with spacers to establish side reveal and bottom clearance.
- Mount hinges loosely so the gate can be tuned.
- Check level, swing, and latch line before final tightening.
- Seal cut, drilled, or abraded steel before the job is closed out.
Common installation errors that shorten gate life
Bad gate jobs usually fail in predictable ways.
- Posts set out of plumb cause drifting, self-swing, and uneven latch contact.
- Insufficient clearance on slope leads to scraping and finish damage at the bottom rail.
- Hardware tightened too early removes needed adjustment during final alignment.
- Mismatched fasteners and frame thickness create movement at the hinge or latch points.
- Bare steel left exposed after drilling or trimming becomes the first rust point.
The cleanest installs are quiet. The gate swings without binding, closes without a shove, and latches without lifting the frame by hand.
Seismic movement, wind load, and HOA rules change the details
California and other seismic areas need more than a generic hinge-and-post layout. A gate installed too rigidly can rack during ground movement, bind at the latch, or transfer stress into adjacent masonry. Hardware with adjustment range helps. So do anchors and post connections chosen for the substrate instead of whatever happened to be on the truck. Nuvo Iron hardware is useful here because adjustable hinges and compatible mounting components make it easier to tune the gate after the posts are set, which matters on sites where small movement is expected.
Wind is another issue that gets underestimated, especially once privacy panels or decorative inserts are added. A rod iron frame that swings well as an open design can behave very differently after infill reduces airflow. In coastal corridors, canyon properties, and exposed corners, that added sail effect should change the hinge choice, latch strength, and stop detail. Decorex components can finish the look cleanly, but the gate still needs enough support to handle the added surface area.
HOA rules add another layer. Many communities want privacy without a heavy, blocked-in appearance. That often means partial screening, narrower inserts, or decorative coverage that leaves some visibility through the gate. Installation has to account for that from the start because privacy additions affect weight, wind load, and latch performance.
If you are comparing components before fabrication or replacement, keeping the posts, hinges, latches, and panels within one line of metal gate and fence products makes compatibility checks much easier.
A quick visual reference helps if you’re comparing basic install flow with hardware placement and alignment checks:
Final tuning is what keeps the gate working
Once the gate is hung, test it like an owner will use it. Open it fully. Let it return to the latch from both directions. Watch the hinge side for twist, and check that the bottom clearance stays consistent through the swing.
Plan ahead if automation, privacy inserts, or extra decorative work will be added later. Leave room for operator brackets, travel stops, and service access now. A gate that is merely acceptable at install day usually gets worse with use. A gate that is aligned, adjusted, and protected at the end of the job stays serviceable much longer.
Long Term Maintenance and Rust Prevention Tips
Most rod iron gates don’t fail because the original build was bad. They fail because small finish issues were ignored until they became metal issues.
That’s why maintenance should be boring and regular. A quick wash, a close look at the welds, and prompt touch-up on damage will save far more effort than waiting until rust is visible from the street.
The finish is your first line of defence
If the gate is going into a coastal or harsh climate, the finish system matters as much as the fabrication. For steel gates, one of the strongest finishing approaches is a two-part epoxy primer under an aliphatic polyurethane topcoat. This system can achieve salt spray resistance of over 1,000 hours, which is a major advantage over untreated steel, according to this gate finish specification reference.
That kind of protection is especially valuable around welds, hardware attachment points, and lower rails where water and debris tend to sit.
A maintenance routine that actually gets done
You don’t need a complicated schedule. You need one you’ll repeat.
- Wash the gate periodically with mild soap and water to remove dirt, road residue, and plant debris.
- Inspect welds and joints because chips often show up there first.
- Check hardware contact points where rubbing can wear through the coating.
- Touch up scratches promptly before moisture gets under the finish.
- Keep the bottom area clear so wet leaves, mulch, and soil don’t stay packed against the lower rail.
Where rust starts first
Rust usually shows up at sharp edges, weld seams, drilled holes, latch strikes, and hinge areas. It also starts where an installer trimmed a piece on site and never properly resealed the exposed steel.
Powder-coated finishes hold up well when intact, but once they’re breached, neglect speeds up the problem. Painted finishes are easier to spot-repair, but they ask for more vigilance. Neither finish can compensate for trapped moisture or ignored damage.
If you can catch a coating failure while it’s still a surface defect, the repair stays simple. Once corrosion gets under the surrounding finish, the work grows quickly.
What not to do
Avoid aggressive wire brushing on sound coating. Don’t wash with harsh chemicals that can dull or soften the finish. Don’t lubricate every moving part with whatever spray is nearby and let it drip over the coating and surrounding masonry.
Use the right touch-up products for the existing finish system. Clean first. Remove only the failing material. Seal the exposed metal properly. Then topcoat to match as closely as practical.
A gate that gets a small amount of routine attention usually stays presentable for a long time. A gate that’s ignored until rust blooms at the lower corners turns into a strip, grind, refinish, and hardware-refresh job much sooner.
Budgeting for Your Gate Project and Sourcing Materials
The total cost of a rod iron gate project isn’t just the gate. It’s the gate, the posts, the hardware, the finish, the fasteners, the anchors, and the labour or time required to get everything aligned correctly.
That’s why the cheapest gate in the search results often becomes the expensive option. A basic leaf with poor coating, light hardware, and no thought for the site can burn up time fast in modifications and callbacks.
Where the money usually goes
The budget tends to break into a few predictable buckets:
| Cost area | What affects it most | Why it changes the project total |
|---|---|---|
| Gate leaf | Material, ornament, fabrication level | Stock versus custom changes everything |
| Posts and supports | Existing conditions, footing needs, mounting method | Posts often decide long-term performance |
| Hardware | Gate weight, access needs, finish quality | Better hinges and latches usually pay back |
| Installation | DIY skill, site access, slope, masonry work | Difficult sites raise labour quickly |
| Finish and upkeep | Climate and coating system | Better corrosion protection reduces future repair work |
Off-the-shelf versus custom
Off-the-shelf works well when the opening is standard, the style is straightforward, and you’re willing to design around available sizes. This route is often best for side entries, garden gates, and simple pedestrian access points.
Semi-custom makes sense when you need a different width, a small style adjustment, or compatibility with existing fence lines. It gives better fit without moving into full fabrication territory.
Fully custom earns its place when the opening is irregular, the property architecture is specific, or the gate has to integrate with masonry, automation, or a distinctive design language. It’s also the right move when a poor fit will be visible every day.
DIY versus hiring it out
DIY can make sense if you’re comfortable laying out posts, drilling anchors, hanging a heavy leaf, and tuning hardware. It’s also more realistic when the site is flat and the opening is simple.
Professional installation tends to be the better value when the gate is heavy, the posts are structural, the site slopes, or there’s masonry and code sensitivity in play. An experienced installer doesn’t just save time. They reduce the risk of ending up with a gate that looks good on day one and drifts out of line later.
Sourcing parts without creating compatibility headaches
The easiest way to lose time is buying the gate from one place, the hinges from another, decorative pieces from a third, and anchors from a fourth, only to discover the finishes don’t match and the mounting dimensions fight each other.
A cleaner approach is to source around the gate system:
- Start with the gate type and opening condition
- Choose hinges based on actual load
- Match latch style to access needs
- Select anchors and post hardware for the mounting surface
- Add decorative components only after core fit is sorted
That’s where a supplier with a deep hardware catalogue is useful. You want access to wedge anchors, lag bolts, carriage bolts, washers, post caps, hinges, finials, and decorative inserts without having to chase each part separately or guess at compatibility.
A well-budgeted project doesn’t always mean buying the most expensive components. It means spending on the parts that are hard to replace later. Posts, anchors, hinges, and finish quality belong in that category. Decorative upgrades can be phased. Structural regrets are harder to undo.
If you’re piecing together a rod iron gate project and want one place to source the practical parts that make the job hold up, XTREME EDEALS INC. is worth a look. Their catalogue covers the hardware that usually decides whether a gate performs well over time, including Nuvo Iron anchors and hinges, Decorex decorative components, post caps, brackets, fasteners, and other fence and gate essentials that help DIYers and contractors finish the job properly.