
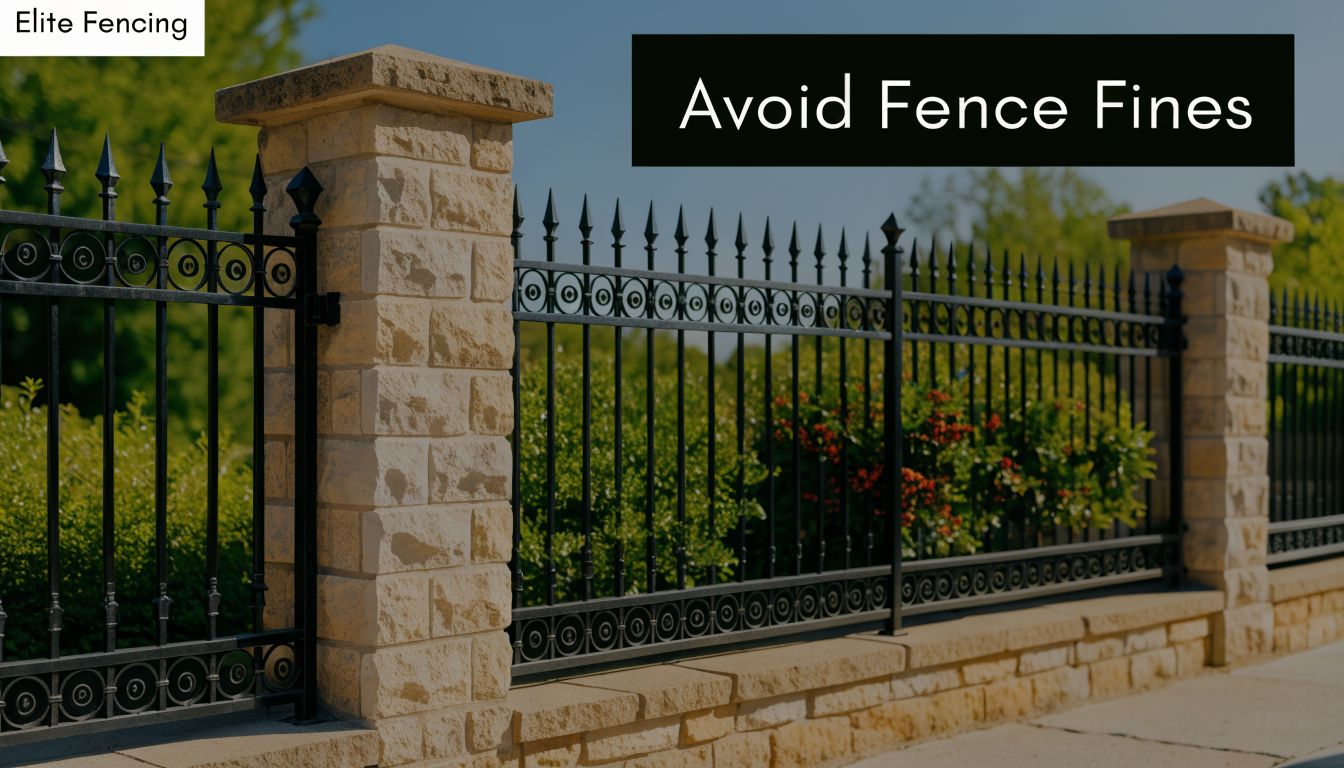
You’ve got the house keys, the yard finally feels like yours, and the fence ideas start immediately. More privacy. A safer space for the dog. A clean line around the property. Maybe a modern horizontal wood fence, maybe black metal, maybe a chain-link fence with privacy slats so you don’t close the yard in too heavily.
Then Toronto reality shows up.
A lot of homeowners assume a fence is a simple weekend project. In practice, the toronto fence bylaw catches people on height, location, driveway sightlines, pool safety, and materials. The expensive mistake isn’t usually buying the wrong boards. It’s building the wrong fence in the wrong spot, then getting told to cut it down, open it up, or rebuild it.
I’ve seen the same pattern over and over. Someone starts with design inspiration, not measurements. They choose a fence style they like, mark out a line loosely, and only later realise the front yard limit is lower than expected, or that the fence near the driveway can’t be a solid wall. At that point, every hinge, bracket, post, and panel decision gets harder.
If you’re still deciding on style, it helps to start with visuals that match real residential projects before you commit to a layout. A gallery like creative fence design ideas and photos is useful, but in Toronto the design has to follow the bylaw, not the other way around.
Your Dream Fence Meets Toronto Reality
A new homeowner in Toronto usually starts with a simple goal. “I want more privacy.” “I need a gate that locks properly.” “I want the backyard to feel finished.” Those are reasonable goals, but the city’s fence rules don’t care what the Pinterest board looks like. They care where the fence sits, how tall it is, what it’s made of, and whether it affects safety.
That’s where people get tripped up.
The legal wording in Chapter 447 can feel dry and fragmented when you read it on its own. It’s written like a bylaw, not like site advice. Homeowners need the translation that happens on the ground. What counts as the front yard in a corner condition? Where do you measure the height from on a sloped lot? Why does one side of the yard allow more height than another?
A good fence plan starts with three things in this order: property line, bylaw height, then materials.
When those three are set early, the build gets easier. Posts go in where they should. Gates swing where they should. You don’t waste time pricing a fence configuration that won’t pass basic compliance.
The practical way to approach the toronto fence bylaw is to treat it as a construction checklist, not a legal puzzle. Once you know the height bands, the visibility rules near driveways, and the pool enclosure requirements, most design choices fall into place fast. The rest of this guide stays focused on that real-world side of the job. What works, what doesn’t, and what usually causes trouble.
The Core Rules of Toronto Fences
Toronto fence rules are straightforward once you sort them by location on the lot. The city does not treat every property line the same, and that is the point many homeowners miss during planning. Height, openness, and even the way the fence is measured can change between the front yard, side yard, rear yard, deck edge, and any area near a driveway or street.
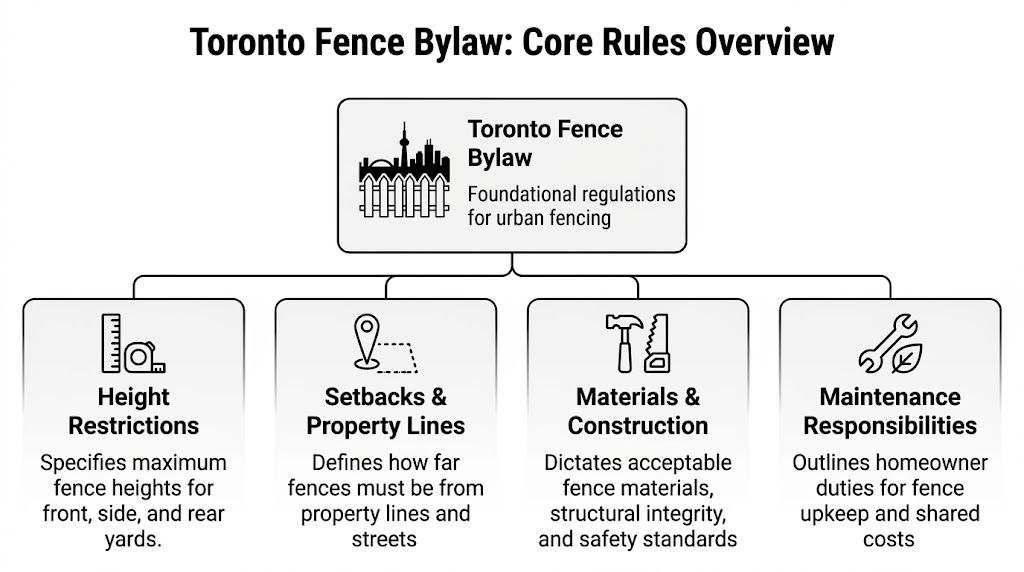
Height limits that matter on real jobs
These are the limits that should guide your layout before you order posts, panels, or gate hardware.
| Fence Location | Maximum Height |
|---|---|
| Front yard within 2.4 metres of a street lot line | 1.2 metres |
| Front yard set back more than 2.4 metres and not facing a public street | 2.0 metres |
| Side yard and rear yard | 2.0 metres |
| Side or rear yard adjacent to a lane, walkway, or non-residential lot | 2.5 metres |
| Unroofed deck or patio | 2.0 metres above the surface |
| Recreational area such as a tennis court | 3.0 metres |
| Pool enclosure on single-residential property | 1.2 metres |
| Pool enclosure on multi-residential or non-residential property | 1.8 metres |
The practical problem is that homeowners often price the whole job as if every run can be built to one height. That works on a simple rear lot line between two houses. It breaks down fast on a lot with flankage, a lane at the back, or a fence segment that turns toward the street. A clean estimate starts by marking each fence run separately, then assigning the allowed height to each run before materials are chosen.
That saves rework.
Visibility rules change the design, not just the paperwork
Any fence close to vehicle movement needs more than a height check. Near driveways, the city expects visibility, which usually means open construction instead of a solid privacy wall. In field terms, that pushes many homeowners toward chain-link, ornamental metal, or another style with clear sightlines where cars and pedestrians cross paths.
A lot of disputes start when someone wants full privacy right up to the driveway. The better approach is to keep the visibility zone open, then add privacy where the lot allows it farther back. If you like the durability and code-friendly openness of chain-link but want a better finish in permitted areas, privacy slats for chain-link fence systems can make sense on the right sections of the property.
The trade-off is simple. Solid panels give privacy. Open styles give sightlines. The bylaw will favour sightlines near streets and driveways every time.
Grade and measurement catch people off guard
Fence height is measured from the lowest adjacent grade along that section of fence. On a flat lot, no one notices. On a sloped yard, it becomes one of the biggest compliance traps in the job.
I usually tell homeowners to stop judging fence height from the top rail alone. A fence that looks level from the patio can still be too tall when measured from the low side. That is why stepped panels, rackable systems, or carefully planned custom framing often work better than forcing one straight line across a changing grade.
Get the grade wrong, and you can fail compliance without ever meaning to build high.
Boundary lines and lot conditions need a reality check before digging
Bylaw compliance does not fix a bad property line assumption. If the fence is sitting on or near a shared line, confirm the boundary before the auger shows up. A fence that is the right height but in the wrong place still creates a problem, and fixing it after concrete sets is expensive.
For homeowners sorting out whether they are dealing with a shared boundary structure or a fence entirely on their own land, Understanding Boundary Wall Rules gives a useful explanation of the difference.
Material choices should match the bylaw from the start
Good fence planning is not only about panel style. It is also about building a gate and post package that will keep the fence compliant after a Toronto winter. Heavy solid panels need stronger posts and better hinges. Open metal or chain-link sections often perform better in visibility zones and put less stress on hardware over time. That matters because sagging gates and leaning posts can turn a legal fence into a maintenance problem within a season or two.
The smart way to read the bylaw is as a build specification. Set the location first. Match the allowed height to each run. Choose materials and hardware that suit that part of the lot. That is the gap most articles miss, and it is where practical product choices make compliance much easier.
Navigating Special Cases Pool Fences and Corner Lots
The ordinary backyard fence rules are only half the story. Toronto gets stricter where a fence affects child safety or traffic sightlines. That’s why pool enclosures and corner or driveway conditions deserve separate attention.
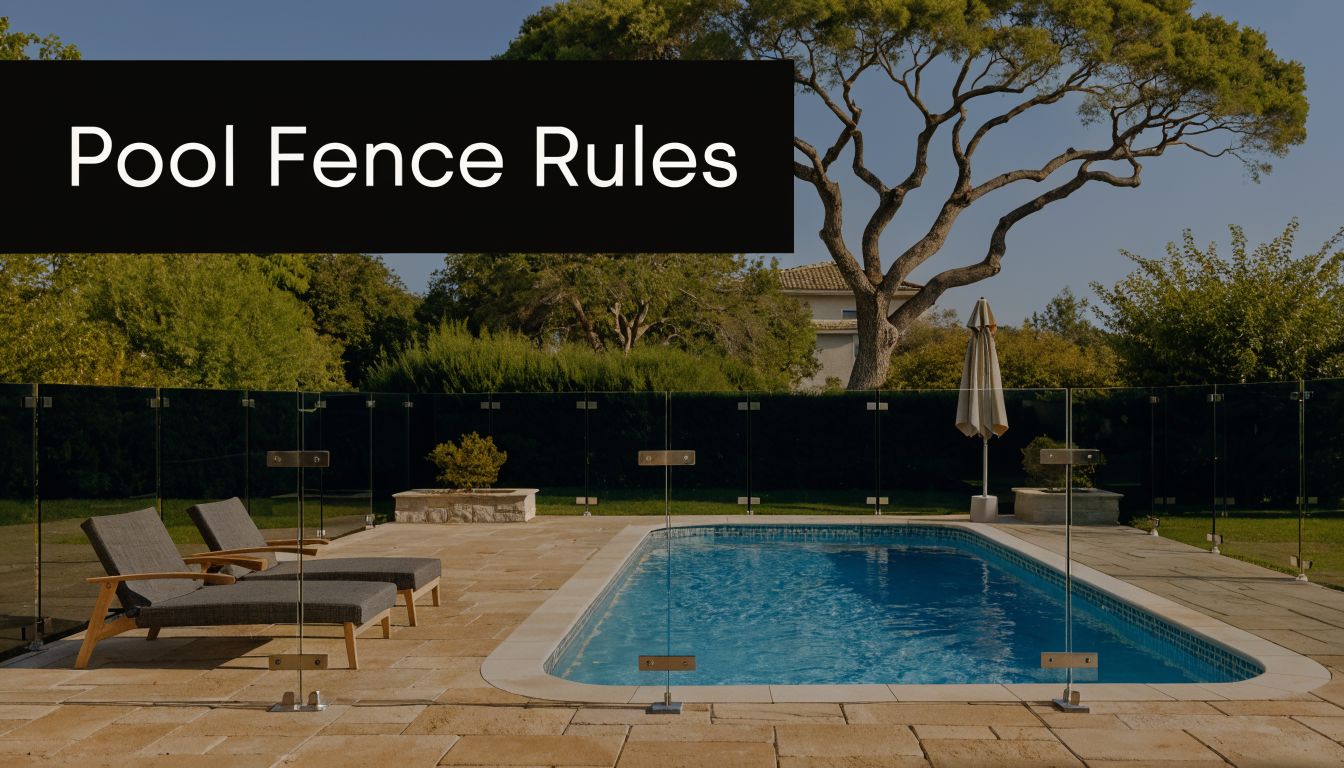
Pool enclosures are safety systems first
A pool fence isn’t just another perimeter fence with a nicer latch. In Toronto, it’s a safety enclosure, and the details matter. The City states that barbed wire, chicken wire, and sheet metal are prohibited materials, and pool enclosure gates must be self-closing and self-latching, with latches at least 1.5 metres high, according to Toronto’s fence enforcement page.
That changes how you build the gate package.
A compliant pool gate needs hardware that closes reliably every time, not just when someone remembers to pull it shut. Hinges need to return the gate cleanly. The latch has to sit high enough and work consistently without sagging. Posts need to stay rigid so the gate alignment doesn’t drift after one freeze-thaw season.
For homeowners considering chain-link around a pool or side yard, privacy can still be added selectively with chain-link fence slats, but the enclosure still has to satisfy the city’s safety requirements. Privacy add-ons don’t replace gate and access rules.
Glass, climbability, and what usually goes wrong
Glass pool fencing can look excellent when it’s done properly, but it’s not just a design choice. It has to function as a barrier. The biggest mistakes are hardware mismatch, loose gate planning, and overlooking climb points created by nearby furniture, planters, or grade changes.
A fence that technically surrounds the pool but creates an easy climb route won’t feel defensible if there’s ever a complaint or inspection.
Around pools, don’t shop by appearance first. Shop by gate performance, panel safety, and whether a child can treat nearby elements as a ladder.
Corner lots and driveway zones need open sightlines
Corner lots catch people because they often feel like side yards, but the city may treat part of that area more like a front or flankage condition. The practical issue is visibility. Drivers exiting a driveway and pedestrians using the sidewalk need clear lines of sight.
That’s why solid privacy panels can become a problem near the approach to the street. Even if the rest of the fence is compliant, the section closest to the driveway may need open construction.
A few material choices commonly create problems fast:
- Solid boards near a driveway: They block visibility and attract complaints.
- Corrugated or sheet-style panels: They run into prohibited material issues.
- Improvised gate add-ons: They often interfere with self-closing action or latch placement.
Retaining walls and mixed structures
Some properties combine a fence with grade retention, masonry piers, or raised landscaping. That can create a structure that looks like one fence but behaves like multiple elements from a compliance standpoint. The safest approach is to evaluate the visible barrier height where the bylaw measures it, not where the owner mentally separates wall from fence.
If the lot has a pool, a corner condition, a steep slope, or all three, don’t treat it like a standard fence quote. These are the jobs where accurate measuring and careful hardware selection save the most grief.
Permits and The Fence Exemption Process
A lot of Toronto fence problems start before the first post hole. A homeowner picks a design, gets pricing, orders materials, then learns the plan needs extra approval or a redesign. The right order is simpler. First confirm whether you are building a standard bylaw-compliant fence, a pool enclosure, or a fence that needs an exemption.
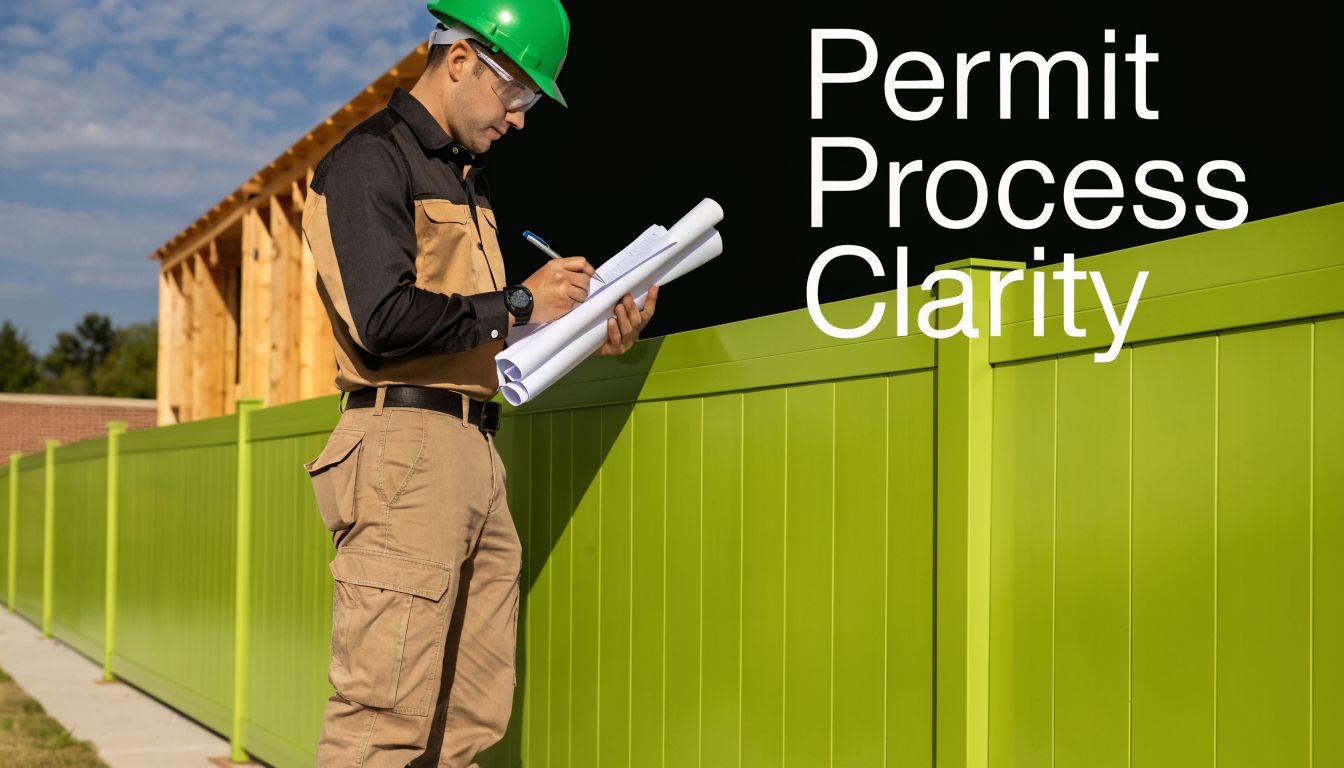
When you can build without extra approval
If the fence stays within the city’s normal limits for height, location, visibility, and materials, the job is usually straightforward. The two cases that regularly trigger a formal process are pool enclosures and fences that do not meet the standard rules.
Homeowners often assume “non-compliant” means something extreme. In practice, it can be a fairly small height increase, a fence section placed in the wrong visibility area, or a design detail that conflicts with the bylaw. On site, those small differences matter just as much as a major overbuild.
There’s a useful general primer on obtaining a permit for fence installation if you want a broader overview before dealing with Toronto’s local process.
What the exemption process actually involves
Toronto handles fence exemption requests through Community Council, and nearby owners are notified as part of the process. The City’s fence exemption information explains the application route, but it does not give much practical direction on what makes one request stronger than another.
That gap matters on real jobs. Owners want certainty before they pay for drawings, hardware, and labour. The city process rarely gives a clean answer at the beginning, so the safest approach is to prepare the application the same way you would prepare for a difficult inspection. Clear measurements, clear reasons, and no guesswork.
What makes an application easier to defend
The strongest exemption requests are tied to the property, not personal preference. Council is far more likely to consider site constraints than arguments about style or privacy alone.
A workable application usually includes:
- An accurate site sketch or plan. Show property lines, the house, driveway, lane, and the exact fence location.
- Real measurements. Use actual proposed heights and lengths, not rough estimates.
- A site-specific reason. Grade change, lot configuration, security exposure, or another physical condition carries more weight than “I want more privacy.”
- A neighbour-impact explanation. If visibility, access, or appearance could become an issue, address it directly instead of waiting for an objection.
- A restrained request. Asking for the minimum deviation needed gives you a better chance than asking for more fence than the site can justify.
From a contractor’s standpoint, this is also where product selection matters. If the application is for a modest increase or a special layout, use hardware and gate components that look intentional and code-conscious, not improvised. Good hinges, reliable self-closing hardware where required, and durable latch sets from XTREME EDEALS help the finished job read as a controlled build rather than a patchwork exception.
Here’s a short municipal explainer worth watching before you start an application:
The real cost of asking for more than the standard allows
If your fence needs an exemption, expect more than a filing fee. The bigger costs are time, revised drawings, hearing preparation, and the chance that the city approves less than you asked for. That is why I tell homeowners to decide early whether they want a fence built comfortably inside the rules or whether they are prepared to spend time and money defending an exception.
That choice affects material buying too. It rarely makes sense to pre-purchase custom panels, oversized posts, or specialty gates before the exemption is decided. On Toronto jobs, the smart move is to lock in the layout first, then order the final hardware package once the city path is clear.
Bylaw Enforcement and How to Avoid Fines
Toronto does enforce fence rules, and the data shows where homeowners most often get into trouble. The City issues 260 to 320 notices of violation annually, 63% relate to height issues, and fines range from $100 to $5,000, with 73% of fines at $500 or less, according to the City’s 2018 Chapter 447 review.
Height is the repeat offender
That shouldn’t surprise anyone who builds fences in the city. Height mistakes are easy to make and easy for neighbours to notice. A fence can look normal to the owner and still be over the limit because of grade, location, or a misread of where the front yard rule starts.
The City’s review also found that, among 200 exemption requests, 62% were fully granted. That doesn’t mean it’s safe to build first and ask later. It means many owners still have to go through a process that could have been avoided with better planning.
What enforcement usually feels like on the ground
Most fence issues don’t begin dramatically. A neighbour complains. An inspector sees a problem. A notice arrives. Then the owner has to decide whether to comply, apply for relief, or argue a position that should have been checked before construction.
That’s where costs stack up:
- Removal labour: Paid twice if the first build was wrong.
- Replacement materials: Especially painful with custom panels or welded sections.
- Schedule delay: Contractors have to return, remeasure, and rebook.
- Neighbour conflict: Often harder to fix than the fence itself.
The cheapest compliant fence is rarely the one with the lowest material price. It’s the one you only build once.
If you get a notice
Don’t ignore it. Measure the fence again carefully, confirm where the city says the issue sits, and compare the actual built condition to your original plan. If the problem is obvious, redesign quickly. If it’s borderline, get clear on whether an exemption is realistic before spending more money.
The practical takeaway is simple. Compliance upfront is cheaper than enforcement later, even when the fine itself isn’t huge.
Your Compliance Checklist and Hardware Guide
A fence can be legal on paper and still be built badly. I see that all the time in Toronto. Posts move after freeze-thaw, gates sag by the second spring, and decorative parts get added before anyone checks whether the finished height still fits the bylaw.
The safer order is simple. Confirm the legal limits first. Then choose the fence style, framing method, and hardware to suit that exact layout. That is the gap most homeowners miss, and it is where this guide becomes more useful than bylaw text alone.
Start with the layout, not the shopping cart
Before you price boards or pick a latch, pin down the fence line and the conditions around it. A few inches in the wrong place can turn a clean install into a rebuild.
Check these items first:
- Property line: Do not assume the old fence was correct.
- Fence location on the lot: Front yard, flankage, rear yard, laneway side, and driveway edge can all change what is allowed.
- Grade: Height is affected by the ground beside the fence, especially on sloped lots.
- Sightline-sensitive areas: Gates and solid panels near a driveway or corner often need more care than the rest of the run.
- Gate swing and clearance: Leave room for snow, settlement, and hardware travel.
That early measuring work decides whether the fence should be stepped, open in sections, shorter near the street, or pushed back slightly. Good hardware cannot rescue a bad layout.
Build the structure for Toronto weather
The visible boards are the easy part. Post work and connections decide whether the fence still operates properly after a few winters.
As noted earlier, Toronto fence permit guidance calls for fence posts to be embedded in concrete at least 90 cm below grade. That matches what performs best in local soil and freeze conditions anyway. Shallow posts save time on install day and cost more later when the gate twists out of square.
Use this hardware framework when you build the structure:
| Build need | Practical hardware choice |
|---|---|
| Post support | Concrete-set posts, or base hardware with the correct wedge or sleeve anchors where that method suits the design |
| Main structural connections | Carriage bolts, lag bolts, washers, and brackets sized for the load, not whatever is left in the garage |
| Board and rail fastening | Exterior-rated screws with corrosion resistance suited to pressure-treated lumber or outdoor exposure |
| Gate support | Hinges rated for the gate weight, plus a latch that stays aligned through seasonal movement |
| Finish hardware | Post caps and decorative fittings added only after final post height is confirmed |
For homeowners trying to match compliance with parts that will last, this selection of fence and gate hardware helps keep the build list practical. You can spec anchors, brackets, bolts, hinges, latches, and finish pieces around the fence you are allowed to build.
Match the hardware to the fence type
Different fence styles fail in different ways.
Wood privacy fence
Wood privacy fences need decent framing and consistent fastening more than fancy trim. Use proper post spacing, straight rails, and exterior fasteners that will not back out or stain the wood early.
The gate is usually the weak point. Homeowners often spend on boards and caps, then undersize the hinges or skip proper bracing. That is why a nice-looking gate starts dragging before the rest of the fence even settles.
Metal or ornamental fence
Metal and ornamental sections put more pressure on anchoring accuracy. If the posts or mounting points are slightly off, the whole run shows it. Use compatible brackets and anchors, especially where steel meets masonry or concrete.
Keep the gate assembly tight. Mixed hardware from different systems often creates play at the hinge side, and that slop gets worse through winter.
Chain-link with privacy add-ons
Chain-link still makes sense in side yards, utility areas, and places where visibility matters. Privacy slats or screening can work, but only if the bylaw allows a more closed design in that location. Choose the fence type to fit the lot condition first, then add privacy treatment if the location allows it.
Pool areas need hardware built for safety
Pool fencing is its own category. Treat it as a safety system, not a standard yard fence with a different latch.
As noted earlier, the same Toronto fence permit guidance says glass pool fence panels must meet CAN/CGSB-12.1-M safety glass standards. The practical point is straightforward. Panel choice, hinge set, latch position, and post rigidity all have to work together. If one part is improvised, the whole gate becomes unreliable.
For pool gates, check these details before installation:
- Self-closing action: The gate should return to the closed position on its own.
- Consistent latch engagement: It has to catch properly after weather changes and minor movement.
- Rigid supports: Even a small amount of post movement can stop the latch from lining up.
- No improvised add-ons: Slide bolts, hooks, or temporary tie-backs are poor substitutes for proper pool gate hardware.
Buy pool gate hardware for function first. Clean looks matter, but they come second to reliable closing and latching.
Decorative details come last
Post caps, finials, and trim can improve the look of a fence. They should never be used to hide weak framing or distract from a poor layout.
This is also where homeowners accidentally create a bylaw problem. A cap or topper may seem minor, but if the finished assembly pushes the fence beyond the permitted profile, you have created extra work for no gain. Confirm height first. Add finish details after.
The field checklist I use before a fence build starts
- Verify the legal fence line.
- Confirm the maximum height at that exact point on the lot.
- Measure grade changes before setting the top line.
- Choose a fence style that suits the location, not just the look you want.
- Keep open construction where visibility rules require it.
- Set posts for long-term stability, not for speed.
- Use anchors, screws, bolts, and brackets that match the load and material.
- Build the gate as a complete operating system with the right hinges and latch.
- Treat pool enclosures as safety hardware first and appearance second.
- Add decorative pieces only after structure, height, and operation are confirmed.
That checklist is what bridges the gap between Toronto bylaw language and a fence that performs. Build it once, build it straight, and use hardware that supports compliance instead of fighting it.
Future-Proofing Your Fence Against Bylaw Changes
A lot of homeowners assume that once a fence is compliant, the issue is finished for good. That’s not always a safe assumption. Toronto’s fence bylaw is under review, with potential changes to fence heights and pool enclosure rules, and there is no public data on implementation timelines or whether existing fences will be grandfathered, according to reporting on the current review.
That uncertainty should change how you build today.
Build for adaptability, not just approval
If you’re right on the edge of what’s currently allowed, avoid construction choices that make future changes expensive. A fence that can be modified panel by panel is easier to deal with than a fully custom welded or integrated system that needs major demolition to adjust.
This matters most in two situations:
- Front-yard and visibility-sensitive areas: These rules are the most likely to affect the look of the street.
- Pool enclosures: Safety standards can tighten, and retrofits are rarely cheap.
Smart long-term decisions
The safest long-view approach is straightforward:
- Keep records: Save drawings, receipts, and product specs.
- Use replaceable components: Hinges, latches, brackets, and panels that can be swapped are easier to adapt.
- Avoid over-customising critical sections: Especially gates and street-facing runs.
- Choose durable hardware now: Retrofitting a weak fence is worse than updating a strong one.
A fence should solve today’s privacy or safety problem without locking you into tomorrow’s rebuild.
Frequently Asked Questions About Toronto Fences
Do I need my neighbour’s permission to build a fence?
If the fence is entirely on your property, the issue is less about permission and more about accuracy. You still need to know where the line is. If the fence sits on or affects a shared boundary, a conversation with the neighbour is the practical move before any work starts. Most disputes come from assumptions about the line, not from the fence style itself.
Who pays for a fence on a shared property line?
That usually becomes a neighbour agreement issue rather than a simple bylaw question. The city’s fence rules control compliance, but they don’t resolve every cost-sharing dispute in a friendly way for you. Get the agreement in writing if both sides are contributing.
Do trees or hedges count as a fence?
Vegetation can function like a screen, but it isn’t always treated the same way in every location. If you’re relying on shrubs or hedging for privacy, check how close they are to the street and whether that placement affects visibility or another bylaw concern. Don’t assume “natural” means unrestricted.
What if I’m repairing an old fence instead of replacing it?
Minor repair and full replacement are not the same thing in practice. If you’re swapping a few boards, resetting a gate, or replacing damaged hardware, that’s one conversation. If you’re rebuilding most of the run, changing the height, changing the material, or moving the line, treat it like a new project and check compliance from scratch.
Can I build a solid privacy fence right up to my driveway?
Not safely as a default assumption. If the fence sits in a visibility-sensitive area, open construction may be required. This is one of the easiest ways to end up with a complaint because the issue affects pedestrians and vehicles, not just aesthetics.
What’s the most common homeowner mistake?
Starting with the desired height instead of the allowed height. The second most common is treating the gate like an accessory instead of part of the system.
What should I buy first?
Not the boards. Buy certainty first. Confirm the property line, the location category, and the required fence type. Then choose posts, anchors, fasteners, hinges, latches, and finish hardware that suit that exact build.
If you’re ready to build or upgrade a fence properly, XTREME EDEALS INC. carries the hardware that makes compliant projects easier to execute, including post caps, hinges, gate hardware, joist hangers, post base brackets, deck screws, carriage and lag bolts, washers, wedge anchors, and more for DIYers, contractors, and property managers who want to get the job done once and get it done right.


Leave a comment
You must be logged in to post a comment.