
You’ve got the fence up, the lines are clean, and the posts are solid. But the tops still look unfinished, like the project stopped one step too soon.
That’s usually the moment people start looking up diy fence post cap ideas. Some want a quick fix. Others want something that looks custom instead of whatever happened to be hanging on a big-box shelf. Both are fair goals. A post cap is a small part of the build, but it changes the whole look of a fence and does real work at the same time.
The practical side matters most. The top of a wood post is vulnerable because the end grain drinks in weather. Sun bakes it, rain sits on it, snow lingers on it, and before long the post starts checking, splitting, and softening where it should stay strong. A good cap helps shed water, protects that end grain, and gives the whole fence a finished look that matches the house instead of fighting it.
Beyond the Basic Fence Post
A lot of fences look incomplete for one simple reason. The posts end bluntly, and your eye goes right to it.
That’s what happens after a fresh install. The rails are level, the boards are straight, and the gate swings properly, but the tops of the posts still look cut off. Add caps, and the fence starts to look intentional. It reads like a finished exterior feature instead of a half-finished chore list.
Why caps matter more than people think
The top of a post takes weather differently than the sides. Water lands there first, sits longer, and works into the end grain faster. Once that starts, even a sturdy fence can age unevenly. The cap isn’t just trim. It’s the small roof over the part of the post that needs protection most.
I’ve seen plenty of homeowners spend good money on panels and hardware, then leave the post tops bare because they plan to “get to it later”. Later often turns into a season or two of exposure, and by then the post tops already show cracks.
Bare post tops age first. If you protect only one part of a wood fence, protect the end grain.
There’s also a design payoff. A flat cap can make a fence feel modern. A pyramid cap suits traditional yards and older homes. A layered cap can tie into Craftsman trim, pergolas, or other woodwork in the yard. If you’re already planning larger backyard projects, design continuity matters. The same thinking that helps when learning how to build a backyard pavilion applies here too. Small rooflines, clean overhangs, and material choice all affect whether the final build looks pieced together or well planned.
Why DIY makes sense
Store-bought caps are convenient, but the selection can be narrow once you need a specific look, a true fit, or something that matches other exterior details. Building your own gives you control over:
- The profile so the cap suits the style of the house
- The overhang so rain drips away from the post face
- The material so you can build for your climate
- The finish so it matches stain, paint, or trim
If you’d rather compare ready-made options before cutting wood, it helps to browse 6×6 post cap options so you can see common shapes and fit styles.
That mix of function and appearance is why I don’t treat caps as an accessory. They’re part of the fence build, not an afterthought.
Essential Tools and Materials for Your DIY Caps
Start with the tools that let you cut accurately and repeat the same piece over and over. Fence caps look simple, but small errors show fast because they sit right at eye level.
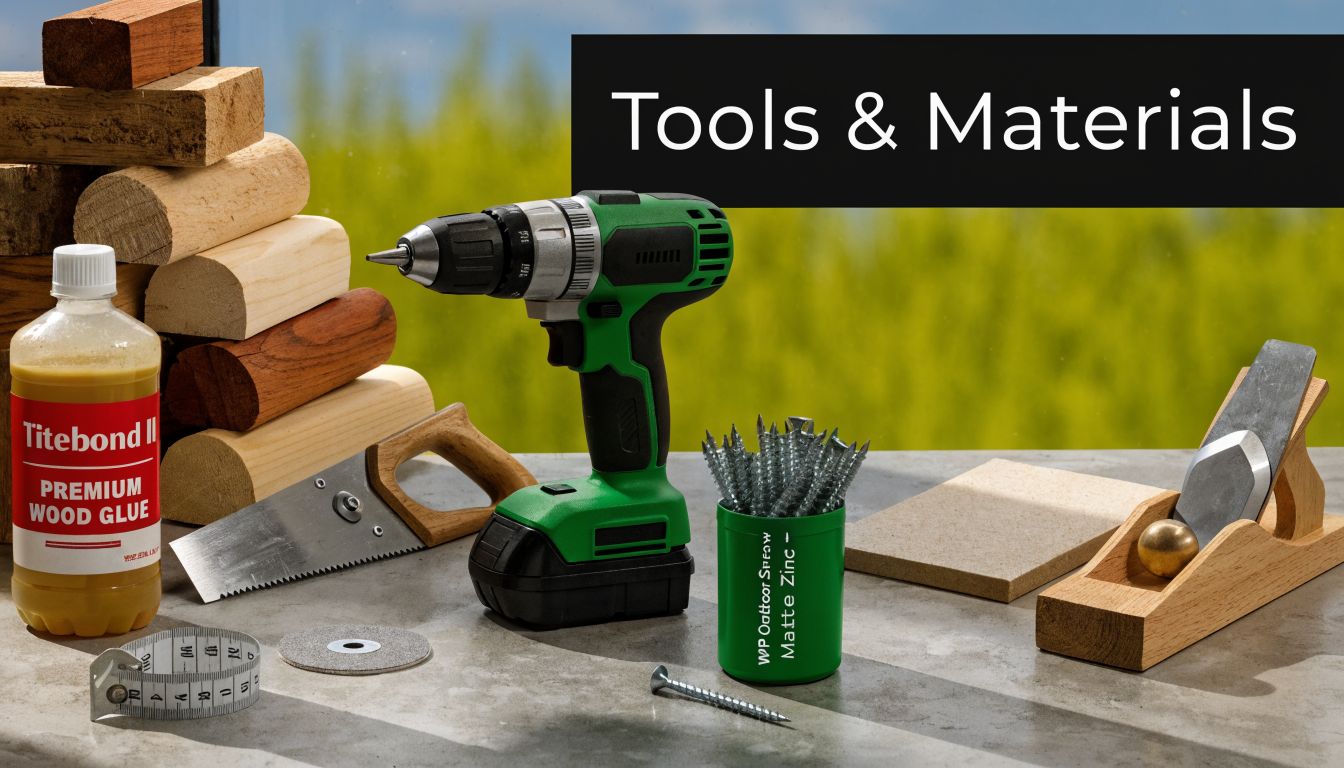
Tools that actually earn their place
You don’t need a cabinet shop, but you do need the right tools for the cap style you choose.
- Miter saw: Best for cutting square blanks to length and keeping repeated pieces consistent. A stop block makes a big difference when you’re making caps for a full fence line.
- Table saw: Necessary for clean bevels on pyramid caps and for ripping stock to exact width.
- Router or trim router: This is what turns a basic flat cap into something that looks finished. Round-over and chamfer bits clean up the top edge, and a straight bit can cut a shallow drip groove underneath.
- Orbital sander: Speeds up edge clean-up and prep before finishing.
- Drill and driver: You’ll need both drilling and fastening control, especially when pre-drilling hardwood or pressure-treated stock.
- Clamps: Small parts shift. Clamps keep fingers away from blades and help glue-ups stay aligned.
- Tape, square, marking knife or pencil: Boring tools, but they decide whether the cap fits or rattles.
Wood choices and their trade-offs
The wood matters as much as the shape.
Here’s the simple breakdown:
| Material | What it does well | What to watch |
|---|---|---|
| Cedar | Naturally suited to outdoor use, easy to cut, stains well | Softer surface can bruise if handled roughly |
| Pressure-treated pine | Budget-friendly and widely available | Needs time to dry properly before some finishes |
| Ipe or other dense hardwoods | Excellent durability, crisp finished look | Hard on blades, slower to drill, heavier to work with |
| Pallet wood | Cheap and available | Often poor quality for weather exposure |
For most homeowners, cedar and pressure-treated lumber are the practical starting points. If you want a painted cap, pressure-treated can work well once it’s dry enough for finishing. If you want a stained cap with cleaner grain and easier shaping, cedar is usually friendlier.
Hardware and code checks
Exterior-rated fasteners are not optional. Interior screws rust, stain the wood, and eventually loosen. Use galvanised or stainless hardware depending on exposure and the material you’re fastening into.
In many regions, material choice isn’t just about looks. The 2022 California Residential Code requires Class A fire-rated materials for exterior elements in Wildland-Urban Interface zones in some applications, so standard DIY wood caps may not comply without fire-retardant treatment. In those cases, non-combustible options can make more sense, including metal caps such as Nuvo Iron styles, as noted in this California code discussion on exterior materials.
Practical rule: Check local code before you buy lumber, not after you’ve built twenty caps.
For the hardware side, fasteners and fittings for outdoor projects are worth checking when you need exterior screws, anchors, brackets, or corrosion-resistant fixings in one place.
Consumables that improve the finished result
Don’t stop at wood and screws. The supplies below save rework:
- Exterior construction adhesive: Helps keep caps stable and reduces movement between wood parts.
- Exterior wood glue: Useful for laminated or layered cap designs, but it should support fasteners, not replace them.
- Sealant, stain, or exterior polyurethane: Your finish system should match your climate and wood species.
- Sandpaper in 120-grit: A good working grit for shaping and prep without polishing the wood too smooth for finish adhesion.
- Brushes and rags: Separate ones for stain and topcoat. Don’t cross-contaminate.
The short version is simple. Clean cuts, weather-suitable lumber, and proper fasteners make the difference between a cap that still looks sharp in a few seasons and one that starts curling, splitting, or staining almost right away.
Project 1 The Classic Pyramid Post Cap
A pyramid cap earns its keep in bad weather. Rain runs off fast, the post top stays better protected, and the shape looks right on everything from a basic privacy fence to a more finished gate line.
It also gives you a good first project if you want something more traditional before trying flatter or more decorative cap styles later. The work is straightforward if your layout is consistent and your saw setup is dialed in.
For a visual walk-through, this build sequence helps: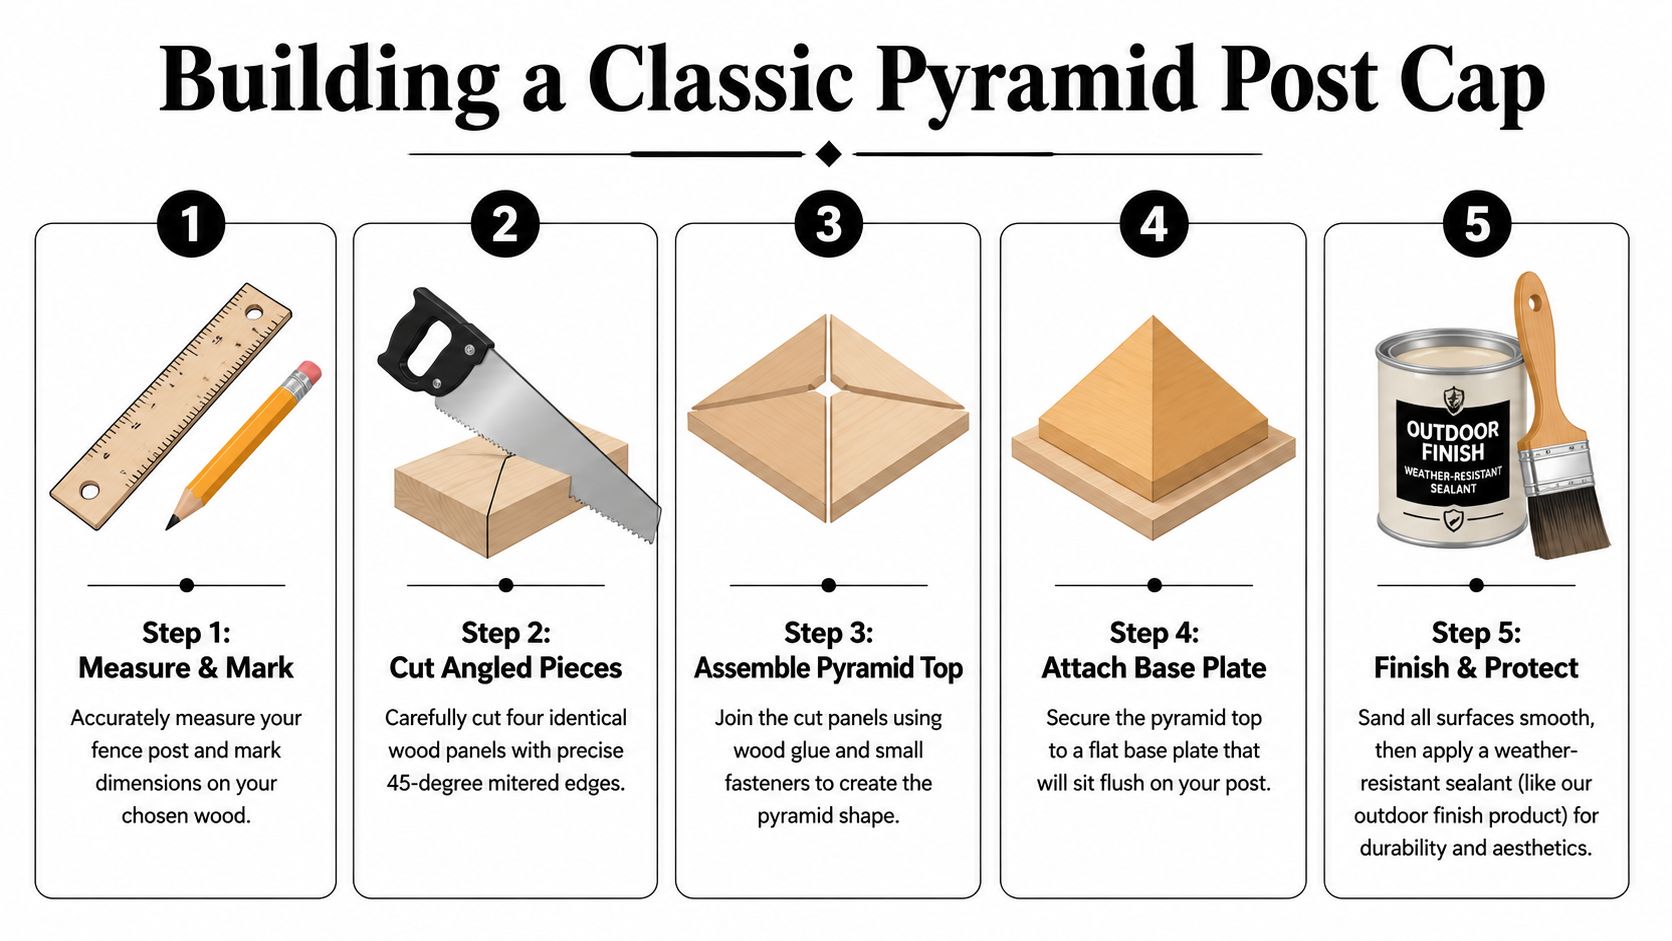
Why this shape works
Cedar pyramid caps have a long track record in wet and coastal climates because the sloped faces shed water instead of letting it sit on the post top. That matters more than people think. Standing water is what starts the cycle of swelling, finish failure, and end-grain rot.
The shape helps, but the details decide whether the cap still looks good a few seasons from now. Clean bevels, a little overhang, corrosion-resistant screws, and a finish on every face all matter.
What you need
For a standard wood 4×4 post, gather:
- A 2×8 cedar board
- Table saw with bevel adjustment
- Miter saw
- Stainless steel screws
- Flexible exterior adhesive
- 120-grit sandpaper
- Exterior stain or sealant
- Square, tape, and clamps
If you still need screws, adhesive, or finish supplies, Xtreme eDeals is a practical place to check because you can usually grab the exterior-rated hardware in one order instead of piecing it together from three stores.
Measure each post before you cut a batch. A lot of older 4x4s are not perfectly square anymore, and even new ones can vary enough to throw off the fit.
Cutting the cap
Start with the finished size, not the board size. Measure the actual post top, then add the reveal you want on each side. For most fences, a modest overhang looks balanced and gives water a clear drip line away from the post face.
Then cut the profile.
- Set the table saw fence for the cap width you need.
- Tilt the blade to about 12 degrees for the bevel.
- Run the stock through on one face, then the opposite face to form the pyramid peak.
- Crosscut each cap blank to final length on the miter saw.
Test the setup on scrap first.
A small change in blade angle shows up fast once you line ten caps down a fence. I check the first piece against a speed square and sight down the peak before committing to the rest of the run.
Use a featherboard or solid work support when beveling longer stock. Never try to shape tiny cutoff pieces freehand at the table saw. Cut the profile from longer material first, then trim individual caps to length.
One test cut saves a lot of cedar.
Building options
You can build this style in two practical ways.
| Method | Best for | Notes |
|---|---|---|
| One-piece bevelled cap | Faster production | Clean look, fewer joints |
| Four-panel pyramid top on a base plate | More decorative builds | More assembly time, but easy to customise |
The one-piece version is what I recommend for most fence runs. It is quicker, easier to keep consistent, and has fewer glue lines to deal with outdoors.
The four-panel build makes sense if you want a taller cap or a more detailed look on gate posts, corner posts, or shorter decorative sections where the extra labor is visible.
A helpful visual demo sits here if you prefer seeing the process in motion.
Sanding and pre-finishing
Sand with 120-grit after cutting and before installation. Focus on removing saw marks and easing the sharp lower edges slightly. Keep the peak crisp. If you over-sand the top, the cap starts to look soft and homemade in the wrong way.
Pre-finishing is worth the extra few minutes. Coat the underside, the end grain, and the bevels before the cap goes on the post. The underside gets ignored all the time, and that is usually where moisture starts causing trouble first.
If you are using cedar, let the first coat soak into the end grain, then wipe off the excess so it does not dry gummy.
Installing the pyramid cap
Dry fit the cap first and check for rocking. If the post top is rough or crowned, plane or sand it flat enough for full contact.
Then install in this order:
- Apply a flexible exterior adhesive to the post top or cap underside
- Set the cap in place and align the reveal
- Pre-drill for stainless screws
- Drive the screws carefully so you secure the cap without splitting the wood
I prefer two stainless screws driven on opposing sides instead of loading the top with fasteners. That keeps the cap secure without turning the visible face into a row of screw heads. If you want the cleanest look, place the screws low on the skirt or from a less visible side, depending on your cap design.
Do not skip pre-drilling. Cedar is forgiving, but the corners and edges can still split if you rush the install.
Common mistakes that ruin this style
A pyramid cap is simple to build, but small errors stand out right away:
- Inconsistent bevels: The fence line looks uneven even if every post is plumb.
- Too little overhang: Water drips down the post instead of clearing it.
- No pre-drilling: Fasteners can split the cap near the edges.
- Wrong adhesive: Interior adhesive fails outside.
- Bare underside or end grain: Moisture gets in where you cannot see it.
Done well, this cap looks clean, traditional, and built to last. Keep the cuts consistent, protect every face, and install it like an exterior part instead of a trim piece.
Project 2 The Simple and Sleek Flat Post Cap
A flat post cap earns its keep on fences where a pyramid cap would feel too busy. I use this style on modern runs, deck rail posts, and painted fences where clean lines matter more than extra profile.
It is also the easiest of the three builds to batch out accurately. If you can measure carefully, cut square, and keep your router setup consistent, you can make a full set in an afternoon.
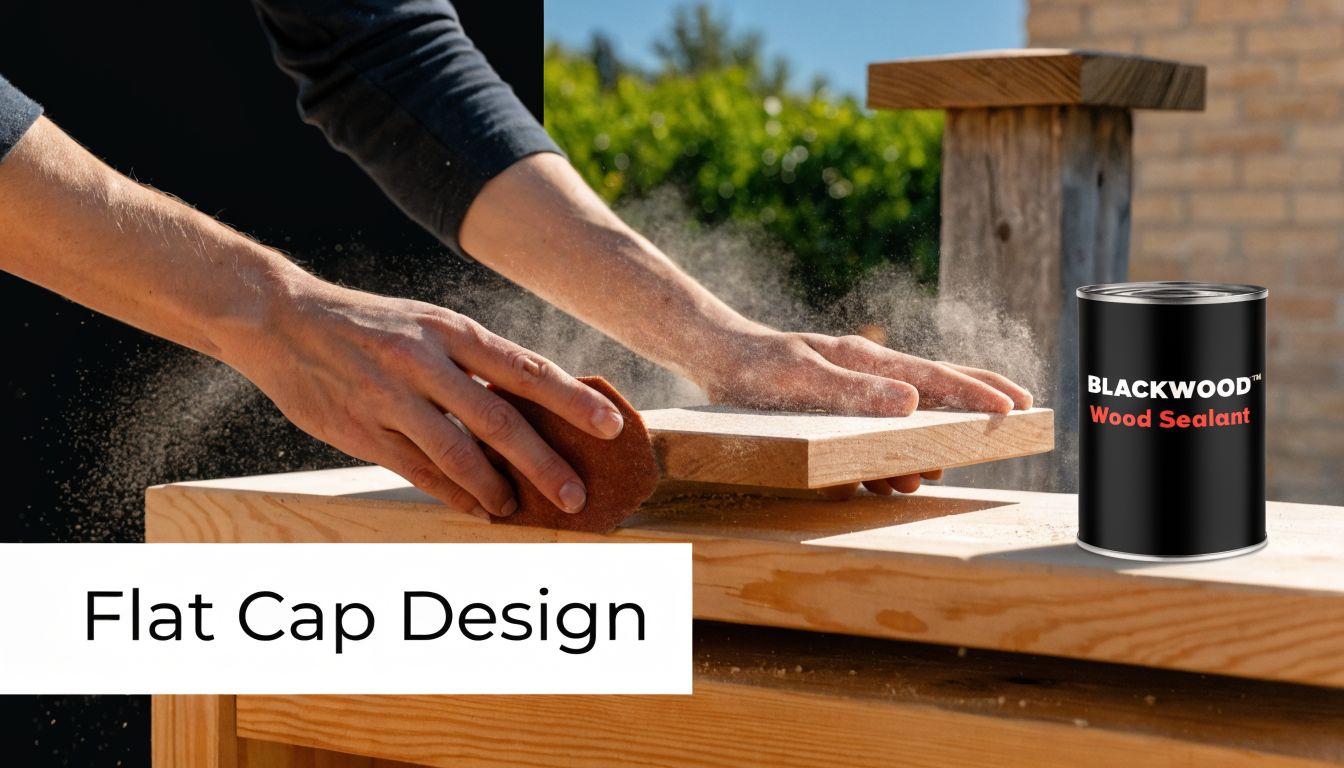
Why this design works
The strength of a flat cap is restraint. It finishes the post without calling too much attention to itself, and it gives water fewer places to sit than a fussy profile with grooves and corners all over the top face.
The detail that makes the difference is edge treatment. I round over or chamfer the top edges on nearly every wood flat cap I build because sharp corners chip, hold finish poorly, and start to look rough sooner. A small eased edge also looks more intentional once paint or stain goes on.
A reliable build sequence
For a standard nominal 4×4 post, a piece of 2×6 stock usually gives enough width for a clean overhang without looking heavy.
Use this order:
- Measure the actual post, not the label size
- Decide your overhang before cutting anything
- Set a stop block so every cap matches
- Cut all blanks square
- Route the top perimeter
- Cut a shallow drip groove on the underside
- Sand the faces and break any sharp bottom edges by hand
- Seal all sides before installation
That stop block matters if you are building more than a couple. One cap that is even 1/8 inch longer than the rest will stand out down a fence line.
Sizing and proportions
Flat caps look best when the overhang is modest and consistent. On most 4×4 fence posts, I like a reveal that is enough to throw water clear but not so wide that the cap starts looking like a shelf.
If the fence is light and contemporary, keep the profile tight. If the posts are chunkier, such as on a gate or pergola corner, you can give the cap a little more presence without making it bulky.
Two details that prevent callbacks
Route the visible edges
A 1/4-inch round-over bit is the safe choice for most builds. It softens the top enough to protect the corner and hold finish better. If the fence design is sharper and more modern, a light chamfer gives a cleaner architectural look.
Add a drip groove underneath
This is the part many DIYers skip, and it matters. A shallow groove cut near the underside perimeter helps water break and fall away instead of curling back under the cap toward the post.
A router does the cleanest job, but a careful table saw pass works too. Keep the groove in from the edge slightly so you do not weaken the perimeter.
Best material choices
Pressure-treated lumber is a practical option for this style because the cuts are simple and the cap does not rely on delicate joinery. Cedar also works well if you want a lighter cap that is easy to machine and takes finish nicely.
The trade-off is movement. Wet pressure-treated stock can shrink and twist as it dries, so I pick the straightest boards I can find and let them dry down if they are fresh from the yard. Cedar is more stable, but it dents easier. Buy the cleanest stock you can because every defect shows on a flat, simple cap.
If you are gathering supplies, pick up stainless or exterior-rated fasteners, exterior adhesive, and a good outdoor finish at the same time. Xtreme eDeals is a handy place to source that hardware without making three separate stops.
Where this style fits best
Flat caps suit:
- Horizontal slat fences
- Modern privacy screens
- Painted fence runs with square posts
- Deck rail posts where a low-profile top looks better than a tall cap
They also make sense for first-time builders. Among the three cap styles in this guide, this is usually the one I recommend for a clean result with the lowest risk of fussy mistakes.
Finishing choices
A flat cap only stays sharp if the finish work is careful. Seal the end grain well, especially around the routed edge and the underside groove. Those are the first places to take on moisture.
For painted fences, use an exterior primer and topcoat rated for horizontal exposure. For stained wood, choose a finish that is easy to recoat because post caps take more sun and water than the sides of the fence. I would rather refresh a maintainable finish every few years than scrape off a failing film finish later.
Built well, a flat cap looks quiet and precise. That is the appeal. Clean cuts, small details, and good sealing do the work.
Project 3 The Decorative Layered Post Cap
A layered cap takes the same basic idea as the flat cap and gives it more presence. Instead of one square top, you stack two or three elements to create shadow lines and a more architectural look.
This style suits Craftsman homes, detailed gates, pergolas, and fences that need a stronger visual finish near an entry. It also gives you room to mix materials, which is where the fun starts.
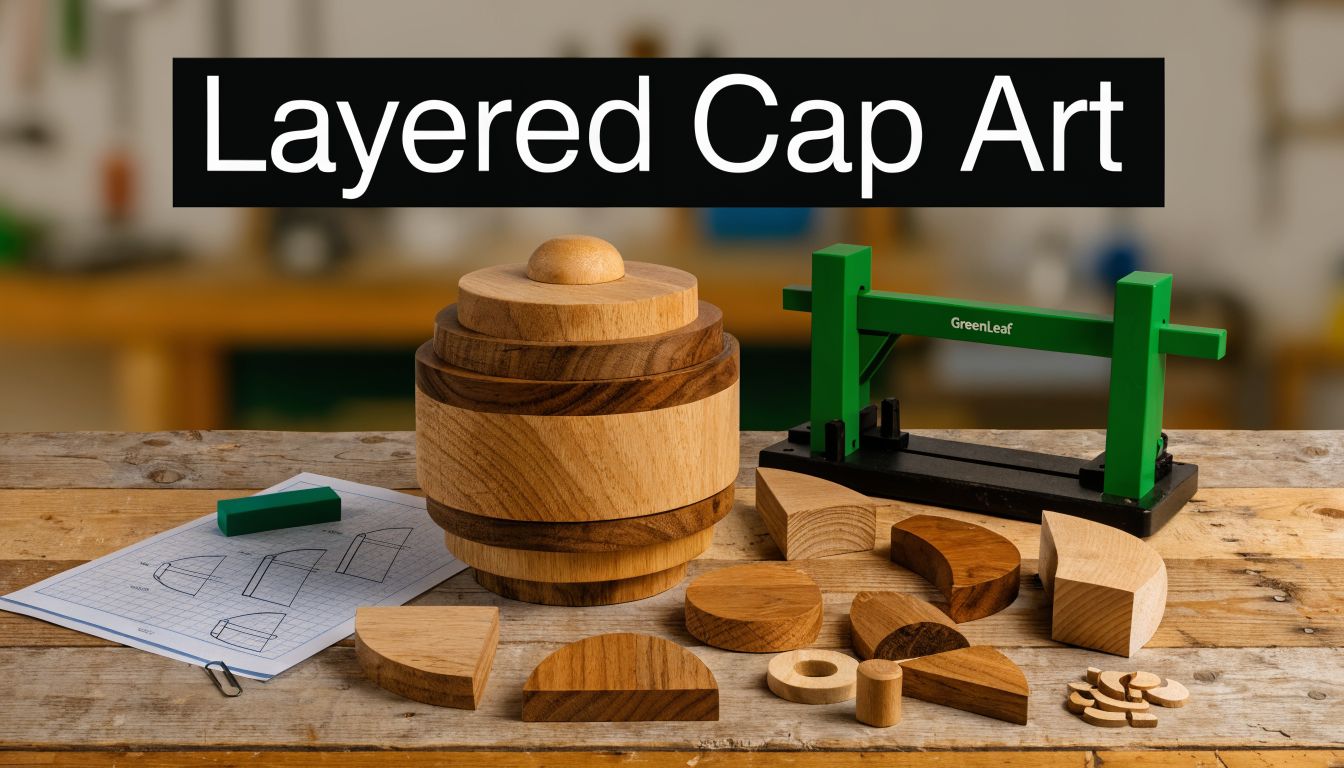
How to plan the layers
Think in steps, not decoration. Each layer should have a purpose.
A good layered cap often includes:
- A base plate providing clean post coverage
- A middle layer slightly smaller than the base to create a reveal
- A top piece that can be flat, bevelled, or gently chamfered
The look comes from proportion. If every layer is too thick, the cap gets heavy. If every reveal is tiny, the detail disappears from a distance.
A practical build method
I usually cut all pieces square first, then dry stack them on the bench before attaching anything. That lets you adjust proportions before glue and fasteners lock the design in.
Try this sequence:
- Cut the base to your desired overall footprint.
- Cut the middle layer smaller on all sides.
- Shape the top layer with a bevel, chamfer, or round-over depending on the house style.
- Dry fit and check from several angles.
- Glue and clamp the layers.
- Reinforce from below or with carefully placed exterior fasteners.
If you’re using different wood species, keep movement in mind. Dense hardwood and softer cedar won’t always react the same way outdoors. In that case, a mechanical fastening strategy matters more than glue alone.
Design combinations that work
| Style direction | Material pairing | Look |
|---|---|---|
| Craftsman | Cedar layers with a broad base | Strong shadow lines, traditional feel |
| Modern hybrid | Painted wood base with a darker top | Cleaner profile, less visual weight |
| Rustic refined | Pressure-treated base with stained cedar top | Casual but more polished than a plain cap |
One nice move with this style is adding a metal finial or accent at the top. That gives you a custom look without having to carve or turn decorative parts yourself.
Mixing DIY woodwork with ready-made hardware
Layered caps are where manufactured hardware can look at home rather than tacked on. A simple metal finial, decorative top piece, or metal accent cap can finish the stack neatly, especially on gate posts or feature posts at corners.
I’d keep the main cap body wood if you want warmth, then use metal only as the crowning detail. Too much mixed material can start to look busy. A little contrast usually does the job.
If the fence already has strong details, keep the cap restrained. If the fence is plain, the cap can carry more personality.
What to watch on assembly
This style adds glue lines, and glue lines add opportunities for failure if you rush prep.
Pay attention to:
- Flat mating surfaces: Any twist in one layer gets amplified in the stack.
- Clamp pressure: Too much squeeze-out can starve the joint.
- Fastener placement: Don’t put screws where they’ll split thin edges.
- Finish order: It’s often easier to seal individual parts before final assembly, then touch up after.
The layered cap isn’t harder because of one tricky cut. It’s harder because proportions, alignment, and restraint all matter at once. When you get those right, it looks like custom millwork.
Finishing and Installation for Long-Lasting Results
A fence post cap usually fails from water, not from bad joinery. The cut can be dead-on and the profile can look great on sawhorses, but if water gets into the end grain or the fasteners start rusting, the cap will not last.
Finish and installation are what turn these three cap styles from shop projects into outdoor parts that can hold up season after season. The details change a little between a Classic Pyramid, a Sleek Flat cap, and a Decorative Layered build, but the goal stays the same. Keep water moving off the cap, seal every vulnerable surface, and fasten it in a way that still holds after heat, cold, and seasonal wood movement.
Match the finish to the exposure
Sun, standing water, and wind-driven rain matter more than the color label on the can.
A cap on a full-sun gate post gets punished harder than one tucked under trees along a side yard. Flat caps need extra attention because they shed water more slowly than pyramid caps. Layered caps have more joints and edges, so they need better sealing before assembly and a little more maintenance later.
For most wood species, I stick to a simple rule. Use a penetrating exterior oil if you want easier upkeep, or use an exterior stain-and-sealer system if you want more color control and a bit more surface build. Either way, seal the underside, the edges, and especially the end grain. Skipping the hidden face is one of the fastest ways to trap moisture and start a failure cycle from the bottom.
A finishing routine that holds up
This sequence works well on all three cap designs:
- Sand to 120-grit or 150-grit depending on the wood species
- Vacuum or wipe off dust completely
- Pre-finish individual parts if you built the decorative layered version
- Flood the end grain first so it gets a full coat
- Coat every face, including the underside
- Apply the next coat only after proper dry time
- Let the finish cure before installation
That pre-finishing step matters most on layered caps. Once those parts are glued and fastened together, it gets harder to coat the inside corners well. On pyramid and flat caps, full finishing before installation still helps because the bottom face usually gets ignored once the cap is attached.
If you need supplies, this is also the stage where it pays to buy the right exterior screws, construction adhesive, brushes, and finish instead of making do with leftovers. Xtreme eDeals is a handy place to pick up corrosion-resistant fasteners and exterior-rated products without piecing the order together from three stores.
Fasten for weather, not just for assembly
Outdoor caps move a little. Wood swells, shrinks, and twists with the seasons. The attachment has to allow the cap to stay tight without splitting thin edges or loosening after a year outside.
I get the best long-term results with adhesive plus screws. The adhesive beds the cap and helps close minor gaps. The screws provide mechanical hold if the glue line gets stressed by movement or moisture.
Use:
- Exterior construction adhesive
- Stainless or coated exterior screws
- Pilot holes near edges or in hardwoods
- Centering marks so the reveal stays even on every side
For a flat cap, keep screws in from the corners enough to avoid splitting. For a pyramid cap, drive fasteners where the stock still has enough thickness to hold. For layered caps, plan screw placement before assembly so you do not hit a hidden fastener or blow out a thin decorative strip.
If your cap project is part of a larger fence rebuild, it also helps to understand how the posts themselves are secured. This guide on anchoring fence posts to concrete is useful if you are repairing caps and bases at the same time.
Installation mistakes that shorten service life
The failures I see most often are boring, predictable, and easy to avoid.
- Setting a cap on a wet post top
- Using interior or plain steel screws outdoors
- Leaving the underside bare
- Forcing screws too close to narrow edges
- Installing before the finish has cured
- Depending on glue alone
One more tip. Check the top of the post before the cap goes on. If the post is out of square, crowned, or split, fix that first with a trim cut or light planing. A cap only sits as well as the surface under it.
Good finishing and careful installation do more than improve appearance. They are what separate a cap that still looks right after a few hard seasons from one that starts checking, loosening, and holding water before the fence is even broken in.
Frequently Asked Questions About DIY Post Caps
A fence can look finished and still have weak spots at the post tops. That is usually where the questions start. After building all three cap styles in this guide, these are the issues that come up most often once people move from ideas to actual cuts, fasteners, and finish work.
How much overhang should a post cap have
Keep enough overhang to shed water clear of the post face, but not so much that the cap looks clumsy or catches on clothing, hoses, or gates. On most wood fence posts, a modest, even reveal on all four sides looks right and performs well. The main thing is consistency. A clean, repeatable overhang across the whole fence always looks better than one cap with a bold profile and the next one cut tight.
Can I use pallet wood for post caps
I usually pass on pallet wood for caps. The problem is not just appearance. Pallet boards are often too thin, too dry, split-prone, or of uncertain species and treatment history, which makes them a poor choice for a part that sits in full weather and takes water from every direction. If you want inexpensive stock, use offcuts from cedar, treated lumber rated for exterior use, or a stable hardwood you can seal properly.
Should I glue the caps or screw them
Use screws as the primary hold. Exterior adhesive can help reduce small gaps and add some bedding between surfaces, but glue alone is not enough for a cap that will see sun, rain, and seasonal movement. I use exterior-rated screws, predrill where the stock is thin, and treat adhesive as support rather than the main attachment. If you need stainless or coated fasteners, exterior construction adhesive, or finish supplies, Xtreme eDeals is a handy place to gather them without piecing the order together from three stores.
Is cedar always the best choice
Cedar is a very good all-around option, but it is not the automatic winner on every job.
It cuts cleanly, finishes well, and holds up respectably outdoors. Treated lumber is often the more practical choice for budget builds or for matching an existing treated fence. Dense hardwood can look excellent on a feature fence, but it takes more effort to machine, predrill, and maintain. Pick the material that fits your climate, your tools, and how much upkeep you will realistically do a year from now.
Can I add solar lights to a homemade cap
Yes, if you plan for them before you cut the cap parts. The light base needs a flat, stable mounting area, and some models need room for a wire chase or recessed hardware. This matters most on the Classic Pyramid and Decorative Layered designs, where the shape can interfere with a light base if you size the cap first and try to adapt it later. For feature posts, buying a ready-made metal or solar cap is sometimes the smarter move, and there is no shame in mixing DIY wood caps on the fence line with manufactured caps at gates or corners.
What’s the biggest beginner mistake
Cutting a batch before measuring the actual posts.
Nominal post sizes fool people all the time, and older fences are rarely uniform. One post may be weathered, another slightly crowned, another trimmed a bit out of square. Build one sample cap first, test it on the actual post, then commit to production. That single step saves material and prevents a pile of almost-right caps that need rework.
Build one full sample cap first. Test fit it, finish it, install it, and only then batch the rest.
Are metal caps better than wood caps
Metal caps are lower maintenance and faster to install. Wood caps give you more freedom in shape, profile, and finish, especially if you want to match one of the three styles in this guide.
The trade-off is straightforward. Metal is convenient and consistent. Wood is more customizable and easier to tune to a fence that is slightly out of square or built from nonstandard stock. Choose metal if speed and low upkeep matter most. Choose wood if matching the fence and building your own details matters more.
If you’re gathering parts for your fence upgrade, XTREME EDEALS INC. is a practical place to source post caps, fasteners, anchors, and related hardware so you can match the build method to the job instead of piecing supplies together from multiple shops.