


You know, the real secret to a fence that stands the test of time isn’t the fancy panels or the perfect stain colour—it's the foundation. Get the posts right, and everything else falls into place. If you want to do this properly, you need to dig a hole that's one-third the height of your post, drop in a gravel base for drainage, and then lock it in with concrete, making sure it's perfectly plumb.
Honestly, this one step is the most critical part of the entire project.
Building a Fence That Lasts Starts Here
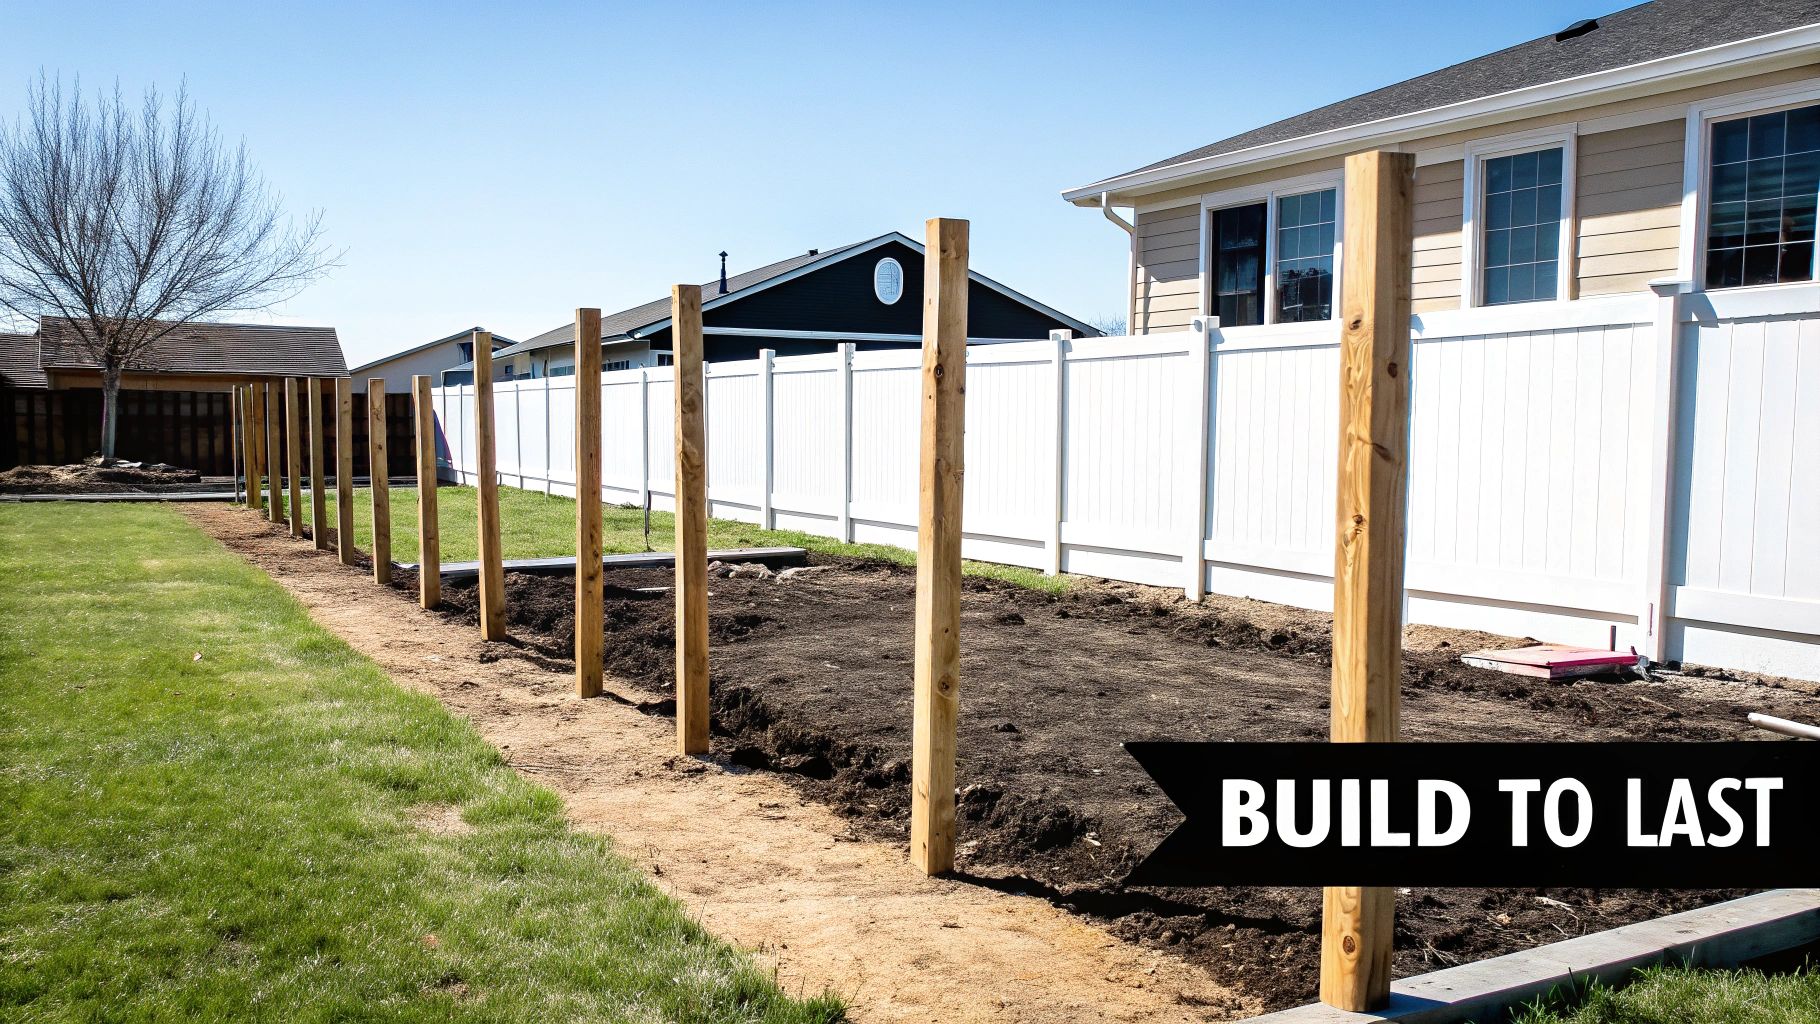
Nail the post installation, and your fence will stand arrow-straight for decades. But if you cut corners here, you'll be staring at leaning sections and facing expensive repairs sooner than you think. This guide is all about cutting through the noise and giving you practical, real-world advice on everything from laying out your fence line to setting each post like a pro.
Think of this as your complete roadmap to an unshakeable fence foundation. It's not just about digging holes; it's about understanding the forces—wind, weather, shifting soil—that your fence will be up against year after year.
The Foundation of a Great Fence
The sturdiest fences always start with a meticulous approach to their footings. Your fence posts are the skeleton of the whole project; without a solid structure, everything else is just window dressing. A post that’s too shallow or doesn't have the right support is guaranteed to fail, and it'll probably take a whole section of your fence down with it.
A well-installed fence post does a lot more than just hold up the panels. It fights back against wind, prevents sagging over time, and anchors the entire structure to the ground. It’s the single most important connection between your fence and the earth.
This whole process takes more than just brute force. It demands some careful planning and the right materials to really last. You’ll need to think about a few things:
- Soil Conditions: Are you working with heavy clay, loose sand, or rocky ground? Each one presents its own set of challenges and will change how you need to secure your posts.
- Climate Factors: Here in Canada, digging below the frost line is non-negotiable. If you don't, you'll be a victim of "frost heave," which is when frozen ground literally pushes your posts right out of the ground.
- Fence Style and Weight: A heavy-duty privacy fence needs a much more robust foundation than a light, decorative one. If you're still weighing your options, you can explore some creative fence designs to see what might work for your yard.
Choosing the Right Hardware
It's not just about the posts. The hardware you pick is just as important for stability and long-term durability. Using professional-grade fasteners, brackets, and finishing touches makes sure every single connection point is rock-solid.
For example, if you're installing a fence on an existing concrete patio, you’ll need specialized post base brackets that anchor directly to the surface. And don't forget the finishing touches. At Xtreme eDeals Inc., we carry a huge variety of hardware, including awesome decorative post caps from brands like Nuvo Iron. They do more than just look good—they protect the vulnerable end grain of your posts from water damage and rot.
It’s this kind of attention to detail that separates an amateur job from a professional, long-lasting fence.
Planning Your Fence Layout Like a Pro
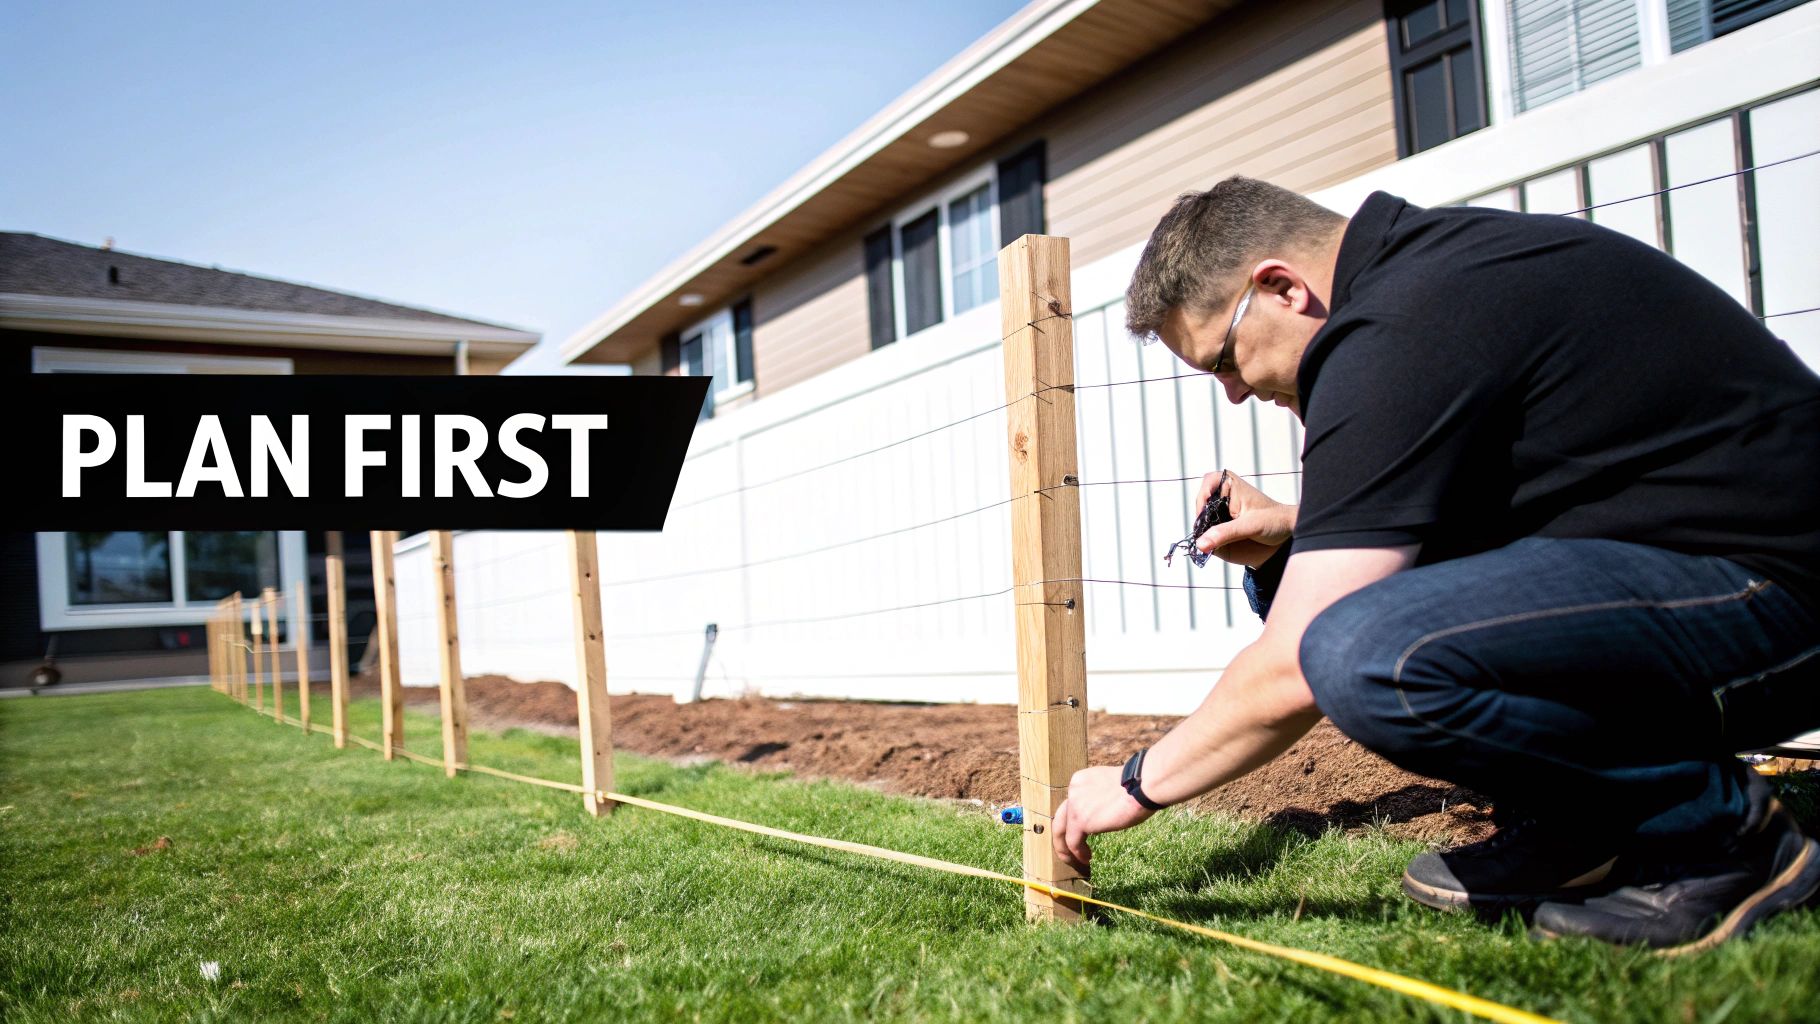
Before your hands get dirty, the most important work happens with a tape measure and a bit of foresight. A rock-solid fence post installation is built on a precise layout, and this is where you separate a weekend project from a weekend headache.
It's tempting to just grab a shovel and start digging, but that's a classic rookie mistake. It's the fast track to a wavy fence line, or even worse, a dangerous and expensive accident. Taking the time now to map everything out properly is your guarantee for straight lines, square corners, and a fence you can be proud of.
Mapping Your Fence Line
First things first: know your boundaries. You need to be absolutely certain where your property line is to avoid any awkward conversations with the neighbours later on. Once you've confirmed it, drive a wooden stake firmly into the ground at every corner and endpoint of your future fence.
Now, stretch a mason's string line tightly between those stakes. This simple string is your new best friend—it’s the visual guide that dictates exactly where your fence will run, making sure every single post falls into perfect alignment.
A taut string line is non-negotiable for a straight fence. Use it to visualize the entire run, see how the fence will handle slopes, and mark every post location with paint or a flag before you even think about picking up a post-hole digger.
With the string line as your guide, you can walk the line with a measuring tape and mark the exact centre for each post hole. This is the kind of prep work that pays off big time when you're learning how to install fence post the right way.
Prioritizing Safety and Compliance
This next part is crucial, and it happens before a single speck of dirt is moved. You have to find out what's buried in your yard. Hitting a gas line, water main, or electrical cable is an absolute nightmare—it's incredibly dangerous and can land you with massive fines and repair bills.
Luckily, there's a free service for this. In Canada, you are required by law to contact your local "Click Before You Dig" service a few business days before you start. They’ll send crews to mark all the underground utilities on your property so you can dig with confidence.
Beyond what’s underground, you also need to look into your local bylaws. A quick call or visit to your municipality’s website is a must. Many towns have specific rules about:
- Fence Height: Maximum heights can differ for front yards versus backyards.
- Property Line Setbacks: You might have to build your fence a specific distance inside your property line.
- Material Restrictions: Some communities have aesthetic rules about what your fence can be made of.
Checking these things now will save you from the gut-wrenching possibility of having to tear down a fence that doesn't meet local code.
Calculating Post Spacing
As a general rule of thumb, most fence posts are spaced 6 to 8 feet apart, measured from the centre of one post to the centre of the next. This spacing is the sweet spot for providing strong support for fence panels without letting them sag over time. But this isn't set in stone.
Gates, for example, throw a wrench in standard spacing. You have to account for the gate's actual width plus the extra space needed for hinges and latches. The posts on either side of a gate also need to be set closer together and more securely to handle the constant stress of opening and closing. You can see great examples of this if you want to learn how to build a privacy fence like a carpenter.
Slopes and uneven ground also require some on-the-fly adjustments. On a steep hill, you'll likely need to place your posts closer together to allow the fence panels to follow the contour of the land without leaving big, awkward gaps at the bottom. Getting these measurements right during the planning stage is what prevents major headaches later on.
Digging the Perfect Hole for Maximum Stability
With your layout marked and your safety checks done, it’s time to actually break ground. This is the moment where the real strength of your fence is born. A fence's ability to stand up to wind, shifting soil, and just the passage of time comes down to how well you dig these holes right now.
Get this part right, and you’re building a foundation that will last for decades. It's not just about digging down; it's the combination of depth, width, and proper drainage that creates an unshakeable anchor for every single post.
Getting the Hole Depth and Diameter Just Right
You've probably heard the classic rule of thumb: the hole's depth should be one-third of the post's height above the ground. So for a standard 6-foot fence, you’d use an 8-foot post and bury 2 feet of it. This simple ratio gives the post excellent leverage against forces like wind trying to push it over.
But here in Canada, there's a much more important rule that trumps all others: you must dig below the local frost line. Frost heave is no joke. When moisture in the soil freezes, it expands with incredible force and can literally push your fence posts right out of the ground over a single winter. To be safe, always dig at least 6 inches below your area's frost line to anchor your footings in stable, unfrozen earth.
The hole's diameter is just as critical. You need enough room around the post for a thick, solid collar of concrete. A solid guideline is to make the hole's diameter three times the width of your post. For a common 4×4 post (which actually measures 3.5 inches by 3.5 inches), that means you're aiming for a hole about 10-12 inches across.
Choosing Your Weapon: Digging Tools
The tool you use to dig can be the difference between a manageable afternoon and a weekend of misery. Your choice really boils down to your soil, how many holes you're digging, and your budget.
- Manual Post-Hole Digger: This classic "clamshell" tool is great for smaller projects with only a few posts to set, especially if you have relatively soft, rock-free soil. It’s cheap and gives you precise control.
- Gas-Powered Auger: If you have a long fence line to build or you're dealing with tough ground like heavy clay or rocks, renting a one- or two-person auger is a total game-changer. It drills perfect holes in a fraction of the time and saves your back in the process.
Pro Tip: Sooner or later, you'll hit a big rock or a stubborn root that even an auger can't chew through. That's when a digging bar becomes your best friend. It’s just a long, heavy steel bar with a chisel point on one end that lets you break up obstructions the old-fashioned way.
The Unskippable Step: The Gravel Base
Before you even think about dropping a post in the hole, there’s one last critical step. You absolutely must add a 4- to 6-inch layer of all-purpose gravel to the bottom of every single hole. This small detail is one of the most effective things you can do to prevent your wooden posts from rotting.
This gravel layer acts as a drainage field. It gives water that seeps into the hole a place to go, keeping it away from the bottom of the post. Without it, the end grain of the wood sits in a puddle, creating the perfect conditions for rot to set in and compromise your entire fence from the ground up.
In fact, professional fence builders often rely on a combination of these exact measurements. For the wood fences you see all over Canadian suburbs, best practices suggest spacing posts a maximum of 8 feet apart and digging those 10-12 inch diameter holes. For an 8-foot post, that means digging down to 36 inches—enough to get one-third of the post in the ground, with extra depth for that crucial gravel base. If you want to see how the pros approach it, you can explore more on fence installation cost factors and best practices. Once the hole is ready, you'll add the gravel, set the post perfectly plumb, and get ready for concrete.
Setting Posts in Concrete for Unbeatable Strength
Alright, your holes are prepped and ready. Now comes the part that truly anchors your fence for the long haul. For the vast majority of fence projects, setting posts in concrete isn't just a suggestion—it's the gold standard for creating a foundation that can laugh off years of wind, rain, and the occasional stray soccer ball.
This is where you create a permanent, unyielding footing that locks each post in place. When you do this right, your fence line stays straight and true, preventing that sad, leaning look that plagues poorly installed fences. There's a reason the pros do it this way.
Mixing Concrete to the Perfect Consistency
The secret to a rock-solid concrete footing is all in the mix. You're aiming for a smooth, lump-free consistency that looks a lot like thick oatmeal. It shouldn't be a soupy liquid, and it definitely shouldn't be a dry, crumbly mess. Most people doing it themselves grab a bag of quick-setting concrete, which is made specifically for this and makes life a lot easier.
A classic rookie mistake is dumping in too much water at once. That leads to a weak, porous footing that can crack and fail. Start by pouring the dry mix into a wheelbarrow and making a little crater in the middle. Add water a little at a time, mixing it in completely with a shovel or hoe until you hit that ideal thick-but-workable texture.
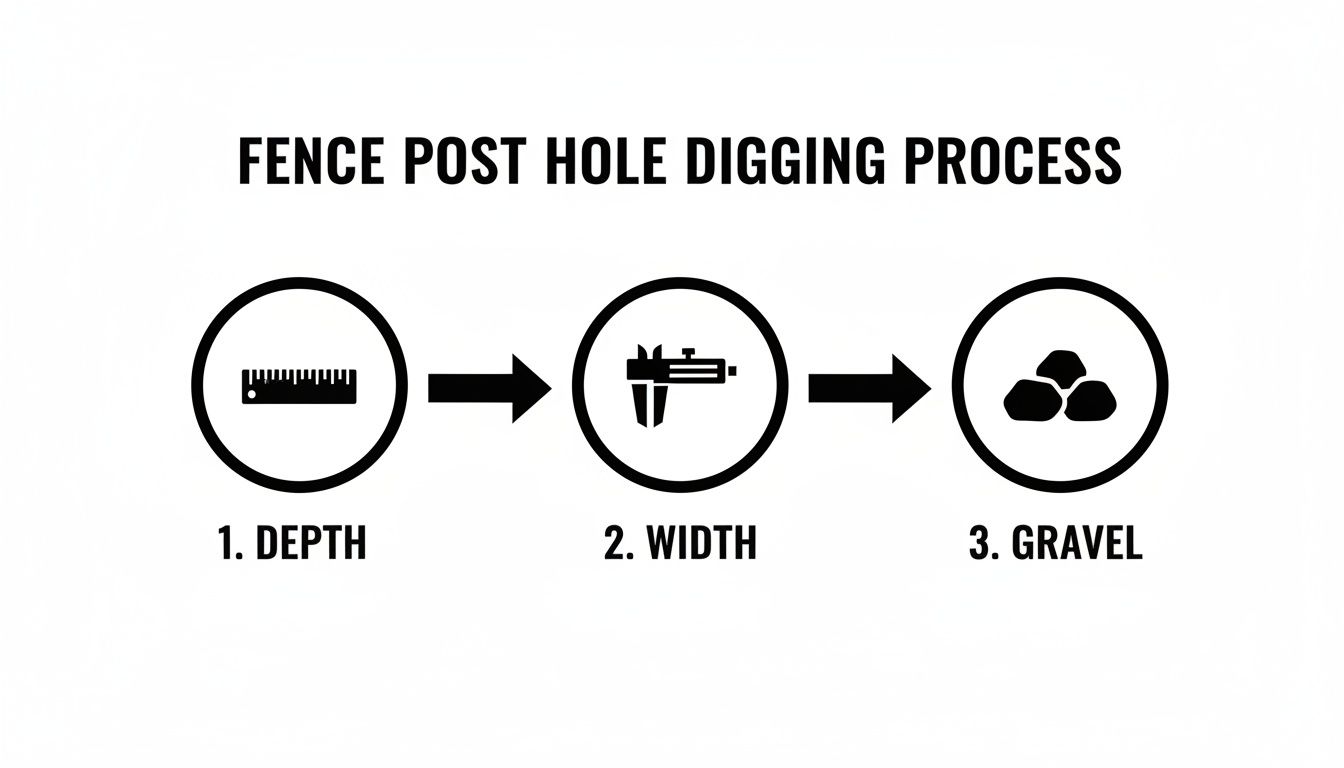
This image nails the prep work that comes before the concrete. Getting the depth, width, and that crucial gravel base right is what sets your project up for success from the ground up.
Securing the Post and Pouring the Footing
With your concrete mixed, it's go-time. Place the post right in the centre of the hole, letting it rest on the gravel base you already added. Now, grab a post level—this is a handy tool that checks for plumb on all four sides at once—and get that post perfectly vertical.
Once the post is plumb, you must brace it. Screw a couple of scrap 2x4s to adjacent sides of the post, with the other ends staked firmly into the ground. These braces hold the post steady while you pour and, more importantly, while the concrete cures.
Don't even think about "eyeballing" if a post is straight. A post that's even a hair off-plumb will stick out like a sore thumb once the fence panels go up. Trust your level and brace every single post before you touch the concrete.
Okay, now you can carefully shovel the concrete into the hole, filling it evenly all the way around the post. As you pour, use a stick or a piece of rebar to poke and prod the wet concrete. This gets rid of any air pockets that could weaken the footing.
Fill the hole until the concrete is a couple of inches above ground level. This lets you create a "crown" or "collar" by sloping the surface away from the post on all sides. This simple step is huge—it directs rainwater away from the wood, preventing rot right at the most vulnerable spot. Professionals always follow this rule of thumb: tamp 4-6 inches of gravel at the base, insert the post, pour the concrete, and then slope the top away from the post to shed water. In fact, some regions with tough climate conditions even have building codes requiring it. You can learn more about professional fence installation standards to see how these small details lead to a fence that lasts for decades.
Surface Mounting for Existing Concrete
But what if you're putting a fence on an existing patio or concrete slab? Digging is obviously out of the question. You can still get an incredibly strong foundation by using surface-mounted hardware. This is where high-quality post base brackets are your best friend.
These heavy-duty metal bases are designed to be anchored directly onto the concrete. Here’s how it works:
- Position the Bracket: Set the post base exactly where you want the post to stand.
- Mark and Drill: Use the bracket as a template to mark the anchor holes, then use a hammer drill with a good masonry bit to drill into the concrete.
- Secure the Base: Fasten the bracket down with concrete sleeve anchors or wedge anchors for maximum grip.
- Install the Post: Drop your post into the bracket and secure it with the right screws or lag bolts.
Using hardware specifically made for the job is non-negotiable for a safe and secure installation. The right brackets and anchors can make a surface-mounted fence just as sturdy as one set deep in the ground.
Essential Hardware for a Professional Installation
To ensure every post—whether set in concrete or surface-mounted—is secure and professional, using the right hardware is key. Here are some essential items from Xtreme eDeals Inc. that cover the most common installation scenarios you'll encounter.
| Hardware Type | Primary Use | Installation Scenario | Pro Tip |
|---|---|---|---|
| Heavy-Duty Post Base | Securing posts to existing concrete or wood surfaces. | Attaching a fence or pergola to a patio, deck, or concrete footing. | Always use a hammer drill for concrete and pre-drill holes in wood to prevent splitting. |
| Concrete Sleeve Anchors | Fastening post bases and brackets to concrete slabs. | Surface mounting on patios, walkways, or foundation walls. | Choose an anchor length that penetrates the concrete by at least 2.5 inches for a solid hold. |
| Galvanized Lag Bolts | Securing wood posts into surface mount brackets. | Final step of installing a post into a metal base bracket. | Use an impact driver with a socket attachment to drive lag bolts efficiently without stripping the heads. |
| Adjustable Post Holders | Anchoring posts in freshly poured concrete. | New fence installations where posts are set directly into wet concrete footings. | The "stirrup" design keeps the wood post elevated off the concrete, preventing moisture wicking and rot. |
Choosing project-specific hardware from a trusted source like Xtreme eDeals Inc. eliminates guesswork and ensures your fence is built on a foundation of strength and durability.
Finishing Touches and Common Mistakes to Avoid

With your posts standing firm, you can finally see the finish line. The heavy lifting is mostly done, but don’t pack up your tools just yet. These final details are what separate a decent fence from a great one, protecting all your hard work and making sure it looks sharp for years to come.
Skipping these last few steps is like running a marathon and walking off the course right before you cross the tape. A little attention to detail now is what locks in the long-term health and stability of your entire fence.
Protecting Your Posts with Style
One of the most important finishing touches for any wooden fence is the post cap. It might look like a simple cosmetic piece, but its job is critical. An uncovered wood post has its end grain pointing right up at the sky, basically acting like a straw that soaks up every drop of rain.
This constant cycle of getting wet and drying out is the number one cause of rot and decay, which can absolutely destroy a post from the inside out. A post cap is your first line of defense—a simple, effective shield that deflects water, preserves the wood, and seriously extends the life of your fence.
At Xtreme eDeals Inc., we carry a huge variety of post caps to match any style you’re going for. You can find everything from sleek, modern pyramid caps to more ornate designs from top brands like Nuvo Iron. They don't just protect your investment; they also give your finished project that clean, cohesive look. If you need some help narrowing down the options, check out our guide on how to buy post caps for your fence or deck.
Sidestepping Common Installation Pitfalls
Even when you're careful, a few common mistakes can creep in and undermine an otherwise solid fence post installation. Just knowing what to watch for is half the battle.
The most frequent errors usually happen during the digging and setting stages. Rushing through these early steps can lead to leaning posts down the road, premature rot at the base, or a fence line that gets slowly pushed out of the ground by frost.
Here are the top mistakes I see people make all the time:
- Digging Too Shallow: This is the cardinal sin of setting posts. If you don't dig below your local frost line, you’re setting yourself up for frost heave. The frozen ground will literally push your posts upward, wrecking your perfectly straight fence line. Always check your local building codes for the required depth.
- Forgetting the Gravel Base: Skipping that 4-6 inch layer of gravel at the bottom of the hole is a critical mistake. Without it, the end of your post sits directly in trapped moisture, creating the perfect environment for rot to take hold right at the base.
- Improper Bracing: A post that isn't braced securely while the concrete is curing will almost certainly shift. Even a tiny lean becomes glaringly obvious once the fence panels are up. Always use sturdy 2x4s to lock the post in a perfectly plumb position until the concrete is rock hard.
Here's a pro tip: Do a final check for level and plumb after the concrete has fully cured. This is your last chance to make any tiny adjustments before you start hanging heavy fence panels and locking everything into its final position.
The Final Once-Over
Before you officially call the post-setting phase complete, take a few minutes for one last inspection. Walk your fence line and eyeball the alignment, making sure each post lines up with your string line. Double-check the height of each post to ensure they're consistent—this is especially important if you're building on a slope.
This last bit of quality control makes the next stage of attaching rails and panels go so much smoother. Taking the time now to get these finishing touches and checks right is the secret to a fence that not only looks fantastic but is built to handle whatever the Canadian weather throws at it.
Got Questions? We’ve Got Answers.
Even the best-laid plans run into questions once the shovels hit the dirt. Getting answers to the most common fence post installation queries can save you a world of hurt—and a lot of cash. Let’s walk through some of the hurdles I see homeowners face all the time.
Nailing these details is what separates a fence that just stands there from one that’ll laugh off whatever the Canadian seasons can throw at it.
How Deep Do My Fence Post Holes Need to Be?
This is probably the most critical question, and the answer isn't just a single number. First, there's the rule of thumb for basic stability: you want to bury at least one-third of the post's total length. If you're putting up a standard 6-foot fence, you’ll be working with 8-foot posts, which means at least 2 feet of that post needs to be underground.
But here’s the non-negotiable part, especially up here in Canada: you must dig at least 6 inches below your local frost line. Frost heave is no joke; it can push a poorly set post right out of the ground. That concrete footing has to be anchored in stable soil that doesn't freeze, or your perfectly straight fence line will be a wavy mess by spring. Always, always check with your local municipality for the required frost depth in your area before you even think about digging.
How Far Apart Should I Space My Fence Posts?
For most residential fences—whether they're wood, vinyl, or aluminum—the sweet spot for spacing is between 6 and 8 feet, measured from the centre of one post to the centre of the next. This gives you solid support for your fence panels without needing a forest's worth of posts.
It’s tempting to stretch that distance beyond 8 feet to save a few bucks on materials, but it's a classic mistake. Over time, your rails will start to sag, especially with the weight of wood or composite panels. If you're dealing with heavy materials or live in a particularly windy spot, sticking closer to the 6-foot spacing is cheap insurance for a stronger fence.
One quick tip: don't forget to adjust your spacing for gates. You have to factor in the actual width of the gate plus the hardware clearance for hinges and latches. This almost always means your gate posts will be closer together than the rest of your line posts.
Do I Really Have to Use Concrete for Every Post?
For the posts that do the heavy lifting? Absolutely, yes. Concrete is the only way to guarantee stability where it matters most. There are a few spots on your fence line where using it isn't just a good idea—it's mandatory.
- Gate Posts: These things take a beating from the constant swinging and weight of the gate. Without a rock-solid concrete footing, they’ll sag and pull out of alignment, and soon enough, your gate won’t open or close properly.
- Corner Posts: Think of these as the structural anchors holding two fence lines in tension. They need that unyielding stability that only a deep concrete base can deliver.
- End Posts: Just like a corner post, the last post in a run has to be completely solid to keep the entire fence line taut and straight.
Now, for the regular 'line posts' in the middle of a straight run, you can sometimes get away with a tightly compacted gravel-and-soil base. This really only works for very light fences in soil that's already compact and drains exceptionally well. But honestly, for the best long-term results and to avoid leaning posts down the road, setting every single post in concrete is the way to go. It's a bit more work upfront, but it pays off for decades.
How Long Does the Concrete Need to Cure?
Patience is your best friend here. A lot of quick-setting concrete mixes will feel hard to the touch in less than an hour, but don't be fooled—that doesn't mean it has reached its full structural strength. That initial set is just the start of the chemical hardening process we call curing.
To be safe, you need to wait a bare minimum of 24 to 48 hours before you start hanging heavy fence panels or, especially, a gate. If you rush it, you can easily shift the post in the still-soft concrete, ruining its perfect plumb position forever. While full curing to maximum strength can take weeks, after about two days, it’s generally strong enough to handle the fence's weight. That small wait is a tiny price to pay for a perfectly straight, secure fence.
Equipping yourself with the right hardware is just as important as having the right answers. At XTREME EDEALS INC., we provide the professional-grade post caps, bases, and fasteners you need to complete your project with confidence. Browse our full selection of fence and deck accessories at https://www.xtremeedeals.ca to find the perfect finishing touches for a fence built to last.


Leave a comment
You must be logged in to post a comment.